Advanced Windows 11 Guide for Developers

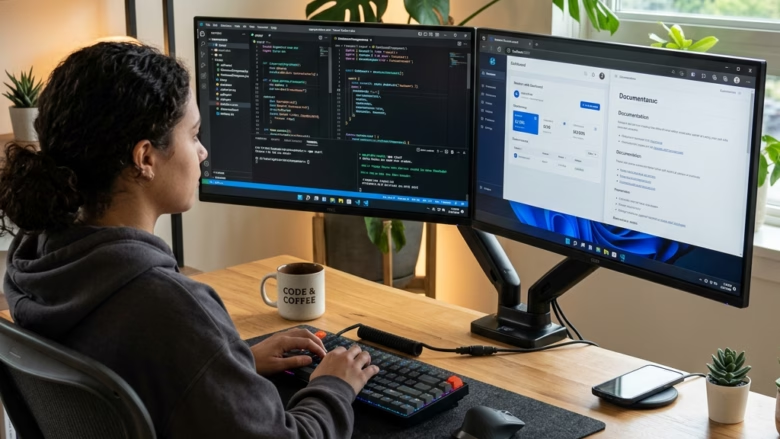
Developer Mode in Windows 11 lets you test apps, install software from outside the Microsoft Store (sideloading), and run scripts without the normal security blocks. This built-in feature also turns on Windows Subsystem for Linux (WSL) 2 so you can run Linux tools directly on your PC.
Because it relaxes some of Windows’ default protections, turn it on only on machines you use for development. The setting is available in Home and Pro, and you need an administrator account to change it.
Enable Developer Mode in Windows 11 by pressing Win+I, selecting Privacy & security, clicking For developers, and toggling Developer Mode to On. This unlocks sideloading, scripts without security blocks, and Windows Subsystem for Linux 2. On Windows 11 build 24H2 and later, find it under System instead of Privacy & security.
Steps to Enable Developer Mode:
- Press Win+I to open the Settings app .
- Select Privacy & security in the left sidebar.
- Click For developers. You should see a list of developer options, with Developer Mode at the top.
- Set the switch for Developer Mode to On. A warning about security risks appears.
- Click Yes on the confirmation prompt. The switch now shows On. Windows may take a short while to install the developer components in the background.
On newer Windows 11 builds (24H2 and later), Microsoft moved this page, and For developers sits under System instead. If you don’t see it under Privacy & security, look there. If the switch is greyed out, you are probably signed in with a standard account, or a work or school policy is managing the PC. In that case, ask your administrator.
Apps you already sideloaded stay installed, but you won’t be able to sideload new ones.
How to turn on Developer Mode in Windows 11
Optimizing Storage with Dev Drive
Dev Drive is a specialized storage volume built on the Resilient File System (ReFS) that speeds up file operations for heavy developer workloads. You can create a Dev Drive to store source code and build caches separately from your main operating system files for better performance.
It works best for things like package caches, build output and source repositories, where a build touches thousands of small files. Keep your normal documents and installed programs on the regular system drive. Dev Drive needs a fairly recent Windows 11 build, and Microsoft recommends at least 50 GB of free space for it. You'll find the option in Settings, under System, then Storage, then Advanced storage settings, then Disks & volumes. If you don't see a Create Dev Drive button, update Windows first.
To ensure files remain protected, check out our guide on How to Turn On or Off Dev Drive Protection in Windows 11. Managing access levels for projects requires balancing performance with security, which is covered in How to Set Dev Drive as Trusted or Untrusted in Windows 11.
Managing Remote Access
The Windows Device Portal lets you manage and test your computer remotely through a web browser without sitting in front of the physical machine. You can use this utility to monitor processing speeds, debug applications, and inspect system logs over your local network.
Device Portal depends on Developer Mode, so turn that on first. Whether a Device Portal option appears on the For developers page depends on your Windows build, so check there before you plan around it. If it is available, only use it on a network you trust, and set a strong username and password. Anyone who can reach the portal and sign in can see a lot about your system. Turn it off when you finish testing.
Managing this feature involves following our tutorial on How to Enable or Disable Windows Device Portal in Windows 11. Memory leaks and performance drops surface quickly when monitoring processes through this portal. Watch for a process whose memory use climbs steadily and never drops back.
The Essential Power User Toolkit
Mastering development work on Windows 11 requires equipping the system with a few essential utilities. The next sections cover three that save the most time: Registry Editor for hidden tweaks, Windows Terminal for your daily shell, and Winget for setting up a machine from a script.
Advanced Registry Tweaks
Registry Editor (a hierarchical database storing configuration settings) lets you adjust hidden Windows behaviors that are not available in the standard Settings app. You can use Registry Editor to speed up menu animations, change taskbar sizes, and fine-tune your desktop environment.
Before you change anything, note the original value so you can put it back. You can also use File and then Export in Registry Editor to save a copy of the branch you're about to edit.
Example: Boost System Responsiveness
Windows 11 menu animations speed up by tweaking a registry key. Administrative privileges are required to apply this modification. Altering how quickly menus appear and disappear makes the operating system feel snappier.
- Press Win + R, type regedit, and press Enter. Click Yes if User Account Control asks for permission. Registry Editor opens.
- In the left pane, navigate to HKEY_CURRENT_USER\Control Panel\Desktop. The values for that key appear in the right pane.
- Find the value named MenuShowDelay.
- Double-click it and change the value from 400 to 100. Click OK.
- Restart your computer so the change takes effect.
The value is a delay in milliseconds, and 400 is the Windows default. To undo the tweak, open the same value again and set it back to 400, then restart.
Reducing menu delays makes the computer feel faster by cutting down the waiting period before interface elements render. Desktops respond instantly to mouse clicks once this tweak takes effect.
Customizing Windows Terminal
Windows Terminal acts as the central hub for development workflows. Modern fonts improve readability, and configuring the preferred shell (such as PowerShell) to open directly inside the project directory saves keystrokes. Custom color schemes added to the settings.json file also reduce eye strain during long coding sessions.
Most of this can be done from the Terminal's own settings page, so you only need to edit the JSON file for things the interface doesn't offer:
- Open Windows Terminal and press Ctrl + , to open Settings.
- Under Startup, choose your preferred shell in Default profile.
- Open Defaults under Profiles to set options for every shell. Use the Starting directory setting to open in your project folder, and the font options under Appearance to pick a font.
- To edit settings.json directly, click Open JSON file at the bottom of the settings sidebar. Save the file, and Terminal applies the change right away.
Before you edit the JSON, copy the file somewhere safe. If a typo breaks the settings, Terminal will show a warning, and you can restore your copy.
Automating Your Setup with Winget
Winget (the Windows Package Manager) lets you install multiple applications at once using command-line scripts instead of clicking through installers manually. You can write a batch script with Winget commands to set up new development machines in minutes.
Winget comes with current Windows 11 through the App Installer component. If it's missing, update App Installer from the Microsoft Store.
Create a script named setup.bat:
Running a script with administrative rights guarantees every machine receives identical software tooling. Automation eliminates manual downloading of individual installers across multiple workstations.
Save the file, then run it from Windows Terminal in the folder where you saved it. Some installers ask for administrator approval, so you may see User Account Control prompts. To remove anything the script installed, use Settings, then Apps, then Installed apps.
Summary
Mastering Windows 11 for development involves taking full control of the operating system environment. Enabling Developer Mode, utilizing Dev Drives, and automating software deployment with Winget builds a robust workspace. Kick off the configuration process by activating Developer Mode and spinning up a dedicated Dev Drive. Then add the Terminal settings and Winget script that suit your workflow, so you can rebuild the setup quickly on any new machine.
Have a question about this guide?
Answered by AI from this guide. Good questions may be added to this page — please don't include personal details.
Did this guide fix your problem?

About the Author
Richard
Tech Writer, IT Professional
Richard is a writer at Geek Rewind who turns complex IT tasks into clear, step-by-step guides. He draws on years of hands-on experience in system administration and enterprise IT operations, focusing on Windows, Linux and WordPress: the problems people actually run into, and the fixes that work. His server and WordPress guides come from systems he runs himself. Richard builds and maintains the platform behind Geek Rewind, from its Ubuntu servers and Nginx configuration to its custom WordPress plugins. Many new tutorials start with readers' questions, and he's always glad to answer them in the comments.
No comments yet — be the first to share your thoughts!