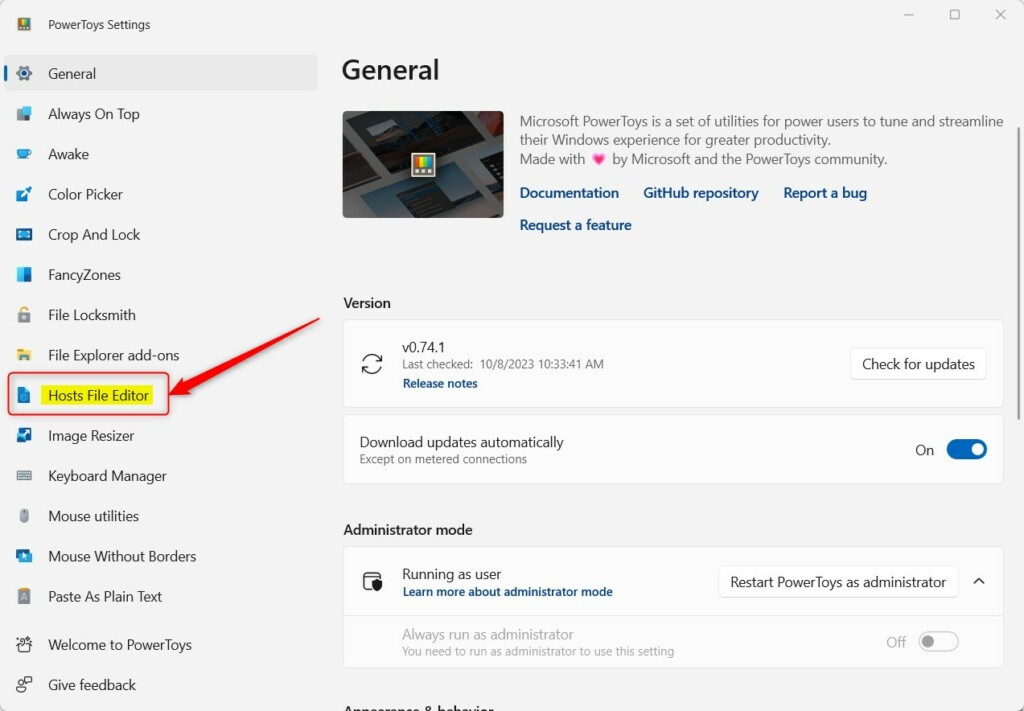
How to Edit Hosts File with PowerToys on Windows 11
Editing the Windows 11 hosts file with PowerToys lets you link website names to specific internet addresses.
The hosts file is like a personal address book on your computer. It tells Windows which IP address to use for a website name before it even checks the internet’s main address directory (DNS).
PowerToys’ Hosts File Editor offers a user-friendly, visual way to change these settings. This tool is included in PowerToys version 0.65 and up.
You can use it to test websites locally or block specific sites from loading, making it much easier than editing the plain text file directly.
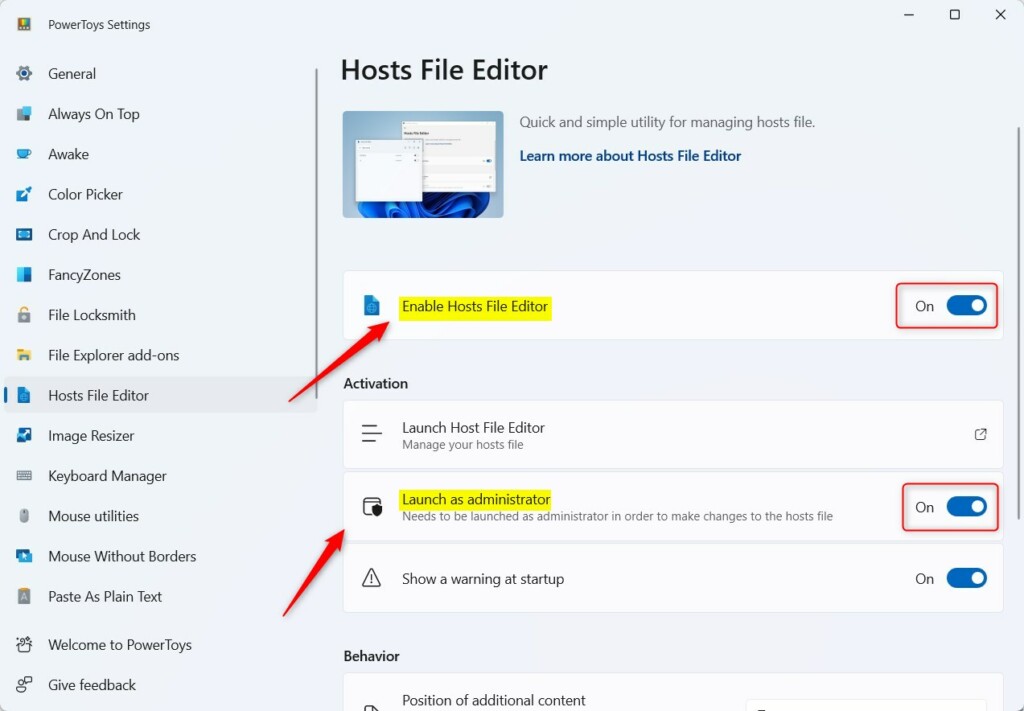
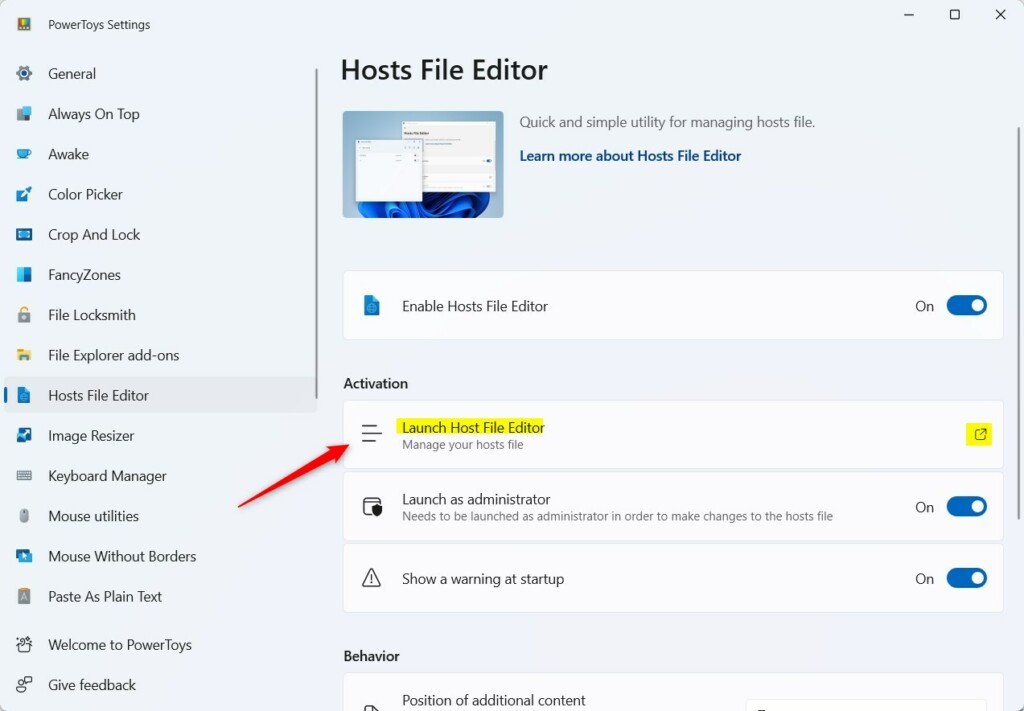
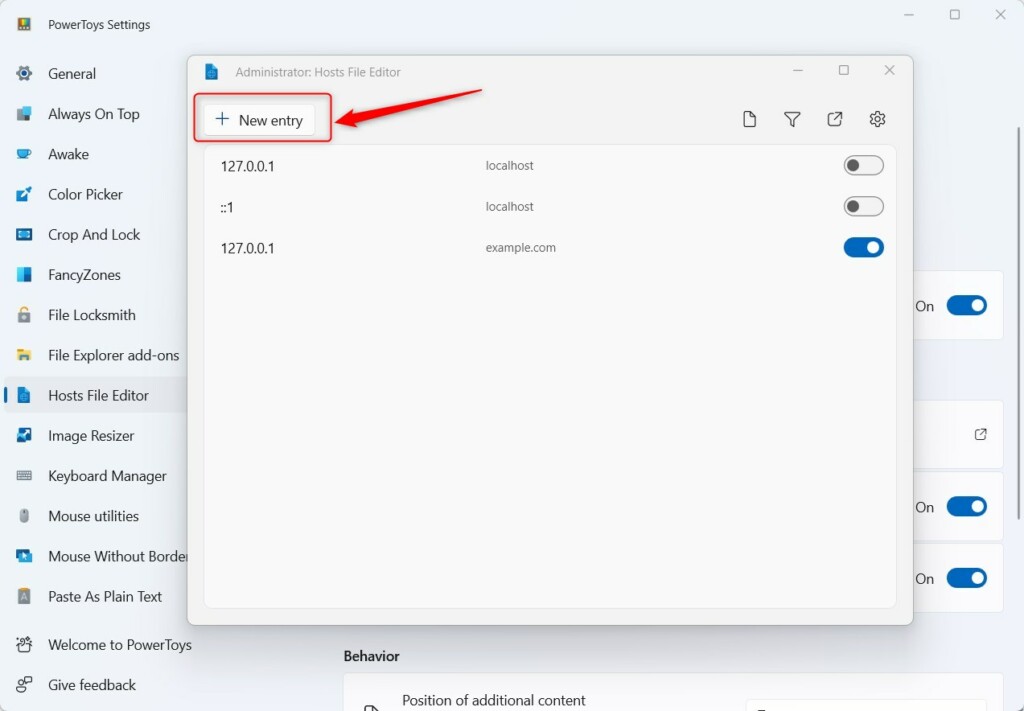
Open PowerToys, navigate to Hosts File Editor, and enable it. Click “Launch Host File Editor” and then “New entry” to add an IP address and domain. Ensure “Launch as administrator” is enabled in PowerToys settings for saving changes.
Why use the Hosts File Editor?
Your computer's hosts file acts like a private phonebook, linking website names like "example.com" to their specific internet addresses, such as "127.0.0.1".
What happens when you finish?
How to Install PowerToys
To get started, download the installer from the official Microsoft PowerToys website. Run the installer and follow the on-screen prompts. Once finished, you will have a suite of tools to manage your Windows system more effectively.
How to Use the Hosts File Editor
You can easily edit your computer’s hosts file using the Hosts File Editor in PowerToys to control which IP addresses websites use. This lets you block specific sites or direct traffic to different servers. Just remember you need to run PowerToys as an administrator to save any changes you make to the hosts file.
You must turn on "Launch as administrator" in the settings for PowerToys. This action is crucial because the hosts file is a protected Windows system file. Without administrator rights, you cannot save any changes you make to the hosts file.
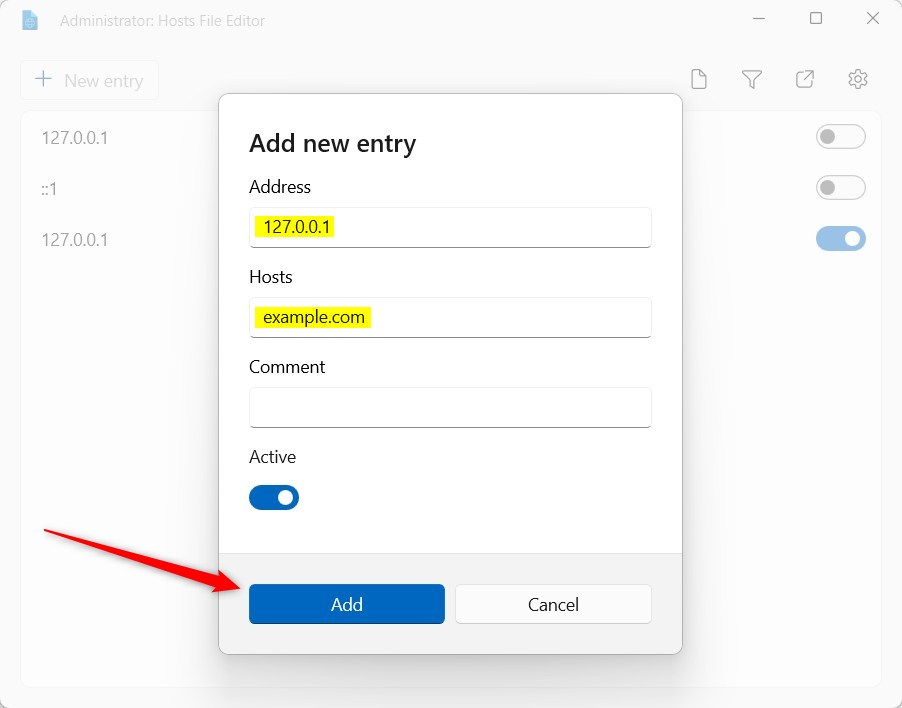
After enabling, click Launch Host File Editor. To add a new entry, click the New entry button.
Enter the IP address, such as 127.0.0.1 (the loopback address), and the domain name you wish to map. Click Add to save your changes.
Troubleshooting and Permissions
If you cannot save changes, ensure you have enabled the Launch as administrator setting. If the file is locked by another program, close your browser and try again. If you make a mistake, you can delete the entry in the PowerToys interface to undo the changes.
Summary
The PowerToys Hosts File Editor simplifies the process of managing domain mappings. By using this tool, you avoid risky manual edits to system files. It is the safest way to handle local development environments, block domains, or redirect traffic on your Windows 11 machine.
Does PowerToys Hosts File Editor require admin rights?
Yes, the tool requires administrative privileges. Because the hosts file is a sensitive system file, Windows restricts access to it. Enabling the “Launch as administrator” option in PowerToys allows the application to modify the file safely without you needing to manually edit system permissions.
Can I use the Hosts File Editor to block websites?
Yes, you can block websites by mapping a domain name to the loopback address 127.0.0.1. When your computer tries to connect to that domain, it will be redirected to your own machine instead of the internet, effectively blocking the site from loading in your browser.
What is the difference between editing the hosts file manually vs using PowerToys?
Manual editing requires opening a text editor as an administrator and navigating to 📁C:\Windows\System32\drivers\etc, which is prone to syntax errors. PowerToys provides a graphical interface that validates your entries, prevents accidental formatting mistakes, and makes it much easier to toggle or delete specific mappings.
Was this guide helpful?

About the Author
Richard
Tech Writer, IT Professional
Richard, a writer for Geek Rewind, is a tech enthusiast who loves breaking down complex IT topics into simple, easy-to-understand ideas. With years of hands-on experience in system administration and enterprise IT operations, he’s developed a knack for offering practical tips and solutions. Richard aims to make technology more accessible and actionable. He's deeply committed to the Geek Rewind community, always ready to answer questions and engage in discussions.
No comments yet — be the first to share your thoughts!