
This article explains customizing how new email alerts are shown in Outlook on Windows 11.
The new Outlook app in Windows 11 is a redesigned and updated version of the popular email and calendar management software. It has a modern user interface, and new features make it easier to stay on top of your emails and appointments.
The app has many features, including support for subscription management, email forwarding, setting default From address, backing up your mailbox, changing the reading pane, opening a new window for a message, language translations, turning text predictions on or off, switch primary account, sharing a calendar, changing language, date, and time format, public a calendar, show week numbers in Outlook calendar, deleting your search history, export your search history, add or remove events from emails to your Calendar, switch to dark mode, link preview, sound alerts for notifications, notifications in Windows 11, alerts for emails and mentions, and more.
When Notification for Mail is enabled, the Desktop notification style is defaulted. With this setting, notifications appear at the bottom of your screen and disappear automatically.
At this moment, there are only two options: Desktop or None. Choosing None will hide Outlook notifications from appearing at the bottom of the screen. This may be better for your privacy.
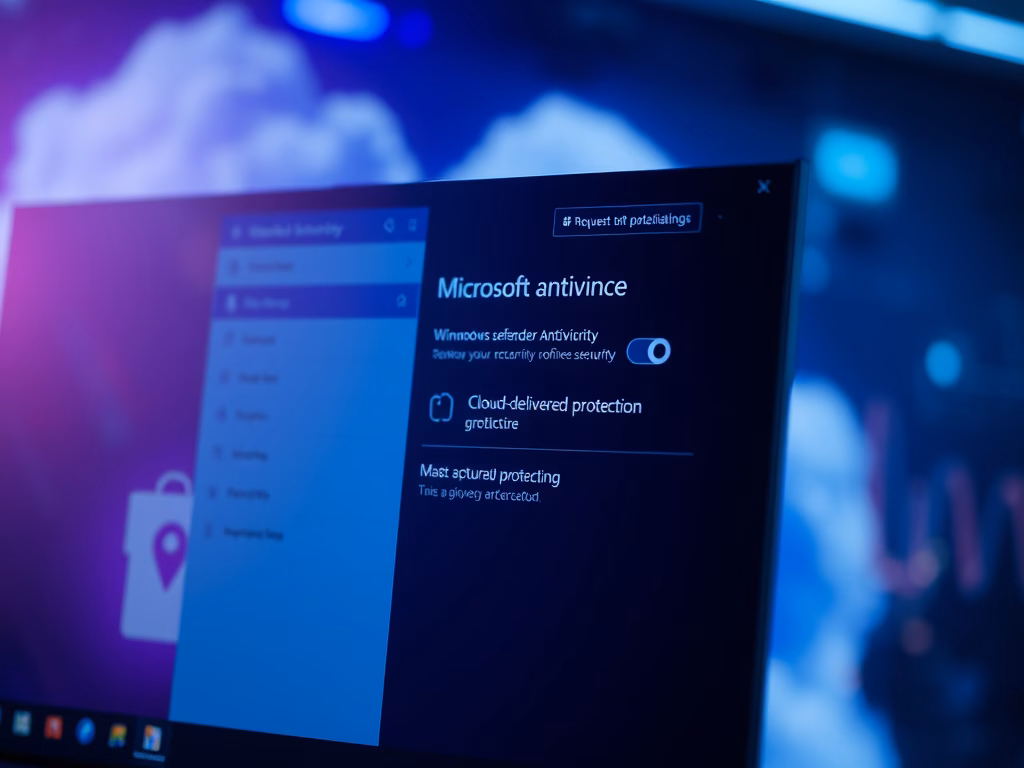
Choose how new email notifications are shown for Outlook
As mentioned, you can display Outlook notifications using the Desktop style or hide them so they aren’t visible.
Here’s how to do it.
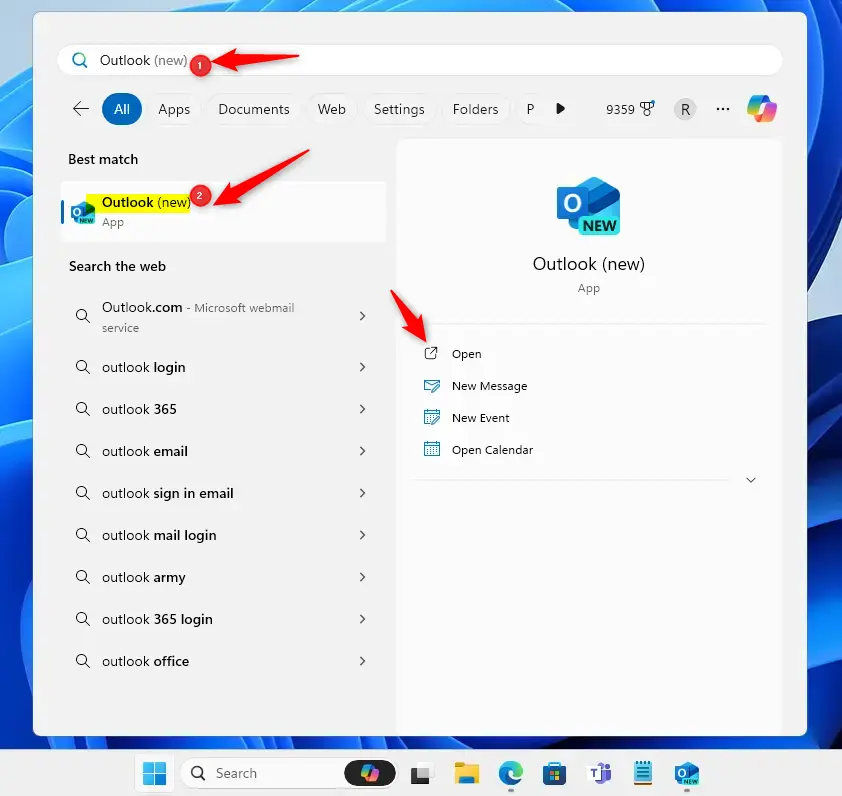
First, open the Outlook app by clicking on its icon in the Start menu or searching for it in the taskbar search box.
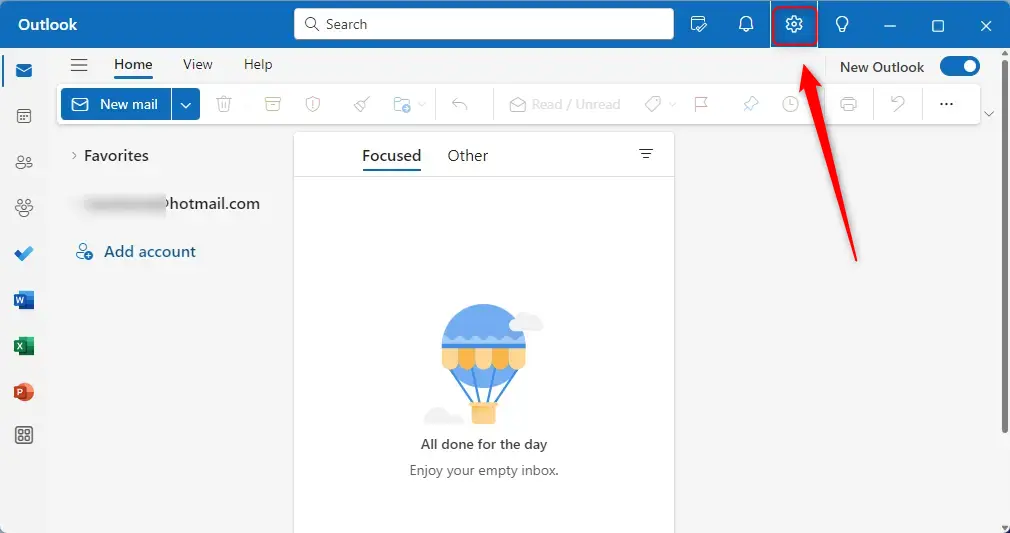
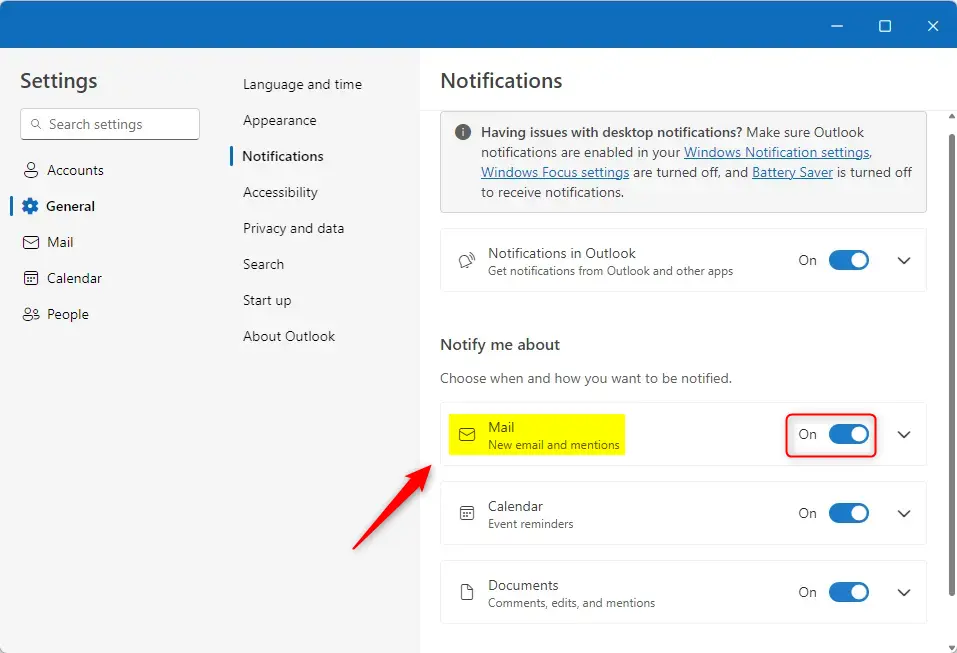
Once Outlook is open, click on the Settings gear icon at the top right of the menu bar.
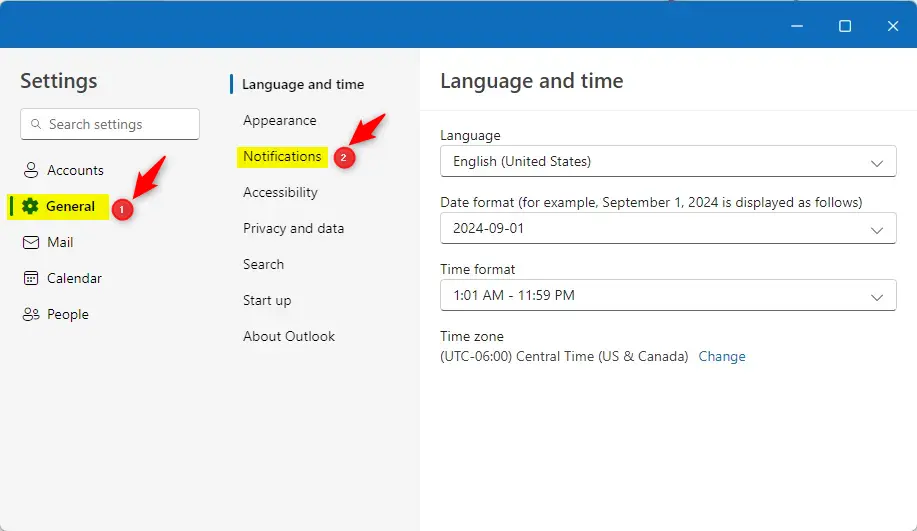
In the Settings sidebar, click General to open a sub-menu, then select Notification to open the settings.
Under the Notifications settings, look for the Notifications in Outlook section. You should now see a dropdown caret allowing you to enable or disable sounds for notifications.
(This assumes you have “Notification in Outlook” turned on.) If Notifications are not enabled, the settings below won’t have any effects.
If you are having issues with notifications, make sure Outlook notifications are enabled in your Windows Notification settings, Windows Focus settings are turned off, and Battery Saver is turned off to receive notifications.
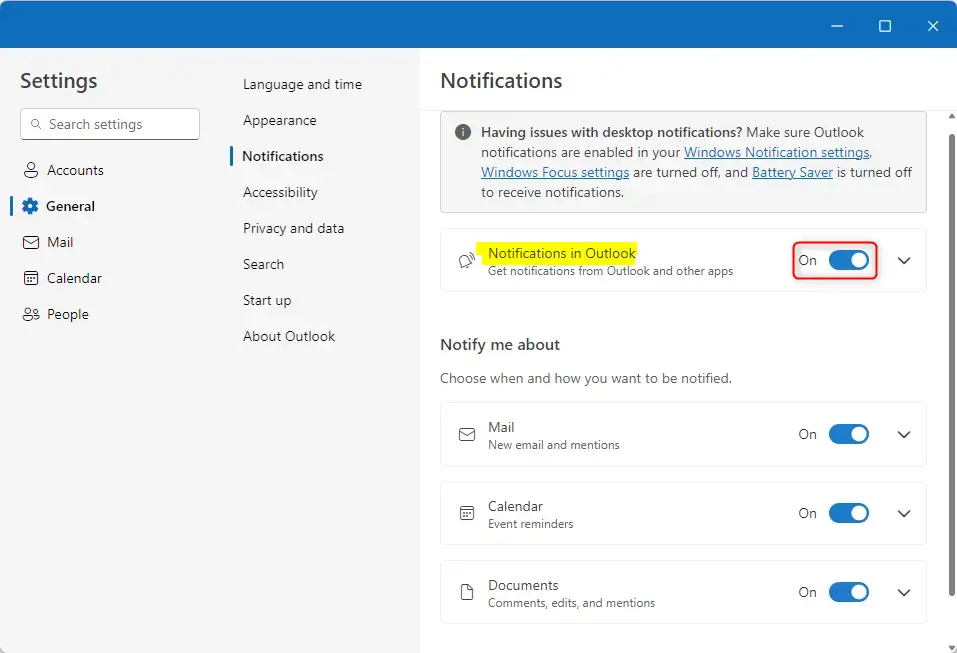
Once Notification in Outlook is enabled, you can turn notifications for new emails and mentions on or off.
Select the “Mail” tile. Then, toggle the button switch to the Off position to disable notifications for new emails and mentions.
To enable notifications for new emails and mentions, toggle the switch button to the On position.
If you want to receive new email notifications but control how they are shown in Windows, click the down-caret on the “Mail” tile.
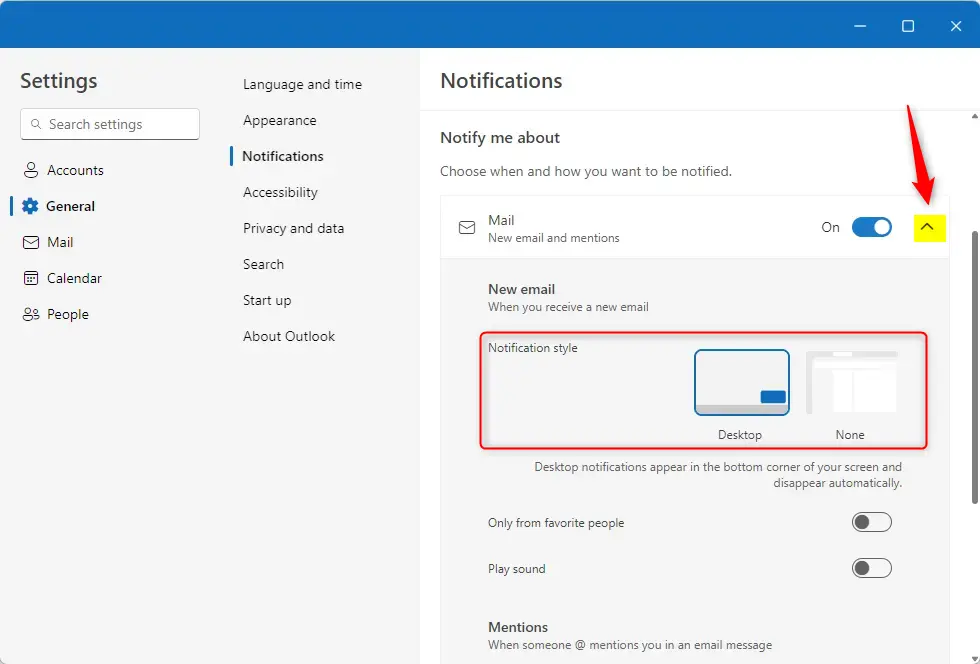
Select the notification style that works for you on the dropdown option for Mail.
- Desktop – Notifications appear in the bottom corner of your screen and disappear automatically
- None – No notifications will appear on your screen.
You can exit the app when you’re done.
That should do it!
Conclusion:
- With the new Outlook app in Windows 11, users can customize how new email notifications appear, allowing for a tailored experience.
- Following these steps, users can easily enable or disable notifications for new emails and mentions, and they can choose between the “Desktop” style or “None” for notification appearance.
- It’s important to ensure that Outlook notifications are enabled in Windows Notification settings and other necessary configurations to receive notifications properly.
- This guide aims to empower users to manage their email notification preferences and make the most of the Outlook app in Windows 11.
Leave a Reply to Understanding Email Notifications: Customizing Alerts on Your Phone Made Easy – Senior Tech Advice Cancel reply