How to Customize Outlook Calendar Alerts on Windows 11

Outlook calendar alerts on Windows 11 are pop-up messages and sounds that remind you about upcoming meetings and appointments so you never miss an event. You can change how these reminders work by picking sounds, banner styles, and timing options directly inside your Outlook settings.
Recent versions of Outlook on Windows 11 let you set default reminder times from 0 minutes up to 2 weeks before an event starts. Adjusting these settings helps cut down on notification noise and keeps your schedule on track.
The steps below use the new Outlook for Windows app, which has a gear icon in the top bar. Classic Outlook (the older desktop version) keeps its reminder options in a different place, under File Options, so the screens won’t match there. All of these changes are per user and don’t need administrator rights.
Open Outlook, click the Settings gear icon, select General Notifications, toggle Calendar on, then click the dropdown arrow and choose your reminder style: Reminder for a center pop-up, Desktop for a corner notification, or None to disable alerts. Click Save to apply changes.
How to change Outlook Calendar notification styles
You can customize Outlook Calendar alerts by changing your notification styles directly inside the Outlook app. This built-in feature lets you control how and when pop-up reminders appear for your appointments and meetings, making sure you never miss an important event on your schedule throughout the workday.
Changes apply as soon as you save them, and you can reverse any of them by returning to the same screen.
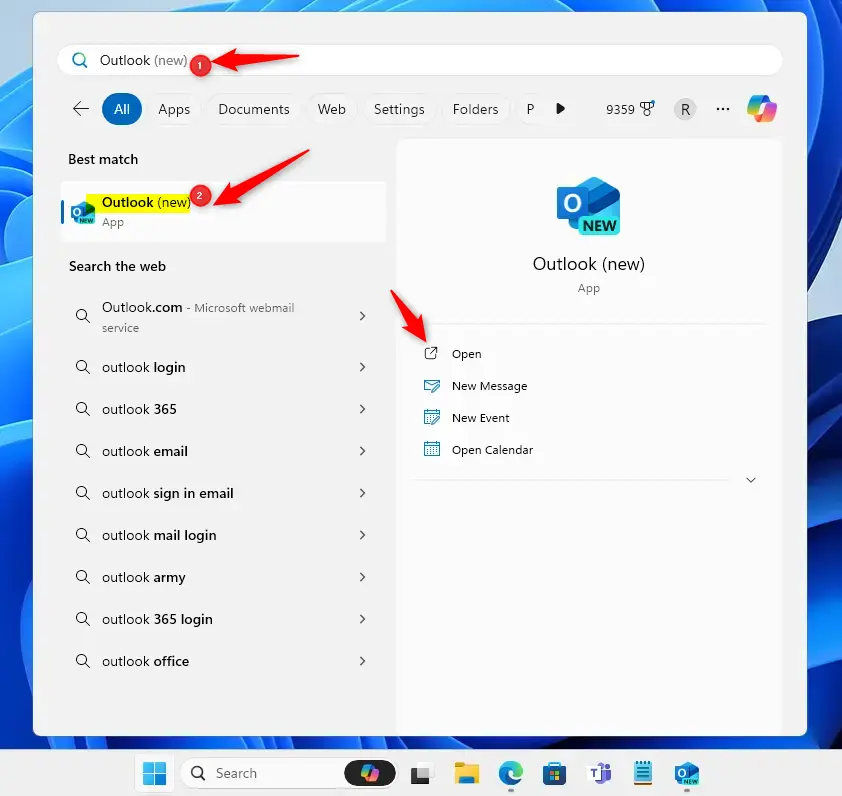
- Open the Outlook app from your Start menu or by searching for it in the taskbar . You should see your mailbox open. If you only see the classic layout with a ribbon and a File menu, you are in classic Outlook, and the steps below will look different.
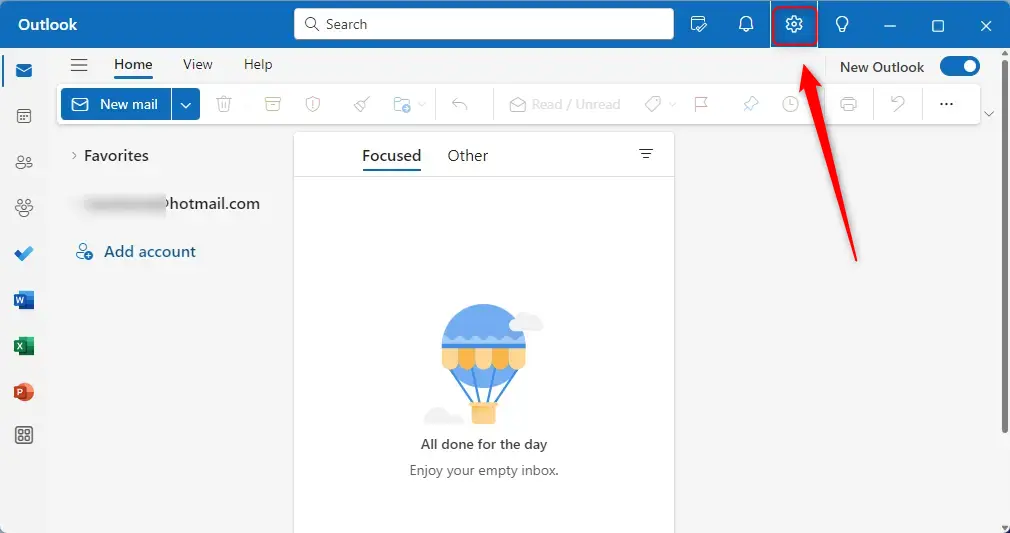
- Click the Settings (gear) icon located at the top right of the menu bar. A Settings window opens with a list of categories on the left.
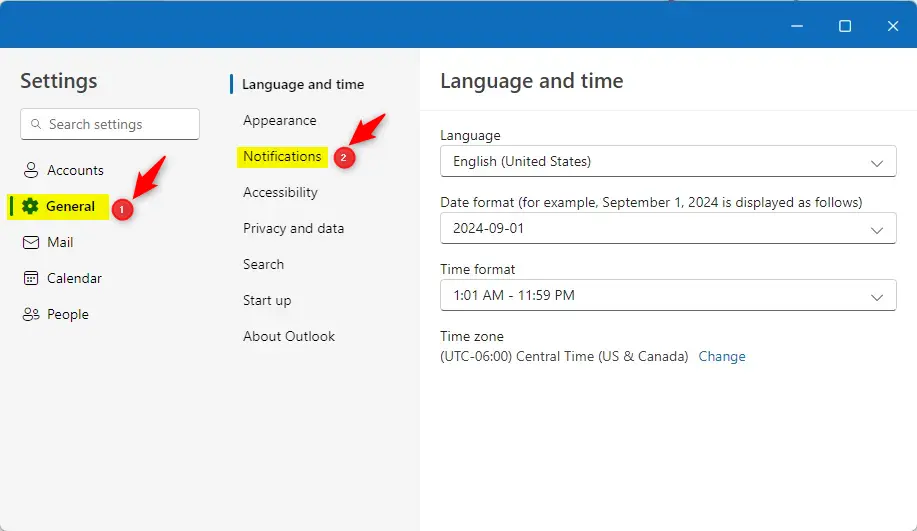
- In the sidebar, click General, then select Notifications. The right-hand pane now shows the notification options for Outlook.
- Look for the Notifications in Outlook section. Ensure you have “Notification in Outlook” turned on. If your alerts are not working, check that Outlook notifications are enabled in your Windows Notification settings, that Windows Focus settings are turned off, and that Battery Saver is turned off. Any of these can silence Outlook even when its own settings are correct, and they are the most common reason a reminder never shows up.
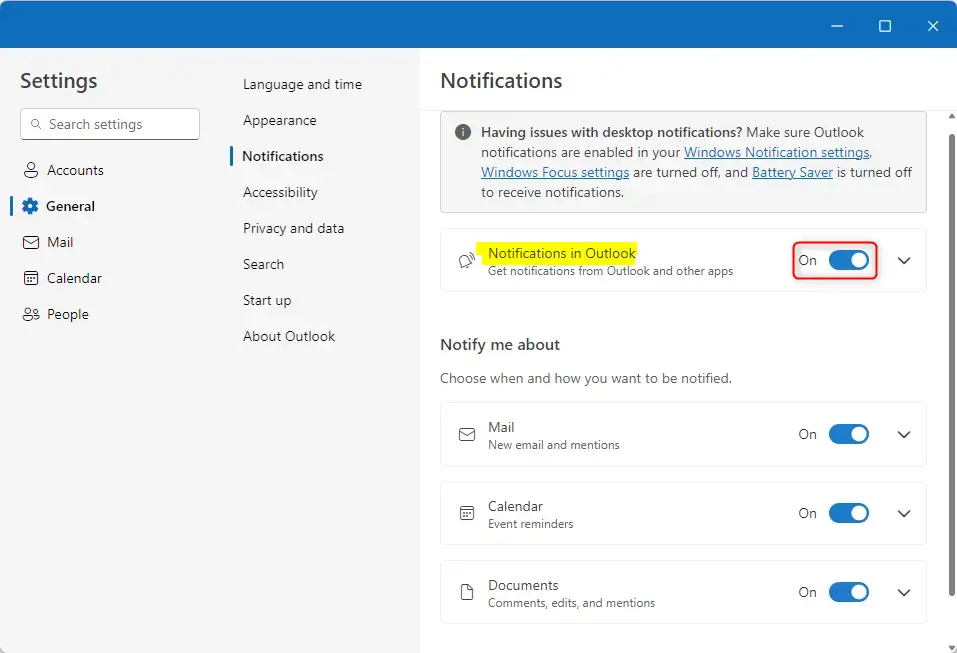
- Once Notification in Outlook is enabled, find the Calendar tile. You can toggle the switch to On or Off to enable or disable reminders. If the Calendar options look greyed out or are missing, go back to step 4 and confirm the main notification setting is on first.
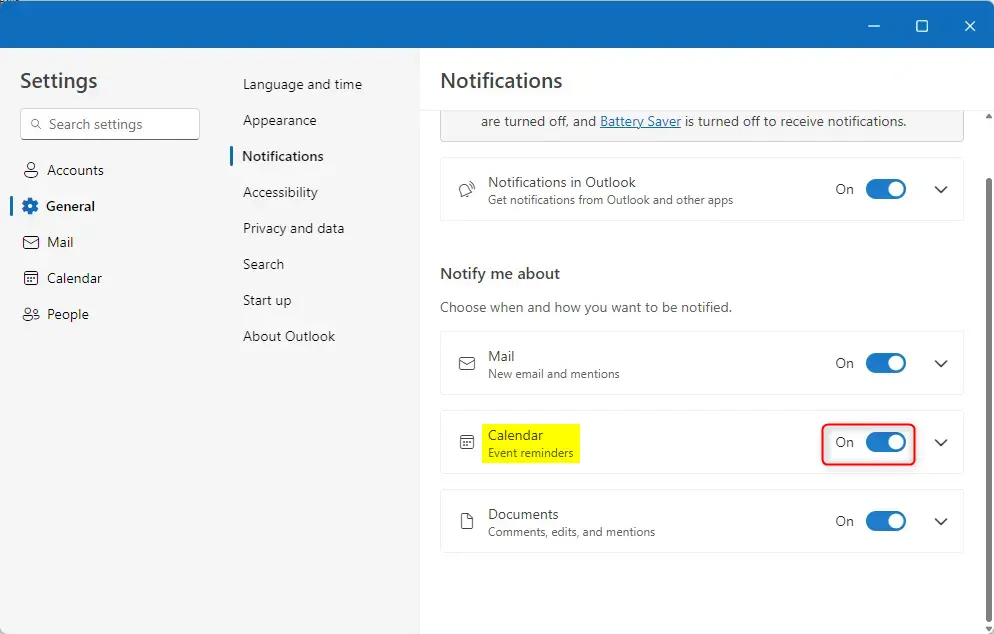
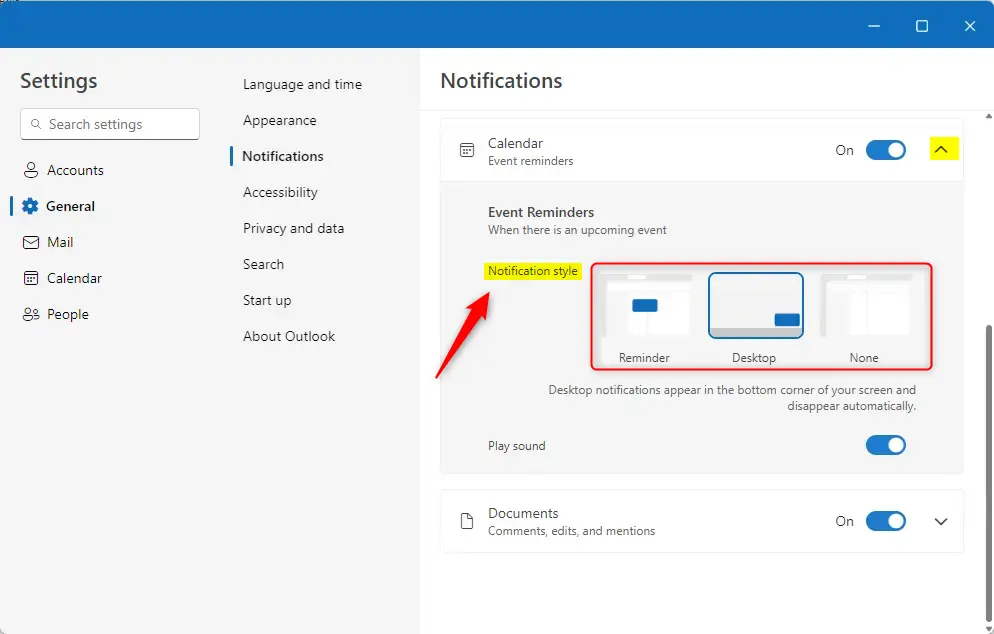
- Once Calendar notifications are enabled is enabled, click the dropdown arrow on the Calendar tile to see more options. The tile expands to show the extra settings. Under Event Reminders, choose one of these styles:
- Reminder: A pop-up appears in the center of your screen and stays until you close it. This is the safest choice if you tend to miss meetings.
- Desktop: A notification appears in the bottom corner of your screen and fades away on its own. It is less intrusive, but easy to miss if you look away.
- None: No alerts will appear. Choose this only if you rely on other ways of tracking your schedule.
- If you choose the Reminders style, you can also set the app to automatically dismiss pop-ups for past events. This keeps old reminders from piling up on your screen after a meeting has already started or ended. If you chose Desktop or None, this option does not apply.
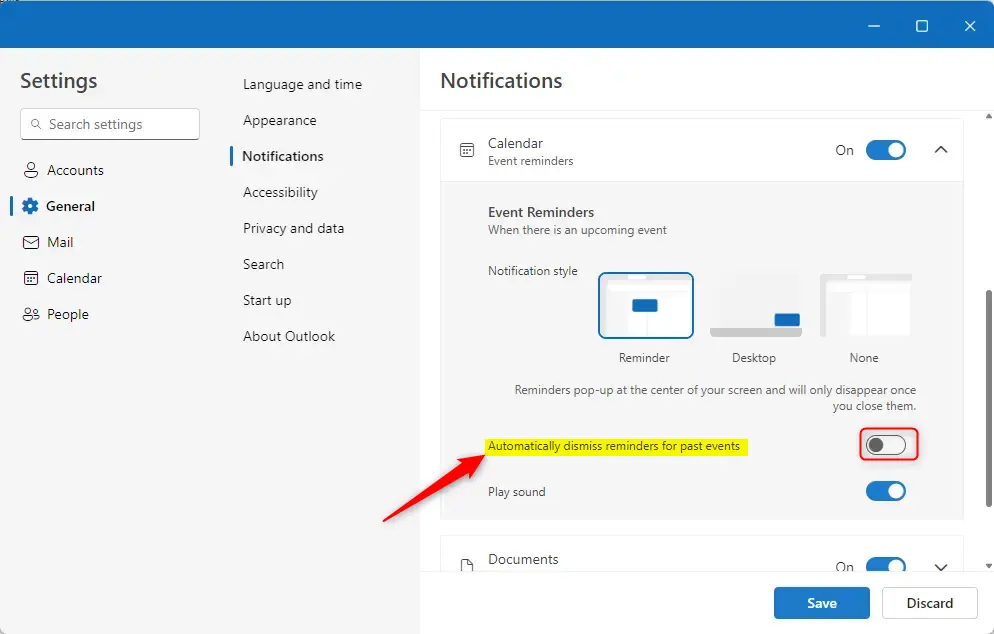
- Click the Save button at the bottom to finish. To test the result, create a calendar event a few minutes from now with a short reminder time and wait for the alert. To undo your changes, reopen the same screen, pick the previous style, and save again.
This is necessary if you’re modifying specific system paths, like 📁C:\
Summary
Customizing your Outlook Calendar notifications helps you stay organized. By choosing between pop-up reminders or subtle desktop alerts, you can manage your time more efficiently and cut down on unnecessary interruptions during your workday. If an alert still doesn’t appear after you save, recheck the Windows-level notification settings from step 4 before changing anything else in Outlook.
Have a question about this guide?
Answered by AI from this guide. Good questions may be added to this page — please don't include personal details.
Did this guide fix your problem?

About the Author
Richard
Tech Writer, IT Professional
Richard is a writer at Geek Rewind who turns complex IT tasks into clear, step-by-step guides. He draws on years of hands-on experience in system administration and enterprise IT operations, focusing on Windows, Linux and WordPress: the problems people actually run into, and the fixes that work. His server and WordPress guides come from systems he runs himself. Richard builds and maintains the platform behind Geek Rewind, from its Ubuntu servers and Nginx configuration to its custom WordPress plugins. Many new tutorials start with readers' questions, and he's always glad to answer them in the comments.
[…] or off notifications when Outlook is closed, turn on or off incoming email alert sounds, customizing Calendar alerts, sharing your work hours and location, and […]
[…] on or off notifications when Outlook is closed, turn on or off incoming email alert sounds, customizing Calendar alerts, sharing your work hours and location, and […]