How to Get and Apply Themes in Windows 11

- 16 steps
- Needs administrator rights
A theme is a saved bundle of appearance settings. Windows 11 themes change the desktop background, accent color, sounds, and mouse cursor in one step, and the quickest way to get one is Settings Personalization Themes, where the Browse themes button opens free themes in the Microsoft Store.
This guide covers the built-in themes, the Microsoft Store route, themes from Microsoft’s website, customizing and removing themes, and what to check when the options are missing or greyed out. Applying a theme does not need a restart, so you can see the change straight away.
Open Settings Personalization Themes, select Browse themes to open the Microsoft Store’s free theme collection, then choose a theme and select Get. Once the download finishes, return to the Themes page and click the new theme. Windows applies the background, accent color, sounds and cursors immediately, with no restart needed.
What a 🪟 Windows 11 theme includes
A theme bundles four things: a desktop background (or a slideshow of several), an accent color, a sound scheme, and a mouse cursor set. The accent color is the color Windows uses on the Start menu, taskbar, buttons, and window borders.
Windows 11 ships with a few themes already installed. These include Windows (light) and Windows (dark), plus picture themes such as Glow, Captured Motion, Sunrise, and Flow. The exact list varies a little between Windows versions (called builds), so you may see more or fewer than this.
Themes work on both Windows 11 Home and Pro. You do not need an administrator account to apply one, because a theme changes only your own user account settings (your profile).
How to get and apply themes in 🪟 Windows 11
Follow the numbered steps below to get and apply themes in Windows 11 from the Microsoft Store, which is the route Microsoft built into Settings. Free themes install in a few seconds.
- Open Settings. Press Win+I, or right-click Start and select Settings.
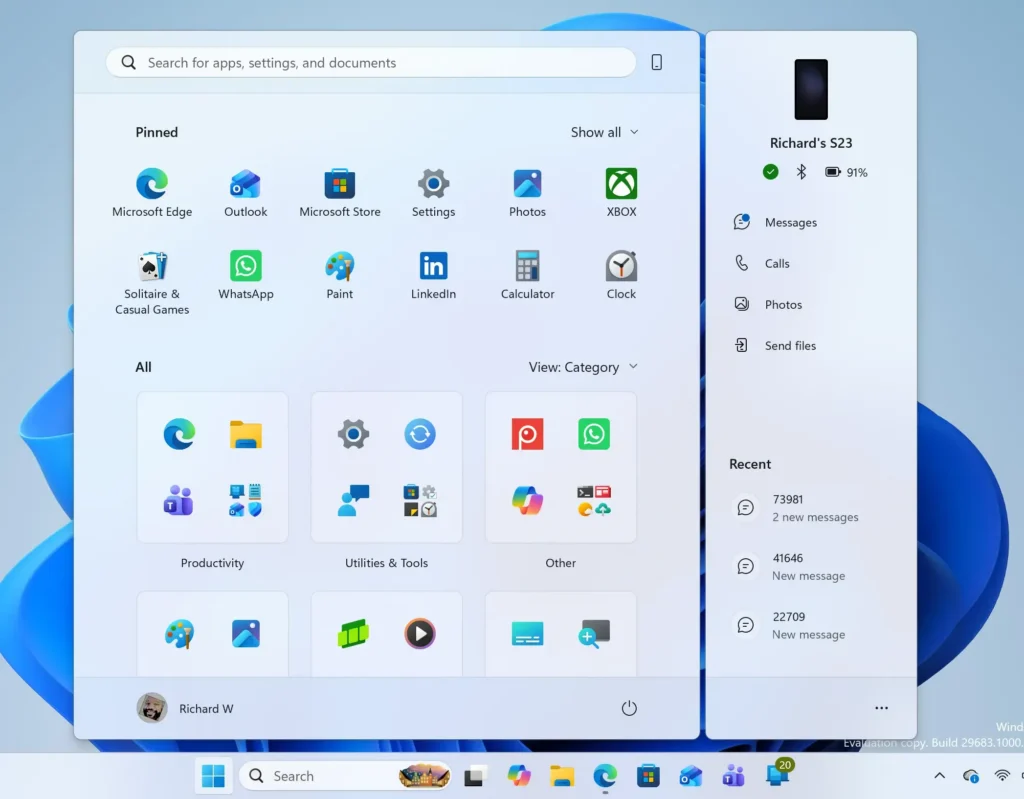
Windows 11 Start menu search panel for opening OpenSSH Client settings - Select Personalization. It is in the left-hand list. The right pane now shows options for background, colors, themes, and more.
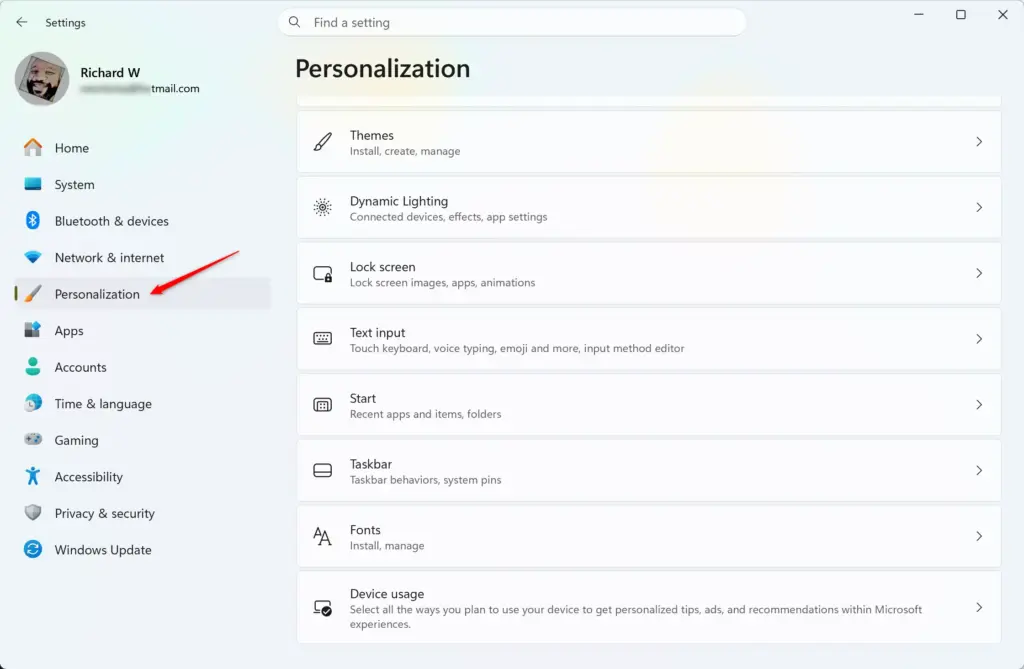
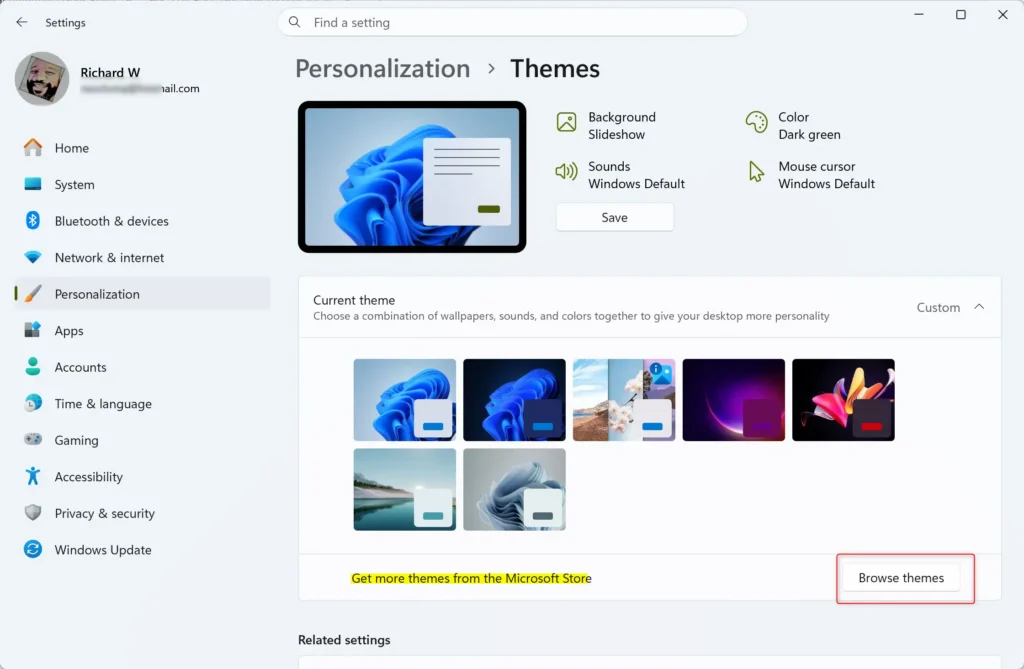
Settings › Personalization - Select Themes. The page opens with your current theme at the top. Below it is a gallery of the themes already on your PC.
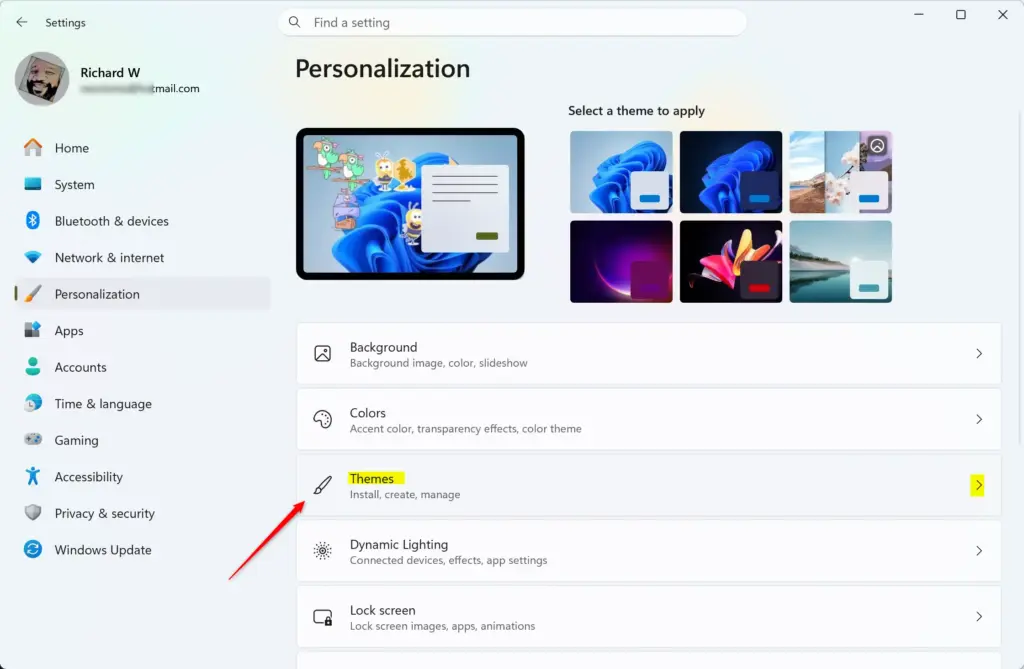
Settings › Personalization › Themes - Select a built-in theme to try it. Click any thumbnail in the gallery. The background, colors, and sounds change right away, and the thumbnail gets a highlight border.
- Select Browse themes. This button sits next to the text Get more themes from Microsoft Store. The Microsoft Store opens on its themes collection. On some builds the button label differs slightly.
- Select a theme you like. Each theme page shows preview images, the number of backgrounds, and whether it is free.
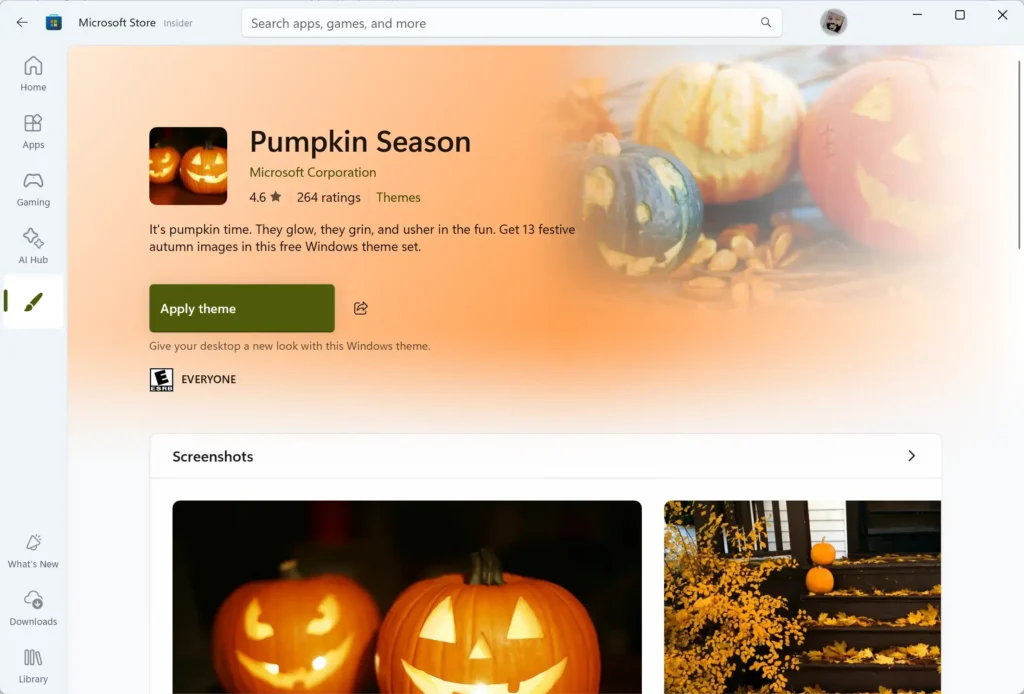
- Select Get. Paid themes show a price instead. The Store may ask you to sign in with a Microsoft account first. If it does, sign in and select Get again.
- Wait for the download to finish. The button changes when the theme is installed. Themes are small and finish quickly on most connections.
- Return to Settings Personalization Themes. The new theme now appears in the gallery with the others. If you do not see it, close and reopen Settings.
- Select the new theme. Windows applies it immediately. The desktop background, accent color, and sounds change without a restart.
If the Store opens but shows no themes, or the Get button does nothing, see the troubleshooting section below. The related post Get New Themes for Windows 11 and Apply Them walks through the same task with extra screenshots.
Get a theme from Microsoft’s website
Microsoft also publishes themes on microsoft.com, in its Windows personalization gallery. A theme from the site downloads as a theme pack file, which is a single compressed file holding the images and settings. The file ends in .deskthemepack or .themepack.
These steps apply a theme downloaded from the website.
- Open your browser. Search for Microsoft’s Windows themes or personalization gallery on microsoft.com.
- Select a theme category. Categories group themes by subject, such as landscapes or animals.
- Select Download. The browser saves the theme pack file, usually to the Downloads folder.
- Open the downloaded file. Double-click it in the browser’s download list or in File Explorer.
- Wait for Settings to open. Windows applies the theme automatically and shows the Themes page in Settings.
- Confirm the theme is selected. It now appears in the gallery, highlighted as your current theme.
The post How to Download and Install Themes in Windows 11 covers this file-based method in more depth. If you want to stick with Microsoft’s built-in routes, see the post official Microsoft Store methods for custom themes, which covers the official Microsoft Store methods for custom themes.
Change and save parts of a theme
You can change any theme after you apply it. Windows then labels your current setup Custom, and the changes stay until you pick another theme.
The Themes page has four tiles near the top: Background, Color, Sounds, and Mouse cursor. Select one to adjust that part only.
Change the background or accent color
Select the Background tile to pick a picture, a solid color, or a slideshow. Select the Color tile to switch between light and dark modes or set the accent color. A dark theme paired with a different accent color is a common combination.
Change sounds and the mouse cursor
Select the Sounds tile to pick a different sound scheme or set sounds to none. Select the Mouse cursor tile to change the pointer style, size, or color. Cursor options open the Mouse pointer settings page.
Save your customized theme
After changing a tile, a Save button appears next to the current theme. Select it, type a name, and select Save. The theme joins the gallery so you can return to it later.
Remove a theme you no longer want
Removing a theme does not affect the rest of your PC. Go to Settings Personalization Themes, right-click the theme thumbnail, and select Delete. Windows removes it from the gallery.
You cannot delete the theme that is currently applied. Select a different theme first, then delete the one you no longer want. Built-in themes may not show a Delete option at all.
To undo a change right away, select Windows (light) or Windows (dark) from the gallery. Both are built-in themes that reset the background, colors, and sounds to Windows defaults. If your mouse cursor still looks wrong afterwards, select the Mouse cursor tile and check it.
If themes are missing, greyed out, or will not apply
Most failures come from one of five causes. Check them in this order.
Windows is not activated
Your organization manages the PC
On a work or school PC, an administrator can block theme changes. Settings then shows Some of these settings are managed by your organization, or the theme options are greyed out. Only an administrator can lift the block.
If you manage the PC yourself, the cause may be a restriction you set earlier using a policy (a saved rule that controls a setting). The posts How to Restrict Desktop Themes in Windows 11 and How to Stop Users from Changing Desktop Themes in Windows 11 explain how that restriction is set. Use them to reverse it. The Group Policy method (a built-in tool that controls settings for a PC) needs Windows 11 Pro or higher, and changing it needs an administrator account.
The Microsoft Store will not open or load themes
If Browse themes opens a blank Store window or an error, sign out of the Store and sign in again, then retry. If the Store stays unavailable, download the theme from Microsoft’s website instead and open the file, as described above.
A downloaded theme file does nothing
If double-clicking a theme pack opens the wrong app or shows an error, the file may be incomplete. Delete it and download it again. Make sure the file name ends in .deskthemepack or .themepack. A .zip extension, or any other ending, means the download was saved as a different file type.
A contrast theme is active
Contrast themes are high-visibility color schemes under Accessibility. They override normal themes, so your chosen theme may look wrong while one is on. Go to Settings Accessibility Contrast themes, set the option to None, and select Apply. The post Color Filters vs Contrast Themes in Windows 11 Accessibility explains the difference.
What to do next
If a theme’s wallpaper looks wrong after a feature update, reapply it from Settings Personalization Themes. Feature updates can reset personalization choices. For something beyond the standard gallery, read How to Enable Hidden Education Themes in Windows 11. For more ways to customize the Themes page itself, see How to Get Custom Themes in Windows 11 Settings Personalization.
Have a question about this guide?
Answered by AI from this guide. Good questions may be added to this page — please don't include personal details.
Did this guide fix your problem?

About the Author
Richard
Tech Writer, IT Professional
Richard is a writer at Geek Rewind who turns complex IT tasks into clear, step-by-step guides. He draws on years of hands-on experience in system administration and enterprise IT operations, focusing on Windows, Linux and WordPress: the problems people actually run into, and the fixes that work. His server and WordPress guides come from systems he runs himself. Richard builds and maintains the platform behind Geek Rewind, from its Ubuntu servers and Nginx configuration to its custom WordPress plugins. Many new tutorials start with readers' questions, and he's always glad to answer them in the comments.
No comments yet — be the first to share your thoughts!