How to Change Your Main Screen in Windows 11

Your primary display in Windows 11 holds your main taskbar, the system tray clock, and, in most cases, newly opened apps. Setting the main screen tells Windows where to put your most important windows. It also decides which monitor shows the sign-in screen and where the Start menu opens. Some apps reopen on the monitor they were last used on, so a few windows may not follow the change right away.
Press Win+I to open Settings, go to System Display, click the monitor you want as main, scroll down to Multiple displays, and tick Make this my main display. Your taskbar and clock move to that monitor immediately with no restart needed.
The setting only matters when you have more than one monitor connected. It works the same on Windows 11 Home and Pro. Follow these steps to choose which monitor acts as your main screen:
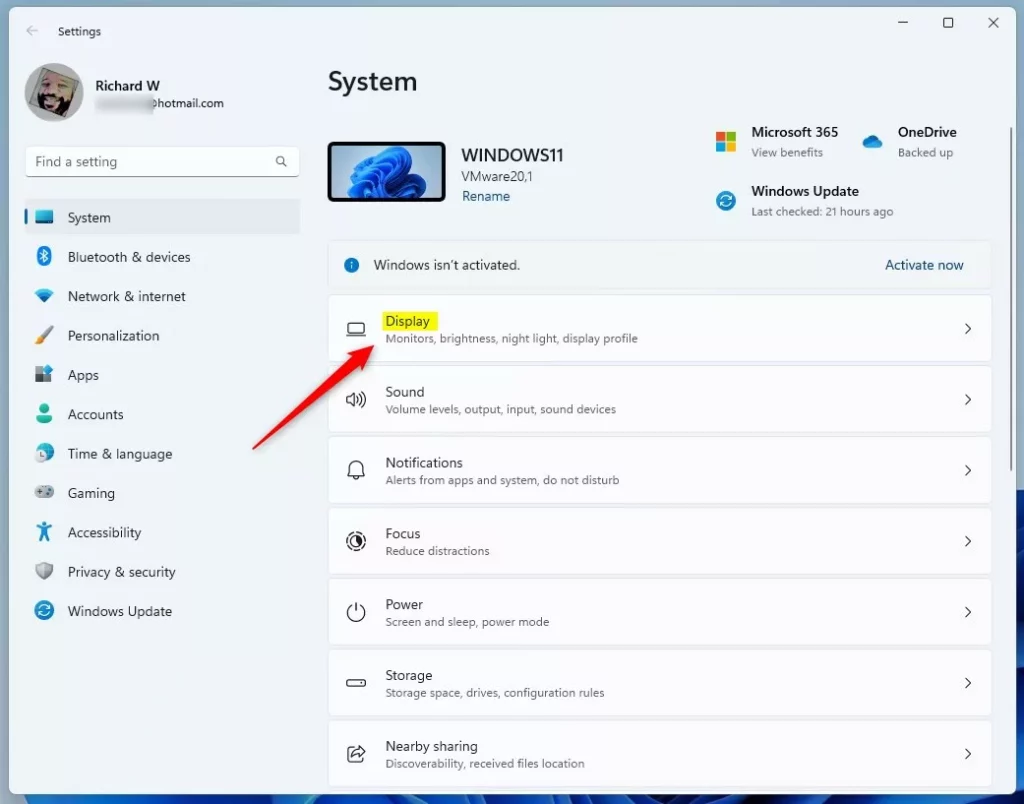
- Press Win+I to open Settings .
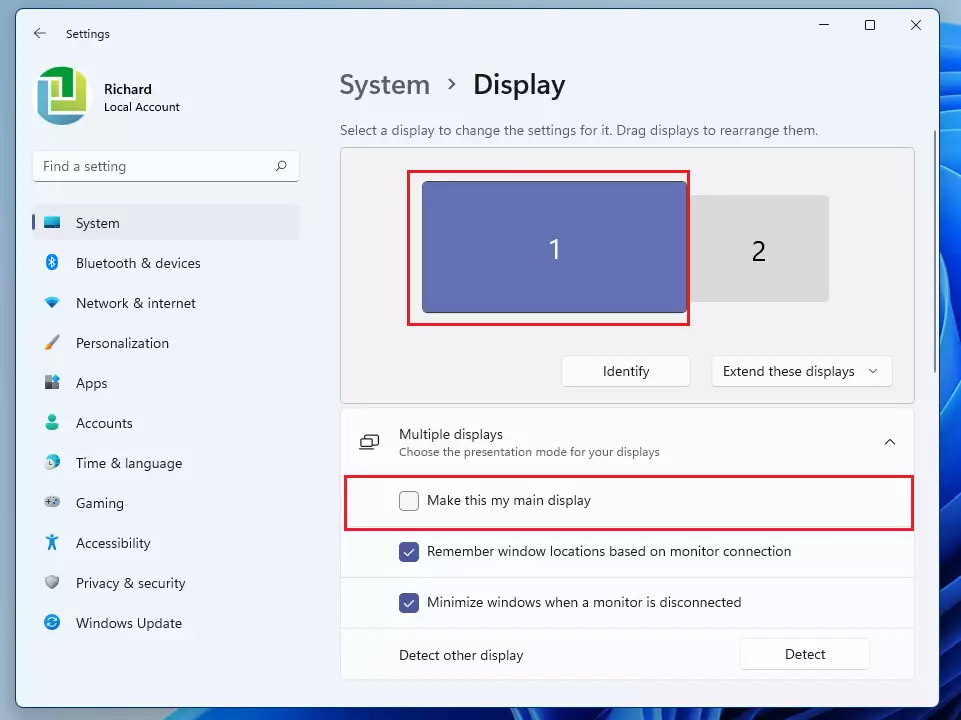
- Go to System Display You should see a diagram of your monitors, each shown as a numbered box.
- Click Identify if you are not sure which box is which physical monitor. A large number appears briefly on each screen.
- Click the box for the monitor you want as your main screen.
- Scroll down and expand Multiple displays.
- Tick Make this my main display. The taskbar , clock and desktop icons should move to that monitor straight away. No restart is needed.
If Make this my main display is greyed out or already ticked, the monitor you selected is already the main one. Select the other monitor in the diagram instead. The same applies if you want to undo the change: select your old monitor and tick the box again.
If a monitor is missing from the diagram, expand Multiple displays and click Detect, then check the cable and input source on the monitor. If you only see one box, press Win+P and choose Extend. In Duplicate mode both screens show the same picture, so there is no separate main display to pick.
Option 1Change Your Main Screen Using Windows Settings
Windows Settings lets you change your windows 11 main display in just a few clicks by selecting the correct monitor number in your display properties. This built-in method works for almost all computers and keeps your taskbar, new windows, and notifications on your preferred screen without needing extra software.- Press Win+I to open Settings.
- At the top, you’ll see pictures of your screens labeled with numbers. Click the screen you want to be your main one.
If you’re not sure which screen is which, click the Identify button. Numbers will briefly show up on each screen. - Scroll down and click on Multiple displays to expand the options.
- Check the box that says Make this my main display.
- If the box is already checked and grayed out, that screen is already your main display.
- When done, you can close the Settings window.
Option 2Change Main Screen Using NVIDIA Control Panel
This alternative method is helpful when Windows Settings does not recognize your monitors correctly or fails to save your primary display choice.
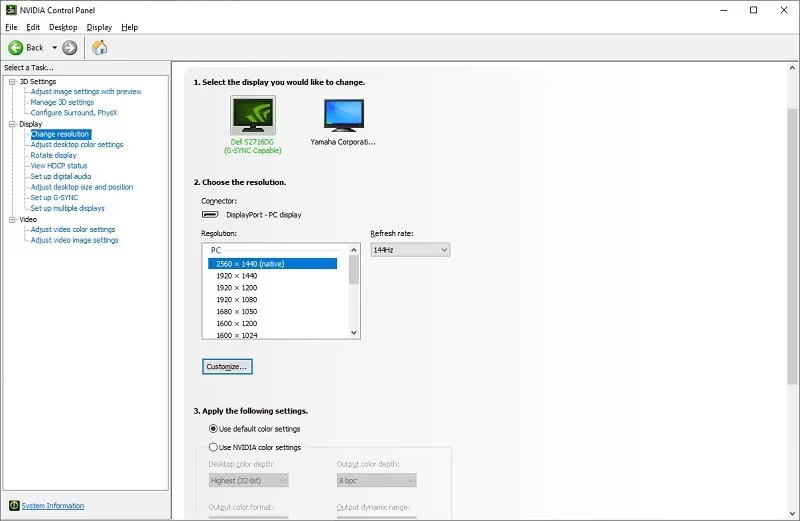
- Open NVIDIA Control Panel . You can find it by right-clicking the desktop and selecting it.
- In the left menu, click Set up multiple displays under Display.
- Right-click the number of the screen you want as your main display, then click Make primary.
- Click Apply.
- A confirmation message will appear. Click Yes within 20 seconds to keep the change, or it will revert.
- Close the NVIDIA Control Panel when you’re finished.
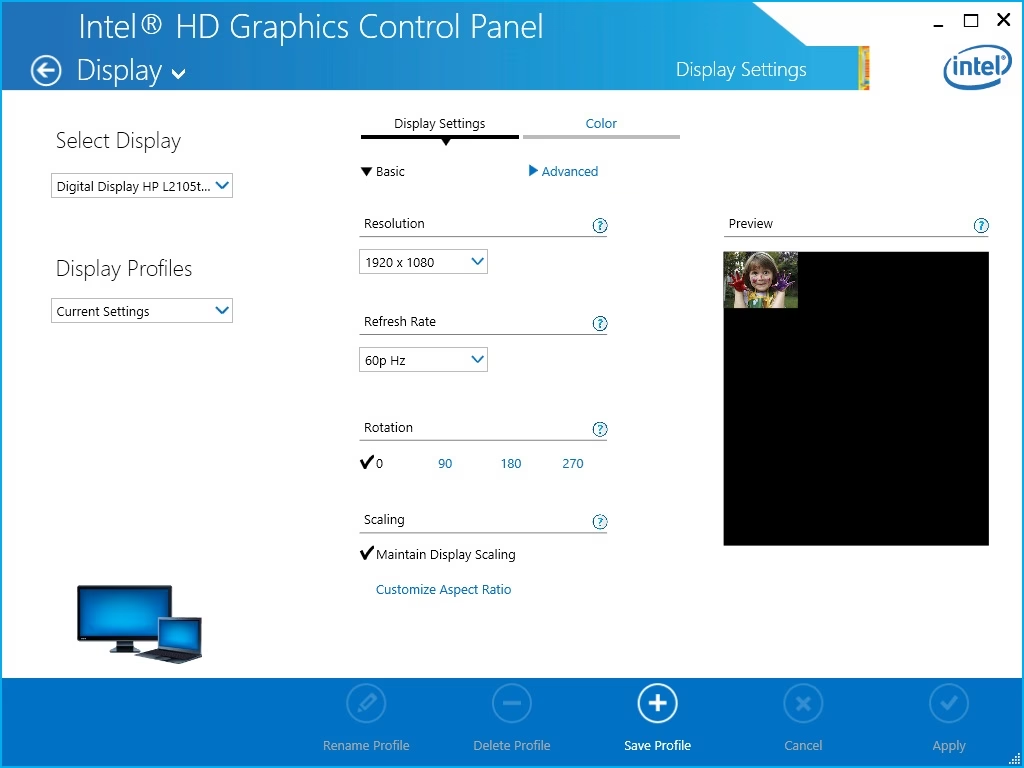
Option 3Change Main Screen Using Intel Graphics Control Panel
This tool provides a dedicated menu specifically for multi-monitor setups running on Intel hardware drivers.
- Open Intel Graphics Control Panel from the Start menu (look under All Apps).
- Click the Display icon at the bottom.
- In the left menu, click Multiple Displays.
- Choose the display you want as your main screen from the Primary Display drop-down menu.
- Click Apply.
- Click Yes to confirm the change within 15 seconds, or it will go back.
- Close the Intel Graphics Control Panel when done.
Option 4Change Main Screen Using AMD Radeon Settings
Use this if your PC has AMD graphics and drivers installed.
- Open AMD Radeon Settings.
- Click on Display.
- Select the display you want to be your main screen.
- Turn on the Preferred Display switch.
- You can now close the AMD Radeon Settings.
Summary
- The main display is the screen where important things like your taskbar and notifications show up.
- You can change your main display through Windows Settings or your graphics card’s control panel, depending on what type of graphics you have.
- Each method is easy and quick to do.
- Make sure to confirm your choice if the system asks, or the change will go back.
- Following these steps will help you use your multiple monitors the way you want.
Choosing your windows 11 main display takes just a minute using either the main Windows settings or your graphics card software. Setting the correct primary screen ensures your taskbar, notification center, and new app windows always open on the monitor you actually look at.
Was this guide helpful?

About the Author
Richard
Tech Writer, IT Professional
Richard is a writer at Geek Rewind who turns complex IT tasks into clear, step-by-step guides. He draws on years of hands-on experience in system administration and enterprise IT operations, focusing on Windows, Linux and WordPress: the problems people actually run into, and the fixes that work. His server and WordPress guides come from systems he runs himself. Richard builds and maintains the platform behind Geek Rewind, from its Ubuntu servers and Nginx configuration to its custom WordPress plugins. Many new tutorials start with readers' questions, and he's always glad to answer them in the comments.

No comments yet — be the first to share your thoughts!