How to Duplicate or Mirror Your Display in Windows 11

- 25 steps
- Needs administrator rights
- Includes a restart or sign-out
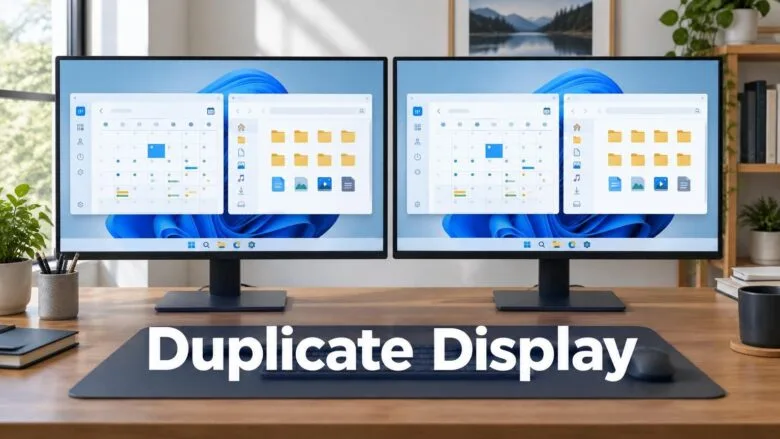
Display duplication in Windows 11 lets both your monitor and a projector, TV, or second screen show the exact same image at the same time. This is the fastest way to present on a big screen or mirror your laptop to an external display.
The simplest method uses the Win+P keyboard shortcut, which opens a panel where you pick “Duplicate” in seconds. You can also duplicate through Settings if you prefer clicking through menus, or use wireless duplication if your second screen supports it.
No restart is needed, and the steps work the same on Windows 11 Home and Pro. If the duplicate option doesn’t appear or the picture looks wrong, there are quick fixes covered in this guide.
Press Win+P, select Duplicate from the Project menu, then click or press P again to confirm. Both screens immediately show the same desktop. If Duplicate is greyed out, Windows hasn’t detected the second display yet.
What Does Duplicate Display Do in 🪟 Windows 11?
Duplicate (also called mirroring) copies one desktop to both screens at once. Whatever you do on your main screen appears on the second screen, including the mouse pointer.
Windows 11 gives you four display modes. They are listed in the Project menu (the panel that opens when you press Win+P):
- PC screen only uses your main screen and turns the other one off.
- Duplicate shows the same desktop on both screens.
- Extend treats the two screens as one large desktop, so you can drag windows between them.
- Second screen only turns off your main screen and uses only the external one.
Duplicate is the right choice when other people need to see exactly what you see. Use Extend when you want more working space. No administrator rights are needed for any of the steps below, except where a step says otherwise.
Before You Start: Connect the Second Display
Connect and power on the second screen first, so you are not troubleshooting the wrong thing later.
- Plug the cable into your PC. Common connections are HDMI, DisplayPort, and USB-C. A USB-C port only carries video if it supports DisplayPort output. Check your PC’s manual if you are not sure.
- Plug the other end into the monitor, TV, or projector, then switch the device on.
- Set the monitor, TV, or projector to the matching input, such as HDMI 1. Use the remote or the buttons on the device.
After these steps, the second screen often lights up on its own. By default, Windows 11 usually extends the desktop to a newly connected display. You may see a blank screen with only a wallpaper and cursor, or a mirrored copy of your desktop. Either way, the next section sets the mode you want.
How to Duplicate Your Display With Windows Key + P
This is the quickest method. It switches the mode instantly and works on any Windows 11 PC with a second display connected.
- Press Win+P. The Project menu opens on the right side of the screen with the four modes listed.
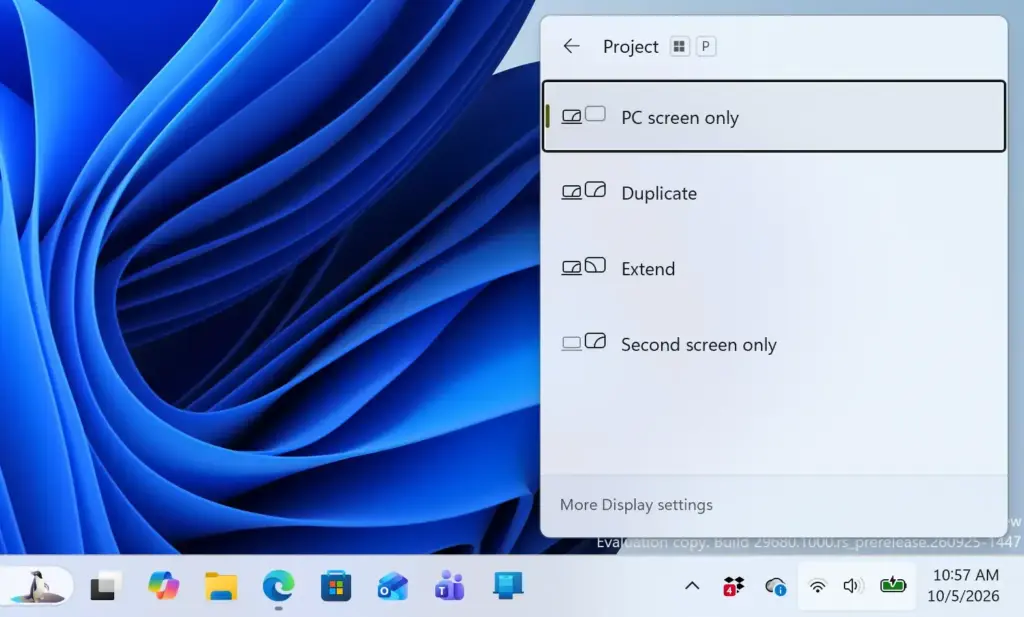
- Select Duplicate. You can click it, or keep holding the Win and press P again to move down the list, then release the keys to confirm.
The screen may go dark for a second or two while Windows changes the mode. You should then see the same desktop on both displays.
If the Project menu opens but Duplicate is greyed out or does nothing, Windows has not detected a second display. Skip to the troubleshooting section below.
How to Switch Back
Press Win+P again and choose Extend to get a larger desktop, or PC screen only to turn the second display off. The change applies right away.
How to Duplicate Your Display in Settings
Use Settings if you prefer menus, or if you want to adjust resolution while you are there. Settings also lets you choose a mode for a specific display when you have more than two.
- Open Settings , then go to System Display. The page shows a preview of your screens as numbered boxes near the top.
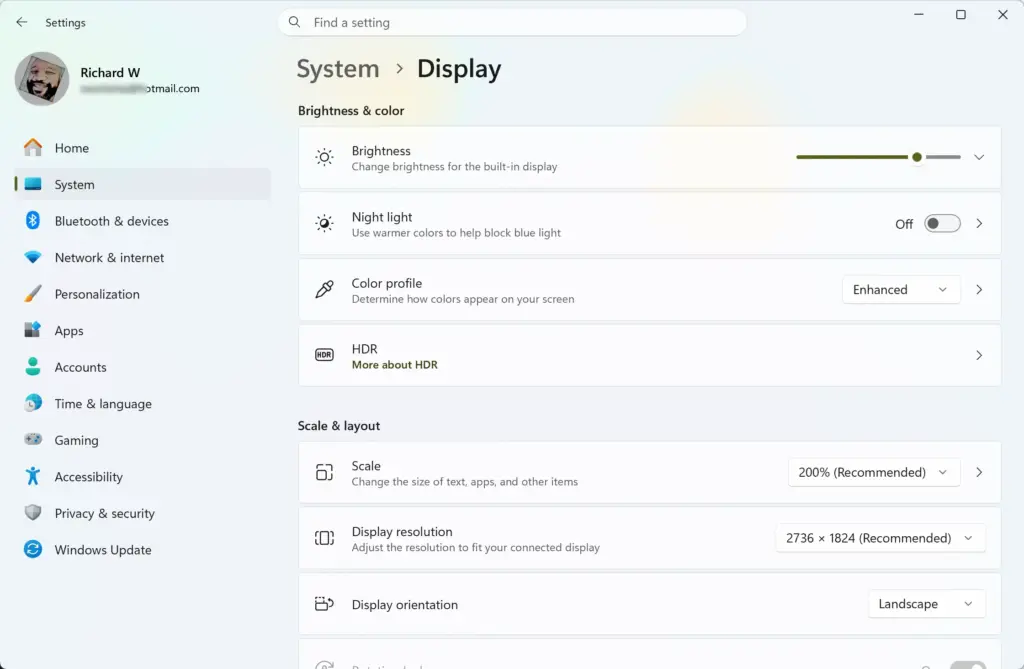
Settings › System › Display - Scroll down to Multiple displays and select it to expand the section. If you only see one screen in the preview and no Multiple displays section, Windows has not found the second display. Select Detect if the button is there, or go to the troubleshooting section.
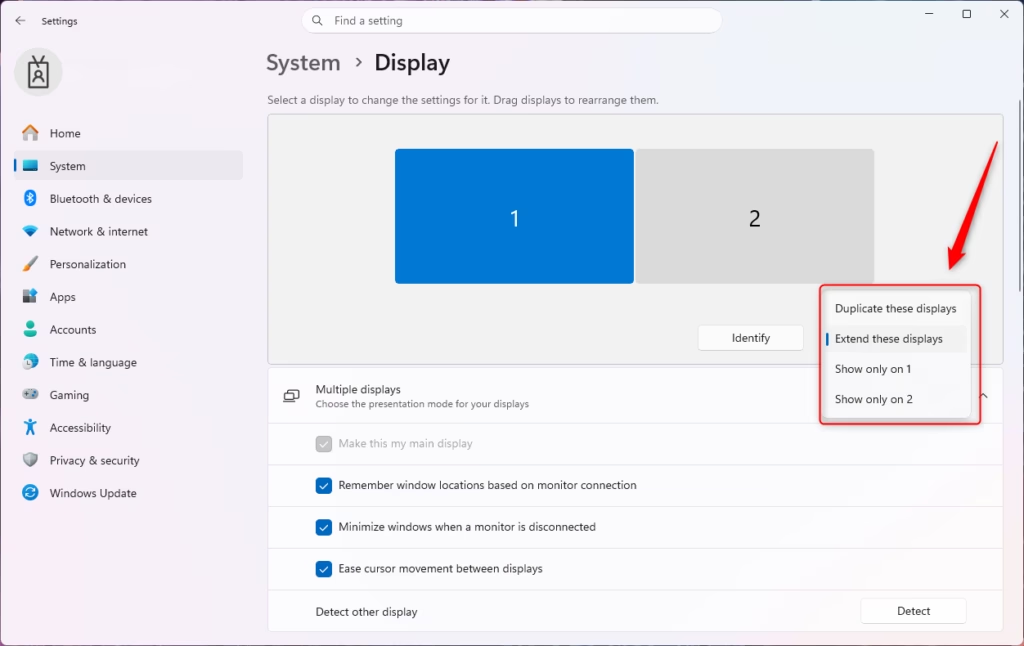
Windows 11 multiple displays project options for screen duplication. - Open the drop-down list in that section and select Duplicate these displays. The screens go dark briefly, then both show the same desktop.
- Select Keep changes when the confirmation box appears. If you do nothing, Windows reverts to the previous mode after about 15 seconds. This protects you if the new mode gives you a blank screen.
If you have three or more displays, the drop-down list offers choices for specific screen pairs—the exact wording depends on how many screens Windows detects. Select the option that names the screens you want to mirror.
How to Undo It in Settings
Open Settings System Display Multiple displays, then choose Extend these displays from the drop-down list. You can also choose the option that shows only one of your screens. Select Keep changes to confirm.
Fix a Stretched, Blurry, or Cropped Duplicate Picture
When you duplicate, both screens receive the same image, so Windows has to pick a resolution that works for both. If one screen is a 16:9 TV and the other is a laptop panel with a different shape, you may see black bars, a stretched image, or blurry text. The fix is to match the resolution to the screen your audience is watching.
- Open Settings System Display.
- Scroll to Display resolution and open the drop-down list.
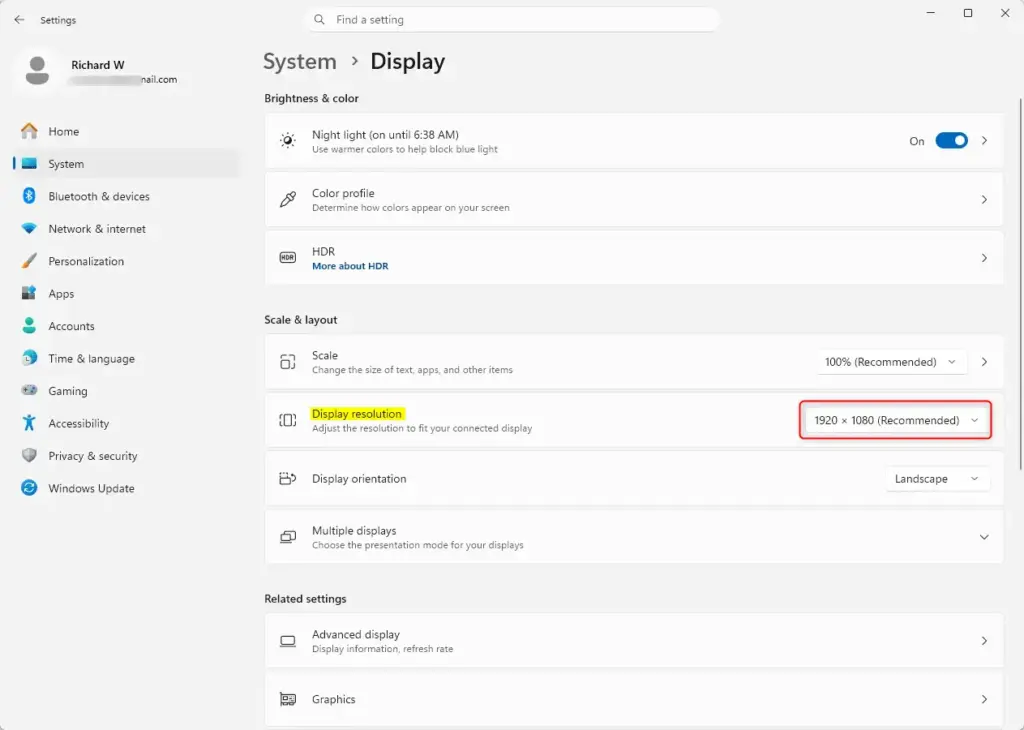
Settings › System › Display › Display resolution - Choose the resolution marked (Recommended) for the external screen. For a projector, choose the resolution the projector supports natively, which is listed in its manual or on its spec sheet.
- Select Keep changes. The picture should now fill the external screen without bars or stretching.
If text looks too small for people at the back of a room, go to Settings System Display and open the Scale drop-down list. Pick a larger percentage such as 125% or 150%. In duplicate mode, scaling applies to what both screens show.
How to Duplicate Your Display Wirelessly
If your TV or projector supports Miracast—a wireless standard that sends your screen over Wi-Fi without a cable—you can mirror to it wirelessly. Both devices must support Miracast, and the receiving device must be switched on and set to receive a screen. Many smart TVs support it, but some call the feature something else, such as screen mirroring.
- Press Win+K. The Cast panel opens and lists nearby wireless displays it can find.
- Select the name of your TV or projector. If it does not appear, check that it is on and in screen-sharing mode, then wait a few seconds.
- Wait for the connection to finish. Your screen should appear on the wireless display.
- Press Win+P and select Duplicate if the screen is extending rather than mirroring.
You can also reach wireless options from the Project menu. Press Win+P and select Connect to a wireless display at the bottom of the panel.
If the panel finds nothing, your PC’s Wi-Fi adapter or its driver may not support Miracast. Updating the driver can help, as described in the next section. Wireless mirroring also adds a short delay, so a cable is a better choice for video playback or anything where timing matters.
How to Stop Wireless Duplication
Press Windows key + K and select Disconnect next to the connected display. You can also press Windows key + P and choose PC screen only.
Why the Duplicate Option Is Missing or Not Working
Work through these checks in order. They go from the most common cause to the least common.
Windows Does Not Detect the Second Display
- Check that the cable is firmly seated at both ends, and that the monitor is on and set to the correct input.
- Open Settings System Display, expand Multiple displays, and select Detect if the button is shown. Windows searches again for connected displays.
- Try a different cable or a different port on the PC. Cables fail more often than people expect, especially adapters and cheap USB-C cables.
- Connect the second display to another computer, if you have one, to rule out a faulty monitor or projector.
The Screen Is Black or Flickering After Switching Modes
This shortcut restarts the graphics driver (the software that controls your display). The screen may flash or go black for a second, and you may hear a short beep. It does not close your open apps.
If that does not help, wait about 15 seconds. When you change the mode in Settings, Windows reverts automatically if you do not confirm.
The Graphics Driver Is Out of Date
An old or generic graphics driver can stop Windows from detecting a display or offering all modes. You may need administrator privileges for this step, so sign in with an administrator account.
- Open Settings Windows Update.
- Select Advanced options, then select Optional updates.
- Expand Driver updates and tick any entry for your graphics adapter, such as Intel, AMD, or NVIDIA.
- Select Download & install. Restart the PC if Windows asks you to.
If no graphics driver is listed, get the latest driver from your PC manufacturer or from the graphics vendor's website. Installing that driver also needs administrator privileges.
A Graphics Control Panel Overrides Windows
Some PCs include a graphics control panel from Intel, AMD, or NVIDIA. It can have its own display mode settings, and these may differ from the Windows settings. If duplicate keeps switching back, check that panel for a display or multiple displays page, and set the mode there as well. Menu names vary by vendor and driver version, so look for a page that lists your connected screens.
Protected Video Shows a Black Screen on the Second Display
Some streaming apps and protected video files may not play on an external screen if the connection or the screen does not support the required copy protection. You may see a black rectangle where the video should be. Try a different cable or port, or play the video in a different app or browser. If the video plays on your main screen but not the second one, copy protection is the likely cause.
What to Do Next
Windows usually remembers the mode you chose for the same set of displays, so the next time you plug in the same monitor or projector you may not need to change anything. If it comes back in the wrong mode, press Windows key + P and pick the one you want again. When you are ready to work across two screens instead of showing one, choose Extend and use the Display page in Settings to set which screen is your main one and how the screens are arranged.
Frequently asked questions
What is the shortcut key for duplicate screen?
Press Windows key + P to open the Project panel, then click Duplicate. Your main screen's image appears on the second screen right away. No restart is needed. To switch back, press Windows key + P again and choose Extend or PC screen only.
How do I show two different screens on two monitors?
Choose Extend in the Project panel to show different content on each screen. Press Windows key + P, then select Extend. Each monitor then shows its own part of the desktop, and you can drag windows between them.
What is duplicate these displays?
Duplicate these displays is the Multiple displays option in Settings that copies one screen's image to every connected display. Open Settings, go to System Display, and pick it from the dropdown. It does the same thing as choosing Duplicate in the Project panel.
How to duplicate display on 3 monitors?
Yes. Choosing Duplicate mirrors all connected monitors at once, so three screens show the same image. Press Windows key + P and select Duplicate, or use Duplicate these displays in Settings. If only two screens mirror, your graphics card may lack enough video outputs or the driver may need updating.
Still have a question?
Answered by AI from this guide. Good questions may be added to this page — please don't include personal details.
Did this guide fix your problem?

About the Author
Richard
Tech Writer, IT Professional
Richard is a writer at Geek Rewind who turns complex IT tasks into clear, step-by-step guides. He draws on years of hands-on experience in system administration and enterprise IT operations, focusing on Windows, Linux and WordPress: the problems people actually run into, and the fixes that work. His server and WordPress guides come from systems he runs himself. Richard builds and maintains the platform behind Geek Rewind, from its Ubuntu servers and Nginx configuration to its custom WordPress plugins. Many new tutorials start with readers' questions, and he's always glad to answer them in the comments.
No comments yet — be the first to share your thoughts!