How to Arrange Multiple Displays in Windows 11 Display Settings

- 2 ways to do it
- Includes a restart or sign-out
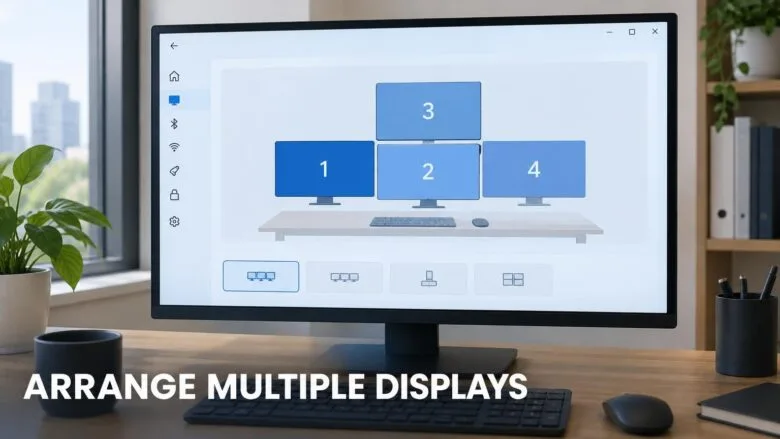
Windows 11 lets you arrange multiple displays by dragging numbered boxes in Display settings to match how your monitors sit on your desk. The layout you create controls where your mouse pointer moves from one screen to the next and which monitor windows open on when you drag them across screens.
Open Display settings by right-clicking an empty area of your desktop and selecting Display settings, then drag the screen boxes until the layout matches your physical setup. This takes just a few seconds and needs no restart or administrator access.
Right-click an empty area of the desktop, select Display settings, then drag the numbered screen boxes in the diagram until they match how your monitors sit on your desk. The layout controls where your mouse pointer crosses from one screen to the next.
Before you start: check that Windows sees every display
You can only arrange displays that Windows has detected. Confirm each monitor is powered on, set to the correct input, and connected by a cable that fits (such as HDMI, DisplayPort, or USB-C, or through a dock). If a monitor shows a picture, Windows usually sees it. If it does not, the troubleshooting section further down covers it.
This works the same on Windows 11 Home and Pro. There is no edition difference. The page layout changed slightly between the original release (21H2) and later versions such as 22H2, 23H2 and 24H2, so a label may sit a few lines higher or lower on your build. The option names below are the same.
Open Display settings
The Display page holds the layout diagram and every per-monitor option. You can open it two ways.
Method 1from the desktop
- Right-click an empty area of the desktop.
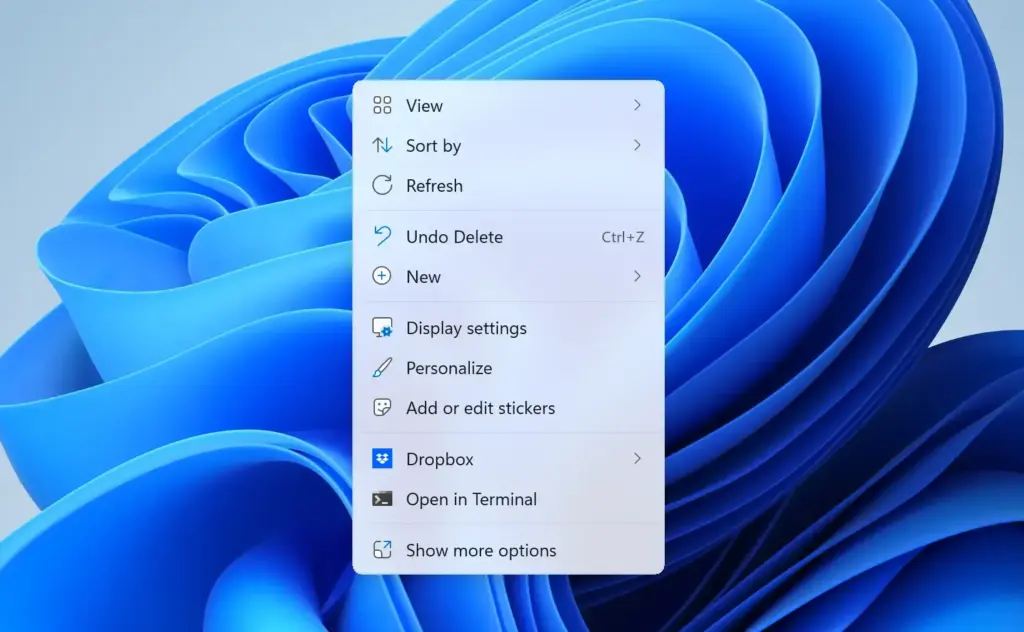
- Select Display settings. On some builds you first need to select Show more options, but Display settings normally appears in the first menu.
You should now see the System Display page. Near the top is a diagram with one numbered rectangle for each detected monitor.
Method 2from the Settings app
- Press Win+I to open Settings.

Windows 11 Start menu with Settings gear icon highlighted. - Select System in the left pane.
- Select Display.
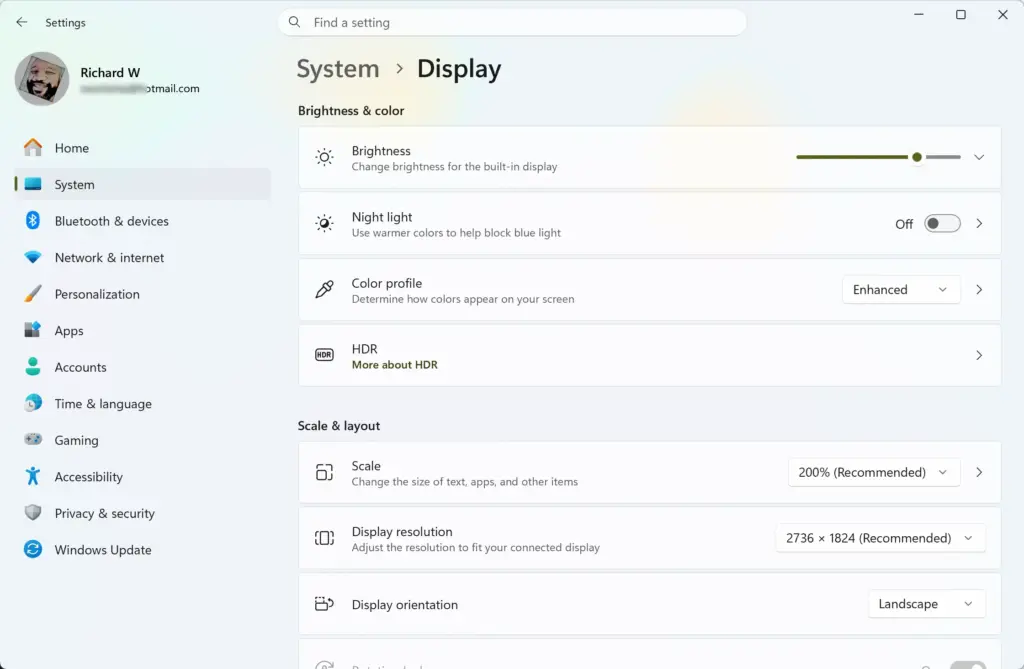
Settings › System › Display
You land on the same page with the same diagram.
Make sure the displays are extended, not duplicated
Arranging only matters when each monitor shows different content. If both monitors show the same picture, they are duplicated, and the diagram collapses into one box. Switch to extended mode first.
Switch with the Project menu
- Press Win+P. A short menu opens on the right side of the screen.
- Select Extend.
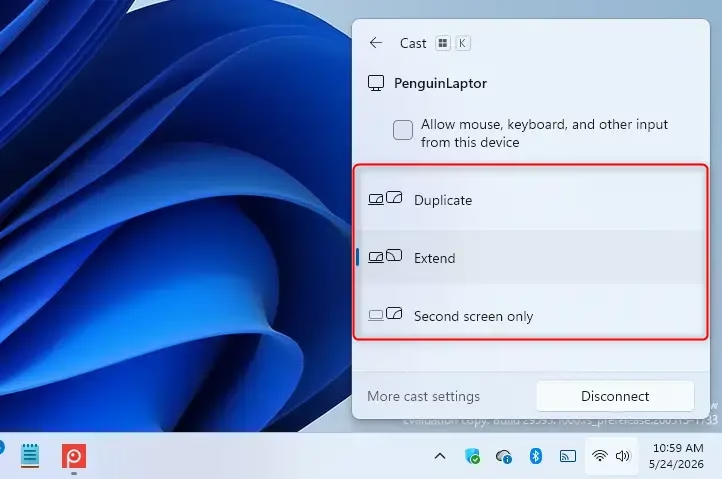
The menu offers four choices: PC screen only, Duplicate, Extend and Second screen only. Your second monitor should now show an empty desktop extension, and the diagram on the Display page shows two boxes.
Switch in Display settings
- On the Display page, scroll to Multiple displays and select it to expand the section.
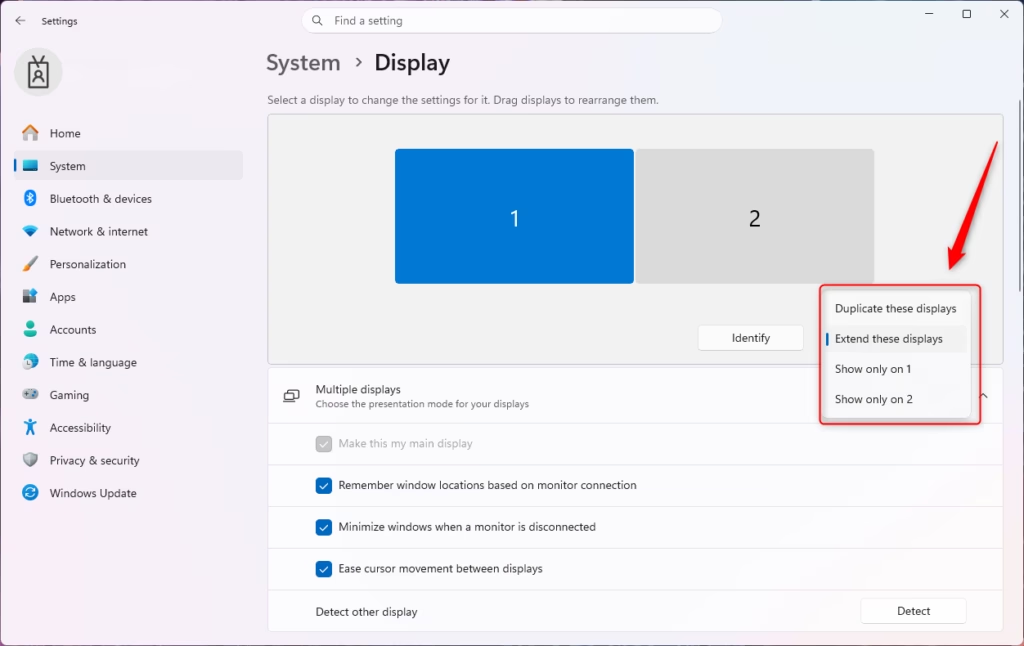
Windows 11 multiple displays project options for screen duplication. - Open the drop-down menu next to the display mode setting.
- Select Extend these displays.
Otherwise it reverts after a few seconds.
Arrange the displays
This is where the real work happens. You’re telling Windows which monitor sits left, right, above, or below the others.
Identify which box is which monitor
The boxes are numbered, but the numbers do not always match what you expect. Check them before you drag anything.
- On the Display page, select Identify below the diagram.
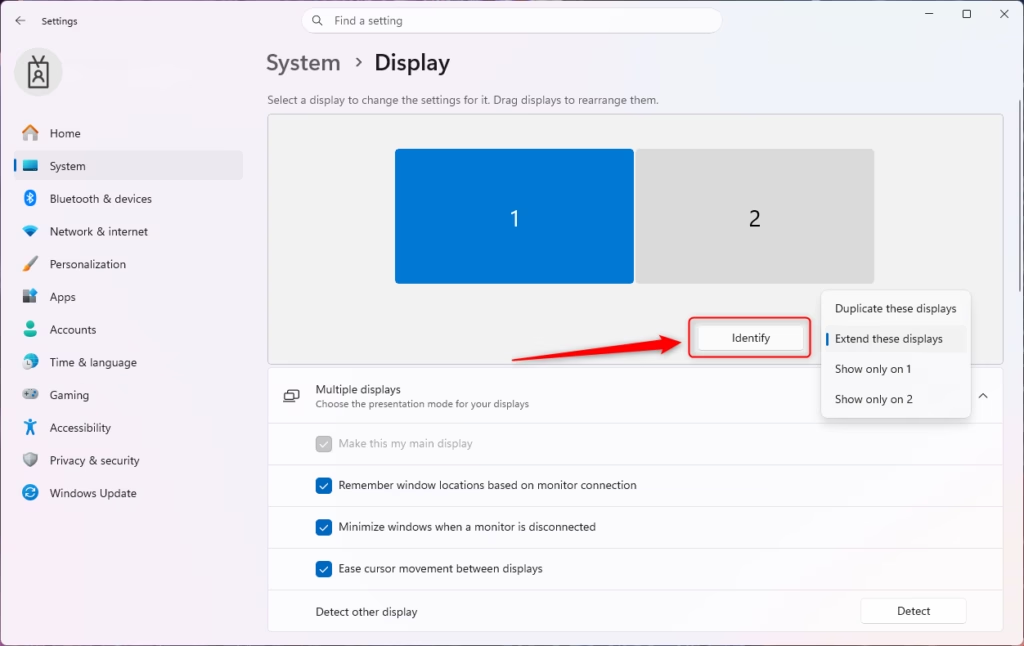
Windows 11 multiple displays identify screen numbers. - Look at each monitor. A large number appears in the corner of every screen.
- Match each number to its box in the diagram.
If Identify does nothing, a monitor may be asleep or not detected. See the troubleshooting section below.
Drag the boxes to match your desk
- Select and hold the box for the monitor you want to move.
- Drag it to the side of the other box that matches its real position. If the second monitor sits on your left, put its box to the left of the main one.
- Release the mouse button. The box snaps against the edge of the neighbouring box.
- If an Apply button appears below the diagram, select it.
Windows applies the new layout immediately or after you select Apply. Move your pointer off the edge of one screen. It should appear on the neighbouring screen at the side you expect.
The boxes cannot overlap, and they must touch at an edge or corner. Windows pulls them together if you leave a gap. That is intentional: a gap would leave a dead zone where the pointer cannot cross.
Align the edges for vertical offsets
Monitors with different heights, or monitors on different stands, rarely line up perfectly. The pointer crosses between screens only where the two boxes share an edge. Compare the real screens, then adjust the boxes to match.
- Drag the box up or down while keeping it against the side of its neighbour.
- Release it where its top edge sits at the same relative height as the real monitor.
- Move the pointer slowly across the seam between the screens to test it.
If the pointer seems to catch or hit an invisible wall near the top or bottom, the boxes do not share enough edge there. Nudge one box until the shared section covers the area where you cross.
Stack monitors above and below
You can place a monitor above or below another one. Drag its box above or below the other box, then release it. The pointer then crosses at the top or bottom edge. You can also build combinations, such as two boxes side by side with a third centred below them.
Choose your main display
The main display is where Windows puts the sign-in screen, new app windows by default, and (unless you change it) the taskbar's main set of icons. Choose the one you look at most.
- On the Display page, select the box for the monitor you want as your main display.
- Scroll to Multiple displays and expand it if it is closed.
- Tick the Make this my main display check box.
If the check box is already ticked and greyed out, that monitor is already your main display. To change it, select the other monitor's box and tick the box there.
Show the taskbar on every screen
By default, Windows 11 shows the taskbar on all displays. If yours does not, turn it back on.
- Open Settings and select Personalization.
- Select Taskbar.
- Expand Taskbar behaviors.
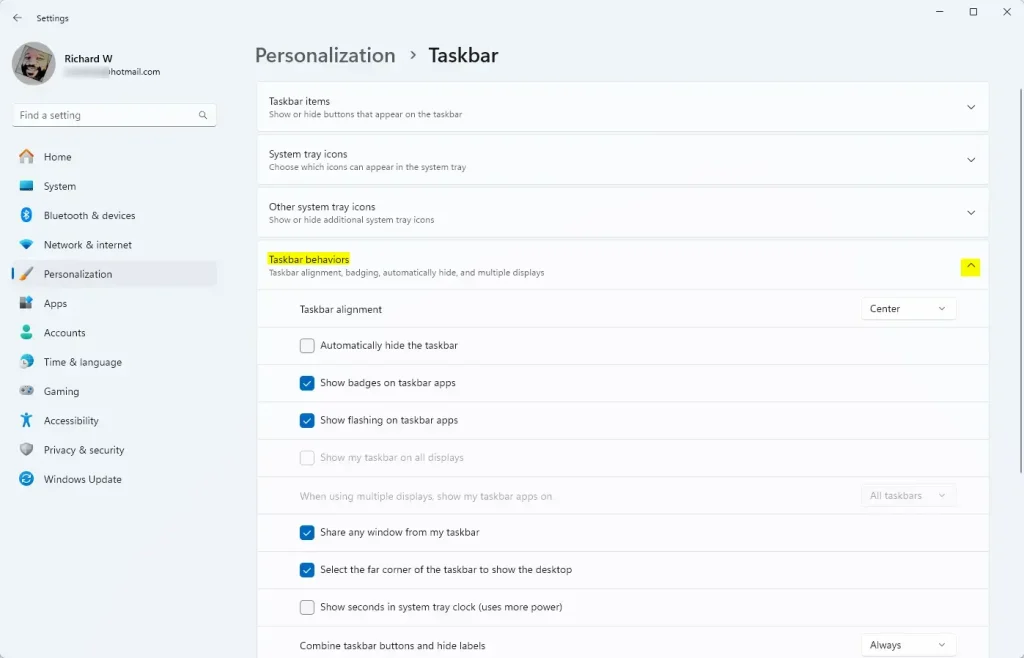
Expand Taskbar behaviors in Windows 11 Personalization settings. - Tick Show my taskbar on all displays.
The taskbar appears on the other monitors within a moment.
Set scale, resolution and orientation per display
Each monitor has its own settings. Arranging the boxes does not change them, but mismatched settings often make a correct layout feel wrong. For example, a 4K screen and a 1080p screen at the same scale make text look very different between them.
- On the Display page, select the box for the monitor you want to change.
- Under Scale, choose a percentage that makes text readable on that screen. Windows recommends one for each monitor, and it is a sound starting point.
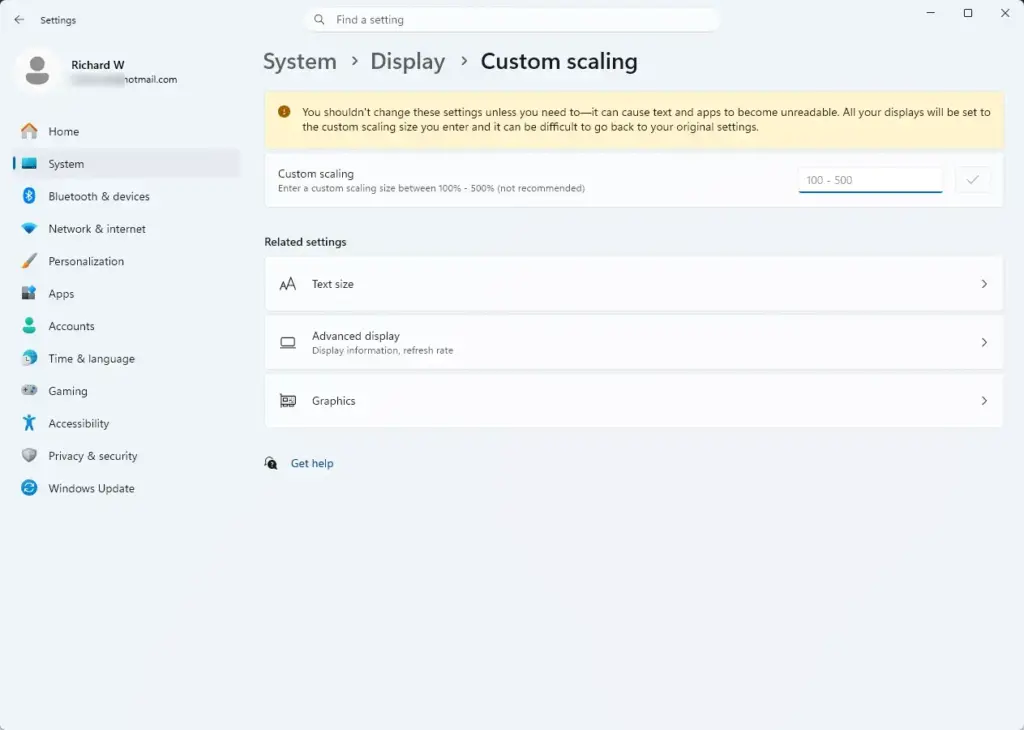
Settings › System › Display › Scale - Under Display resolution, keep the value marked (Recommended). That is the monitor's native resolution.
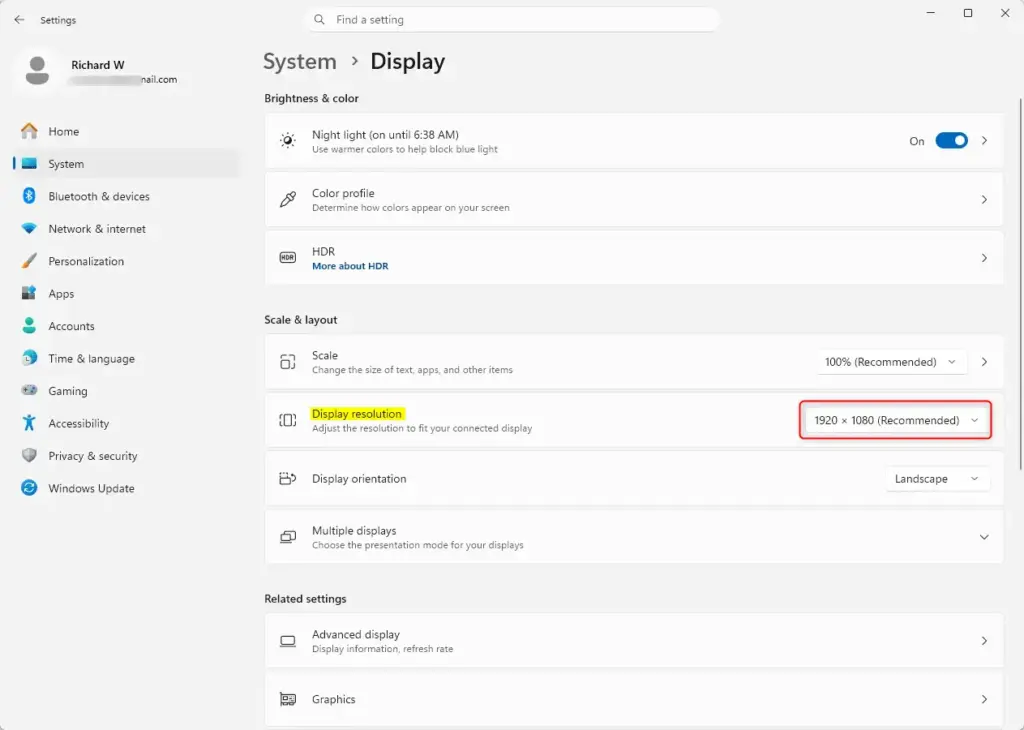
Settings › System › Display › Display resolution - Under Display orientation, choose Landscape or Portrait.
Select Keep changes when the confirmation prompt appears. If you rotate a monitor to Portrait, its box in the diagram changes shape. Drag it again to line it up with its neighbours.
Close and reopen any app that looks fuzzy after a scale change.
Keep windows in place when monitors disconnect
Laptop users who dock and undock often find their windows jumbled after reconnecting. Two options in Multiple displays control this behaviour:
- Remember window locations based on monitor connection returns windows to their earlier positions when you reconnect a monitor.
- Minimize windows when a monitor is disconnected minimises windows instead of moving them onto the remaining screen.
Tick or clear each one as you prefer. These options are on the page in current Windows 11 builds. If you do not see them, expand Multiple displays and scroll within it, or check that Windows is fully updated.
If a display is missing or the options are greyed out
Only one box appears in the diagram
Windows has detected one monitor, so there is nothing to arrange. Work through these checks in order:
- Check that the second monitor is powered on and set to the input you are using.
- Reseat both ends of the cable, or try another cable or port.
- Press Windows key + Ctrl + Shift + B. This restarts the graphics driver, and the screen may flicker or go black for a second.
- On the Display page, expand Multiple displays and select the button to detect other displays, if one is shown.
- Restart the PC with the monitor connected.
If the monitor still does not appear, update the graphics driver. Open Settings, select Windows Update, then Advanced options and Optional updates, and install any display driver update listed. You can also install the latest driver from your graphics card or PC maker.
The Extend option is missing or greyed out
This usually means Windows sees only one display, so the earlier checks apply. It also happens in a Remote Desktop session. The remote session reports the display set of the machine you connect from, which can hide the layout of the host PC. Make the change while signed in at the physical PC.
The pointer crosses at the wrong place
Your boxes do not match the physical layout. Return to the Arrange the displays section, run Identify, and move the boxes until the numbers and positions match what is on your desk.
Windows forgets the layout
Windows stores the layout for each combination of connected monitors. If a monitor is flaky, goes to sleep and drops off the connection, or sits behind a dock that resets, the layout can revert. Fix the unstable connection first. A direct cable from the PC to the monitor rules the dock out.
Undo a layout change
Nothing here is permanent. To go back, open Settings, select System, then Display, and drag the boxes back to where they were. Select Apply if it appears. To return to a single screen, press Windows key + P and select PC screen only. To mirror one picture on both monitors, select Duplicate instead.
If a change leaves a screen blank and you cannot see the prompt, wait about 15 seconds. Windows reverts a resolution or scale change on its own when you do not confirm it. If a screen stays black, press Windows key + P and choose PC screen only, or Duplicate, to get a picture back.
What to do next
Your displays now line up with your desk, so the next task is to set up how windows behave across them. Try Snap layouts, which you open by hovering over a window's maximise button, to place apps in tidy zones on each monitor. If a particular monitor looks soft or oversized after you rearrange, return to its box on the Display page and adjust Scale and Display resolution there. Layouts can reset after a graphics driver reinstall or when you change the cable or dock, so check the diagram again after those changes.
Frequently asked questions
Can 🪟 Windows 11 handle 4 monitors?
Yes, Windows 11 supports up to 4 monitors on most systems. Open Display settings, right-click your desktop, and select Display settings. You'll see all detected monitors listed. Arrange them by dragging the numbered boxes to match your physical setup. The exact limit depends on your graphics card and ports available.
How do I get my monitor to display different things?
Use Extend display mode to show different content on each monitor. Right-click your desktop, select Display settings, then find the Multiple displays dropdown. Choose Extend these displays. Windows treats each screen as separate workspace, so you can drag windows between them independently.
How to arrange multiple Windows on screen?
Use Windows Snap to arrange open windows on your screen. Drag a window to screen edges to snap it to half, quarter, or custom sizes. Press Windows key + arrow keys for quick layouts. Right-click the taskbar and select Cascade windows or Tile windows to auto-arrange all open windows at once.
How do I duplicate or extend displays in 🪟 Windows 11?
Right-click your desktop and select Display settings. Find the Multiple displays dropdown near the top. Choose Extend these displays to show different content on each monitor, or Duplicate these displays to mirror the same image on all screens. No restart needed.
Why is the Multiple displays section missing, so I can't set my main display?
Asked by a reader
This usually means Windows sees only one display, and the Multiple displays section appears only when it finds two or more. Make sure the second monitor is on and connected. Press Windows key + P and select Extend, then check the diagram on the Display page for a second box. If it's still missing, press Windows key + Ctrl + Shift + B or restart the PC with the monitor connected. When two boxes show, select the box you want and look for the main display option.
Still have a question?
Answered by AI from this guide. Good questions may be added to this page — please don't include personal details.
Did this guide fix your problem?

About the Author
Richard
Tech Writer, IT Professional
Richard is a writer at Geek Rewind who turns complex IT tasks into clear, step-by-step guides. He draws on years of hands-on experience in system administration and enterprise IT operations, focusing on Windows, Linux and WordPress: the problems people actually run into, and the fixes that work. His server and WordPress guides come from systems he runs himself. Richard builds and maintains the platform behind Geek Rewind, from its Ubuntu servers and Nginx configuration to its custom WordPress plugins. Many new tutorials start with readers' questions, and he's always glad to answer them in the comments.
No comments yet — be the first to share your thoughts!