How to Change Display Orientation in Windows 11

Display orientation in Windows 11 rotates your screen between landscape, portrait, landscape (flipped), and portrait (flipped). People use it to match a physical monitor setup, to read long documents on a vertical monitor, to mount a secondary display sideways, or to fix a screen that got turned upside down by accident. Convertible laptops and tablets running Windows 11 Build 22557 or newer can also switch direction automatically when you turn the device.
You can change the setting in a few seconds from the main display settings, with no extra software. This guide covers four ways to do it: physically turning the device, keyboard shortcuts, the Settings app, and the NVIDIA Control Panel .
Open Settings , go to System Display, scroll to Scale & layout, click the Display orientation dropdown, and select Landscape, Portrait, Landscape (flipped), or Portrait (flipped). The screen rotates and shows a confirmation prompt to keep or revert the change.
Option 1Rotate Your Device (For Tablets & 2-in-1 Devices)
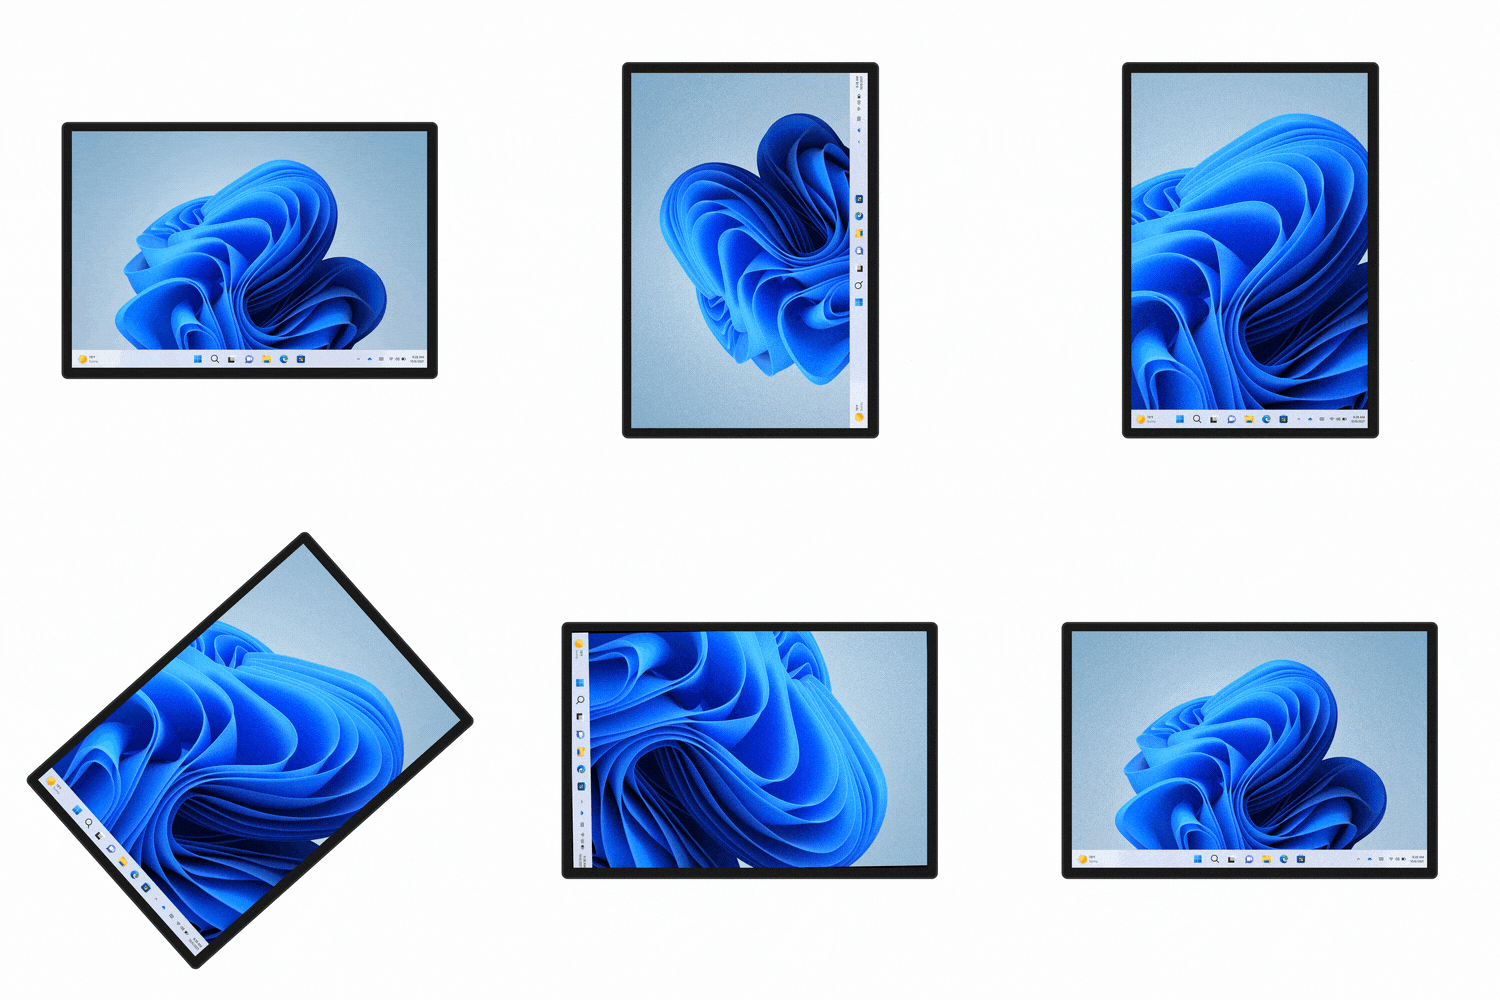
On supported hardware, such as a tablet or 2-in-1 with an accelerometer, the interface rotates as soon as you turn the device sideways. If nothing happens when you turn it, check these things:
- Rotation lock may be switched on. On a device that supports it, you can turn it off in Quick Settings or in the display settings.
- Your device may have no rotation sensor. Most desktop monitors and many standard laptops don’t, so use one of the manual methods below.
- The device may be docked or connected to an external monitor. Rotation applies to the built-in screen only, so you may need to set the external one by hand.
Option 2Use Keyboard Shortcuts
Hold Ctrl and Alt, then press an arrow key. The combinations are:
- Ctrl + Alt + Up Arrow = Normal landscape (default)
- Ctrl + Alt + Down Arrow = Upside down landscape
- Ctrl + Alt + Right Arrow = Rotate screen 90° to the right
- Ctrl + Alt + Left Arrow = Rotate screen 90° to the left
Older GPUs have no built-in hotkey support, and some driver versions leave the hotkeys turned off. If you press the combination and nothing happens, don’t keep trying. Use the Settings app instead.
If the screen ends up upside down, press the shortcut for normal landscape to get back to the default view. If that doesn’t work, use the Settings method below, since you can still click through it with the mouse.
Option 3Change Orientation in Windows Settings
- Press Windows key + I to open Settings.
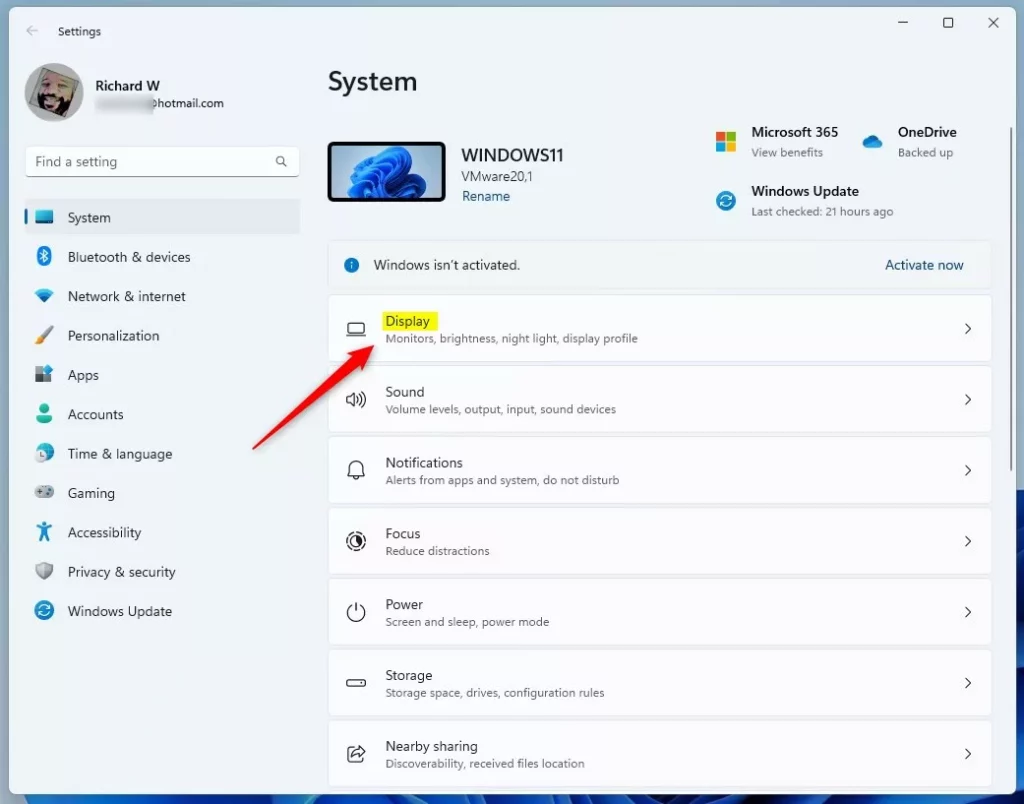
- Click System on the left, then select Display on the right. You should now see your screen layout at the top, with the settings below it.
- If you have more than one screen, click the numbered screen you want to change. Use Identify if you aren't sure which number belongs to which monitor. The selected screen is highlighted.
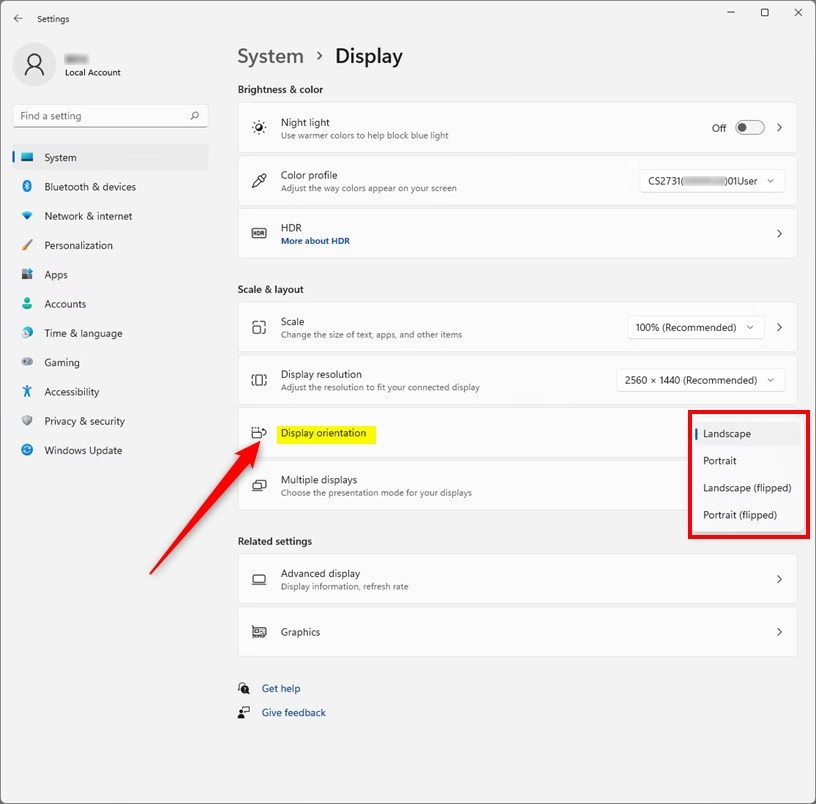
- Scroll down to the Scale & layout section.
- Click the drop-down menu under Display orientation and pick the way you want your screen to turn. The options are Landscape, Portrait, Landscape (flipped), and Portrait (flipped). The screen rotates right away.
- Windows shows a confirmation prompt. Click Keep changes if the screen looks right, or Revert to go back. If you do nothing, Windows reverts on its own after a short countdown. That's a safety net in case the new orientation leaves you unable to see the prompt.
The Settings app is the most reliable way to fix a sideways or upside-down screen, and it works on both Home and Pro editions. If the Display orientation option is missing or greyed out, the usual cause is the graphics driver. Install the latest driver from your PC maker or the GPU vendor and try again. To undo any change, open the same drop-down and select Landscape.
Option 4Use NVIDIA Control Panel (If You Have NVIDIA Graphics)
If your PC has a dedicated NVIDIA graphics card, the NVIDIA Control Panel is an alternative to the Settings app. It has its own rotate display menu and can turn a monitor to any of the four orientations. If the Control Panel isn't installed, you can get it from the Microsoft Store, and it needs a working NVIDIA driver.
- Open NVIDIA Control Panel (search for it in the Start menu).
- On the left, click Rotate display under the Display section. The rotation options appear on the right.
- Select the screen you want to change (if you have multiple).
- Choose your orientation: Landscape, Portrait, Landscape (flipped), or Portrait (flipped).
- Click Apply. The screen rotates and a confirmation prompt appears.
- If the new setting looks good, click Yes to keep it, or No to cancel.
If you don't confirm, the change reverts automatically after a 20-second countdown. That means a bad choice can't leave you stuck with an unreadable screen.
Summary
- You can switch your screen between landscape and portrait depending on what you need.
- Tablets and 2-in-1 devices can rotate the screen automatically as you turn them.
- There are several ways to change your screen orientation:
- Physically rotate your device (if supported).
- Use keyboard shortcuts (on some PCs, depending on the graphics driver).
- Change the setting in the Windows Settings app.
- Use NVIDIA Control Panel if you have NVIDIA graphics.
- Check that the screen setup suits how you sit and work before you finish, especially after rotating a monitor to portrait.
Changing your Windows 11 display orientation takes only a moment, whether you use keyboard shortcuts, the Settings app, or your graphics card software. If one method doesn't work on your hardware, try the next. The Settings app works on most PCs.
Was this guide helpful?

About the Author
Richard
Tech Writer, IT Professional
Richard is a writer at Geek Rewind who turns complex IT tasks into clear, step-by-step guides. He draws on years of hands-on experience in system administration and enterprise IT operations, focusing on Windows, Linux and WordPress: the problems people actually run into, and the fixes that work. His server and WordPress guides come from systems he runs himself. Richard builds and maintains the platform behind Geek Rewind, from its Ubuntu servers and Nginx configuration to its custom WordPress plugins. Many new tutorials start with readers' questions, and he's always glad to answer them in the comments.


No comments yet — be the first to share your thoughts!