How to Split Screen Windows 11

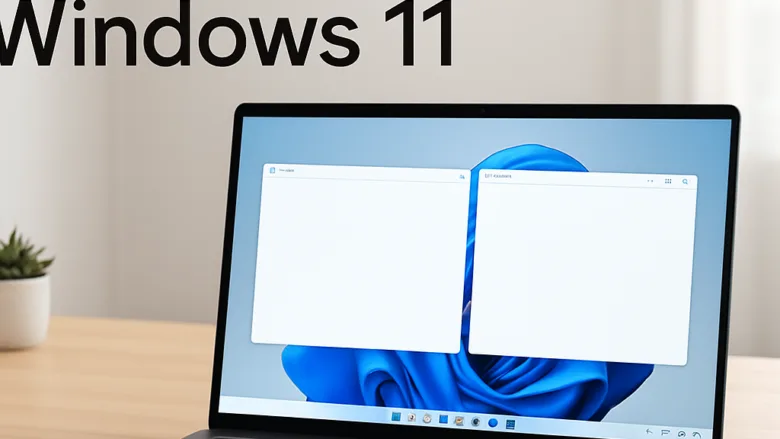
Snap Layouts is a built-in Windows 11 feature that arranges several open windows into organized grids on your screen. Instead of resizing windows by hand, you drag an app to the edge or corner of your display, or hover over its maximize button, and it snaps into place.
On a standard monitor you can view up to 4 windows at once. Larger and ultra-wide screens offer more layout options. Snap works the same on Home and Pro, so you don’t need a particular edition. Before you start, open Settings, select System, and click Multitasking to make sure the main Snap windows toggle is on.
Hover over the maximize button of an open window and click a grid layout, then select another app to fill the remaining space. Alternatively, press Win+← Arrow or Win+→ Arrow to snap the active window to half the screen, then select a second window from the prompt.
Enabling and Configuring Multitasking Settings
The Multitasking page controls how windows snap when you drag them to the edges of your screen or hover over the maximize button. If snapping does nothing on your PC, check here first. The main toggle may be off, or one of the sub-options may be unchecked.
- Open Settings. The quickest way is to press the Win+I.
- Select System from the left-hand navigation pane.
- Click Multitasking to open the window management preferences. You should see a section called Snap windows with a toggle.
- Make sure the Snap windows toggle is set to On, then click the drop-down arrow next to it. A list of checkboxes appears underneath.
- Check or uncheck the options to suit how you work. Two of the most useful are “Show snap layouts when I hover over a window’s maximize button” and “When I snap a window, suggest what I can snap next to it”.
- Look for the option that resizes adjacent snapped windows together when you resize one. Leave it checked if you want the divider behavior described later in this guide.
If you turn the main Snap windows toggle off, the sub-options are hidden and every snapping method in this guide stops working. Turn it back on to undo that. The exact list of checkboxes can vary slightly between Windows 11 versions, so you may see a few more or fewer than described here.
Method 1Using the Snap Layouts Hover Menu
The Snap Layouts hover menu shows every grid available for your screen size. Hover over the maximize button and you get visual templates, so you can choose how two, three, or four windows share your display.
- Open the first application window you want to arrange.
- Hover your mouse cursor over the maximize button in the top-right corner of the window frame, just to the left of the close button. Wait a moment. A small pop-up with layout thumbnails appears.
- Click the section of the grid where you want the current window to sit. The window snaps to that zone.
- Click another open application in the Snap Assist grid that appears over the remaining space. It fills the next section of your layout.
- Repeat the last step until every zone is filled.
If the pop-up never appears, the “Show snap layouts when I hover over a window’s maximize button” option in Multitasking is probably unchecked. Some apps with custom title bars don’t show the menu at all. In that case, use the keyboard or drag methods below. You can also press the Win+Z to open the same layout box for the active window.
Method 2Using Keyboard Shortcuts to Snap Windows
Press the Windows key together with the left or right arrow key to snap the active window to that half of the screen.
- Click the title bar of the window you want to move, so it is the active window.
- Press Windows Key + Left Arrow or Windows Key + Right Arrow. The window fills the matching half of the screen.
- Press Windows Key + Up Arrow or Windows Key + Down Arrow to move the window into a quadrant once it is snapped to a side. On a window that is not snapped, the same keys maximize it or restore its previous size.
- Select a second window from the prompt that appears on the opposite side of the screen. This finishes your split-screen layout.
If no prompt appears, the "When I snap a window, suggest what I can snap next to it" option is probably off. You can still click any other window or use the same shortcuts on it. To undo a snap, press Windows Key + Down Arrow once or twice, or drag the window away from its position.
Method 3Drag and Drop to Screen Edges
Dragging a window to the screen edges locks it into a half-screen or quarter-screen arrangement. This is the method most people reach for first, and it needs no setup beyond the Snap windows toggle.
- Click and hold the title bar of the application window you want to move.
- Drag the window completely against the far left or far right edge of your monitor. A translucent outline appears on that half of the screen, showing where the window will land.
- Release your mouse button to snap the window into place.
- Click any other open app thumbnail in the empty space on the opposite side. This completes your dual-window view.
If you change your mind before releasing the button, drag the window back toward the middle and the outline disappears. To free a snapped window later, drag it by its title bar away from the edge and it returns to its earlier size.
Creating Half-Screen Layouts
A half-screen layout divides your display evenly between two applications. It suits comparing documents, or keeping a web page next to a text file you are working in.
- Drag the first window to the left border of the screen and release it when the outline appears.
- Pick the second window from the Snap Assist thumbnails on the right. Or drag it to the right border yourself.
- Alternatively, click each window in turn and press the Windows key with the left or right arrow to place it.
- Drag the divider between the two windows left or right if you want one to take more space.
Each window has its own minimum width, so an app may refuse to shrink past a certain point. If that happens, the other window simply gets less room to grow.
Creating Quarter-Screen Layouts
A quarter-screen layout divides your monitor into four equal quadrants, so you can keep an eye on four applications at once. It works best on large or ultra-wide displays. On a small laptop screen, four windows get cramped quickly.
- Click and drag any open window toward one of the four corners of your monitor until a triangular shaded region appears.
- Release the mouse button to lock the window into that quarter of the display.
- Repeat for up to three more windows, dragging each into one of the remaining empty corners.
- Drag the divider lines between the windows if you need to give one application more workspace. Adjacent panes resize together as you drag.
If the neighboring panes don't resize together, check the option about resizing adjacent snapped windows on the Multitasking page. You can also place a quadrant with the keyboard. Snap a window to a side with the Windows key and a left or right arrow, then press the up or down arrow.
Advanced Split Screen Techniques for Power Users
Virtual desktops let you keep separate multi-window setups for different tasks, such as one desktop for work and another for personal browsing. Snap Layouts work on each desktop independently, so every desktop can have its own arrangement.
- Click the Task View button on your taskbar, or press Windows Key + Tab. Your open windows and any existing desktops appear.
- Click New desktop to add an empty desktop.
- Open the apps for that task on the new desktop and snap them with any of the methods above.
- Open Task View again and click a desktop at the bottom of the screen to switch between your workspaces.
If you can't see the Task View button, it may be hidden in your taskbar settings. You can still use the Windows Key + Tab shortcut. To remove a desktop, hover over it in Task View and click the close button. Its open windows move to the neighboring desktop, so nothing is lost.
If this didn't work
If windows still refuse to snap, first confirm the Snap windows toggle is on under Settings System Multitasking, then restart your PC. A restart clears many temporary glitches in window management. If snapping still fails, damaged system files may be the cause. Windows includes the System File Checker tool, which scans protected files and repairs the ones it can.
- Click Start and type Command Prompt.
- Right-click Command Prompt in the results and select Run as administrator.
- Click Yes if User Account Control asks for permission. A black window opens with an administrator prompt.
- Run the System File Checker scan and wait for it to finish. It can take several minutes, so don't close the window.
- Read the result message. It will say whether it found no problems, repaired files, or couldn't fix some of them.
- Restart your computer, then try snapping a window again.
You need an administrator account to run this scan. On a work or school PC, your IT department may restrict it. If the scan reports files it could not repair, snapping may still fail. At that point, check for pending Windows updates, since a newer build often fixes window management bugs.
Have a question about this guide?
Answered by AI from this guide. Good questions may be added to this page — please don't include personal details.
Did this guide fix your problem?

About the Author
Richard
Tech Writer, IT Professional
Richard is a writer at Geek Rewind who turns complex IT tasks into clear, step-by-step guides. He draws on years of hands-on experience in system administration and enterprise IT operations, focusing on Windows, Linux and WordPress: the problems people actually run into, and the fixes that work. His server and WordPress guides come from systems he runs himself. Richard builds and maintains the platform behind Geek Rewind, from its Ubuntu servers and Nginx configuration to its custom WordPress plugins. Many new tutorials start with readers' questions, and he's always glad to answer them in the comments.
No comments yet — be the first to share your thoughts!