How to Customize Edge Split Screen for Better Multitasking

Split screen in Microsoft Edge shows two web pages side by side inside a single tab on Windows 11 and later versions. It is built into the browser, so you don’t need extra apps or extensions. It works well for comparing products in two online stores, keeping notes open next to a source, or reading a message while you type a reply.
The two pages share one tab, so your tab bar stays tidy. You can drag the middle divider to resize either side and give more room to the page you need to focus on.
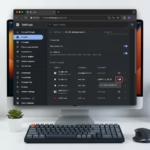
Customize Edge Split Screen by going to Settings Accessibility Shortcut section and typing your desired shortcut keys in the “Shortcut for split window” box. Your changes save automatically, but restart the browser to ensure the new shortcut works.
Why use Split Screen?
Two pages side by side cut down on tab switching. Read an article on the left while you take notes on the right. Keep a spreadsheet or reference page open on one side while you fill in a form on the other. Once you have a shortcut for it, you can start a split view in a second instead of dragging windows around.
What happens when you are done?
When you finish these steps, you will have a custom keyboard shortcut that opens the side-by-side view. If you split pages many times a day, the saved clicks add up.
How to Enable Split Screen
Before you customize the shortcut, make sure the feature is available in your copy of Edge. Check the toolbar first:
- Open Microsoft Edge and look at the top toolbar.
- Find the Split Screen icon and click it. A second pane should open next to your current page.
- If you can’t find the icon, open Settings Appearance
- Make sure the Split screen button is turned on. The icon should now appear in the toolbar.
If the setting is missing, your version of Edge may be out of date. Update Edge and check again. To turn the button off again later, return to the same setting and switch it off.
How to Customize Edge Split Screen Shortcuts
You can assign your own keyboard combination for split screen in the browser settings. With a custom key, you can open two pages side by side without reaching for the mouse. That helps when you are comparing sites or working across several tabs at once.
Work through the steps below in order. Pick a combination that doesn't clash with shortcuts you already use in Edge, Windows, or other apps.
- Open the Microsoft Edge browser.
- Click the Settings and more button (the three horizontal dots) in the top right corner.
- Select Settings from the menu.

- Click on Accessibility in the menu on the left side of your screen.
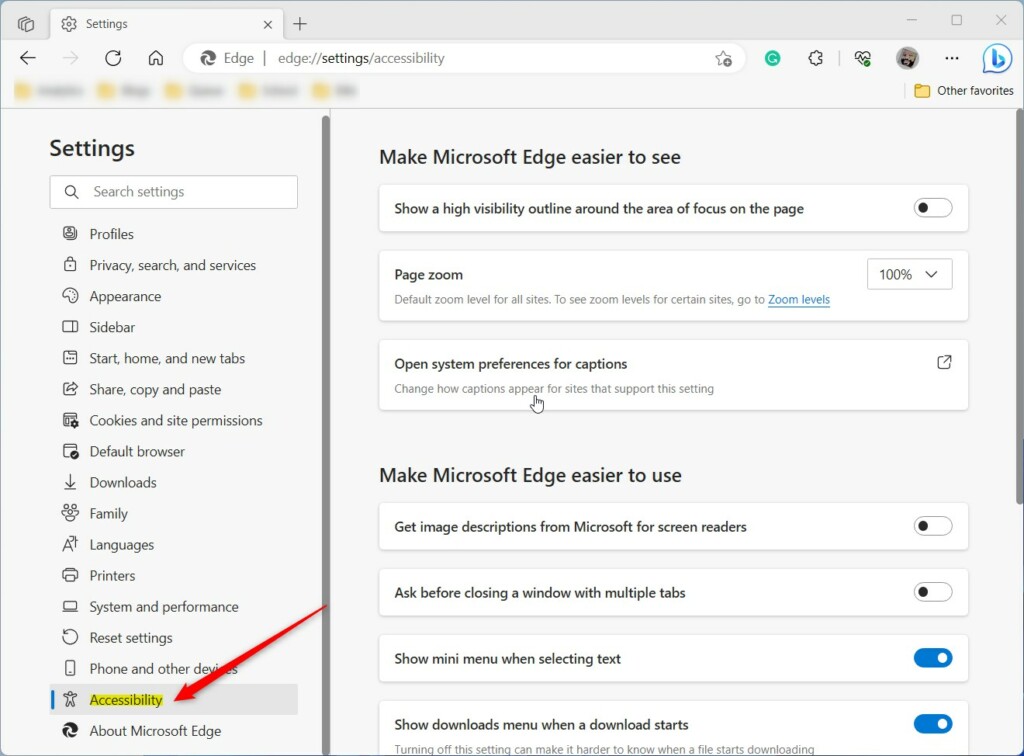
- Look for the Shortcut section. Find the box labeled Shortcut for split window.
- Type the new keys you want to use. You must include either the CTRL or ALT key in your combination.
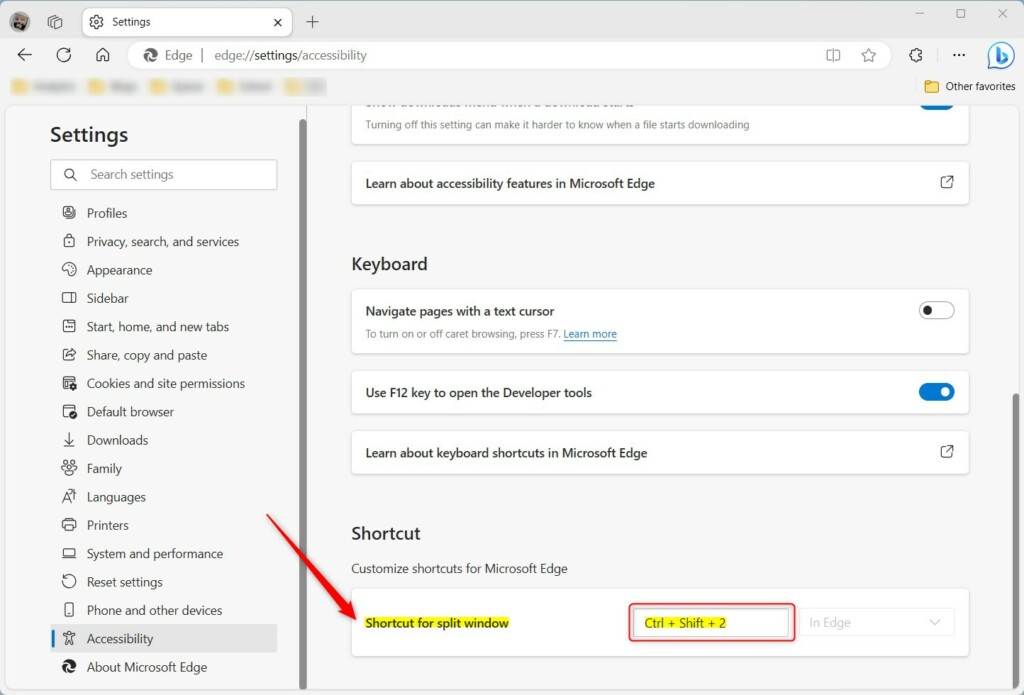
Edge saves your changes automatically, so there is no Save button to look for. Restart the browser afterward so the new shortcut is picked up.
If you use more than one Edge profile, repeat the setup in each one. You don't need administrator privileges to change these browser settings, so this works on a standard user account too.
If the shortcut doesn't respond, check that Edge is the active window and that no other app is using the same key combination. If it still doesn't work, pick a different combination and try again.
Managing and Resizing Windows
Once both pages are open, drag the middle divider left or right to resize either window. Give the page you are reading or typing in more room, and shrink the reference page to a narrow strip if you only need to glance at it.
Summary
A custom split screen shortcut in Microsoft Edge is a small change that saves time every day. Set it once and you can open a side-by-side view from the keyboard whenever you need to compare, copy, or take notes.
How do I exit split screen mode?
Was this guide helpful?

About the Author
Richard
Tech Writer, IT Professional
Richard is a writer at Geek Rewind who turns complex IT tasks into clear, step-by-step guides. He draws on years of hands-on experience in system administration and enterprise IT operations, focusing on Windows, Linux and WordPress: the problems people actually run into, and the fixes that work. His server and WordPress guides come from systems he runs himself. Richard builds and maintains the platform behind Geek Rewind, from its Ubuntu servers and Nginx configuration to its custom WordPress plugins. Many new tutorials start with readers' questions, and he's always glad to answer them in the comments.


do not have this option