How to Add a BitLocker Preboot PIN as a Standard User in Windows 11

- 11 steps
- Needs administrator rights
- Includes a restart or sign-out
A BitLocker preboot PIN is a number you type on the startup screen, before Windows loads, to start a device that uses BitLocker drive encryption. Windows Insider builds now let standard users on managed devices add that PIN themselves, without an administrator account.
The change appears in Experimental Build 26340.10013 and Beta Build 26320.10003, both released November 16, 2026. When the device has no PIN yet, Windows shows a notification. Select it and a window opens where you set the PIN.
This feature is in Windows Insider preview builds only. It is not in the release version of Windows 11, and Microsoft may change it before it ships.
On a managed Windows 11 device running an Insider build, wait for the BitLocker notification that appears when no PIN is set, then select it to open the window where you enter your PIN. No administrator account is needed. The feature is in Experimental Build 26340.10013 or Beta Build 26320.10003 only, not the release version.
What changes for standard users
BitLocker can protect a drive with a TPM alone. The TPM (Trusted Platform Module) is a security chip that holds the encryption keys and releases them when the startup files look untouched. A TPM-only device starts without asking you for anything.
A TPM+PIN protector adds a second check. The TPM still verifies the startup files, but the drive stays locked until someone types the correct PIN. A lost or stolen device is much harder to get into this way.
Until now, adding a startup PIN needed administrator rights. The guides on this site that cover BitLocker with a PIN and USB key at startup all assume an administrator account. The new behavior removes that requirement for standard users on managed devices, which are devices run by an organization through its IT team.
None of the steps below need administrator privileges. That is the point of the feature.
What you need before you start
Check these four things first. If one is missing, the prompt probably will not appear.
- A supported preview build. The feature is documented for Experimental Build 26340.10013 and Beta Build 26320.10003. Builds come through the Windows Insider Program, which you join under Settings Windows Update Windows Insider Program. On a managed device, IT usually controls whether that is allowed.
- A managed device. Microsoft describes this for standard users on managed devices. A personal PC that no organization manages is not covered by the documentation.
- A TPM. The protector is TPM+PIN, so the device needs a TPM. If yours has none, read how to turn on BitLocker without a TPM chip. That route uses different protectors and needs administrator rights.
- No PIN set yet. The notification appears only when the device has no PIN. If a PIN already exists, Windows has nothing to ask you for.
How to check your Windows build
Check the build first, because the feature does not exist in release builds. This takes under a minute.
- Open Settings. Press Win+I.
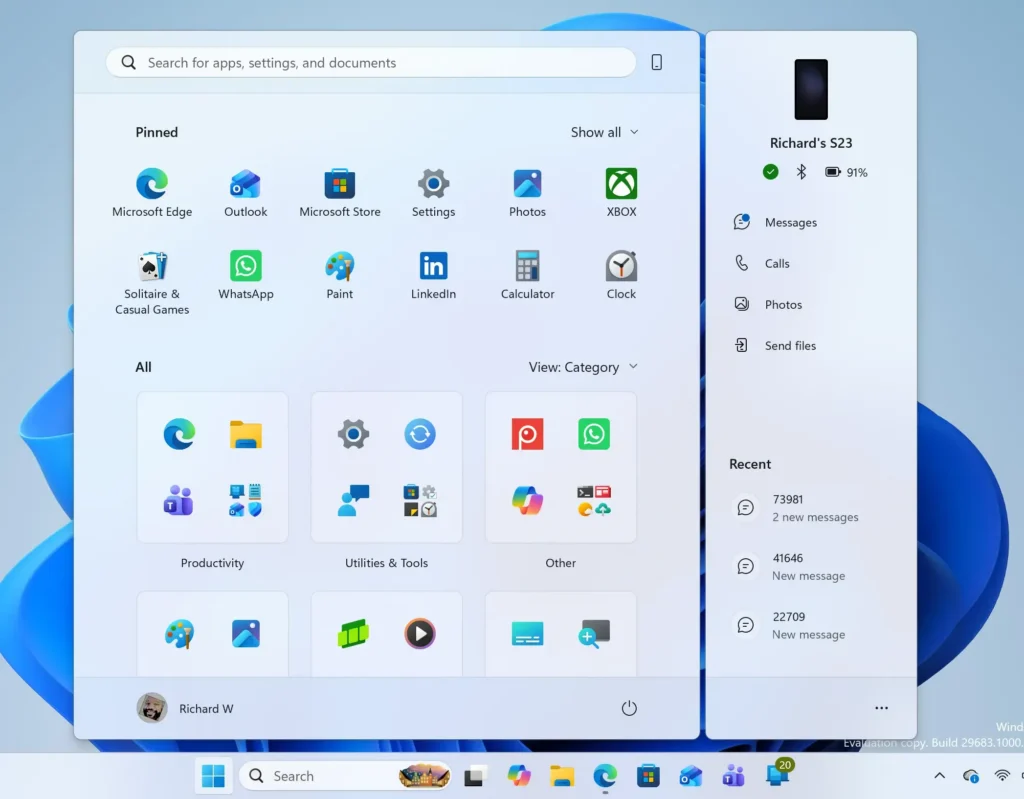
Windows 11 Start menu search panel for opening OpenSSH Client settings - Select System, then select About. The Windows specifications section lists the details of your installation.
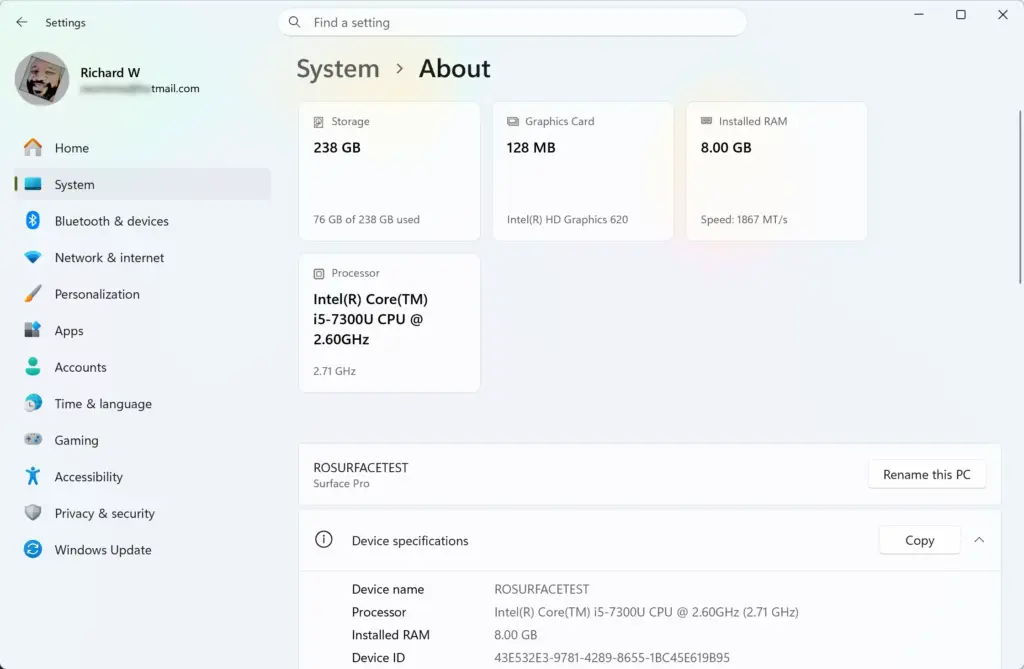
Settings › System › About - Read the OS build line. A build number of 26340.10013 or 26320.10003, or a later build from the same channel, means you are on a build that documents the feature.
If your build number is older than both builds above, or the device is not in the Windows Insider Program, you are on a build without the prompt. If your build does not have the prompt, skip to the administrator method section below.
How to add a BitLocker PIN without admin rights in 🪟 Windows 11
These steps show how to add a BitLocker PIN without admin rights on a managed device running a supported Insider build. Microsoft has documented the outline of the flow (notification, then a window to set the PIN) but not every screen, so the exact wording on your device may differ.
- Sign in to Windows with your standard user account. You do not need to switch to an administrator account or enter administrator credentials.
- Wait for the BitLocker notification. When the device has no PIN yet, Windows shows a notification asking you to add one. It appears as a normal Windows toast (a small pop-up near the clock).
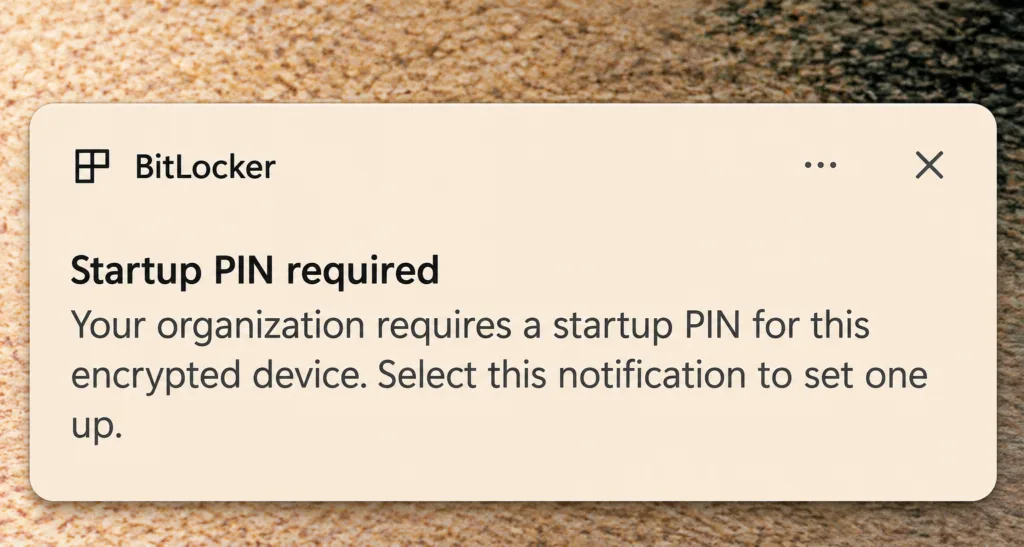
- Select the notification. This opens a window where you set the PIN. If Windows asks for administrator credentials at this point, stop and read the next section.
- Enter the PIN you want to use at startup. Pick something you can recall without writing it next to the device.
- Confirm the PIN if the window asks for it. Retype it exactly as you entered it the first time.
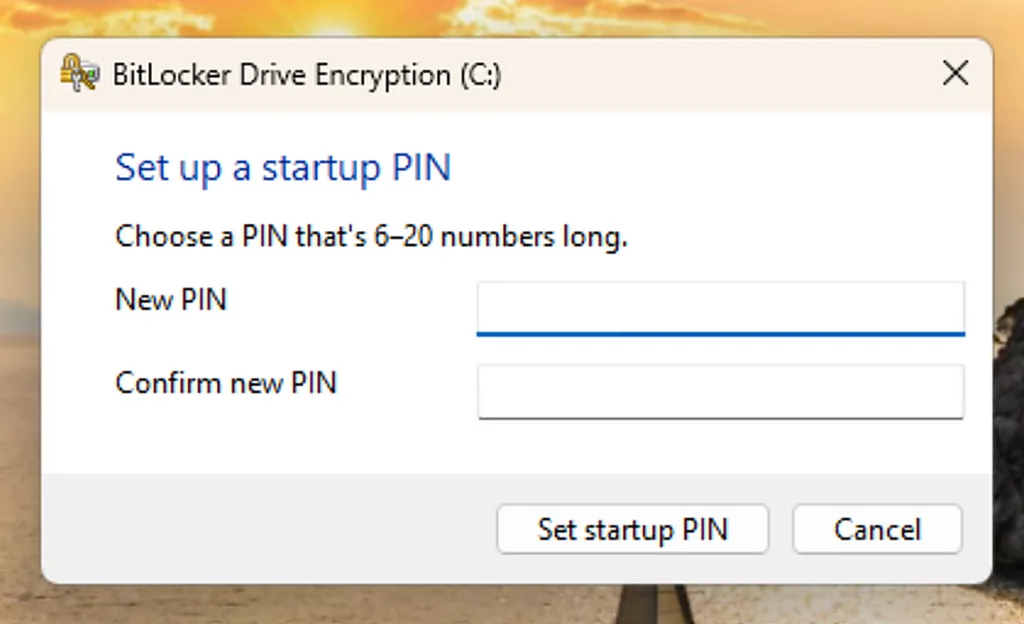
BitLocker - Finish the window by following the on-screen prompts. Microsoft has not documented the remaining screens, so use the button the window offers to apply or save the PIN.
- Restart the PC. Whether a restart is required is not documented, but restarting is the quickest way to confirm the PIN works.
- Type your PIN at the startup screen. A BitLocker PIN prompt should appear before Windows loads. Enter the PIN, then sign in as usual.
If the PIN screen appears at startup, the TPM+PIN protector is active. If the PC goes straight to the sign-in screen with no PIN prompt, the PIN was not applied. Check the protectors on the drive using the steps in how to open BitLocker settings in Windows 11.
If the notification doesn’t appear
Missing prompts are the most likely problem, since this feature depends on the build, the device management, and the current BitLocker state. Work through these checks in order.
Check the build and channel
Go back to Settings System About and compare your Windows build number with the two builds above. Release builds of Windows 11 do not include this prompt, however up to date they are. A device that is in the Windows Insider Program but on a different channel (the release track its builds come from) may also lack it, because the builds are channel-specific.
Check whether a PIN already exists
The notification asks you to add a PIN only when the device has none. If someone already set a startup PIN, whether you or IT, you will not be prompted. If you do not know your PIN, ask your IT team. Do not try to guess.
Check whether the device is managed
The documented behavior covers managed devices. Connected work or school accounts are usually listed under Settings Accounts Access work or school. That list is a hint rather than proof, because an organization can manage a PC in other ways. If you are not sure, ask your IT team whether the device is enrolled and whether the preboot PIN prompt is enabled for it.
Check for the TPM
The option Microsoft describes is TPM+PIN. In BitLocker, a protector is the method that unlocks the drive, so this one needs both the TPM chip and a PIN. A device without a working TPM cannot get that protector. Microsoft does not say what the prompt does on a PC without a TPM. If the prompt is missing on that PC, treat it as expected.
Look for the notification again
If you dismissed the notification, it may still be in the notification list. Select the date and time at the right end of the taskbar to open it. Microsoft has not said whether the prompt returns after you dismiss it. Do not count on seeing it again.
Choose a PIN you can remember
Pick a PIN you will still remember after a few weeks away from the PC. Do not reuse a PIN from your other accounts. Avoid obvious numbers such as birthdays or repeated digits. Microsoft’s notes do not state length or character rules for this window, so follow whatever the window enforces.
The PIN is typed before Windows starts, so it is not tied to your Windows sign-in. Changing your Windows password or Windows Hello PIN does not change it.
What is not confirmed yet
The feature is new and Microsoft’s description is short. These points are not covered in the release notes, so treat them as unknown until Microsoft documents them:
- The exact text of the notification and the layout of the PIN window.
- The minimum and maximum PIN length, and whether letters or symbols are allowed.
- Whether a restart is required before the PIN takes effect.
- Whether a standard user can later change or remove the PIN without an administrator.
- Which release version of Windows 11 will include the feature, and when.
Microsoft published the original announcement in its Windows Insider release notes for build 26340.10013. Check that page for updates, since preview behavior can change between builds.
Changing or removing the PIN later
The release notes describe adding a PIN, not changing or removing one. Changing it afterward may need an administrator, depending on how your organization configures the device.
With an administrator account, the existing methods still apply. The guide on enabling or disabling the startup PIN or USB requirement covers the Windows 11 settings route. Managing BitLocker with PowerShell covers the command-line route. Both need administrator rights.
Use the administrator method if your build doesn’t have this
If you are on a release build, or on a device that is not managed, the preboot PIN prompt will not appear. In that case an administrator must set the PIN with the standard method. Ask your IT team, or sign in with an administrator account if you have one.
The steps are in how to enable BitLocker with PIN and USB key in Windows 11. Avoid workarounds for the administrator prompt. BitLocker settings are protected for a reason, and a bad change can leave the drive locked.
What to do next
After the PIN is set, restart once and confirm the PIN screen appears before Windows loads. Keep your recovery key somewhere you can reach without the PC.
If you later need to pause protection for a firmware update or hardware change, read how to pause and restart BitLocker on Windows 11. If you use a password on a data drive, how to change a BitLocker password covers that task.
Frequently asked questions
How to add multiple monitors to your 🪟 Windows 11 PC?
Connect the second monitor to a free video port on your PC, using a cable or a docking station, then turn it on. Windows usually detects it on its own. If the screen stays blank, check that the cable is seated firmly and that the monitor input is set correctly.
How to add multiple monitors to your 🪟 Windows 11 PC site:Microsoft.com?
Connect the extra monitor with a cable or docking station, power it on, and let Windows detect it. Most displays are found automatically. If one stays dark, reseat the cable and confirm the monitor is set to the correct input. For exact steps on your model, check Microsoft's official Windows support pages.
How to add multiple monitors to your 🪟 Windows 11 laptop?
Connect the external monitor to your laptop with a cable, adapter, or docking station that fits both devices' ports. Turn the monitor on and let Windows detect it. If the screen stays blank, check the cable and the monitor's input setting. Keep the laptop plugged in, since a second screen drains the battery faster.
How to pin apps to 🪟 Windows 11 taskbar efficiently?
Open the app, right-click its icon on the taskbar, and choose the option to pin it. Pin only the few apps you use every day so the taskbar stays easy to scan. Drag pinned icons to reorder them, keeping your most-used apps first.
How to manage user accounts in 🪟 Windows 11?
Managing user accounts means adding, removing, or changing accounts on your PC. Most of these tasks need an administrator account. Standard users can sign in and manage their own files and settings, but cannot create or delete other accounts. On a work or school device, your IT team usually controls accounts.
How to pin apps to start menu in 🪟 Windows 11?
Open the Start menu and find the app, either by searching for it or browsing the app list. Right-click the app and choose the option to pin it to Start. It then appears as a tile in the pinned area. Unpin apps you no longer use to keep the area tidy.
Still have a question?
Answered by AI from this guide. Good questions may be added to this page — please don't include personal details.
Did this guide fix your problem?

About the Author
Richard
Tech Writer, IT Professional
Richard is a writer at Geek Rewind who turns complex IT tasks into clear, step-by-step guides. He draws on years of hands-on experience in system administration and enterprise IT operations, focusing on Windows, Linux and WordPress: the problems people actually run into, and the fixes that work. His server and WordPress guides come from systems he runs himself. Richard builds and maintains the platform behind Geek Rewind, from its Ubuntu servers and Nginx configuration to its custom WordPress plugins. Many new tutorials start with readers' questions, and he's always glad to answer them in the comments.
No comments yet — be the first to share your thoughts!