How to Enable or Disable BitLocker to Unlock OS Drive with PIN or USB at Startup in Windows 11
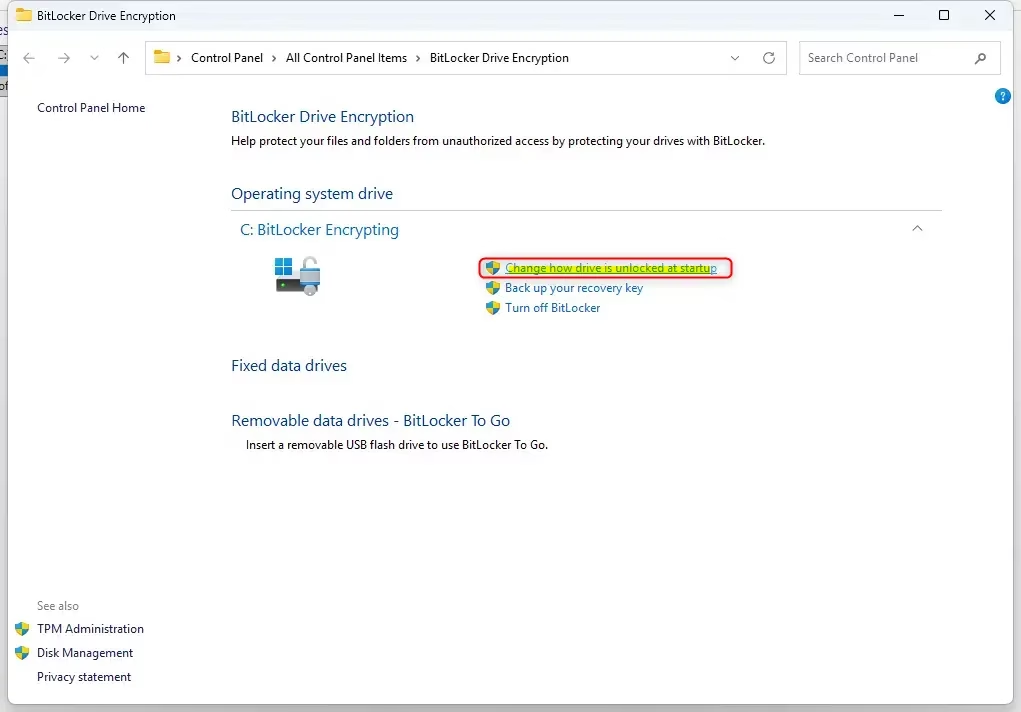
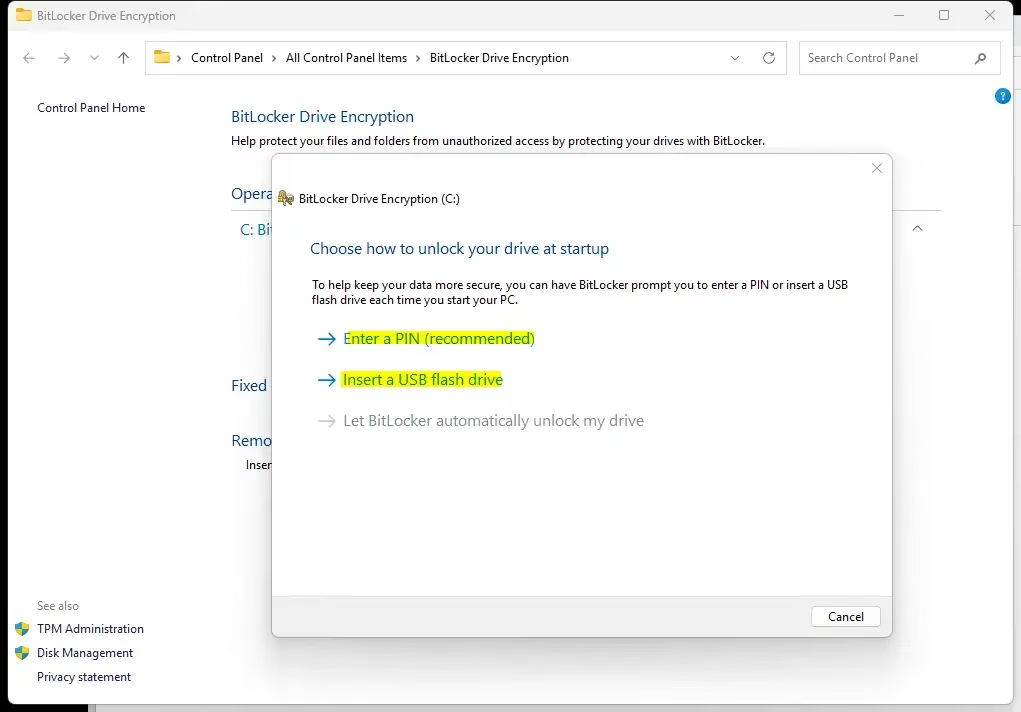
BitLocker lets you set up a PIN or use a USB drive to unlock your Windows 11 operating system drive when your PC starts.
This adds an extra layer of security, even if your computer has a Trusted Platform Module (TPM) version 2.0 chip, which most PCs do.
BitLocker Drive Encryption is a Windows tool that scrambles all the data on your hard drive. This way, if your computer is lost or stolen, no one can get to your files.
To use a startup PIN or USB, your PC needs a TPM 2.0 chip. Both work together to make sure your computer won’t start up unless you provide the correct PIN or plug in the right USB drive.
Enable BitLocker startup authentication by navigating to Computer Configuration Administrative Templates Windows Components BitLocker Drive Encryption Operating System Drives in Group Policy Editor and enabling “Require additional authentication at startup.” Ensure “Allow BitLocker without a compatible TPM” is unchecked unless your PC lacks a TPM.
Enable or Disable BitLocker Settings (Admin Required)
Administrator privileges are needed to perform these steps. If you’re using Windows 11 Pro, you can use the Group Policy Editor.
Using Group Policy Editor
The BitLocker PIN startup requirement for your Windows 11 PC can be turned on or off using the Group Policy Editor. This tool lets you manage startup settings for your operating system drive. Follow these steps to adjust whether you need a PIN or USB drive to start your computer.
1. Press Win + R, type gpedit.msc, and hit Enter.
2. Navigate to: Computer Configuration > Administrative Templates > Windows Components > BitLocker Drive Encryption > Operating System Drives.
3. Double-click Require additional authentication at startup.
4. Select Enabled. Ensure the box for Allow BitLocker without a compatible TPM is unchecked unless your PC lacks a TPM.


5. Click OK.
Using Registry Editor (GUI Alternative)
For those who prefer not to use Group Policy, the Registry Editor offers an alternative way to set up your BitLocker PIN startup requirement. This method involves changing specific settings in the Windows registry. It's a good alternative for managing startup authentication for your drive.
1. Press Win + R, type regedit, and hit Enter.
2. Navigate to: HKEY_LOCAL_MACHINE\SOFTWARE\Policies\Microsoft\FVE.
3. In the right-hand pane, right-click on an empty space, select 'New' > 'DWORD (32-bit) Value', and then name the new value UseAdvancedStartup. Set its value to 1.
4. Repeat this for the other keys below, setting their values as follows:
EnableBDEWithNoTPMset to 0UseTPMset to 2UseTPMPINset to 2UseTPMKeyset to 2UseTPMKeyPINset to 2
To restore the default behavior, delete the keys created above.
Using Command Line (manage-bde)
Advanced users can also utilize the manage-bde command-line tool. Open Command Prompt as an administrator and type: manage-bde -protectors -add C: -TPMAndPIN. This command sets up the PIN requirement for your C: drive.
Troubleshooting 'PIN Not Available'
Summary
Adding a BitLocker PIN or USB key at startup makes your Windows 11 computer more secure.
Can I use a BitLocker PIN on a device without a TPM?
Yes, it's possible, but it requires changing a specific Group Policy setting to allow BitLocker without a compatible TPM. Note that this is less secure than using a TPM 2.0 chip, as the encryption key is stored on the USB drive rather than inside a secure hardware chip.
What happens if I lose my BitLocker USB startup key?
If you lose your startup USB key, you will be locked out of your computer. You must use your 48-digit BitLocker Recovery Key to regain access. Always back up this recovery key to a safe location, such as your Microsoft account or a printed document, before enabling startup requirements.
Was this guide helpful?

About the Author
Richard
Tech Writer, IT Professional
Richard, a writer for Geek Rewind, is a tech enthusiast who loves breaking down complex IT topics into simple, easy-to-understand ideas. With years of hands-on experience in system administration and enterprise IT operations, he’s developed a knack for offering practical tips and solutions. Richard aims to make technology more accessible and actionable. He's deeply committed to the Geek Rewind community, always ready to answer questions and engage in discussions.

No comments yet — be the first to share your thoughts!