How to Automatically Start Programs When You Turn On Windows 11

Automatic startup in Windows 11 launches the apps you pick as soon as your desktop appears after you sign in. The method here is simple: put a shortcut to the program in a Startup folder. Windows opens everything in that folder at sign-in, so you stop launching the same apps by hand every day.
Windows has two Startup folders. 📁C:\
Press Win+R, type shell:startup and press Enter to open your Startup folder, then right-click empty space, choose New Shortcut, paste the program’s path from its Properties Target box, and finish the wizard. The program launches automatically when you sign in.
Why Make Programs Start Automatically?
Setting up startup apps saves time and makes sure the tools you rely on are ready when you sit down. Mail, a chat client, a notes app or a browser are typical examples. You don’t have to open each one and wait for it to load.
Most of these tools add themselves to startup during installation. If one doesn’t, or you turned it off by mistake, you can fix that with the methods below.
Keep the list short, though. Every app you add makes sign-in a little slower, especially on older PCs or hard drives.
Step 1Find the Program You Want to Start
The first step is finding the program’s file and its exact path, so Windows knows what to launch. Look for the program’s icon on your desktop, or search for it in the Start menu . The steps below use Microsoft Edge as the example, but any desktop program works the same way.
Once you have this path, you can point a startup shortcut at the program, so it opens with Windows. The example here is the Edge web browser.
- Look for the program icon (like Edge) on your desktop or in the Start menu. If you only see it in Start, search for the program's name and use the result that appears.
- Right-click on the icon, then choose Properties. A Properties window opens. If you don't see Properties on a Start menu result, use a desktop shortcut instead. Right-clicking in Start gives a different menu.
- In the window that opens, click the Shortcut tab. You will see fields such as Target, Start in and Shortcut key.
- Look at the Target box. This shows the path where the program is located. To copy it, click inside the box, press Ctrl + A to select everything, then press Ctrl + C. Keep any quotation marks that are already in the path.
- You can also click Open File Location to see the program's folder. File Explorer opens with the program file selected. Some apps from the Microsoft Store have no usable Target box, so the path copy method may not work for them.
Here is an example of the Properties window for Microsoft Edge:
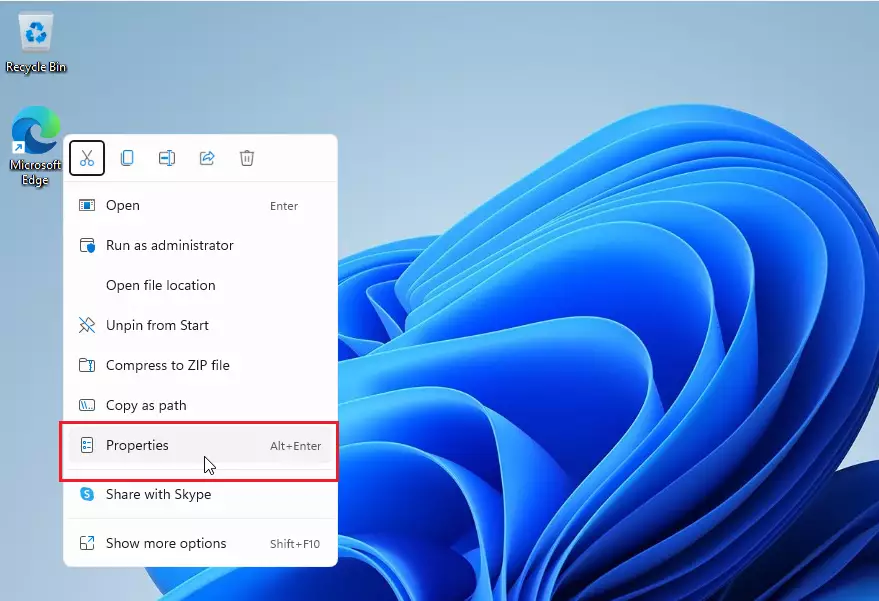
The Target field might look something like this:
"C:\Program Files (x86)\Microsoft\Edge\Application\msedge.exe"
Step 2Open the Startup Folder
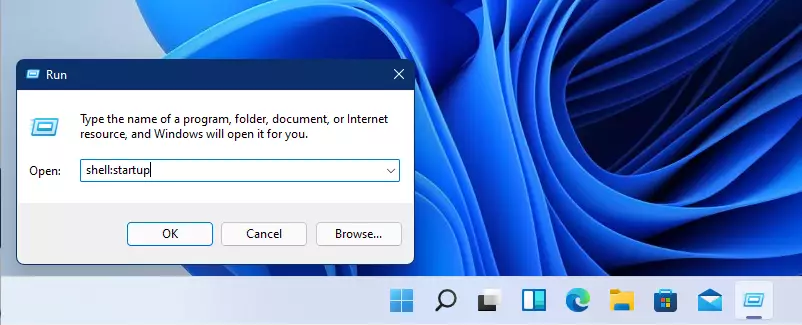
Next, open your Startup folder. It is a hidden system folder, so the quickest way to reach it is the Run box. Press the Windows key + R, type the folder command, and press Enter. File Explorer opens straight to the folder, with no clicking through hidden directories.
- Press the Windows key + R on your keyboard at the same time. This opens a small box called Run, in the lower-left corner of the screen.
- Type
shell:startupin the box and press Enter. A File Explorer window opens on your Startup folder. It is often empty, or holds only a few shortcuts. That is normal.
Anything you place in this folder, such as a program shortcut, is launched by Windows when you sign in. Leave the folder window open. You need it for the next part.
Step 3Add Your Program to Startup
- Inside the Startup folder, right-click on any empty space. A context menu appears. If you right-click on an existing file instead, you get a different menu, so click a blank area.
- Choose New Shortcut. The Create Shortcut wizard opens and asks for the location of the item.
- In the box that appears, paste the program path you copied from the Target box earlier. Press Ctrl + V to paste it. The box should now show the full path to the program.
- Click Next. The wizard moves to a naming screen.
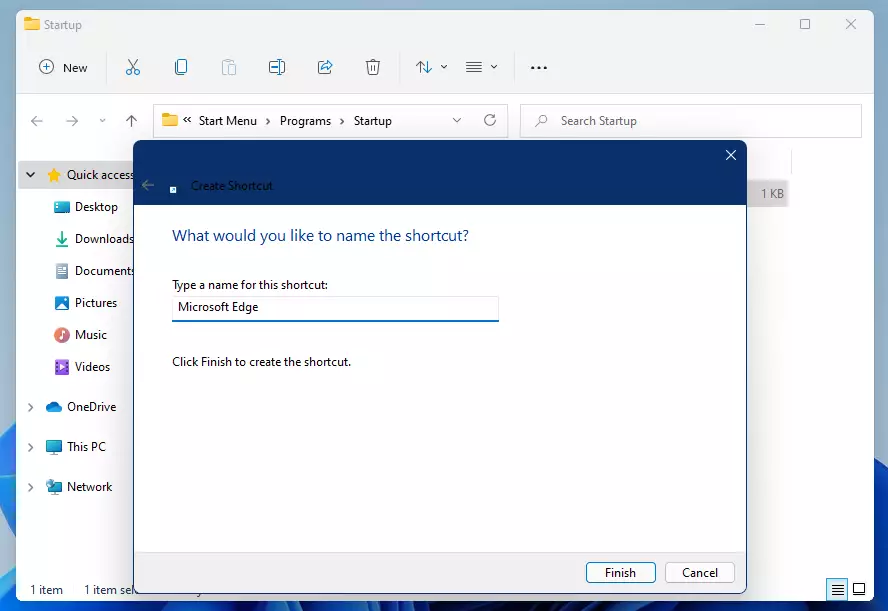
- Give the shortcut a name you will recognize, like "Microsoft Edge". The name only labels the shortcut and does not affect how the program runs.
- Click Finish. The new shortcut now appears in the Startup folder with the program's icon.
To undo it later, open the Startup folder again and delete the shortcut. That removes only the shortcut, not the program itself.
Step 4Test It Out
Restart your PC and sign in to test it. The program should open on its own once the desktop loads. Some apps take a few seconds longer than others, so give it a moment. If nothing opens, check that the shortcut still points to the right file.
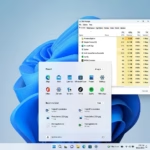
You can also press Ctrl + Shift + Esc to open Task Manager. Its startup list shows every app that Windows launches at sign-in, including the ones from your Startup folder.
In the Startup apps page of Task Manager, each item shows a status of Enabled or Disabled and a Startup impact rating. A program you just added should appear in this list. The impact rating tells you which apps slow down sign-in the most.
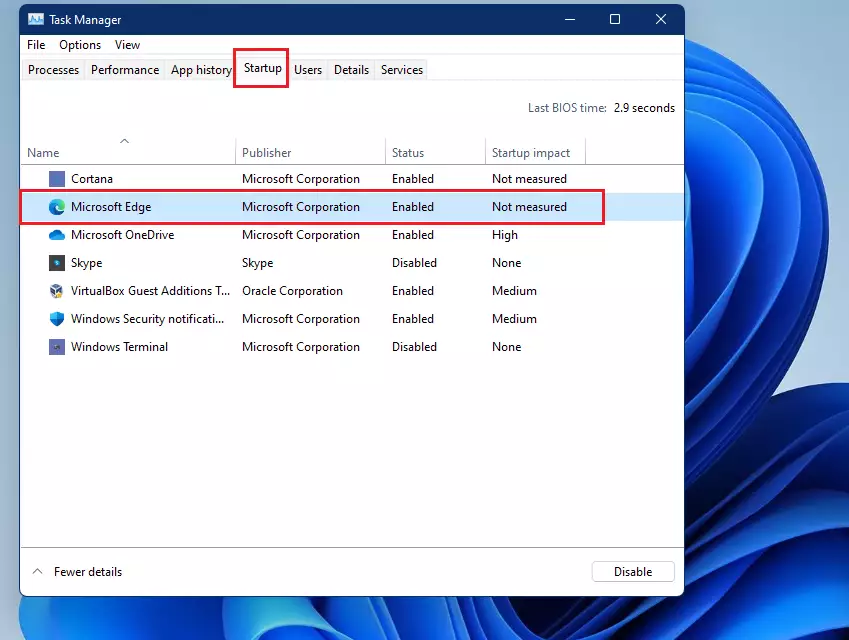
Alternative: Use Task Manager to Add Startup Programs
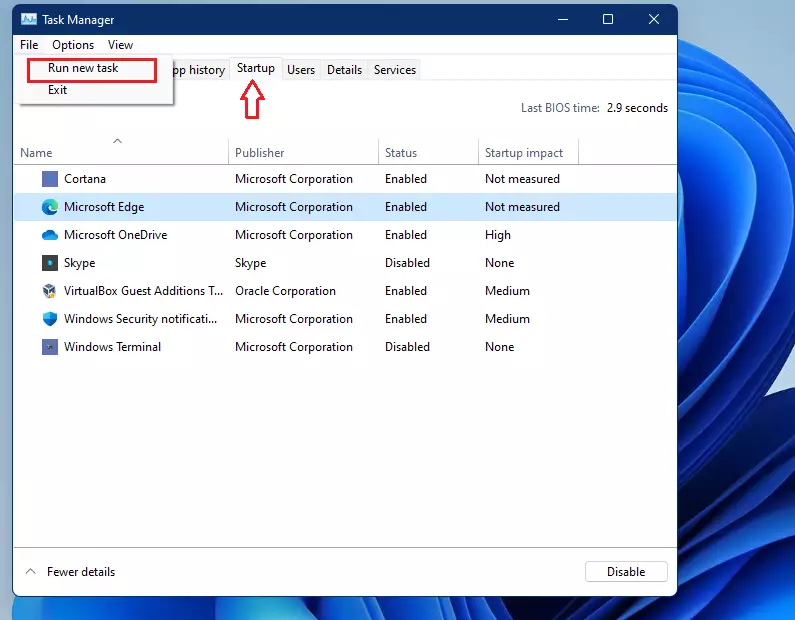
Task Manager gives you a second way to control what runs at boot. Right-click the Start button and select Task Manager. Its startup list lets you turn existing startup apps on or off without digging through folders. It does not create new startup entries, but you can use it to open the Startup folder, as shown below.
To switch an app off, open the startup list, right-click the app and choose Disable. Choose Enable to turn it back on. In Windows 11 version 22H2 and later, the list is on the Startup apps page in the left sidebar. In the original Windows 11 release it is the Startup tab across the top.
- Right-click the Start button and select Task Manager. The Task Manager window opens.
- Click the File menu, then choose Run new task. In Windows 11 22H2 and later, Task Manager has no File menu. Click the Run new task button at the top of the window instead. A small Create new task box opens.
- Type
shell:startupand check Create this task with administrative privileges if you want. You don't need that option to add a normal shortcut. - Click OK to open the Startup folder and add shortcuts as shown above. The same File Explorer window opens as with the Run box.
Summary
- Starting programs automatically saves you time and makes your computer ready when you log in. Add only what you need, since each extra app slows sign-in a little.
- You can add shortcuts to your favorite programs in the Startup folder. To stop one from launching, delete its shortcut.
- Use the Run box (
Windows + R) and typeshell:startupto open this folder quickly. - Task Manager is another way to manage startup programs. Use its startup list to enable or disable apps, and its Run new task option to open the Startup folder.
- This is helpful for programs you use often or need running in the background, such as antivirus and backup tools.
Starting programs automatically when you turn on Windows 11 saves time and has your favorite apps ready right away. Use the Startup folder to add apps and Task Manager to switch them on or off. Together they give you full control over what opens when you sign in, and your daily routine gets faster. If a program causes trouble later, delete its shortcut or disable it in Task Manager, and it stops launching at the next sign-in.
Was this guide helpful?

About the Author
Richard
Tech Writer, IT Professional
Richard is a writer at Geek Rewind who turns complex IT tasks into clear, step-by-step guides. He draws on years of hands-on experience in system administration and enterprise IT operations, focusing on Windows, Linux and WordPress: the problems people actually run into, and the fixes that work. His server and WordPress guides come from systems he runs himself. Richard builds and maintains the platform behind Geek Rewind, from its Ubuntu servers and Nginx configuration to its custom WordPress plugins. Many new tutorials start with readers' questions, and he's always glad to answer them in the comments.

No comments yet — be the first to share your thoughts!