What to Do When Windows 11 Explorer Crashes on Right Click

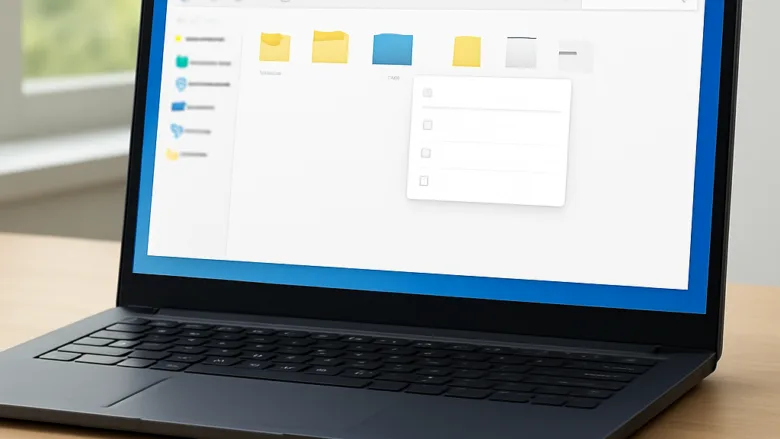
Windows 11 Explorer crashes on right click when a background app adds a broken item to your context menu (the pop-up menu that appears when you right-click a file or folder). The taskbar and desktop icons flash and restart because Windows cannot load that faulty menu item.
Faulty shell extensions cause this. These are small bits of code added by programs such as archive tools or file managers, and they can fail on Windows 11. The fix is to find the bad program and remove it from your menu. The methods below run from the quickest check to the deeper repairs, and none of them needs special hardware or a paid tool.
When Windows 11 Explorer crashes on right click, a third-party app has added a broken context menu handler to your right-click menu. Restart Windows Explorer using Task Manager by pressing Ctrl+Shift+Esc, selecting Windows Explorer from the Processes tab, and clicking Restart task. Then use ShellExView to disable problematic shell extensions one at a time until the crash stops.
Understanding Why File Explorer Crashes on Right Click
File Explorer usually crashes on right click in Windows 11 because a third-party app adds a broken shortcut to your menu. These extra shortcuts are called context menu handlers. When you right-click a file, Windows tries to load every app shortcut at the same time. If one older app does not work with the new Windows 11 design, the whole File Explorer process freezes or crashes.
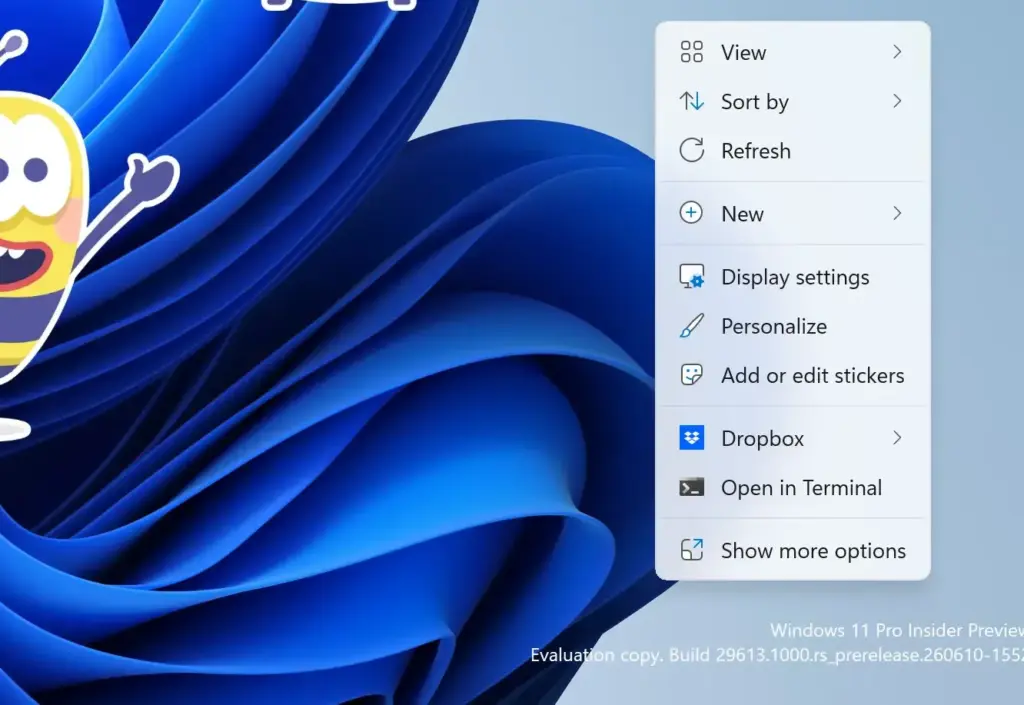
Windows 11 introduced a new, modern right-click menu . To keep older programs working, Windows also includes a Show more options entry at the bottom of that menu, which loads the old-style menu. If an older app is broken, incompatible, or corrupted, it can crash the Windows Explorer process every time you open that menu.
The fixes below apply to both Windows 11 Home and Pro. Work through them in order and test the right-click menu after each one, so you know which step solved it.
Method 1Restart Windows Explorer Using Task Manager
You do not need to reboot. It does not fix the cause, but it gets your screen back so you can keep working through the other methods.

- Press Ctrl + Shift + Esc to open Task Manager.
- If Task Manager opens in a compact view with fewer details, click the More details button at the bottom. You should now see the full window with tabs or a side menu.
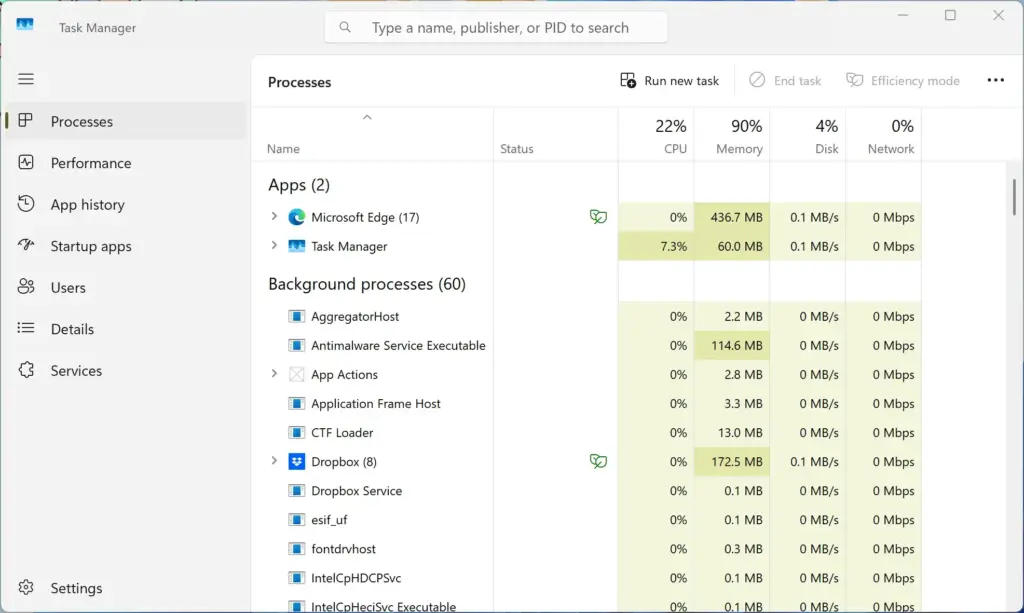
- Look through the list of running apps under the Processes tab to find Windows Explorer. If you cannot see it, scroll down to the Windows processes section.
- Click Windows Explorer to select it.
- Click the Restart task button in the top right corner of the Task Manager window.
Your screen and taskbar will flash for a second. This means Windows Explorer has restarted, and your desktop should respond normally again. If the taskbar stays blank, repeat the steps. The crash will come back if you right-click the same item again, so move on to the next methods to find the cause.
Method 2Use the Shift Key Bypass for the Classic Menu
The Shift key shortcut opens the classic right-click menu straight away in Windows 11. It skips the modern menu, which often avoids crashes caused by newer app shortcuts, and it is also a quick way to test which menu is at fault.
- Select the file, folder, or desktop item that causes the crash.
- Hold down the Shift key on your keyboard and press the right mouse button.
- The default Windows 11 menu is bypassed, and the old classic menu opens immediately.
If your computer does not crash when you use the Shift key, you know a specific app's shortcut is causing the problem. If it still crashes, the fault is more likely in an older shell extension, so carry on with the next method. This shortcut only changes which menu opens for that one click. It does not change any setting, so there is nothing to undo.
Method 3Remove Bad Add-ons Using ShellExView
ShellExView is a free tool that finds and turns off broken third-party extensions (add-ons made by other companies) causing right-click crashes. Download it from the official NirSoft website. Once open, it lists the menu add-ons so you can disable suspects in small batches until the crash stops.
- Download the free ShellExView program from the official NirSoft website. Extract the zip file. On 64-bit Windows 11, use the 64-bit version if the site offers one.
- Right-click the program and choose Run as administrator. It scans your computer and shows a long list of extensions and add-ons loaded in the background.
- Go to the top menu and choose Options Hide All Microsoft Extensions Do this first so you do not accidentally turn off important Windows features.
- Look at the remaining items. They usually belong to third-party software such as antivirus programs, WinZip-style archive tools, or graphics software. Sorting by the Type column helps you spot the ones listed as context menu extensions.
- Select the first few non-Microsoft items, then click the red button in the top left corner, Disable Selected Items. Disable only a few at a time.
- Restart your computer, or restart Windows Explorer through Task Manager as shown earlier. The change does not take effect until Explorer reloads.
Right-click again to check if the crash stops. If it does, the bad extension was in the batch you just disabled. To find the exact one, turn the items back on a few at a time and test after each. If the crash continues, turn those items back on and disable a different batch until you find the culprit. To undo any change, select the item and click the green Enable Selected Items button, then restart Explorer.
Method 4Clean Up the Registry Context Menu Handlers (Advanced)
You can do this with the built-in Windows settings and no extra software. The steps below use the Settings app only. Avoid editing the Registry Editor unless you have backed it up first, because one wrong change can affect the whole system.
To remove a suspect app through the graphical interface:
- Click the Windows Start button and open the Settings app (the gear icon). The Settings window should open.

- Click Apps in the left sidebar, then click Installed apps.
- Scroll through the list and look for programs you installed just before the crashing started, such as file-sharing tools, archive tools, or custom utilities. Sorting the list by install date can help.
- Click the three dots next to the suspicious app and select Uninstall. Follow the on-screen instructions to remove it completely.
- Restart your computer to see if removing the app fixes the right-click crash.
If the crash is gone, you can reinstall the app later, but check first that the developer has a version made for Windows 11. If you still need the app and the crash returns, leave it uninstalled or look for an alternative.
Method 5Run System File Checker Scans
System File Checker repairs damaged or corrupted core Windows files that can trigger right-click errors and crashes. It uses built-in Windows tools and fixes problems automatically. You run it from a Command Prompt opened as an administrator. The scan can take a while, so leave the window open until it finishes.
- Click the Windows Start button and type Command Prompt into the search bar. Admin privileges are required for the next step.

- Right-click Command Prompt in the search results and choose Run as administrator.
- When User Account Control asks whether you want to allow the app to make changes to your device, click Yes. If you do not have an administrator account, you will be asked for a password, and you cannot run these commands without one.
- Type DISM.exe /Online /Cleanup-image /Restorehealth into the command window and press Enter:
DISM.exe /Online /Cleanup-image /Restorehealth- Wait for the process to reach 100 percent. If it finds broken files, this step downloads healthy replacement files from the internet, so stay connected. The progress can appear to stall for a while, which is normal.
- Next, type the following command and press Enter:
sfc /scannow- Wait for System File Checker to finish scanning your entire computer. If it finds corrupted files, it fixes them automatically, and the window tells you what it did.
- Restart your computer when the scan finishes, then test the right-click menu again.
Method 6Check for Windows Updates
Microsoft releases bug fixes that can stop File Explorer crashes, so check Windows Update. Installing the latest patches often resolves known stability problems with the right-click menu without any other work from you.
- Open the Settings app by pressing the Windows Key + I together.
- Click Windows Update in the menu on the left side. The update page should appear.

- Click the Check for updates button at the top right.
- If any updates are available, let Windows download and install them.
- Restart your computer when prompted to finish the installation. Updates are not fully applied until you restart.
Unique Expert Tips: Preventing Future Explorer Crashes
Once the right-click crash is fixed, a few habits will help keep it from coming back.
Tip 1Be Careful With Context Menu Customizers
Apps that change or restyle the Windows 11 right-click menu often start crashing when a major system update arrives. If you want to use a customizer, pick one whose developer releases frequent updates. Before you upgrade Windows, uninstall any menu customization app that has not been updated in over a year. You can reinstall it afterwards if a compatible version exists.
Tip 2Isolate Shell Extensions Using Autoruns
Autoruns lets you see every program that hooks into your system menu. It is a free tool from Microsoft's Sysinternals collection that shows startup items and menu hooks in detail. Use it when ShellExView does not point to a clear cause, or when you want a second view.
- Download Autoruns from the official Microsoft Learn website (the Sysinternals pages).
- Extract the downloaded zip file, then right-click the program and choose Run as administrator.
- Click the Explorer tab. This tab lists shell extensions and context menu handlers. Some guides call it the shell extensions view.
- Choose Options Hide Microsoft Entries to remove Windows' own items from the list, so only third-party entries remain.
Uncheck items one by one rather than deleting them. Unchecking disables an entry without removing it, so you can tick the box again if it was not the cause. Restart Explorer after each change and test the right-click menu.
Summary
What to do next
If your right-click menu still crashes after these steps, create a new local user profile to test whether a corrupted user account is the cause. In Windows 11 you can do this under Settings Accounts Other users If the new account works normally, the problem is in your original profile and you can move your files across. Feature updates or a graphics driver reinstall can also restore default shell extensions and reset a modified context menu. With these tools you can now manage your Windows Explorer setup and customize system menus without unexpected freezes.
Was this guide helpful?

About the Author
Richard
Tech Writer, IT Professional
Richard is a writer at Geek Rewind who turns complex IT tasks into clear, step-by-step guides. He draws on years of hands-on experience in system administration and enterprise IT operations, focusing on Windows, Linux and WordPress: the problems people actually run into, and the fixes that work. His server and WordPress guides come from systems he runs himself. Richard builds and maintains the platform behind Geek Rewind, from its Ubuntu servers and Nginx configuration to its custom WordPress plugins. Many new tutorials start with readers' questions, and he's always glad to answer them in the comments.


No comments yet — be the first to share your thoughts!