Remove the Do You Like This Picture Prompt from the Desktop in Windows 11

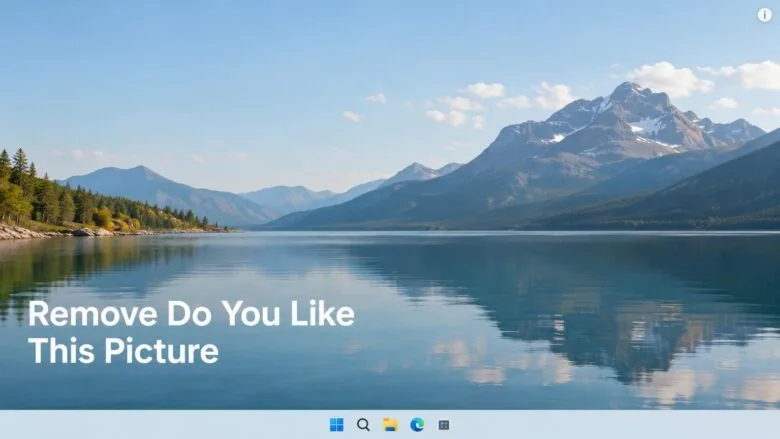
- 17 steps
- Needs administrator rights
Turn off Windows spotlight to remove the Do you like this picture prompt from the Windows 11 desktop. The prompt comes from that background setting, which rotates photos from Microsoft. To remove it, open Settings Personalization Background and change Personalize your background from Windows spotlight to Picture, Solid color, or Slideshow.
Windows spotlight adds a Learn about this picture icon to the desktop. That icon opens the flyout (a small pop-up panel) where Windows asks whether you like the image. Once spotlight is off, the icon and the prompt disappear.
The change takes effect at once, needs no restart, and does not require administrator privileges. It works the same on Windows 11 Home and Pro.
To remove the “Do you like this picture” prompt in Windows 11, turn off Windows spotlight for the desktop. Open Settings, select Personalization, then Background, and change Personalize your background from Windows spotlight to Picture, Solid color, or Slideshow. The Learn about this picture icon and prompt disappear right away, with no restart needed. Your lock screen spotlight setting is not affected.
Why the Do You Like This Picture Prompt Appears
Windows spotlight downloads new photos from Microsoft and shows them as your desktop background. It also places the Learn about this picture icon in the top-right corner of the desktop. Hover over or open the icon and a flyout appears with details about the photo and a way to tell Microsoft whether you like it. Microsoft uses those answers to pick future images.
- Turn off Windows spotlight for the desktop. This removes the icon and the prompt, and it is the method below.
- Keep Windows spotlight and hide the icon. This is covered in a later section.
How to Remove the Do You Like This Picture Prompt from the Desktop
These steps remove the do you like image prompt from the Windows 11 desktop by switching your background away from Windows spotlight. When you finish, your desktop shows a background you chose, and the Learn about this picture icon is gone.
- Right-click an empty area of the desktop. A context menu (the short menu that opens when you right-click) appears.
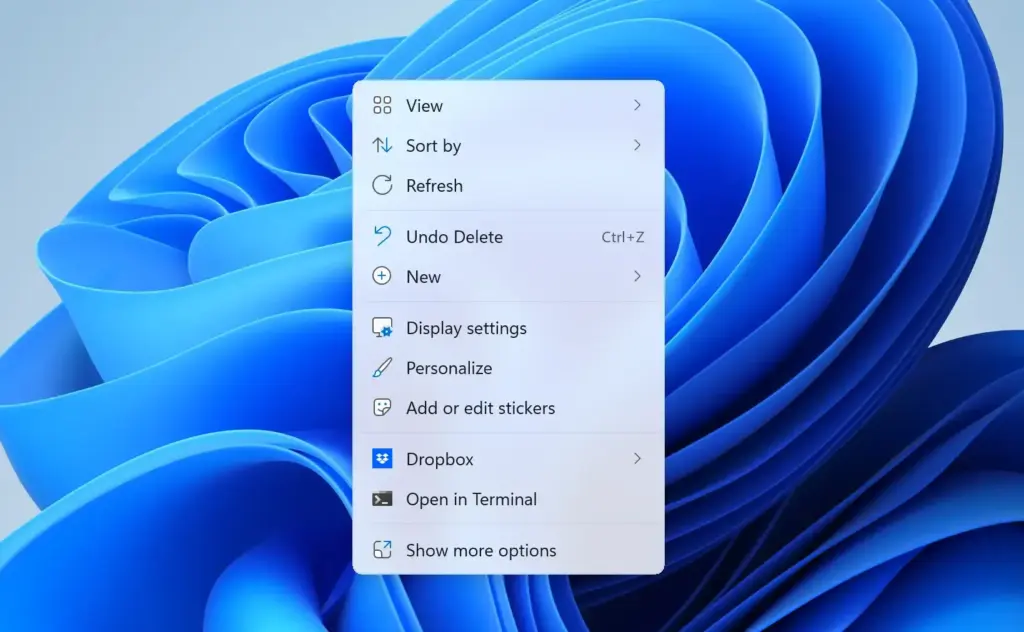
- Select Personalize. The Settings app opens on the Personalization page.
- Select Background. The page shows a preview of your current background at the top. If spotlight is active, the list below the preview shows Windows spotlight.
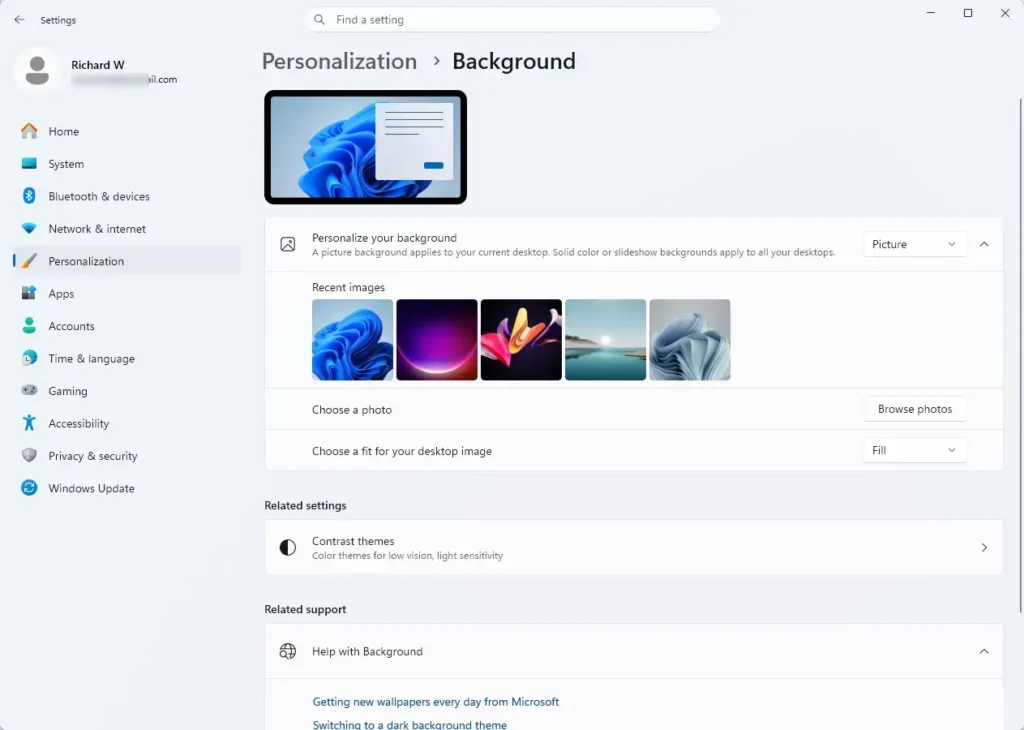
Settings > Personalization > Background - Open the Personalize your background list. A drop-down appears with four choices: Windows spotlight, Picture, Solid color, and Slideshow.
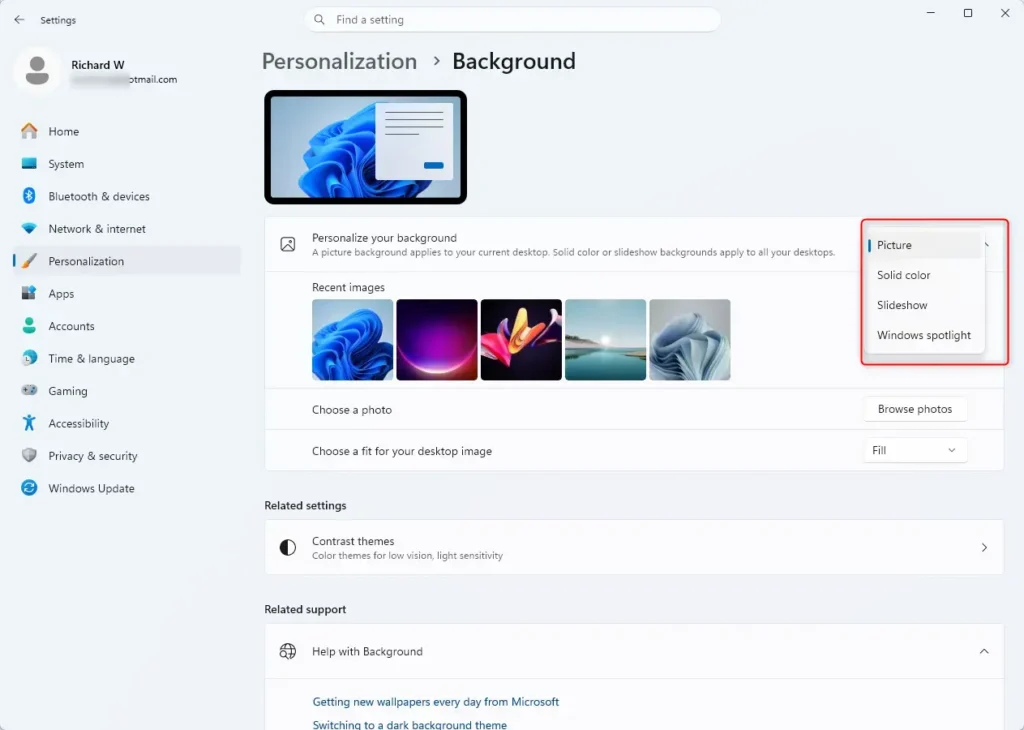
- Select Picture, Solid color, or Slideshow. The options below the list change to match your choice, and the desktop updates within a second or two.
- Pick your image or color. For Picture, choose one under Recent images or select Browse photos to pick a file. For Solid color, choose a swatch under Choose your background color. For Slideshow, select Browse and choose a folder of images.
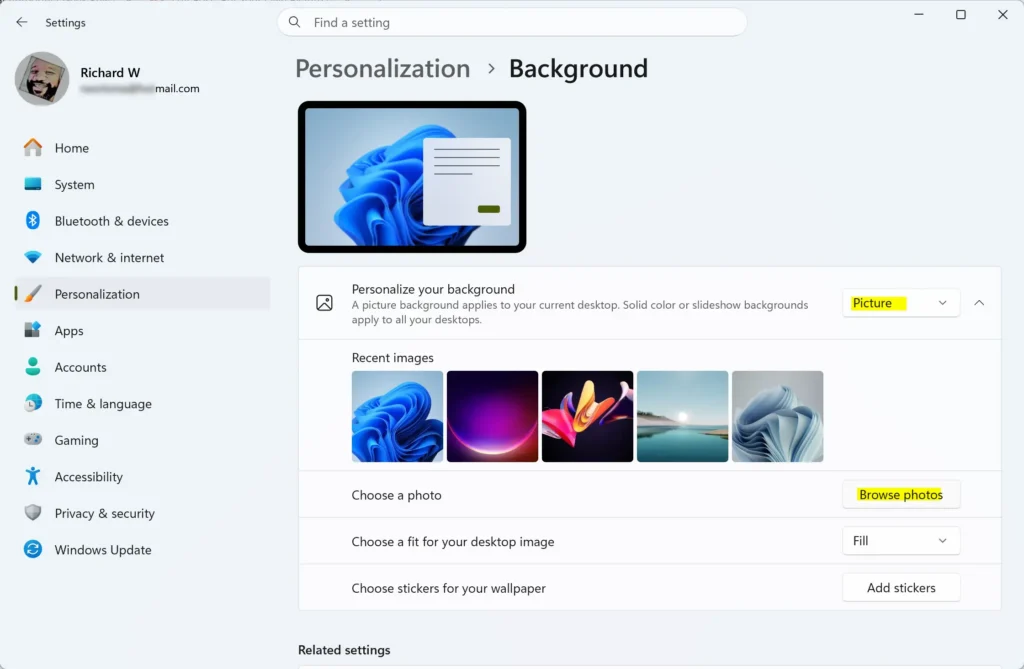
Settings > Personalization - Look at the desktop. The Learn about this picture icon no longer sits in the top-right corner, and the prompt does not appear.
- Close Settings. Windows saves the choice automatically, so there is no Apply or Save button to select.
If the icon is still visible after step 7, wait a few seconds and press F5 on the desktop to refresh it. If it stays, the icon may belong to a different desktop; see the virtual desktops section below.
Which Replacement Background to Choose
Each of the three options removes the prompt. The right one depends on how often you want the desktop to change.
Picture
Picture shows one image and keeps it until you change it. It suits anyone who wants a stable desktop. You can use one of the built-in Windows images or one of your own photos. For help with your own files, see how to put your own picture on the desktop in Windows 11.
After you pick a photo, a Choose a fit for your desktop image list appears. It controls how Windows sizes a photo that does not match your screen shape. Fill is a safe default, because it covers the whole screen and crops the edges if needed.
Solid color
Solid color fills the desktop with one flat color. This option has the least visual noise and keeps desktop icons clear to read. It also helps on a shared PC, such as one in a reception area or public space, where a photo would distract. Choose a swatch, or select View colors to build a custom shade.
Slideshow
Slideshow rotates through the images in a folder you pick. It gives you the variety of Windows spotlight without Microsoft’s prompt, because the pictures come from your own files. Use the Change picture every list to set the interval. Turn on the shuffle switch to randomize the order.
Slideshow can reduce battery life on a laptop, since Windows loads a new image on each change. If battery life matters, set a longer interval or choose Picture instead.
Keep Windows Spotlight but Hide the Icon
You may like the spotlight photos and want only the icon and its prompt gone. Windows opens the prompt from the Learn about this picture icon. Hide or remove that icon, and the prompt stops showing on the desktop.
The steps for that depend on your Windows 11 build, and this post does not repeat them. Follow how to add or remove the Learn about this picture desktop icon in Windows 11 for the full method. If you also want to change which standard icons appear, such as This PC or Recycle Bin, see how to add or remove default desktop icons in Windows 11.
Another option is to hide every desktop icon at once. That hides your files and shortcuts too, so use it only if you rarely keep items on the desktop. The guide to hiding or showing desktop icons in Windows 11 explains how.
If the Option Is Missing, Greyed Out, or Not Working
Windows is not activated
On a PC that is not activated, the Background settings are locked. Settings shows a message saying you need to activate Windows to personalize your PC. Open Settings System Activation to check your status. After you activate Windows, the Background list becomes available.
Your organization manages the PC
On a work or school PC, an administrator can control the desktop background. If the Personalize your background list is greyed out, or Settings says some settings are managed by your organization, you cannot override the choice yourself. Ask your IT department. A PC with its background locked this way may keep showing the prompt until the administrator changes the policy.
The desktop turns solid black
Microsoft lists a known issue on Windows 11 24H2 and 25H2. Confirm the update numbers and release date against Microsoft’s release notes before you rely on them. After you install update KB5120998 (an optional preview update released on 2026-10-28), desktop settings can fail to load on some devices, and the desktop shows a solid black background.
The update KB5124008 fixes this. It corrects the loading problem so the desktop background and other personalization settings load again. To install it, open Settings Windows Update and select Check for updates. If the black background remains after the update, repeat the steps above to pick your background again.
Virtual desktops show a different background
Windows 11 lets each virtual desktop (a separate workspace you switch to with Task View) use its own background. If you removed the prompt on one desktop but still see it on another, that second desktop still uses Windows spotlight.
- Press Win+Tab. Task View opens, and the desktop thumbnails appear along the bottom.
- Right-click the thumbnail of the desktop that still shows the prompt. A menu opens.
- Select Choose background. The Background page in Settings opens for that desktop.
- Change Personalize your background to a value other than Windows spotlight.
To create or close virtual desktops, see how to create and close a desktop on Windows 11.
Something else sits on the desktop
The prompt is not the only item Windows can place on the desktop. Desktop stickers (notes and images you place on the desktop) are separate from spotlight. If a sticker is what you are seeing, follow the guide to remove Windows 11 desktop stickers.
How to Bring Windows Spotlight Back
You can reverse the change at any time. Switching back to Windows spotlight restores the rotating photos, the Learn about this picture icon, and the prompt.
- Right-click an empty area of the desktop.
- Select Personalize.
- Select Background.
- Open the Personalize your background list.
- Select Windows spotlight. The icon appears in the corner, and the first spotlight photo can take a short while to download.
Windows keeps your earlier picture, color, and slideshow folder choices, so you can pick them again from the same page.
What to Do Next
With spotlight off, set the desktop up the way you want it. If you chose Picture, choosing your own photo is the next step. If you want a more personal touch, enabling desktop stickers adds notes and images without any prompts from Microsoft.
Have a question about this guide?
Answered by AI from this guide. Good questions may be added to this page — please don't include personal details.
Did this guide fix your problem?

About the Author
Richard
Tech Writer, IT Professional
Richard is a writer at Geek Rewind who turns complex IT tasks into clear, step-by-step guides. He draws on years of hands-on experience in system administration and enterprise IT operations, focusing on Windows, Linux and WordPress: the problems people actually run into, and the fixes that work. His server and WordPress guides come from systems he runs himself. Richard builds and maintains the platform behind Geek Rewind, from its Ubuntu servers and Nginx configuration to its custom WordPress plugins. Many new tutorials start with readers' questions, and he's always glad to answer them in the comments.
No comments yet — be the first to share your thoughts!