How to Add or Remove Default Desktop Icons in Windows 11

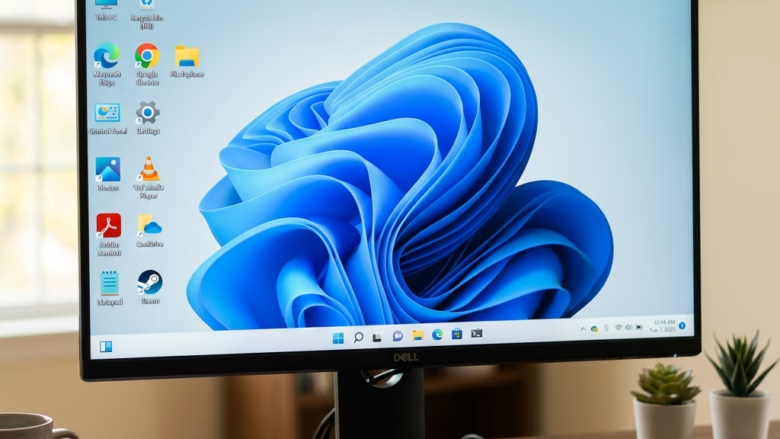
The default desktop icons in Windows 11 are built-in shortcuts to core system tools: This PC, the Recycle Bin , Control Panel , your user files folder, and Network. A fresh install shows only the Recycle Bin , but you can turn on any of the five from Settings Personalization Themes Desktop icon settings
Showing or hiding these shortcuts keeps the screen tidy and puts the tools you use most one double-click away. The change takes a few clicks, needs no restart, and works the same in Windows 11 Home and Pro. You can reverse it at any time.
Open Settings Personalization Themes Desktop icon settings, then tick the boxes for This PC, User’s Files, Network, Recycle Bin or Control Panel to show them, or clear them to hide them. Click OK and the desktop updates immediately, with no restart needed. Hiding an icon does not delete the tool it links to.
Open Desktop Icon Settings
The desktop icon options sit inside the Themes page of Settings. There are two ways to get there. The search route is quicker.
- Press Win+I to open Settings .
- Type Themes into the search box.
- Select Themes & related settings from the results. The Themes page under Personalization opens.
If you prefer to click through, use the manual route instead.
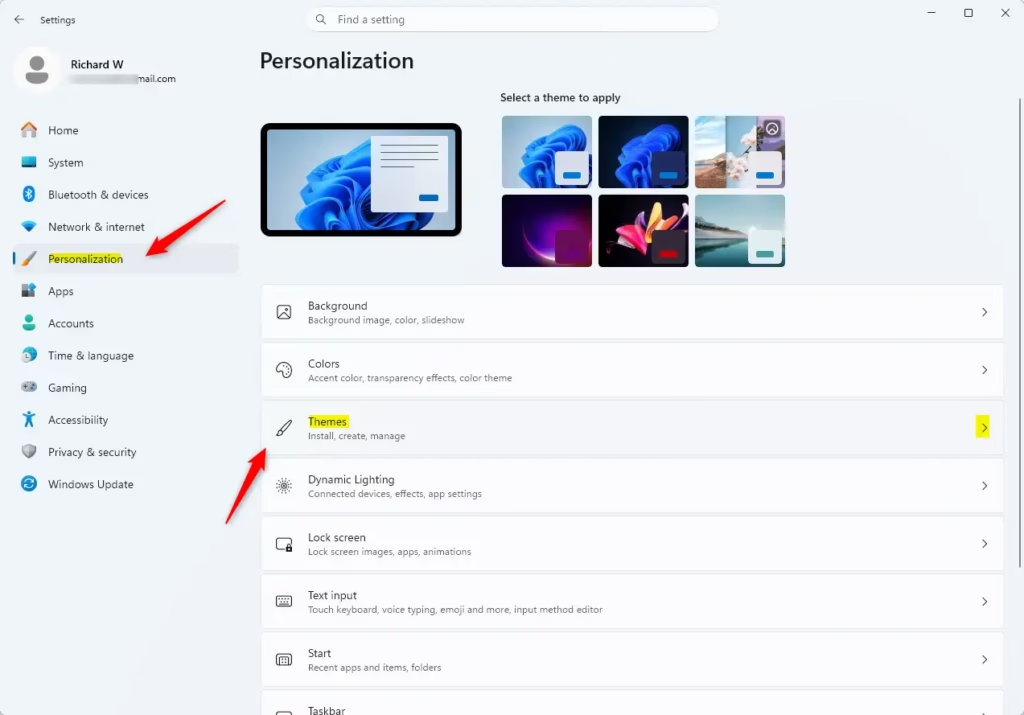
- Open Settings and select Personalization in the left pane.
- Select Themes. You should see your current theme and a list of available themes.
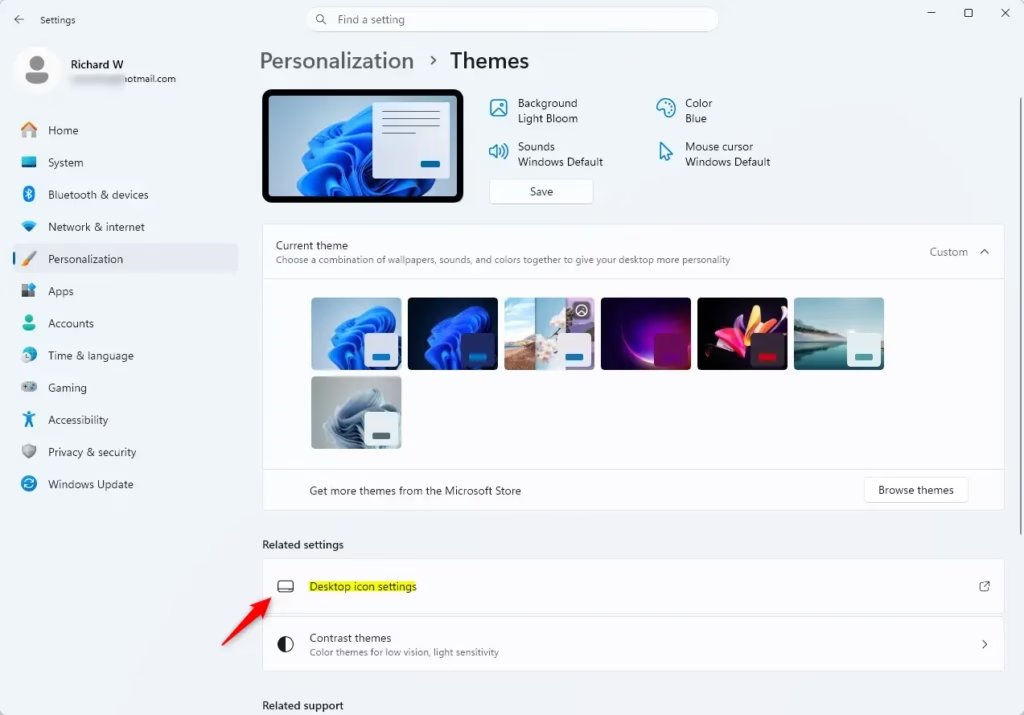
- Scroll down to the related settings and select Desktop icon settings. A small window titled Desktop Icon Settings opens.
That takes you to the same Personalization page in Settings.
Choose Your Icons
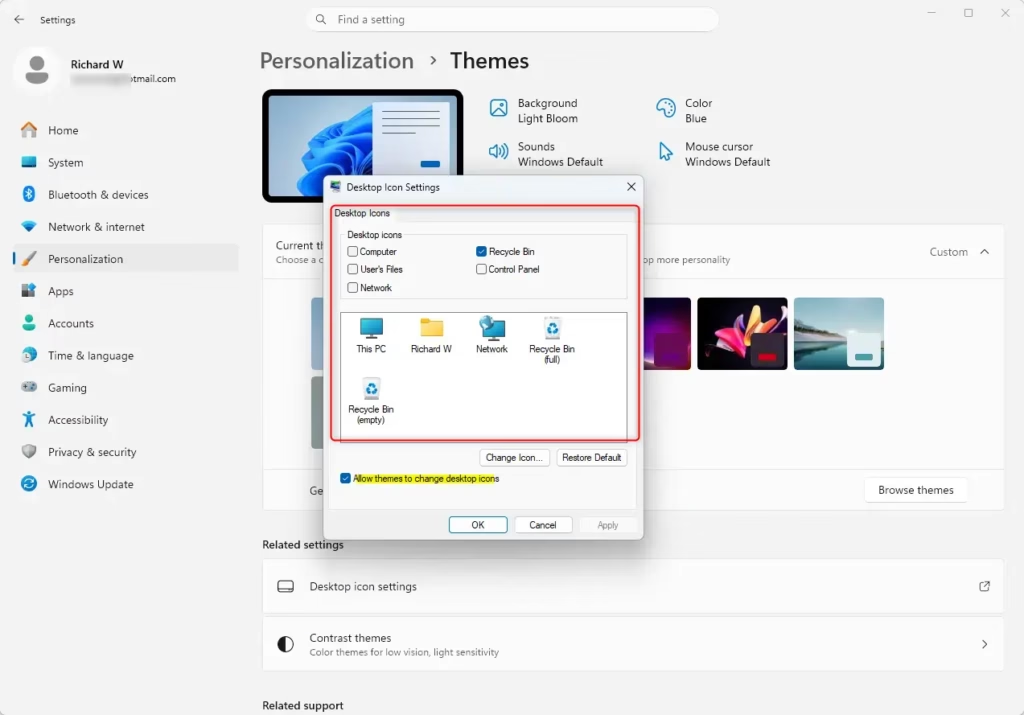
You pick which shortcuts appear in the Desktop Icon Settings window. This is how you customize default desktop icons in Windows 11: every standard system shortcut can be turned on or off from this one window. You can show core items like This PC, Network, and the Recycle Bin , or clear the checkmark for anything you would rather not see.
The window lists the common desktop icons: This PC, User's Files, Network, and Recycle Bin. Control Panel is in the list too. Each has a checkbox beside it.
- Find the icon you want to change in the list.
- Select its checkbox to add it to the desktop. A checkmark means the icon will show.
- Clear the checkbox to remove an icon. No checkmark means it will be hidden.
- Repeat for any other icons you want to change.
Hiding an icon only removes the shortcut. The tool or folder itself is not deleted, so you can bring the icon back by selecting the box again.
If you tick a box and nothing shows up on the desktop, the desktop icons may be hidden altogether. Right-click an empty spot on the desktop, open View, and make sure Show desktop icons is checked.
Confirm Your Choices
- Click OK to save your changes and close the window. You can click Apply first if you want to see the result while the window is still open.
- Look at the desktop. It updates right away, and the icons you selected now appear while the ones you cleared are gone.
You do not need to sign out or restart. To undo anything, reopen the window and change the checkboxes back.
A Note About Themes
You can stop this from happening. The Desktop Icon Settings window has a checkbox that controls whether themes may change the icons.
If your desktop icons keep disappearing or reappearing after you apply a new look, this setting is the likely cause.
- Open Desktop icon settings again from Settings Personalization Themes
- Clear the checkbox that lets themes change desktop icons. It is at the bottom of the window, below the icon list.
- Click OK. Your chosen icons will now stay in place when you apply a new theme.
If you ever want a theme to control the icons again, select the same checkbox.
Summary
Choosing your own desktop icons and locking them in gives you a cleaner, faster workspace, and it is easy to adjust later.
Have a question about this guide?
Answered by AI from this guide. Good questions may be added to this page — please don't include personal details.
Did this guide fix your problem?

About the Author
Richard
Tech Writer, IT Professional
Richard is a writer at Geek Rewind who turns complex IT tasks into clear, step-by-step guides. He draws on years of hands-on experience in system administration and enterprise IT operations, focusing on Windows, Linux and WordPress: the problems people actually run into, and the fixes that work. His server and WordPress guides come from systems he runs himself. Richard builds and maintains the platform behind Geek Rewind, from its Ubuntu servers and Nginx configuration to its custom WordPress plugins. Many new tutorials start with readers' questions, and he's always glad to answer them in the comments.
No comments yet — be the first to share your thoughts!