Put Your Own Picture on the Desktop in Windows 11

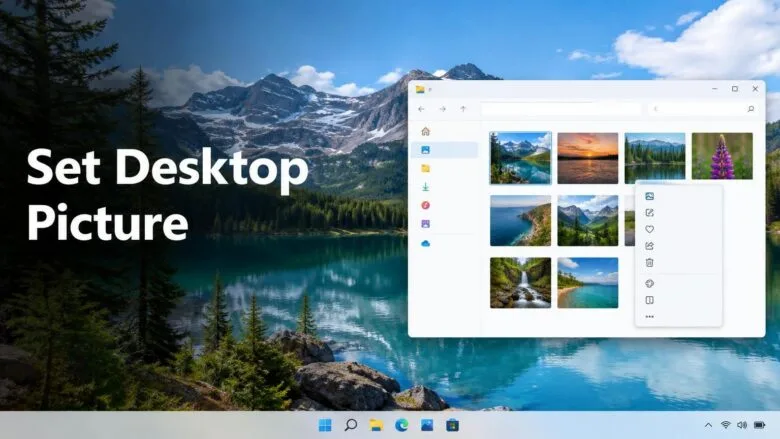
Windows 11 lets you set any picture you own as your desktop background. You can do it in about a minute, either from File Explorer or from the Settings app. Neither way needs administrator rights, and both work the same on Windows 11 Home and Pro.
The quickest route is to right-click the image in File Explorer and choose Set as desktop background. To set it from Settings, open Personalization and then Background. The Photos app also has its own option for this, which the guide covers too.
Once the picture is set, you can change how it fits your screen, use a different picture on each monitor, or rotate through a folder of images. This page also explains what to do when the option is greyed out or the picture looks stretched or blurry.
To put your own picture on the desktop in Windows 11, right-click the image in File Explorer and select Set as desktop background, or open Settings Personalization Background, set Personalize your background to Picture, then select Browse photos and choose the file. Neither method needs administrator rights, and both work on Windows 11 Home and Pro.
Before You Start: Pick the Right Picture
Almost any common image works, but a few choices decide whether the result looks sharp. Spend a minute on these first.
Check the File Type and Location
Use one of these if you have a choice. Save the file in a folder you will not clean out later, such as Pictures. If you move or delete the original, a slideshow that points at that folder stops working. A Recent images entry for the picture may stop working too.
Open File Explorer and look at the status icon next to the file. A cloud outline means the file is online only. Right-click it and select Always keep on this device before you use it as a background.
Match the Picture to Your Screen Resolution
Windows enlarges a picture that is smaller than your screen resolution to fill the screen. Enlarging the picture blurs it. To check your screen's resolution, follow these steps: 1. Open Settings by pressing Windows key + I. 2. Go to System Display. 3. Scroll to Scale & layout and look at the Display resolution box.
- Open Settings by pressing Windows key + I.
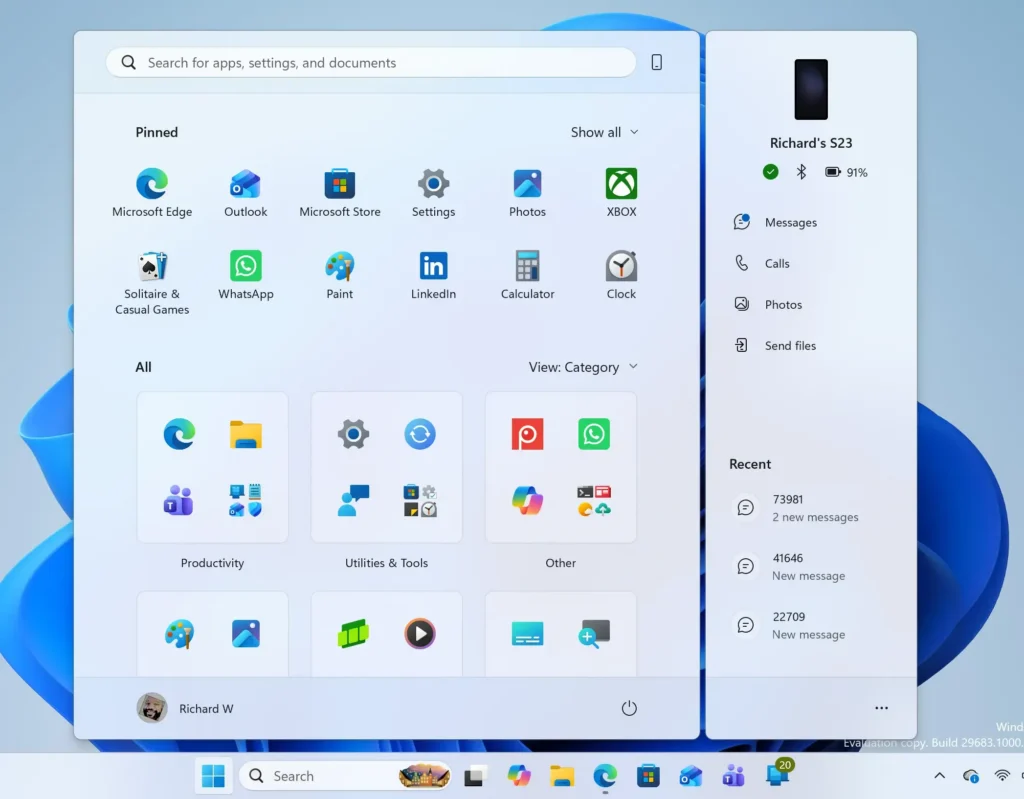
- Go to System Display
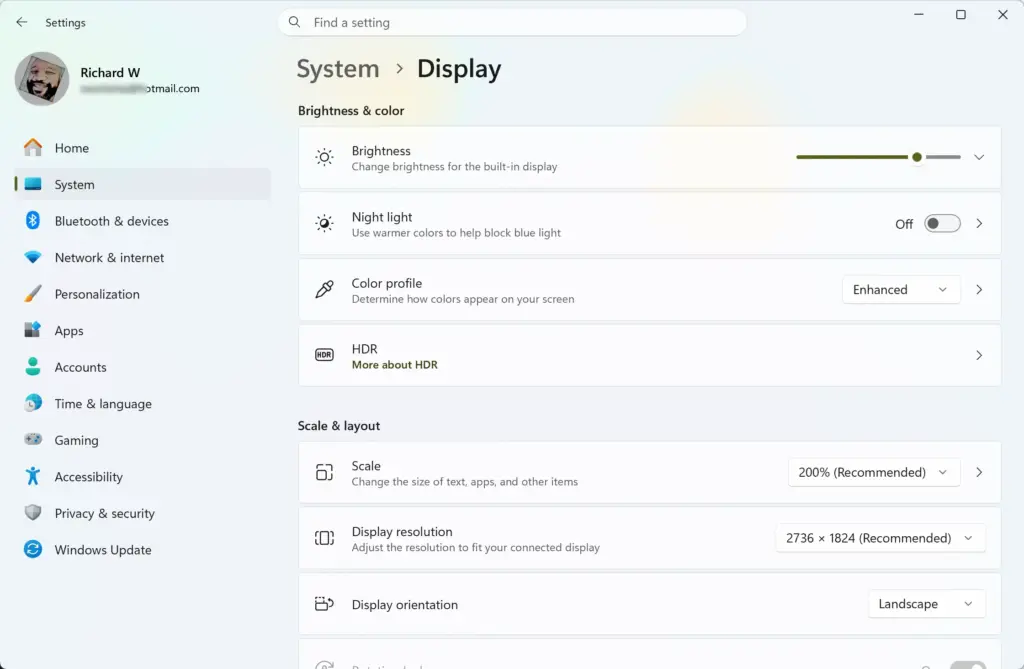
Settings › System › Display - Scroll to Scale & layout and look at the Display resolution box. The value marked (Recommended) is your screen's native resolution (the fixed number of pixels, or dots, the screen is built to show), for example 1920 × 1080. × 1080.
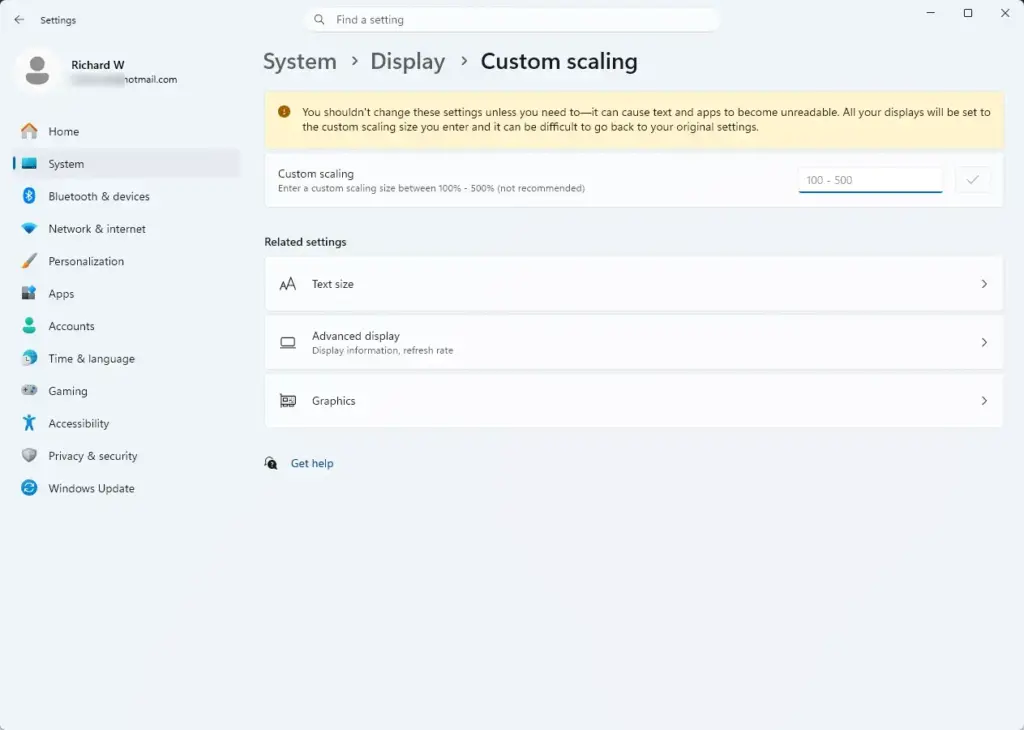
Settings › System › Display › Scale
Choose a picture that is at least that size in pixels. To check an image's size, right-click the file, select Properties, open the Details tab and read the Dimensions line.
Set Your Own Picture as the Desktop Background
There are three ways to do it. The Settings method gives you the most control, so start there if you also want to change how the picture fits the screen.
Method 1Use Settings > Personalization > Background
This method lets you pick any picture on the PC and set how it fills the screen.
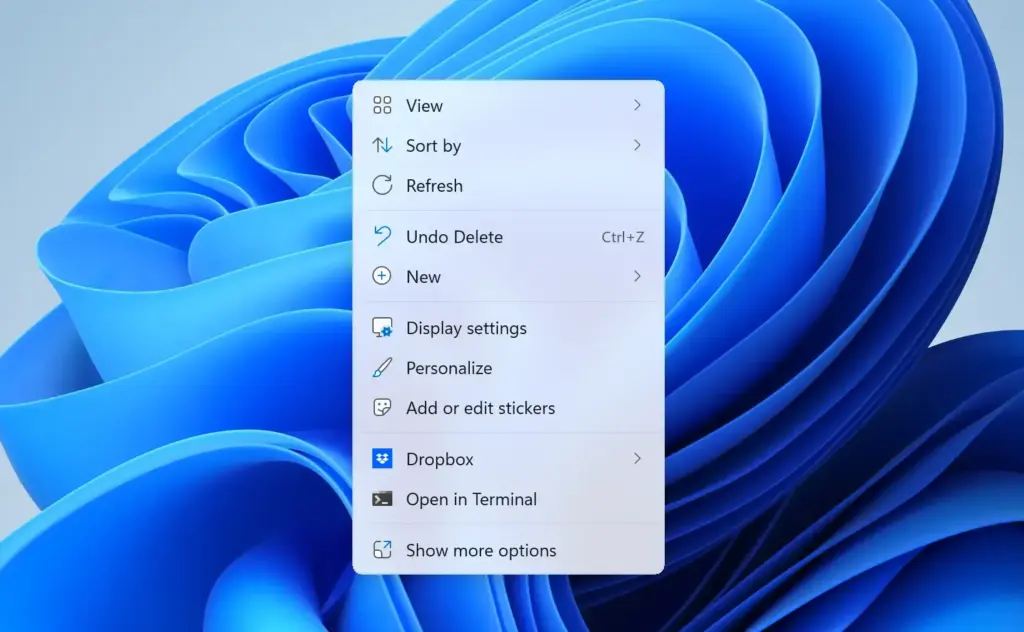
- Right-click an empty area of the desktop and select Personalize. Settings opens on the Personalization page. You can also open Settings with Windows key + I and select Personalization.
- Select Background. The page shows a preview of your current background at the top.
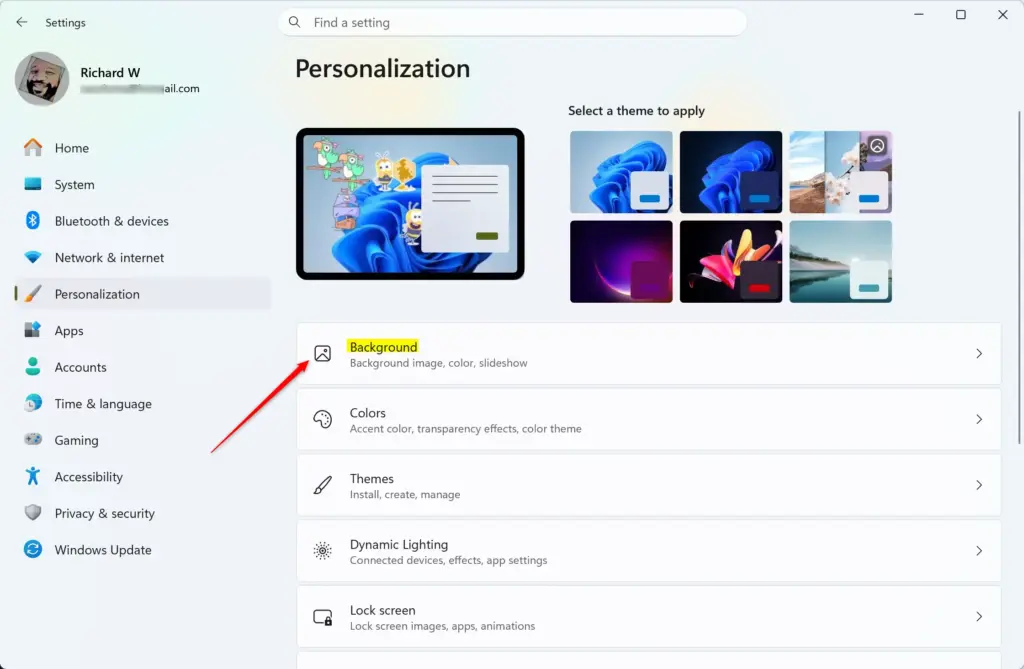
Settings › Personalization › Background - Open the Personalize your background list and select Picture. If another option such as Windows spotlight (a feature that downloads rotating photos from Microsoft) is selected, you cannot choose your own picture until you switch this setting to Picture.
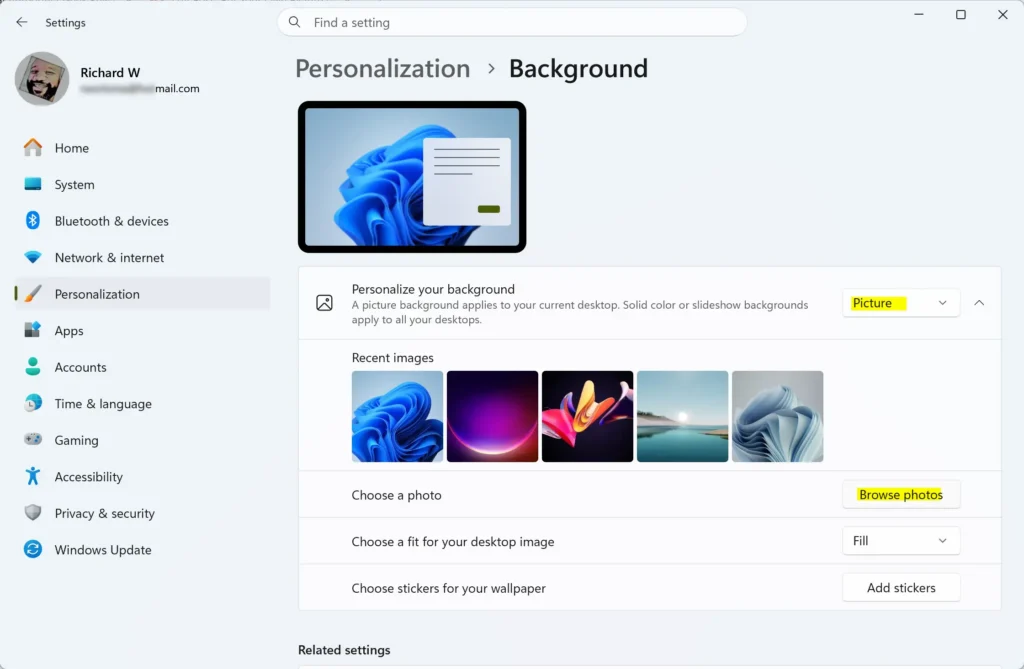
- Find Choose a photo and select Browse photos. On some older Windows 11 builds the button is labelled Browse. A file picker opens.
- Go to the folder that holds your image, select the file, and select Choose picture.
The desktop changes at once, and the preview at the top of the page updates to match. Windows also adds the picture to the Recent images row, so you can switch back to it later by selecting its thumbnail.
Method 2Right-Click the Picture in File Explorer
This is the quickest route when you are already looking at the file. It uses the picture's default fit setting, which you can change afterwards in Settings.
- Open File Explorer by pressing Windows key + E and go to the folder that holds the picture.
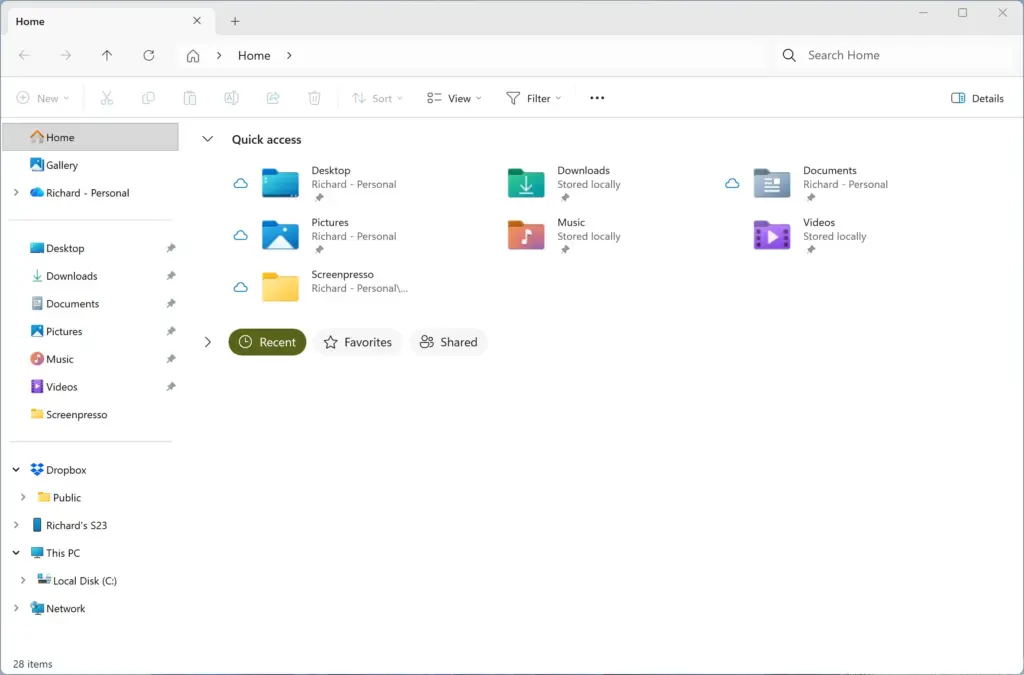
File Explorer - Right-click the image file.
- Select Set as desktop background. If you do not see it in the first menu, select Show more options and look there.
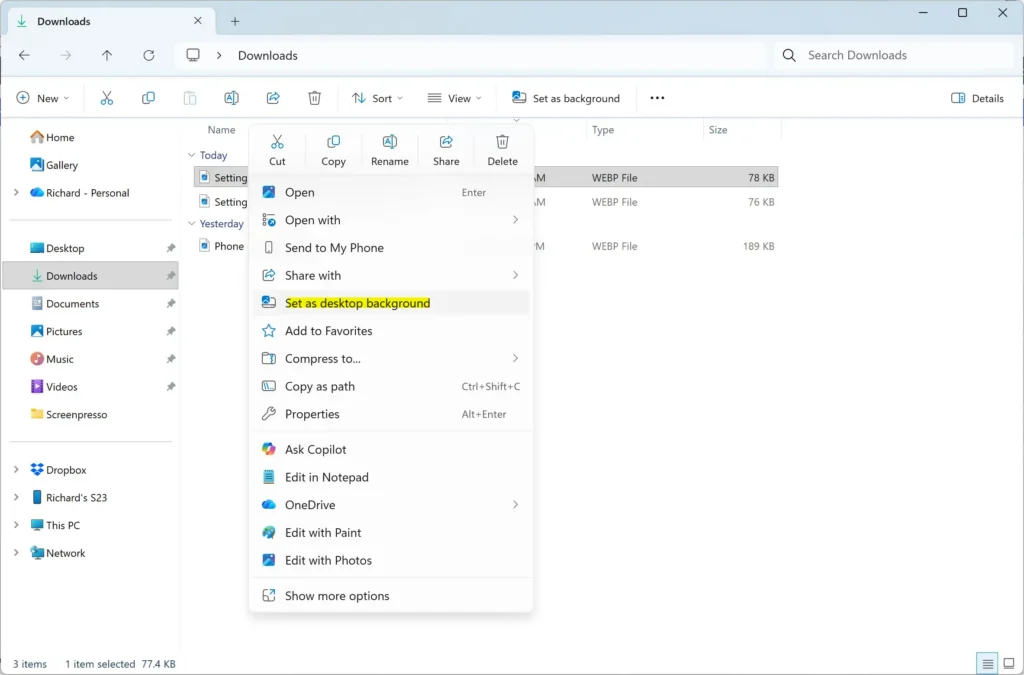
Your desktop changes immediately. If you want to adjust how the picture fits, go to Settings Personalization Background afterwards The picture is already selected there.
Method 3Use the Photos App
Use this method if you are browsing or editing the picture in the Photos app. Menu wording in Photos changes between app versions, so read the labels below as a guide.
- Open the image in the Photos app.
- Select the See more button (three dots) in the toolbar.
- Select Set as, then select Set as background.
The picture is applied to your desktop. If you cannot find Set as in your version of Photos, use Method 1 or Method 2 instead.
Choose How the Picture Fits Your Screen
When the picture and the screen have different proportions, Windows has to crop, stretch or pad the image. You control this with a setting on the same page, and the right choice depends on the picture.
- Go to Settings Personalization Background
- Find Choose a fit for your desktop image and open the list.
- Select one of the options below. The preview updates as you choose.
- Fill: scales the picture until it covers the whole screen and crops any overflow. The image keeps its proportions. This is the best choice for most photos.
- Fit: shows the entire picture without cropping and fills any leftover space with a solid colour. Use it when you cannot afford to lose the edges.
- Stretch: forces the picture to the screen's exact size. It distorts the image if the proportions differ, so avoid it for photos of people.
- Tile: repeats the picture across the screen at its original size. It suits small patterns and textures.
- Center: places the picture in the middle at its original size, with empty space around it if it is small.
- Span: stretches one picture across all your monitors as if they were a single wide screen. It only matters with more than one display.
If a portrait photo looks badly cropped on a landscape screen, try Fit. If you want a clean edge-to-edge look and the cropping is acceptable, stay with Fill.
Use a Different Picture on Each Monitor or Virtual Desktop
By default, a picture you choose applies everywhere. Windows 11 lets you assign different pictures to separate monitors and to separate virtual desktops (extra desktop workspaces you create in Task View).
Set a Different Picture on Each Monitor
- Go to Settings Personalization Background and make sure Personalize your background is set to Picture.
- Add each picture you want by selecting Browse photos. Each one appears in the Recent images row.
- Right-click a thumbnail in Recent images.
- Select Set for monitor 1, Set for monitor 2, or Set for all monitors.
The chosen monitor changes straight away while the others keep their current picture. If you do not see the per-monitor options, only one display is connected or detected. Check Settings System Display to see whether Windows lists both monitors.
Set a Different Picture on Each Virtual Desktop
- Select the Task View button on the taskbar, or press Windows key + Tab. If the button is missing, turn it on in Settings Personalization Taskbar
- Create a second desktop by selecting New desktop if you do not already have one.
- Right-click the thumbnail of the desktop you want to change and select Choose background.
- Pick a picture from the list that opens in Settings.
Switch between desktops to confirm each one keeps its own picture.
Rotate Through Several Pictures with a Slideshow
If you have a folder of favourite images, Windows can cycle through them automatically. A slideshow takes the place of your single picture. You can switch back at any time.
- Put the pictures you want in one folder.
- Go to Settings Personalization Background
- Open the Personalize your background list and select Slideshow.
- Next to Choose albums for your slideshow, select Browse, pick your folder, and select Choose this folder.
- Open the Change picture every list and choose how often the picture changes.
- Turn Shuffle the picture order on or off. With it off, Windows follows the folder order.
- Check Let slideshow run even if I'm on battery power if you use a laptop. This setting is off by default on many laptops, so the slideshow may pause on battery until you turn it on.
- Set Choose a fit for your desktop image as described earlier.
The first picture change happens right away, and later changes follow the interval you chose. Windows looks only at the folder you selected, so adding or removing files there changes what appears.
If the Option Is Greyed Out or the Picture Looks Wrong
Most failures come from one of a handful of causes. Find the symptom that matches yours.
Personalization Settings Are Locked Because Windows Is Not Activated
If you see a message that you need to activate Windows to personalize your PC, and the background options are greyed out, the copy of Windows is not activated. Check this in Settings System Activation The page shows whether Windows is activated, and it offers options to enter a product key (the code that proves you own a copy of Windows) or activate through your Microsoft account. Once Windows is activated, the Background page works normally.
Settings Say "Some of These Settings Are Managed by Your Organization"
On a work or school computer, an administrator can lock the desktop background. When this happens, the options in Settings Personalization Background are greyed out and you cannot change them. Ask the person who manages your work computer (often your IT department) to allow it or to set a picture for you. On a personal PC, this message can also appear if the PC was once enrolled in a work or school account. Check Settings Accounts Access work or school and look for an account you no longer need. Disconnect only an account you recognise and are sure you can remove.
The Desktop Is a Solid Colour or Black
Check these causes in order.
- Open Settings Personalization Background and look at Personalize your background. If it says Solid color, switch it to Picture and choose your image again.
- Open Settings Accessibility Contrast themes If a contrast theme is active, Windows replaces the background picture with a solid colour. Set Contrast themes to None and select Apply.
- Open Control Panel, go to Ease of Access Center, select Make the computer easier to see, and make sure Remove background images (where available) is not ticked. Select Apply if you change it.
- Confirm the picture file still exists in its original folder. If you moved it, choose it again.
The Picture Is Blurry, Cropped or Stretched
Blurriness usually means the image is smaller than your screen resolution. Use a larger picture, as described in the first section. If it is cropped in the wrong place, change Choose a fit for your desktop image to Fit. If it looks distorted, check that the fit is not set to Stretch.
The Background Changes Back by Itself
Three things commonly replace your picture:
- A new theme. Selecting a theme in Settings Personalization Themes replaces the background with that theme's pictures. Set your own picture again after you switch themes.
- Windows spotlight or Slideshow. If Personalize your background is set to either one, your single picture is not used. Set it to Picture.
- A work or school policy. A PC that your organisation manages can reapply a standard background when you sign in. Ask your IT department if it keeps happening.
Go Back to the Default Background
To undo your change, return to Settings Personalization Background. Select another thumbnail from Recent images, or change Personalize your background to Solid color, Windows spotlight or Slideshow.
To restore the standard Windows look, go to Settings Personalization Themes and select one of the Windows themes, such as Windows (light). This replaces your picture with that theme's background. Your original image file is not deleted by any of these changes.
What to Do Next
Your desktop background does not change the sign-in screen. To put your own picture there, go to Settings Personalization Lock screen and set Personalize your lock screen to Picture. If a theme change or work policy overwrites your background later, repeat the steps in Method 1. To keep several looks on hand, save each picture in the same folder and use the Recent images row to switch between them.
Have a question about this guide?
Answered by AI from this guide. Good questions may be added to this page — please don't include personal details.
Did this guide fix your problem?

About the Author
Richard
Tech Writer, IT Professional
Richard is a writer at Geek Rewind who turns complex IT tasks into clear, step-by-step guides. He draws on years of hands-on experience in system administration and enterprise IT operations, focusing on Windows, Linux and WordPress: the problems people actually run into, and the fixes that work. His server and WordPress guides come from systems he runs himself. Richard builds and maintains the platform behind Geek Rewind, from its Ubuntu servers and Nginx configuration to its custom WordPress plugins. Many new tutorials start with readers' questions, and he's always glad to answer them in the comments.
No comments yet — be the first to share your thoughts!