How to Choose the right fit for Windows 11 desktop background image
Windows 11 desktop background fit settings control how your chosen image appears on screen.
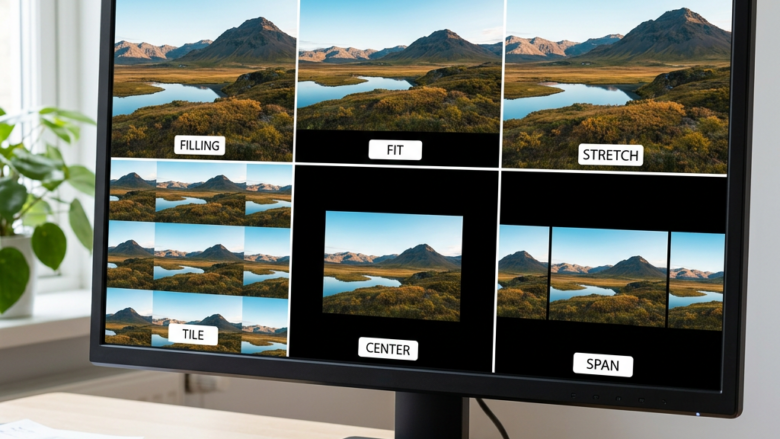
These options determine if the image stretches, crops, or shows with black bars to match your screen’s size and shape.
For example, the “Fill” setting expands the image to cover the entire screen, potentially cropping edges, while “Fit” shows the whole image, possibly adding bars.
Choosing the right setting ensures your wallpaper looks sharp and exactly how you intended, avoiding common display issues like distortion or missing parts of the picture.
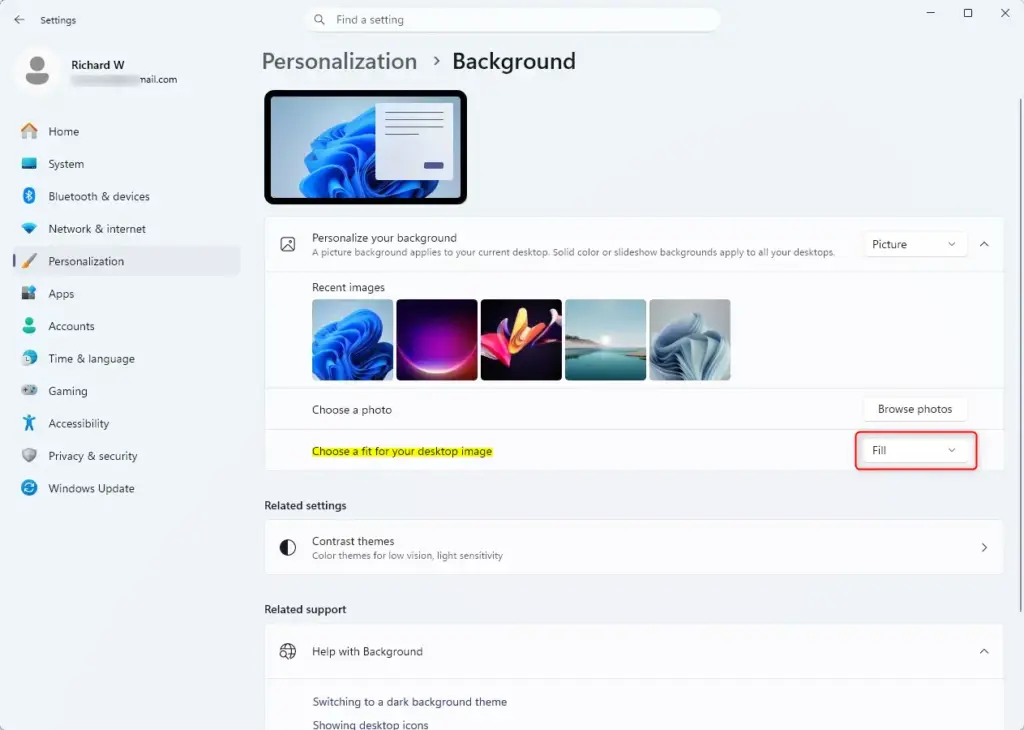
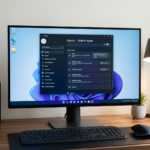
To choose the right fit for your Windows 11 desktop background, right-click the desktop, select Personalize, then Background. Choose from Fill, Fit, Stretch, Tile, Center, or Span to control how your image displays.
Understanding Your Image Fit Options
When you set a picture or a slideshow as your background, Windows offers several ways to display them. Each option changes how the image scales and where it sits on your screen. Getting this right makes a big difference in how your desktop looks.
Fill: The Full-Screen Experience
The ‘Fill’ setting for your Windows 11 desktop background makes your picture cover the entire screen by scaling it up or down. This means your image will completely fill your display without any black bars around the edges, making it a great choice to ensure your wallpaper takes up all available space.
What it does: It makes your picture bigger until it fills the whole screen.
Fit: Preserving the Whole Picture
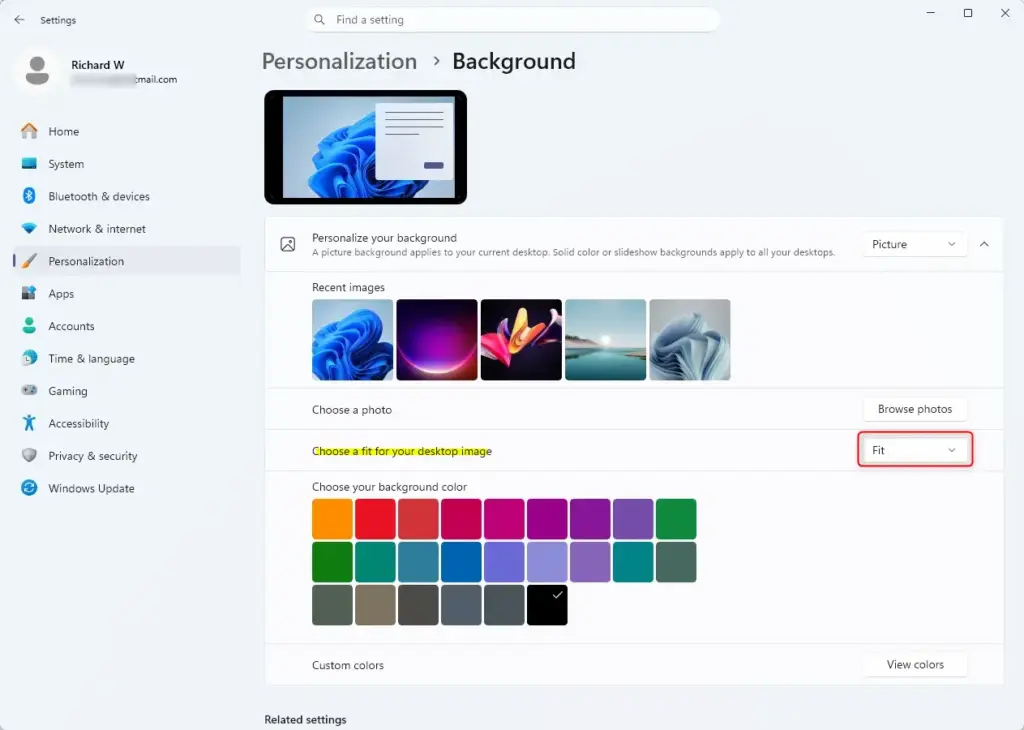
The ‘Fit’ option for your Windows 11 desktop background shows your entire picture while keeping its original shape and aspect ratio. This prevents your image from looking stretched or squished, ensuring you see every part of your wallpaper exactly as it was intended, making ‘Fit’ the best choice for image integrity.
The desktop background image feature changes the displayed image so the entire image is visible on the computer screen. This background image feature maintains the original shape of the picture, also known as its aspect ratio.
Displaying a desktop background image on a Windows 11 PC helps users avoid losing important details near the edges of their pictures. This method ensures that every part of a graphic, especially text, remains visible to the user.
Stretch: Making it Cover, Whatever the Cost
The ‘Stretch’ setting for your Windows 11 desktop background forces your image to fill the entire screen by making it wider and taller. While this covers all available space, be aware that it can distort how the picture looks. Choose ‘Stretch’ if filling the screen is your top priority, regardless of potential image distortion.
The image stretching process makes your picture wider and taller. This stretching action ensures the entire computer screen displays the image without any empty space.
The potential downside: If your image’s original shape doesn’t match your screen’s shape, it can look distorted. Subjects in the image might appear too tall and thin, or other elements could look squashed. It ignores the original shape to fill the screen.

Tile: Repeating Patterns for Effect
The ‘Tile’ option in Windows 11 repeats your chosen desktop background image across your entire screen to create a patterned effect. This setting duplicates your picture over and over until the whole desktop is covered, and it’s especially useful for small images, textures, or patterns you want to see repeated.
What it does: It takes your image and repeats it everywhere on your desktop.
Best for: This works well for small icons, textures, or patterns. If you have a cool little graphic, tiling can make it a unique background.
Center: The Classic Portrait Approach
The ‘Center’ setting for your Windows 11 desktop background places your image right in the middle of your screen without changing its size or distorting it. This means the picture stays exactly as it is, with empty space or borders appearing around its edges, offering a simple way to display an image without alteration.
The desktop background image setting centers your chosen picture on your screen. This setting keeps the image at its original size, avoiding any stretching or shrinking.
A centered Windows 11 desktop background image displays without stretching. If an image file is smaller than the computer screen, the Windows 11 operating system adds a border, often black, around the image. This border prevents distortion, allowing the user to see the image exactly as chosen.
Desktop background images for Windows 11 display a single, smaller photo or digital art piece as the main focus. This image appears without distortion or cropping, giving the desktop a clean, gallery-like look. The Windows 11 background feature allows users to personalize their computer screen with a chosen visual.
Span: For the Multi-Monitor Masters
The ‘Span’ option in Windows 11 is designed for computers with multiple monitors, taking one desktop background image and stretching it across all your connected screens. This makes your monitors look like one giant display, creating a continuous, single image across your entire multi-monitor setup for a unified look.
The desktop background feature takes one image and spreads that image across all connected monitors, treating them as a single large screen.
Ideal scenario: This is great for very wide wallpapers or panoramic images made to be seen across multiple displays. It creates a smooth, immersive experience.
Important Note: The ‘Span’ option is only for people with multiple physical monitors connected to their PC. You won’t see this option if you only use one display.
Putting It All Together: Choosing Your Fit
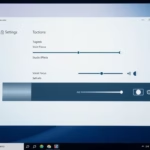
You can easily change how your Windows 11 desktop background image fits your screen by going to your Settings. The quickest way is to right-click on an empty spot on your desktop and select ‘Personalize.’ From there, click on ‘Background’ in the Settings window that appears to find and select all the different fit options available.
- Head to Personalization: The easiest way is to right-click on an empty part of your desktop and choose “Personalize.”
- Navigate to Background: In the Settings window that opens, click on “Background” on the left side.
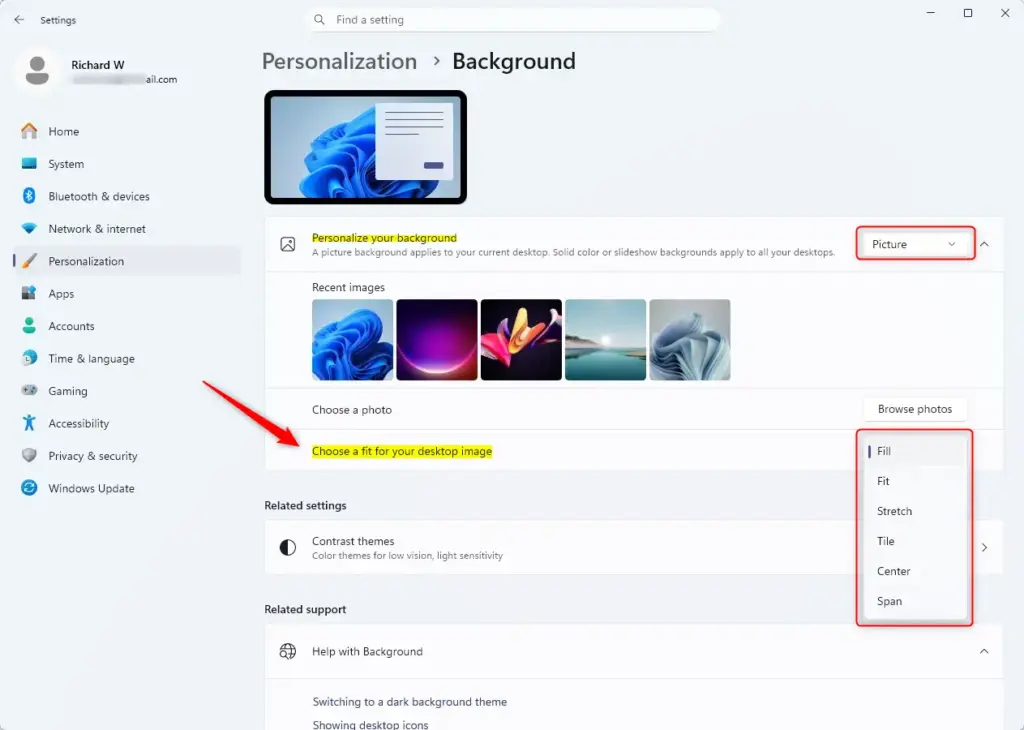
- Select Your Picture or Slideshow: If you’ve picked “Picture” or “Slideshow” as your background type, you’ll see a dropdown menu that says “Choose a fit.”
- Experiment! Click that dropdown menu and try “Fill,” “Fit,” “Stretch,” “Tile,” “Center,” and “Span” (if you have multiple monitors). You’ll see a preview of how each one looks with your chosen image.
Reference:
Summary
Windows 11 provides multiple background fit options: ‘Fill’ covers the screen, ‘Fit’ shows the whole image, ‘Stretch’ distorts to fill, ‘Tile’ repeats, ‘Center’ places it in the middle, and ‘Span’ works across multiple monitors.
Was this guide helpful?

About the Author
Richard
Tech Writer, IT Professional
Richard, a writer for Geek Rewind, is a tech enthusiast who loves breaking down complex IT topics into simple, easy-to-understand ideas. With years of hands-on experience in system administration and enterprise IT operations, he’s developed a knack for offering practical tips and solutions. Richard aims to make technology more accessible and actionable. He's deeply committed to the Geek Rewind community, always ready to answer questions and engage in discussions.
No comments yet — be the first to share your thoughts!