How to Record Game Clips in Windows 11

- 15 steps
- Needs administrator rights
Xbox Game Bar in Windows 11 records game clips with one keyboard shortcut, Win+Alt+R. It can also run in the background so you save a moment after it happens. Game Bar is built into Windows 11 Home and Pro, so you do not need to install anything.
Below, you set up background recording under Settings Gaming Captures and learn where your clips are saved. None of the steps need administrator rights.
Press Win+Alt+R to start and stop a game clip with Xbox Game Bar, which is built into Windows 11 and needs no install. For the last few moments after something happens, turn on background recording under Settings Gaming Captures and press Win+Alt+G. Clips save as MP4 files to Videos\Captures in your user profile.
What Game Bar records and what it does not
Clips save as MP4 video files. They go to Videos\Captures in your user profile. The full path is C:\Users\USERNAME\Videos\Captures, where USERNAME is your Windows account name.
Background recording (a mode where Windows keeps a rolling buffer of your gameplay) lets you save the last few moments after something good happens. Without it, Game Bar records only after you press start.
How to record game clips in 🪟 Windows 11
These steps turn on Game Bar, set up background recording, and record your first clip. The full process, from settings to saved file, is in the numbered list below so you can follow it in order.
- Open Settings. Press Win+I, or right-click Start and select Settings.
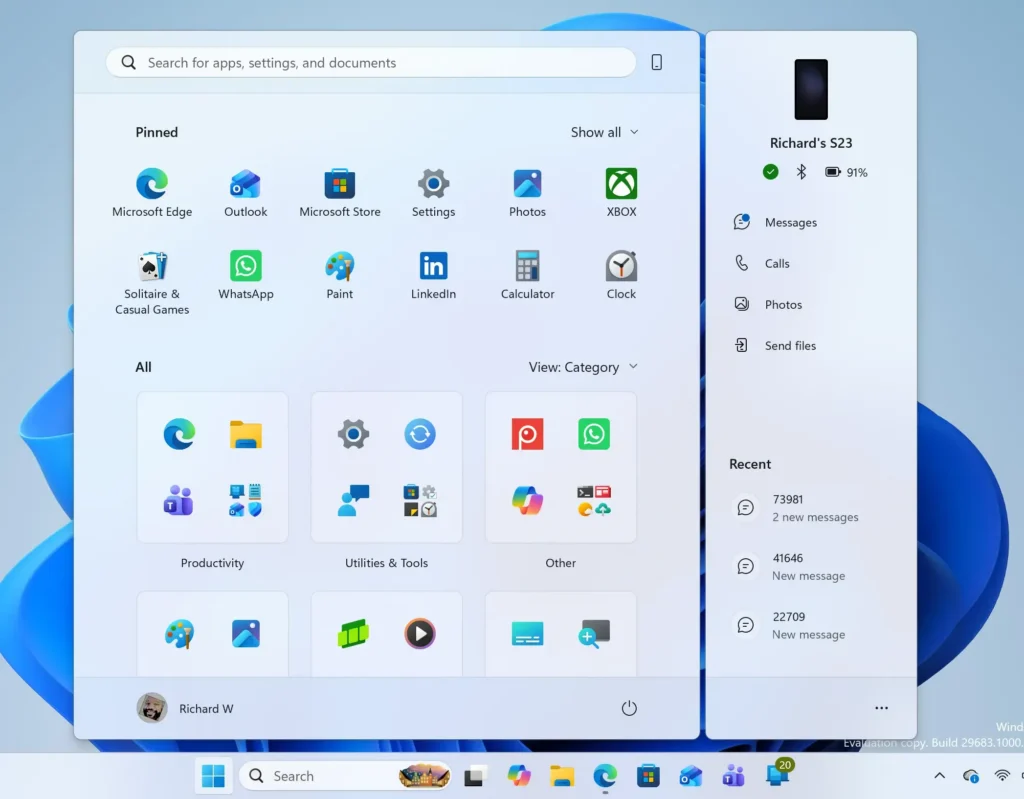
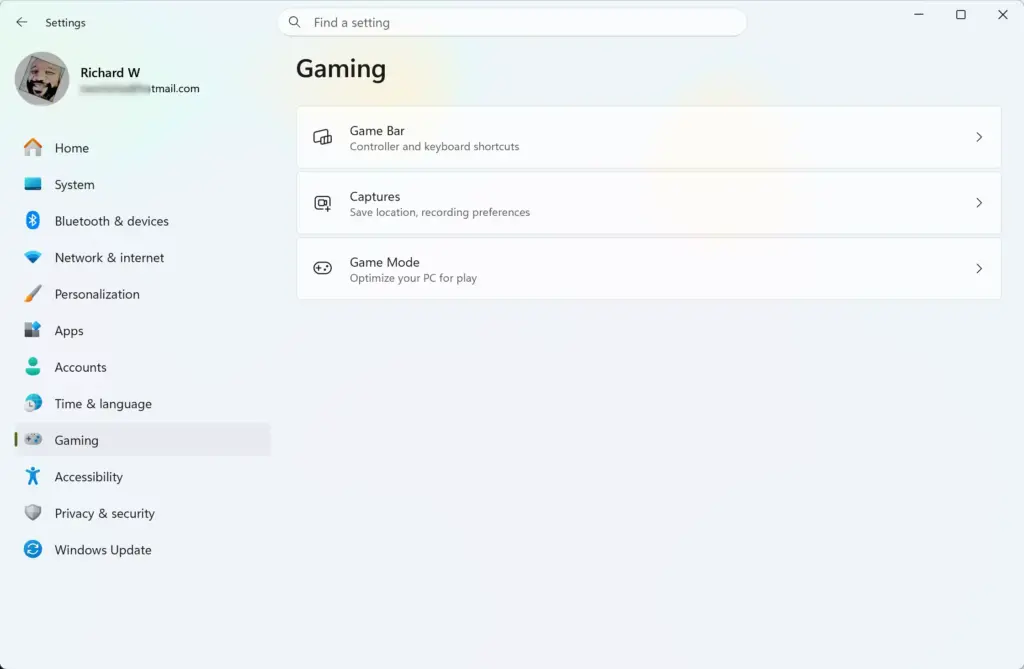
Windows 11 Start menu search panel for opening OpenSSH Client settings - Select Gaming. It is in the left-hand list. The page shows the Game Bar, Captures and Game Mode options.
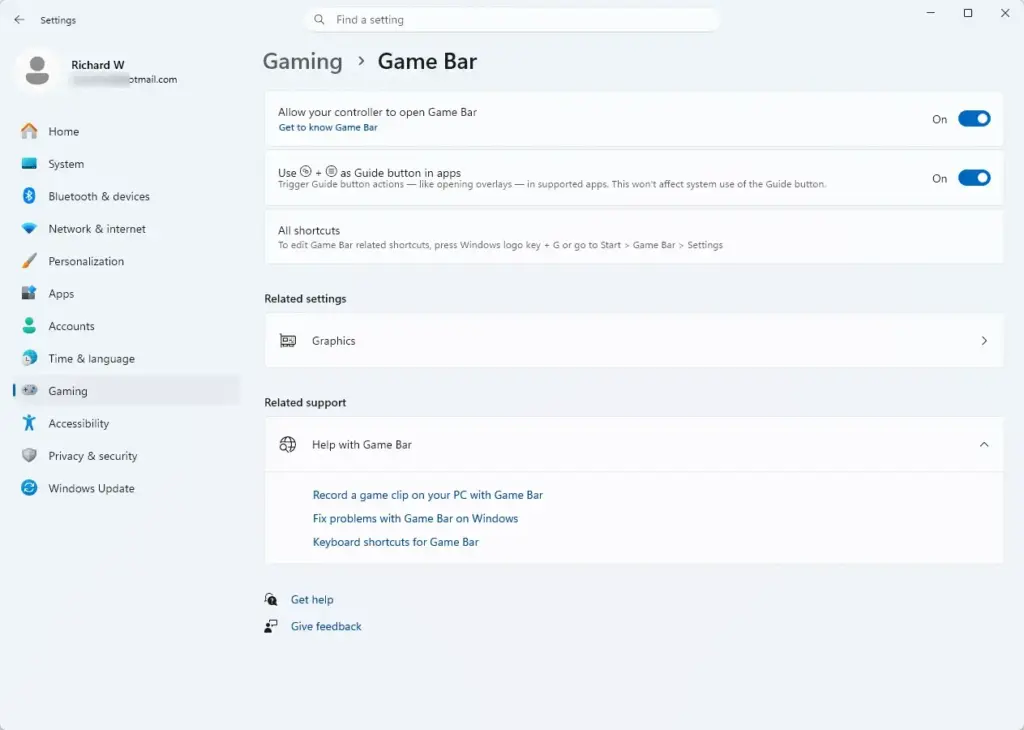
Settings › Gaming - Select Game Bar. Make sure the switch that lets Game Bar open is turned on. The wording of this switch differs between Windows 11 builds. If it is off, the Win+G shortcut does nothing.
Settings › Gaming › Game Bar - Go back and select Captures. This page holds the recording settings. It also shows the capture location and an Open folder button.
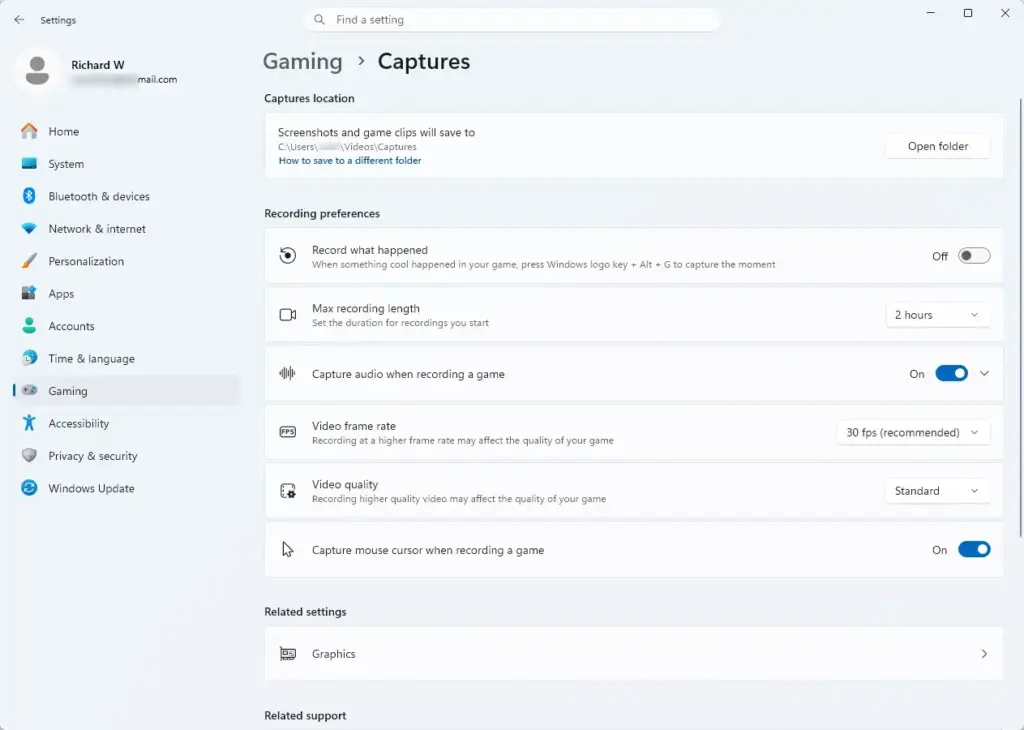
Settings › Gaming › Captures - Turn on background recording. Look for the Record what happened switch. Labels vary slightly between builds, so look for the option that records in the background while you play. Skip this step if you only want to start and stop clips by hand.
- Choose your video settings. Set Video frame rate and Video quality if the page offers them. Higher values give smoother video and larger files, and they need more from your graphics card.
- Turn on audio recording. Find the option for recording audio when you record a game. Leave it on if you want game sound in the clip.
- Start your game. Wait until the game window is in focus. Game Bar records the window that is active when you press the shortcut.
- Press Win+G. The Game Bar overlay opens on top of the game, with widgets such as Capture, Audio and Performance. If a prompt asks whether this is a game, select Yes, this is a game.
- Select Start recording. It is the circle button in the Capture widget. Alternatively, press Win+Alt+R without opening the overlay. A small capture status bar with a timer appears.
- Play the part you want to keep. The recording runs while the game stays in focus. The status bar shows the elapsed time.
- Press Win+Alt+G to save a moment you just played. This works only if you turned on background recording in step 5. Windows saves the recent footage as a clip and shows a notification.
- Press Win+Alt+R to stop recording. You can also select the stop button in the capture status bar. A notification confirms that the game clip was recorded.
- Select the notification to open the clip. To find it later, press Win+G and select See my captures in the Capture widget. The Gallery view lists your clips and screenshots.
- Open the saved file. To use the clip in another app, go to Settings Gaming Captures and select Open folder. The MP4 files are in that folder.
If you cannot find a setting named in a step, your Windows 11 build may place it in a slightly different spot. Game Bar also has its own Settings window (the gear icon in the overlay). Its Capturing section covers many of the same options as Settings Gaming Captures.
Set up background recording
Background recording changes how you play. Instead of deciding to record before a match, you save a clip after the highlight. This works well for unexpected moments such as a lucky shot or a bug you want to show.
Turn it on under Settings Gaming Captures. After that, Win+Alt+G saves the most recent stretch of gameplay. The length depends on the “record the last” setting on that page. Check it before you rely on it, because a clip can only be as long as the buffer you chose.
Background recording has a cost. Windows keeps converting (encoding) the video into a file while you play, so it uses some graphics card power and disk space. On a laptop it also uses more battery. If the game gets choppy (the frame rate drops) or the fan runs hard, turn the switch off and record manually instead.
To undo it, return to Settings Gaming Captures and turn the background recording switch off. The change applies right away. You do not need to restart Windows.
Control audio in your clips
Game Bar can capture game sound, and it can also add your microphone. Open the Audio widget in the overlay. It shows volume levels and the app sources, so you can check what is being recorded. The Capture widget has a microphone button you can toggle while you record.
If your microphone does not register, Windows may be blocking apps from using it. Check Settings Privacy & security Microphone and confirm that microphone access is on. Then open Game Bar again and test the button.
If your clip has no sound at all, check the audio option in Settings Gaming Captures. Also confirm the game itself is not muted. Check the volume mixer (the list of volume controls for each app).
Change where clips are saved
Game Bar saves to the Videos\Captures folder in your user profile. The Captures settings page shows this location and lets you open it, but the Settings page does not move the folder for you in every build.
If Game Bar does not record
Most problems come from a switched-off setting, a conflicting shortcut or a window Game Bar cannot capture. Work through these in order.
- Nothing happens when you press Win+G. Open Settings Gaming Game Bar and confirm the switch for opening Game Bar is on. If it is on and the shortcut still fails, another app may be using the same keys. Close overlay tools such as other screen recorders and try again.
- A message says gaming features are not available for the desktop or File Explorer. Game Bar cannot record those windows. Click into a game or another app window, then press the shortcut again. To record the desktop or several windows, use the Snipping Tool method in How to Record Your Screen with Snipping Tool in Windows 11.
- A prompt asks whether the app is a game. Select Yes, this is a game. Game Bar then treats the window as a game and enables recording for it.
- Win+Alt+G does nothing. Background recording is probably off. Turn it on under Settings Gaming Captures, and then play for a while before you try to save a clip.
- The overlay opens, but recording will not start. Windows may be blocking apps from capturing the screen. Review the privacy setting in How to Enable or Disable Let Apps Take Screenshots and Record Screen in Windows 11.
- Game Bar will not open at all, or it behaves oddly. The app may be damaged. Follow How to Uninstall and Reinstall Xbox Game Bar on Windows 11 to reset it.
If you are unsure how to launch the overlay, How to Access Xbox Game Bar in Windows 11 covers every way to open it, including the controller button.
Check performance before you play
Recording adds work for your PC. If a game stutters, lower Video frame rate or Video quality in Settings Gaming Captures. Turning off background recording also helps, because it removes the constant encoding.
Disk space matters too. High-quality clips grow quickly, so check free space on the drive that holds your Videos folder. Delete old captures from the Gallery view or from the Captures folder when you no longer need them.
Game Bar has a Performance widget that shows how much processor (CPU), graphics (GPU) and memory (RAM) it uses while you play. Open it with Win+G to see whether recording is the cause of a slowdown.
What to do next
To stop background recording later, turn off the switch in Settings Gaming Captures. A Windows feature update or a Game Bar reinstall can reset some capture settings, so recheck that page if clips stop saving. For recording something that is not a game, such as several windows or the whole desktop, the next step is recording with Snipping Tool.
Frequently asked questions
How to add multiple monitors to your 🪟 Windows 11 PC site:Microsoft.com?
Open Settings, go to System, then Display. Under Multiple displays, choose Extend these displays to use each monitor as a separate workspace. Plug in the second monitor first, then click Detect if Windows does not show it. Press Win+P for a quick switch between display modes.
What is com surrogate in 🪟 Windows 11?
COM Surrogate is a background process, usually listed as dllhost.exe in Task Manager. It runs small helper components for other apps, such as creating file thumbnails in File Explorer. It is a normal part of Windows, so leave it running. If one copy uses a lot of CPU or memory, end that task, and Windows restarts it when needed.
How to create users in 🪟 Windows 11 site Microsoft.com?
Open Settings, select Accounts, then choose Other users. Click Add account, then select Add a user without a Microsoft account. Enter a user name and password, then click Next. You must be signed in as an administrator to do this. The new user can then sign in from the Windows sign-in screen.
How to open game bar 🪟 Windows 11?
Press Win+G while a game or app is open to open Game Bar. If nothing appears, Game Bar may be turned off. Go to Settings, then Gaming, then Xbox Game Bar, and turn it on. The overlay shows widgets such as Capture and Audio.
How to record a game on 🪟 Windows 11?
Open the game, then press Win+Alt+R to start recording. Press the same keys again to stop. Clips save as MP4 files in the Captures folder inside Videos, in your user profile. Game Bar records one app window at a time, so the game must be the active window.
How to record with Windows game bar?
Open Game Bar with Win+G, then select the Capture widget. Click Start recording, or press Win+Alt+R to skip the menu. Click the same button to stop. Clips save to the Captures folder inside Videos, in your user profile.
Still have a question?
Answered by AI from this guide. Good questions may be added to this page — please don't include personal details.
Did this guide fix your problem?

About the Author
Richard
Tech Writer, IT Professional
Richard is a writer at Geek Rewind who turns complex IT tasks into clear, step-by-step guides. He draws on years of hands-on experience in system administration and enterprise IT operations, focusing on Windows, Linux and WordPress: the problems people actually run into, and the fixes that work. His server and WordPress guides come from systems he runs himself. Richard builds and maintains the platform behind Geek Rewind, from its Ubuntu servers and Nginx configuration to its custom WordPress plugins. Many new tutorials start with readers' questions, and he's always glad to answer them in the comments.
No comments yet — be the first to share your thoughts!