How to Enable Game Capture on Windows 11
Game capture on Windows 11 lets you record your PC gameplay easily using the Xbox Game Bar. This built-in app requires no extra software, making it simple to record your gaming sessions.
The Xbox Game Bar opens by pressing Windows Key + G. It’s perfect for catching exciting moments and sharing them.
To use game capture effectively, make sure your Windows 11 is updated to the latest version.
Open Windows Settings, click Gaming, then Captures, and toggle “Record what happened” to On. This enables the Xbox Game Bar to automatically save gameplay highlights with a keyboard shortcut.
Why use this feature?
Gaming is better when you can share your best moments with friends. This tool acts like a replay button for your computer. It saves the last few seconds of action so you do not miss a thing. It is perfect for capturing high scores or funny glitches.
What happens when you are done?
Once you turn this on, you can save video clips at any time just by pressing a keyboard shortcut. Your computer will automatically store these clips as video files in your user folder. This makes them easy to find, edit, or share online.
How to enable game recording
To enable game recording on Windows 11, you first need to open the Settings app. From there, you’ll navigate to the Gaming section and then select Captures. This is where you’ll find the specific options to turn on game recording so you can start capturing your gameplay.
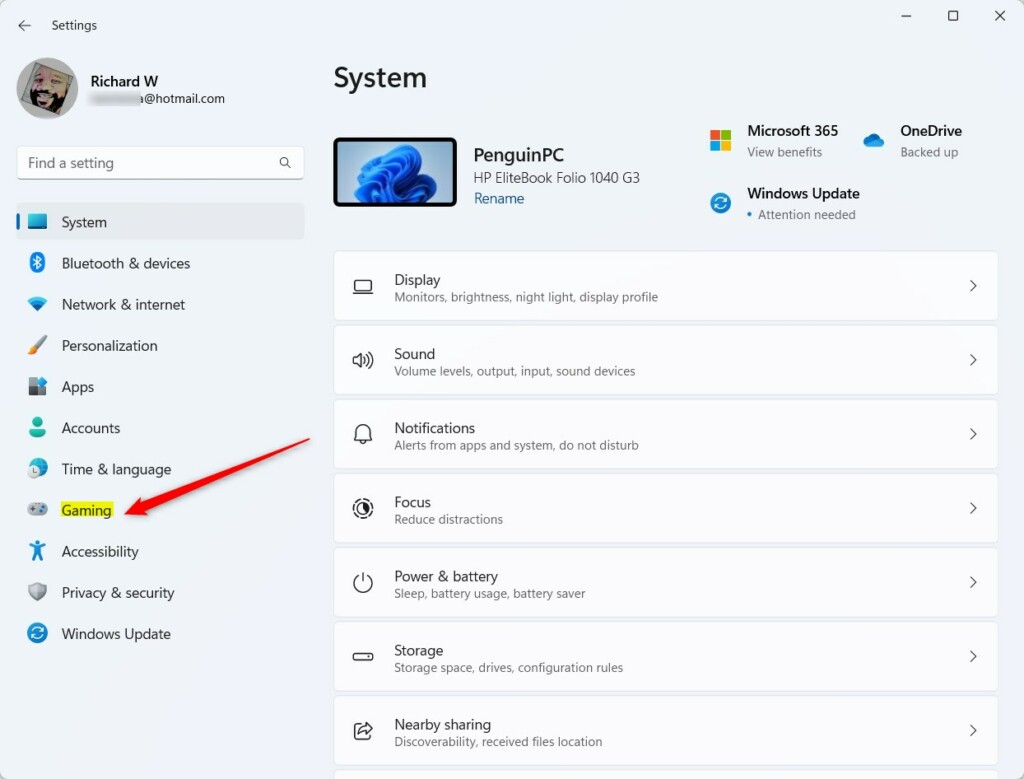
- Open the Windows Settings app. You can find this in your Start menu or by pressing the Windows key + I on your keyboard.
- Click the Gaming button located on the left sidebar.
Turn on or off gameplay video captures in Windows 11 - Select the Captures tile on the right side of the screen.
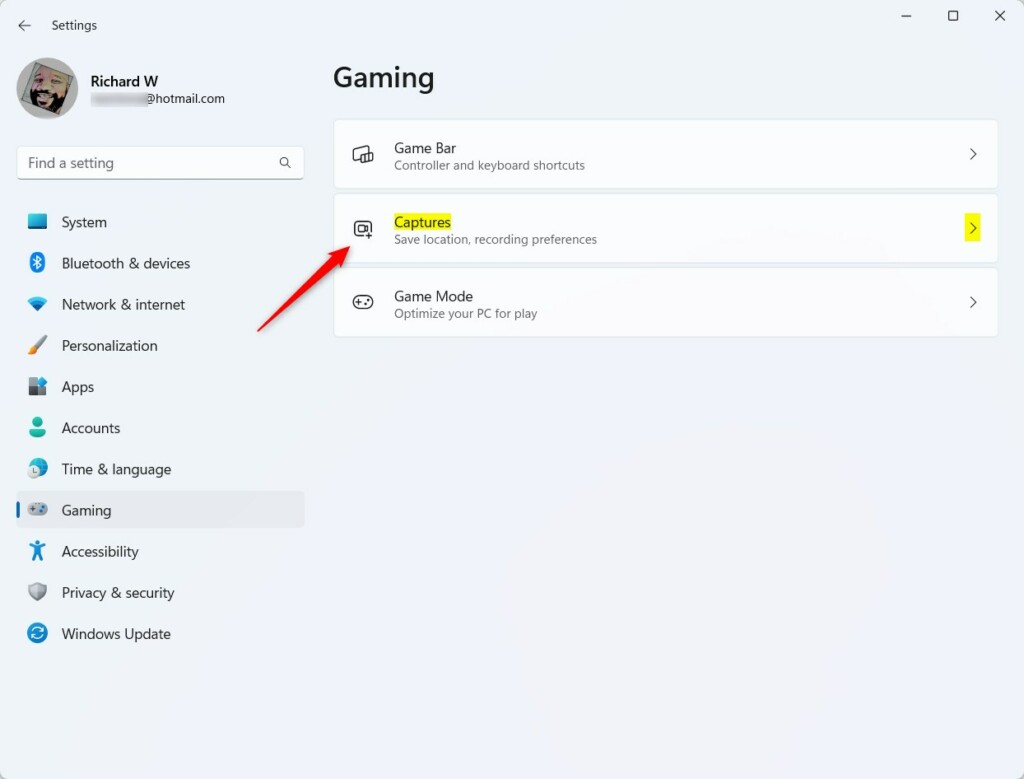
Turn on or off gameplay video captures in Windows 11 - Find the option labeled Record what happened.
- Toggle the switch to the On position.
Office or school computers often require administrator privileges to change certain system settings. Most users can change these settings without administrator rights.
Advanced Capture Settings
You can customize your game capture settings in Windows 11 by adjusting the frame rate, video quality, and audio recording options within the Captures menu.
Managing Your Storage
Accessibility and Screen Readers
Windows 11’s Xbox Game Bar works with screen readers like Narrator, allowing you to use keyboard shortcuts to navigate its features if you have trouble seeing the screen.
Summary
Windows 11 lets you easily record your games without extra apps by enabling the ‘Record what happened’ feature in settings, allowing you to capture highlights with a shortcut.
Why is my game capture button greyed out in 🪟 Windows 11?
Your game capture button might be greyed out in Windows 11 if your graphics card doesn’t support hardware encoding or if the Xbox Game Bar is disabled in privacy settings.
Where does 🪟 Windows 11 save recorded game clips?
Windows 11 saves recorded game clips by default in the Videos folder, specifically under 📁C:\Users\Username\Videos\Captures, but you can change this location in settings.
Does Xbox Game Bar record desktop audio?
Yes, the Xbox Game Bar records desktop audio, including game sounds and voice chat, through your default audio device, and you can adjust these settings in the Game Bar.
Was this guide helpful?

About the Author
Richard
Tech Writer, IT Professional
Richard, a writer for Geek Rewind, is a tech enthusiast who loves breaking down complex IT topics into simple, easy-to-understand ideas. With years of hands-on experience in system administration and enterprise IT operations, he’s developed a knack for offering practical tips and solutions. Richard aims to make technology more accessible and actionable. He's deeply committed to the Geek Rewind community, always ready to answer questions and engage in discussions.


[…] playing your favorite games on Windows, you can capture important and cool moments by pressing the Windows logo key + ALT + G keyboard […]