Set Max Recording Length in Windows 11 Gameplay Captures
Setting a maximum recording length for gameplay captures in Windows 11 controls how long your video clips can be.
Windows 11’s built-in Game Bar lets you record your gaming sessions, and you can set these recordings to stop automatically after a specific time.
You can choose to record for 30 minutes, 1 hour, 2 hours (which is the default), or 4 hours.
This feature helps manage your storage space by preventing very long recordings that can quickly fill up your hard drive.
Shorter recordings also make it easier to find, edit, and share your best gaming moments.
Open the Xbox Game Bar by pressing Windows key + G. Navigate to Settings, then Captures. Under “Record what happened,” set your desired maximum recording length.
Set Max recording length with gameplay captures
As mentioned above, when you capture your cool moments in your game, you can choose how long to record by setting a maximum recording length.
Here’s how to do that.
First, open the Windows Settings app.
You can do that by clicking on the Start menu and selecting Settings. Or press the keyboard shortcut (Windows key + I) to launch the Settings app.
When the Settings app opens, click the Gaming button on the left.

Select the Captures tile on the right to expand it.

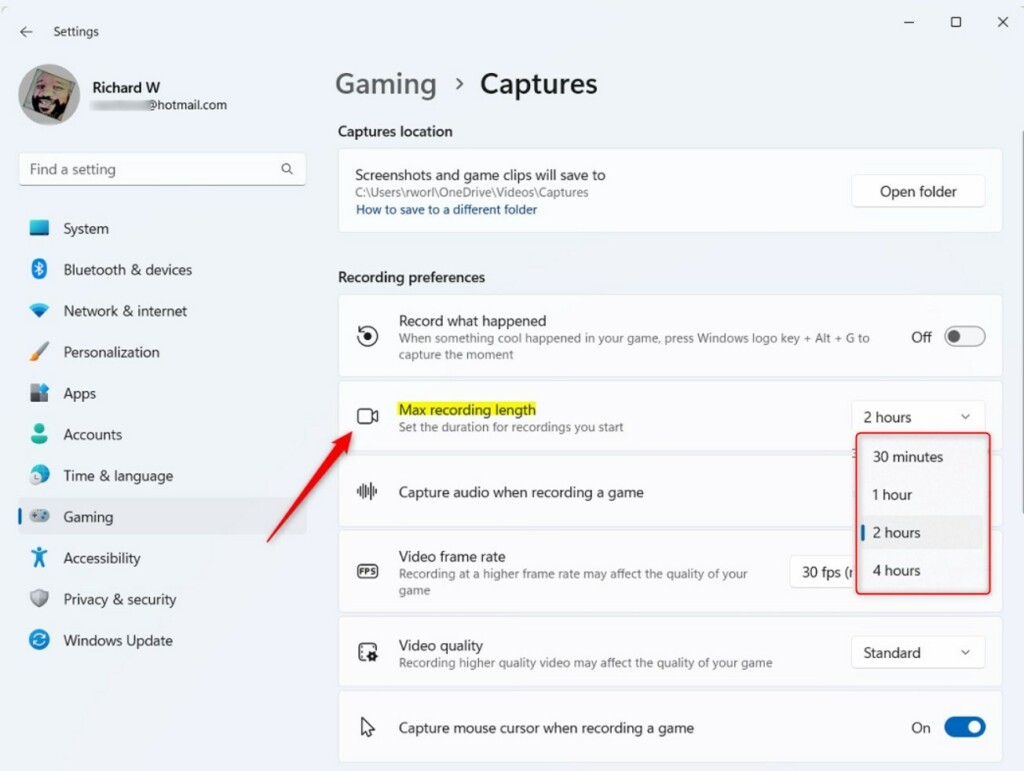
On the Gaming -> Captures setting pane, select the “Max recording length” tile.
Then, choose the maximum recording length from the options available:
- 30 minutes
- 1 hour
- 2 hours (default)
- 4 hours
As mentioned, the video will be saved in the Video folder of your home directory with the length selected above.
Close the Settings app when you are done.
That should do it!
Conclusion:
- Setting a maximum recording length with gameplay captures in Windows 11 can optimize storage space and help organize and edit video clips.
- By limiting the recording length, users can prevent their hard drive from getting filled with lengthy gameplay recordings, ensuring their device runs smoothly.
- Breaking up recordings into manageable chunks improves organization and facilitates editing and sharing specific gameplay moments.
- Following these steps, users can easily customize their maximum recording length and enhance their gaming experience on Windows 11.
Was this guide helpful?

About the Author
Richard
Tech Writer, IT Professional
Richard, a writer for Geek Rewind, is a tech enthusiast who loves breaking down complex IT topics into simple, easy-to-understand ideas. With years of hands-on experience in system administration and enterprise IT operations, he’s developed a knack for offering practical tips and solutions. Richard aims to make technology more accessible and actionable. He's deeply committed to the Geek Rewind community, always ready to answer questions and engage in discussions.

No comments yet — be the first to share your thoughts!