How to Change Screenshot Location in Windows 11
Changing your Windows 11 screenshot location lets you choose where your pictures save, instead of the usual Pictures folder. This is handy if you want to keep screenshots organized on a different drive, like an extra SSD or hard drive, or just have a dedicated folder for them.
This simple tweak means every screenshot you take, whether it’s using the Print Screen key or the Snipping Tool, will automatically go to the new folder you pick. This helps keep your main C: drive from filling up with image files and makes finding your screenshots much easier.
To change your default screenshot location, right-click the Screenshots folder in your Pictures library, select Properties, go to the Location tab, click Move, and choose your new folder. This moves existing files and sets the new default.
How to Change the Default Screenshots Folder
You can change the default screenshots folder location in Windows 11 by moving the existing folder to a new spot using File Explorer. This tells Windows to save all your new screenshots in the folder you choose.
- Open File Explorer and navigate to your Pictures library.
- Locate the Screenshots folder.
- Right-click the folder and select Properties.
- Click the Location tab.
- Click the Move button.
- Select your new desired folder or drive and click Select Folder.
- Click Apply and then OK.
- Windows will ask if you want to move all existing files to the new location. Click Yes to keep your files together.
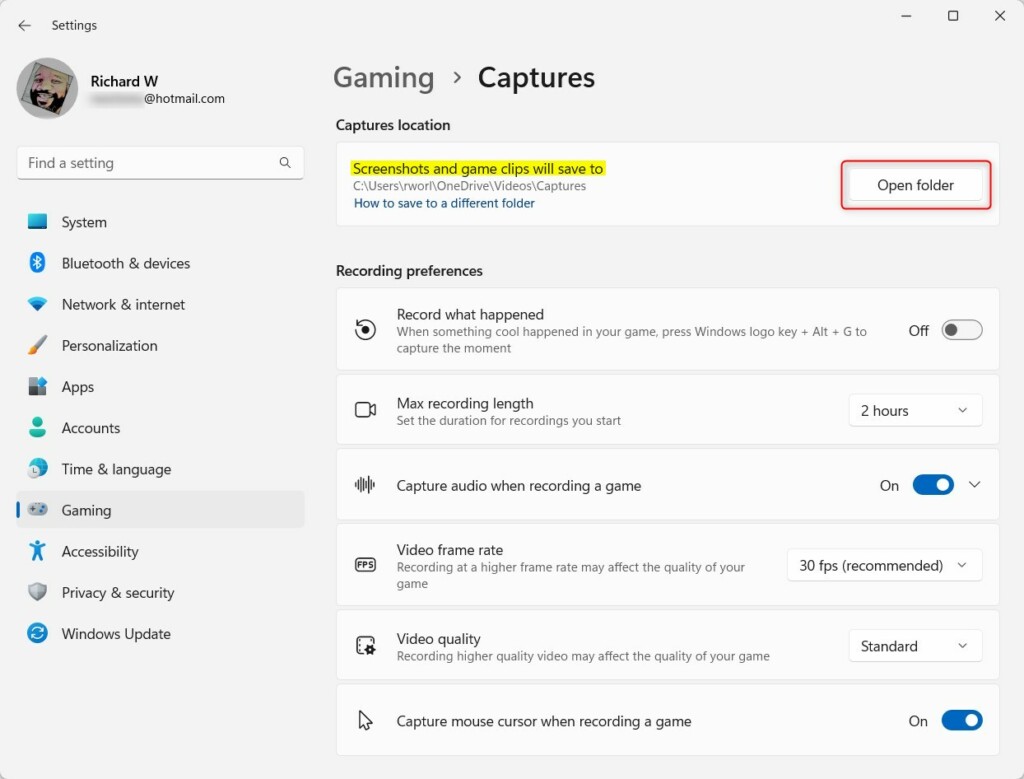
How to Change Your Game Captures Location
To change where Windows 11 saves game clips and screenshots taken with the Xbox Game Bar, you can easily adjust a setting within the Windows Settings app. This allows you to pick a new location for all your game captures.
- Press
Windows key + Ito open Settings. - Click Gaming on the left sidebar.
- Select Captures.

Turn on or off gameplay video captures in Windows 11 - Find the Captures location section.

Turn on or off gameplay video captures in Windows 11 - Click the Open folder button.
Change game capture location in Windows 11 - Select your preferred folder and click Select Folder.
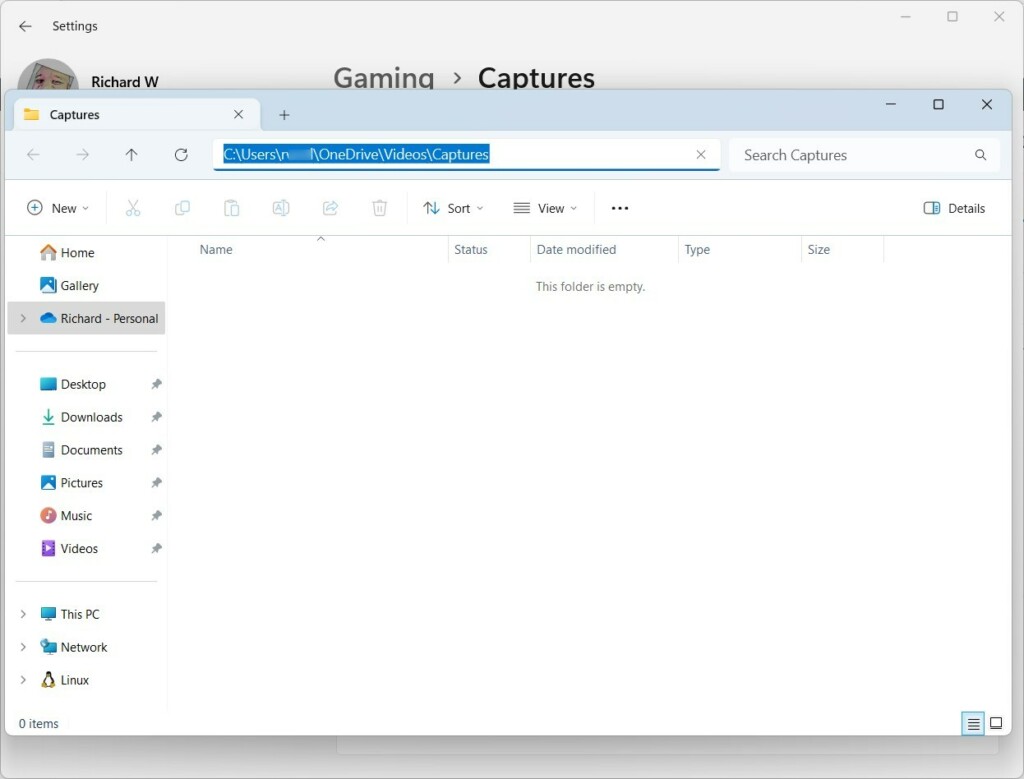
Change game capture location in Windows 11
Registry Editor Method (Advanced)
If you need to change your screenshot location in Windows 11 and other methods haven’t worked, you can use the Registry Editor. This is an advanced step, so proceed with caution when editing system settings.
- Press
Windows key + R, typeregedit, and press Enter. - Navigate to
HKEY_CURRENT_USER\Software\Microsoft\Windows\CurrentVersion\Explorer\User Shell Folders. - Look for the entry named
{B7BEDE81-DF94-4825-B262-63462985392D}. - Double-click it and enter your new file path.
- Restart your computer for changes to take effect.
Summary
Changing your screenshot location in Windows 11 is a great way to manage storage space and keep your files tidy, whether you’re moving the default folder or game captures.
Why are my screenshots saving to OneDrive instead of my PC?
Your screenshots are saving to OneDrive because your Pictures folder is set to sync automatically. OneDrive redirects your local folders to its cloud storage to ensure your files are backed up. You can disable this in the OneDrive settings menu under the Sync and backup tab.
Can I change the screenshot location for the Snipping Tool?
The Snipping Tool generally follows the default save path of your Pictures folder. By changing the location of the main Screenshots folder using the Properties method, the Snipping Tool will automatically start saving your new captures to that updated directory instead of the default system folder.
What happens to existing screenshots when I move the folder?
When you move the folder via the Properties tab, Windows will prompt you to move your existing files. If you select Yes, all your current screenshots will be transferred to the new location automatically. If you select No, your old files will remain in the original folder.
Was this guide helpful?

About the Author
Richard
Tech Writer, IT Professional
Richard, a writer for Geek Rewind, is a tech enthusiast who loves breaking down complex IT topics into simple, easy-to-understand ideas. With years of hands-on experience in system administration and enterprise IT operations, he’s developed a knack for offering practical tips and solutions. Richard aims to make technology more accessible and actionable. He's deeply committed to the Geek Rewind community, always ready to answer questions and engage in discussions.


[…] saved in the Video folder of your home directory. However, Windows lets you change that default location to another drive or folder with more free space and set the max recording length for […]
[…] saved in the Video folder of your home directory. However, Windows lets you change that default location to another drive or folder with more free space and set the max recording length for video […]
[…] you capture a game moment, Windows saves it in your Videos folder. You can also change this save location if you want to save your videos somewhere else, like a different […]
[…] recorded clips are saved in the Videos folder on your PC by default. You can also change where these clips are saved if you […]
[…] + ALT + G. These videos go straight to the Video folder folder in your user directory. You can also change that default location to a different folder or drive if you need more […]