How to Capture Game Audio in Windows 11
Capturing game audio in Windows 11 lets you include all the exciting sounds from your gameplay in your recordings.
Game audio is the sound coming from your game itself, like explosions, character voices, and background music.
Windows 11 makes it simple to manage this sound, ensuring your viewers hear everything that happens in your game.
This process is especially useful if you’re creating content for platforms like YouTube or Twitch, where clear audio makes a big difference.
Quick Tip: How to Record a Game Clip
You can record a game clip in Windows 11 using a simple keyboard shortcut. Pressing the Windows key, Alt, and G all at once saves the last few moments of your game as a video. This is a fast way to capture exciting game action without stopping your play. Your video clips are usually saved in your Videos folder.
Windows key + Alt + G
This saves the last few moments of your game as a video clip.
Why Capture Game Audio?
Capturing game audio, which includes music, sound effects, and character voices, makes game videos more exciting. Including this captured game audio in your game recordings makes those recordings more engaging and gives viewers a fuller experience of the game's atmosphere.
How to Turn Game Audio Capture On or Off in 🪟 Windows 11
You can control whether game audio is captured in Windows 11 through the Settings app. To find these options, first open Settings by clicking Start or pressing Windows key + I. Then, go to Gaming in the menu on the left, and select Captures on the right side. Here, you can easily turn game audio capture on or off.- Open Settings by clicking the Start button and selecting Settings, or press
Windows key + Ion your keyboard. - In the Settings window, click on Gaming from the left menu.

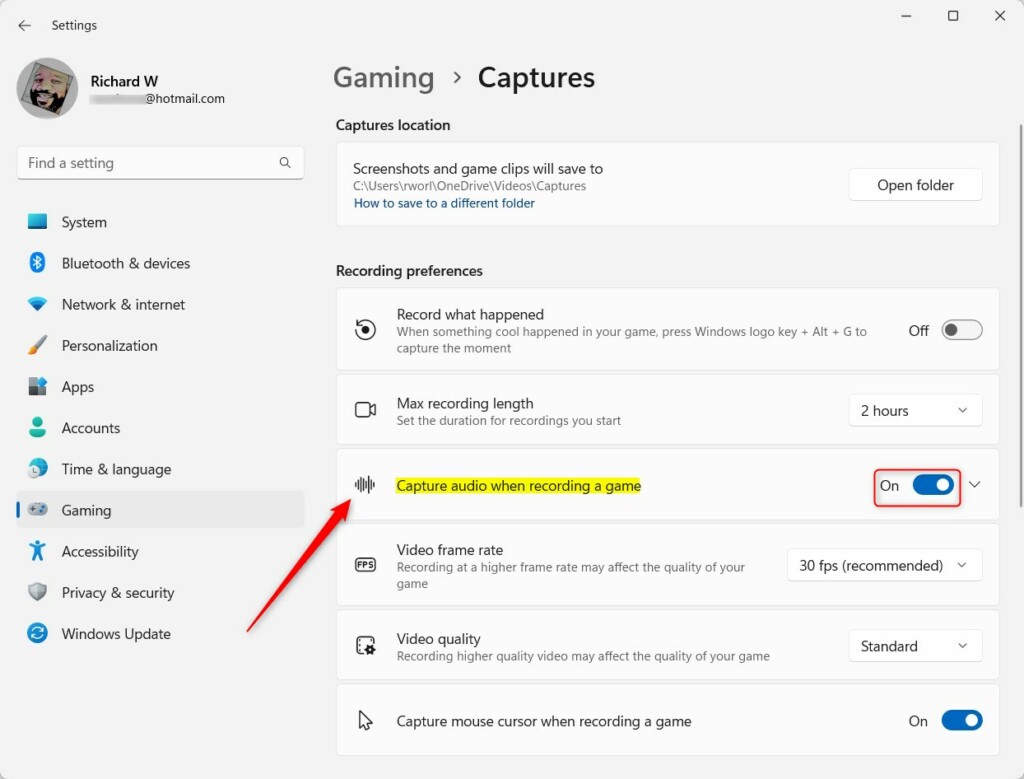
Windows 11 Settings app with Gaming button highlighted - Click on Captures on the right side.

Windows 11 Gaming Captures settings - Find the option called “Capture audio when recording a game”.
- Toggle the switch to On if you want to record game sounds, or to Off if you don’t.
Toggle capture audio on or off in Windows 11 - If you turn it on, click the arrow next to the toggle to see more settings like:
- Audio recording quality – how clear the sound will be
- Microphone volume – if you want to add your voice
- System volume – controls the game sounds volume
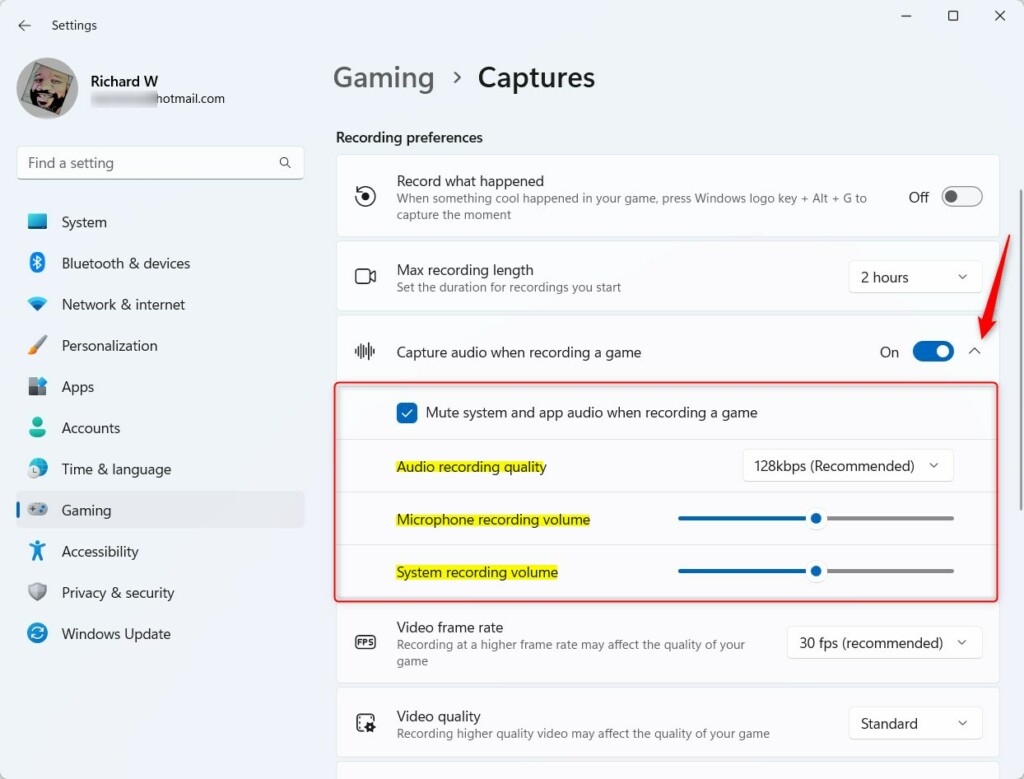
Additional audio capture settings in Windows 11 - When done, close the Settings app.
Summary
Turning on game audio capture in Windows 11 makes your recorded game clips much better by including background music, sound effects, and voices.
Does Windows game capture Record audio?
Recorded audio settings You can turn on the option to also record audio when capturing a game clip. You can choose whether you want to also record system and mic audio when recording a game clip.
Does the 🪟 Windows 11 Snipping Tool Record audio?
Many Windows users are familiar with the Snipping Tool, which captures snapshots of their screen in real-time. However, fewer users are aware that the Windows 11 Snipping Tool has evolved to include a screen recording feature with the capability to capture system audio.
Was this guide helpful?

About the Author
Richard
Tech Writer, IT Professional
Richard, a writer for Geek Rewind, is a tech enthusiast who loves breaking down complex IT topics into simple, easy-to-understand ideas. With years of hands-on experience in system administration and enterprise IT operations, he’s developed a knack for offering practical tips and solutions. Richard aims to make technology more accessible and actionable. He's deeply committed to the Geek Rewind community, always ready to answer questions and engage in discussions.


No comments yet — be the first to share your thoughts!