How to Add Languages to Live Captions in Windows 11
You add languages to Windows 11 Live Captions by downloading additional language packs through the Settings app.
Live Captions is a powerful built-in accessibility feature in Windows 11 that transforms any audio playing on your PC into real-time text. This helps you understand conversations and content, even when you can’t hear it clearly.
Starting with Windows 11, version 22H2, Live Captions is integrated directly into the operating system. It typically defaults to English, but you can easily expand its capabilities.
Adding new language packs unlocks the ability for Live Captions to transcribe a wider range of audio. This customization ensures you get the most out of the Live Captions accessibility tool for any audio or video content you consume.
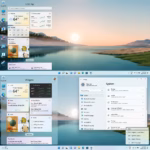
Open Live Captions, click Settings, then Caption language, and Add a language. In Language & region settings, add your desired language, ensuring Speech recognition is selected, then click Install.
Why add languages to Live Captions?
Adding more languages to Live Captions makes your computer more accessible for international content. This improves transcription accuracy by downloading specific language packs tailored to your needs, especially when you are not fluent in the language being spoken.
What happens when you are done?
Once you finish, your computer will be able to listen to audio in the new language. The text will appear on your screen in real-time. Your system will use the downloaded language pack to process the audio locally.
Hardware and Software Prerequisites
How to add a language
You can easily add more languages to Windows 11 Live Captions for different conversations or media. This feature helps you understand content in more than one language. You can select up to five languages at once for Live Captions.
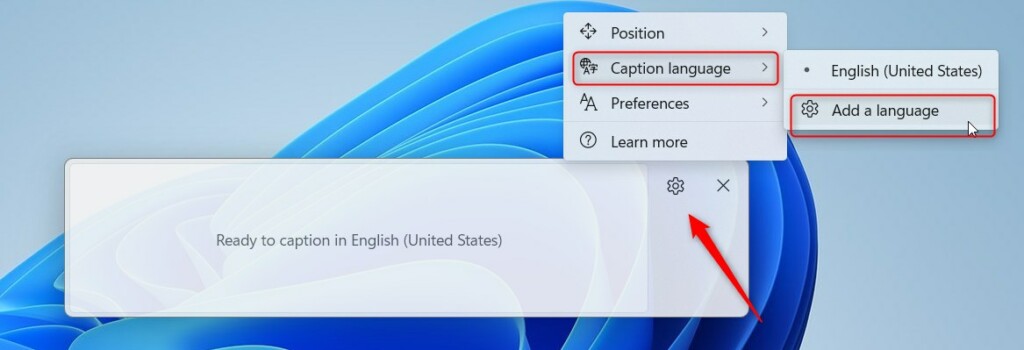
- Turn on Live Captions.
- Click the Settings button inside the Live Captions window.
- Select Caption language and then click Add a language.
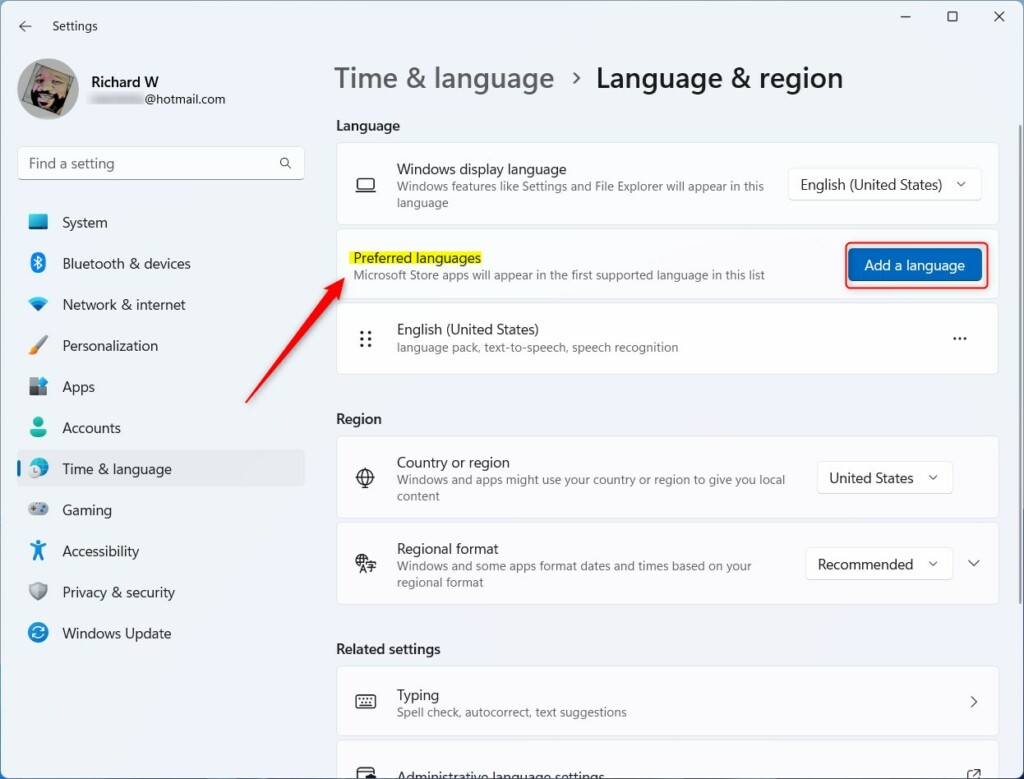
The Language & region settings window will open. Go to the Preferred languages section and select Add a language.
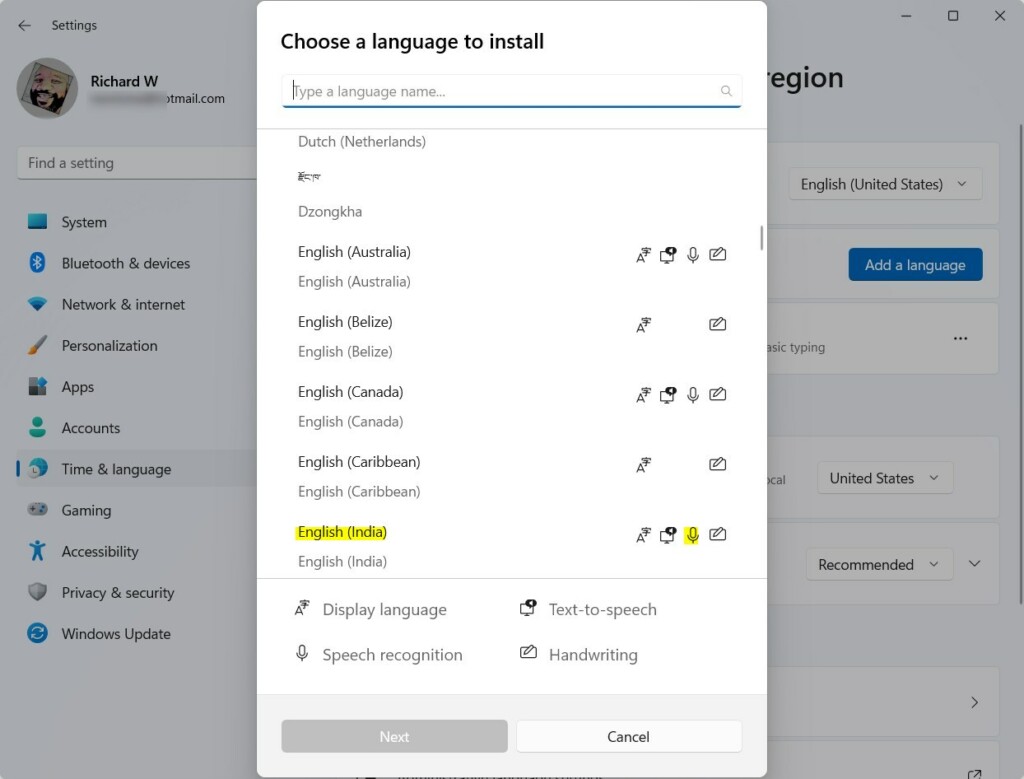
You can add a language to Windows Live Captions by searching for your desired language in the language settings. Ensure the chosen language supports speech recognition, as this speech recognition capability is necessary for Live Captions to function correctly. After confirming support, click the "Next" button to proceed with adding the language.
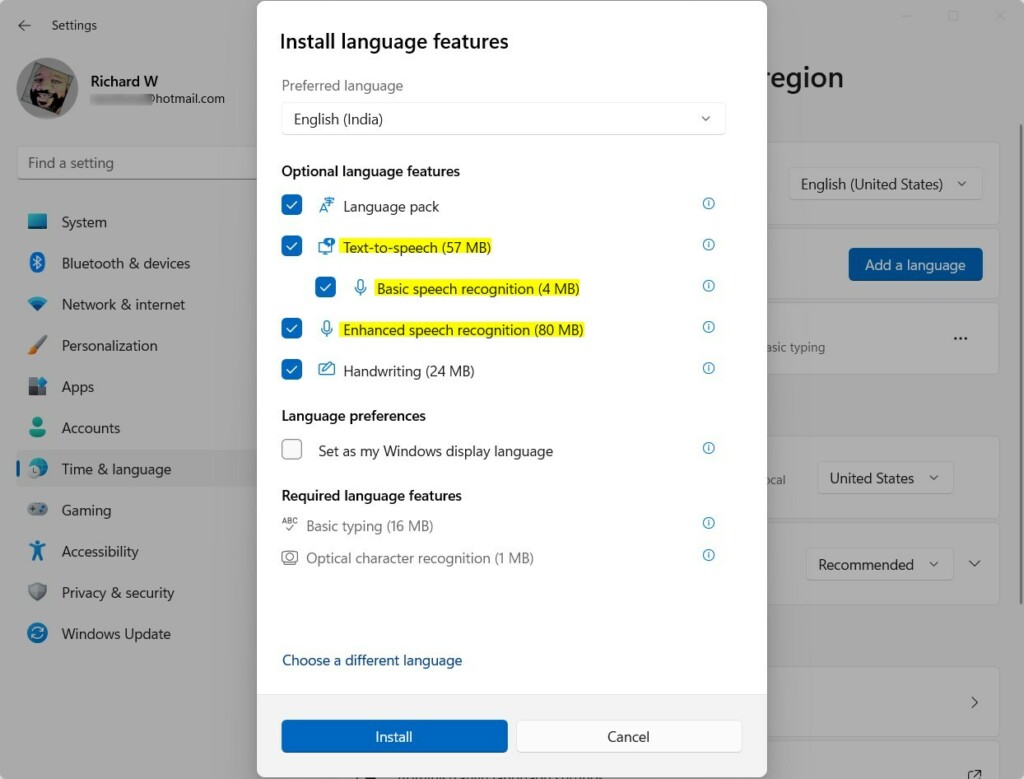
Wait for the download to finish. Once it is done, the new language will show up in your Live Captions menu.
Data Privacy and Processing
Windows 11 processes Live Captions locally on your device, meaning your audio data stays private and isn’t sent to the cloud for transcription.
Troubleshooting and Common Issues
If a language isn’t showing up for Live Captions, check your internet connection first, as language packs need to be downloaded, and ensure your Windows version supports it.
Summary
Adding languages to Live Captions makes your PC more versatile, helping you understand different audio and improving transcription accuracy by using the Language & region settings to install speech recognition.
Reference: Microsoft
Does live captioning work offline?
Yes, live captioning works offline once the language pack is downloaded. Because Windows 11 uses local processing for speech recognition, you do not need an active internet connection to generate captions for your audio or video files after the initial installation of the required language features.
Why is my language not appearing in the settings?
If a language is missing, it may not support speech recognition features yet. Check the language list in the Settings app. Ensure you have installed the ‘Enhanced speech recognition’ component. If it still does not appear, verify that your Windows 11 build is fully updated to the latest version.
Was this guide helpful?

About the Author
Richard
Tech Writer, IT Professional
Richard, a writer for Geek Rewind, is a tech enthusiast who loves breaking down complex IT topics into simple, easy-to-understand ideas. With years of hands-on experience in system administration and enterprise IT operations, he’s developed a knack for offering practical tips and solutions. Richard aims to make technology more accessible and actionable. He's deeply committed to the Geek Rewind community, always ready to answer questions and engage in discussions.


[…] settings one can configure with Live Captions are changing its on-screen positions and installing other languages to transcribe […]
[…] Want to add more languages to use with Live Captions? Check this guide: Add Other Languages for Live Captions. […]