How to Adjust Live Captions Position in Windows 11


Live Captions in Windows 11 turns spoken audio into on-screen text in real time. Press the Win+Ctrl+L keyboard shortcut to start it. It helps you follow dialogue in videos, meetings, and calls. It needs Windows 11 version 22H2 or later, and the first time you use it Windows may ask to download language support.
The caption window can sit on top of buttons or text you need. You can dock it to the top or bottom of the screen, or turn it into a floating window you drag wherever you like. Nothing is permanent, so you can change it again at any time.
Adjust Live Captions position by opening the Live Captions window with Win+Ctrl+L, clicking the gear icon, selecting Position, and choosing Top, Bottom, or Floating. Floating allows you to drag the window anywhere on the screen.
How to Change the Caption Bar Position
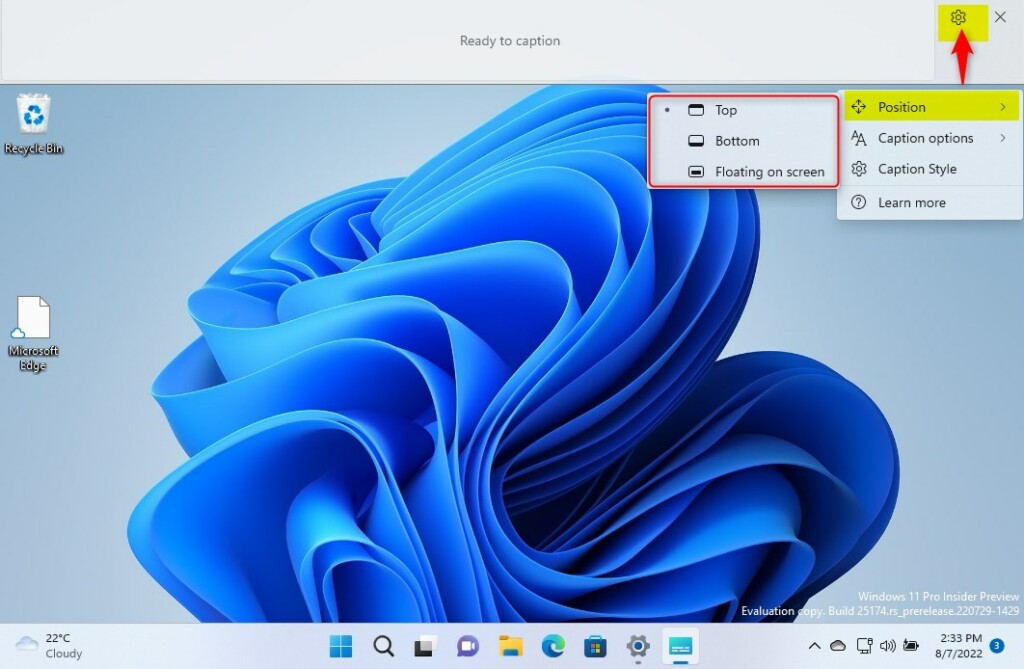
To move the caption bar, start Live Captions first. If the bar is not on screen, press Win+Ctrl+L and wait for it to appear. Then click the gear icon in the caption window to open its settings menu, select Position, and pick Top, Bottom, or Floating. The bar moves as soon as you click, with no restart and no Apply button.
The steps below show each stage on screen.
- Turn on Live Captions on your computer using Win+Ctrl+L.
- Look for the Settings icon (the small gear) on the caption bar.
- Click the gear icon.
- Select Position from the menu.
- Choose Top, Bottom, or Floating.
If you do not see the gear icon, the caption window may be too small or not in focus. Click the caption bar once and look again. If Live Captions is not installed or has not finished downloading its language files, the bar will not appear at all. Check that you are on Windows 11 22H2 or later and that you are connected to the internet for the first setup.
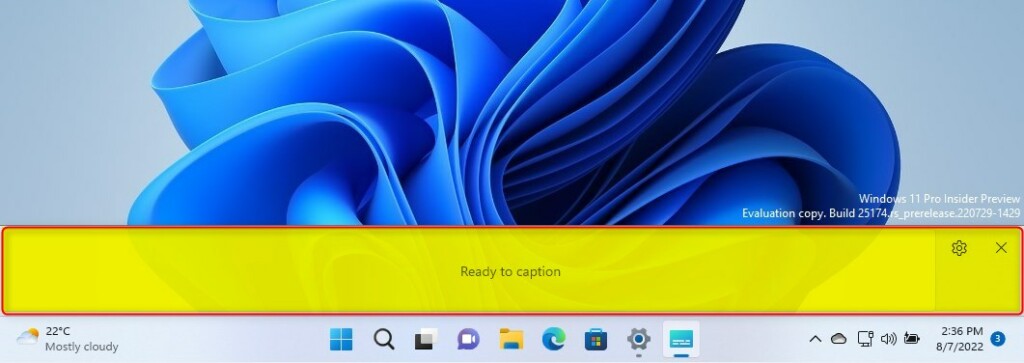
With Bottom selected, the Live Captions bar sits right above your taskbar. It keeps the captions visible without covering the main content of your screen. This is a good choice for video and for meetings where the speakers fill the middle of the window.
If the bar covers a chat box, a playback control, or subtitles baked into the video, switch to Top instead. The two docked positions work the same way, so you can try both and keep the one that gets in your way less.
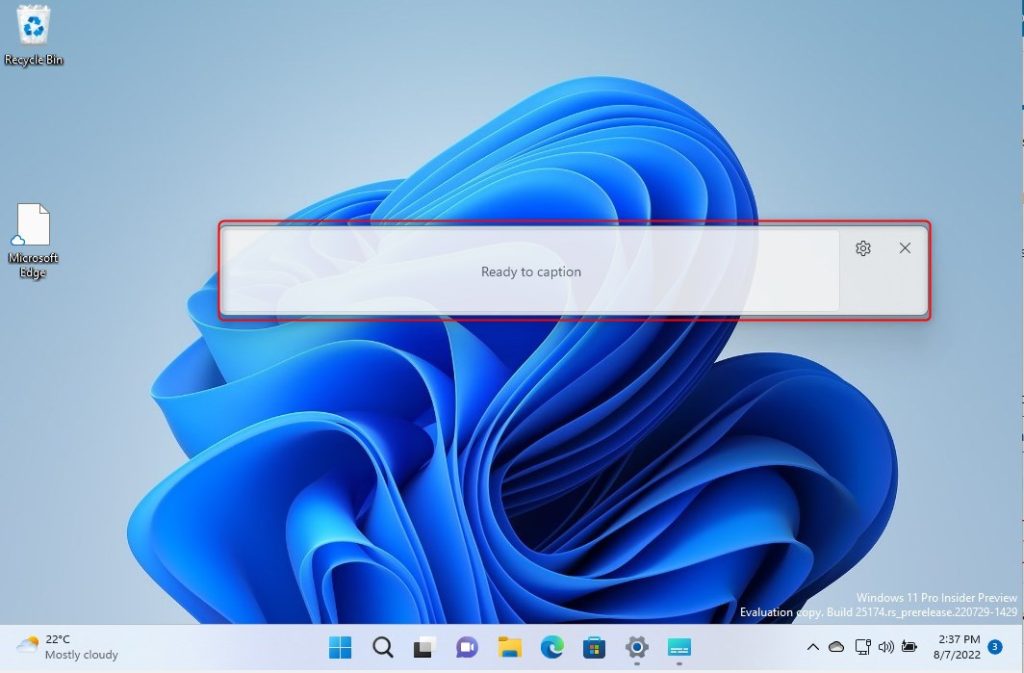
With Floating selected, the caption bar becomes a normal window. Click it and drag it to any spot on the screen. This works well on a large or multi-monitor setup, where you can park it next to the app you are watching instead of on top of it.
The bar keeps its place until you move it again. To go back to a docked bar, open the gear icon, select Position, and choose Top or Bottom.
Customizing Caption Style and Appearance
You can also change how the text looks. The path is Settings Accessibility Captions Here you can adjust the Caption style: font size, color, and background transparency. If the text is hard to read over a busy picture, make the background more opaque. Larger text and a strong contrast between text and background help most when the captions sit over moving video.
Check the result right away by looking at the live caption bar while audio is playing. If you do not like a style, go back to the same page and pick a different one.
Troubleshooting Live Captions
If Live Captions suddenly stops working on your Windows 11 PC, check that the feature has permission to use audio. Open Settings Privacy & security > Microphone and make sure microphone access is on. This matters most if you want captions for your own voice as well as the audio playing from your PC. Then press Win + Ctrl + L to close the captions and again to restart them.
Summary
Live Captions improves accessibility in Windows 11 by turning audio into text as it plays. Changing the position, font size, and background opacity lets you fit the tool to the way you work. More details are available in the official Microsoft accessibility resources.
How does live captions process and use my data?
Live captions in Windows 11 processes audio locally on your device. Voice and audio data never leave for the cloud or Microsoft servers. Privacy and security remain protected while providing accurate, real-time automatic transcription for media and microphone inputs.
Why doesn’t live captions remember my microphone setting preference?
Unsaved live captions microphone settings in Windows 11 usually point to privacy permissions that require review to guarantee app access.
Have a question about this guide?
Answered by AI from this guide. Good questions may be added to this page — please don't include personal details.
Did this guide fix your problem?

About the Author
Richard
Tech Writer, IT Professional
Richard is a writer at Geek Rewind who turns complex IT tasks into clear, step-by-step guides. He draws on years of hands-on experience in system administration and enterprise IT operations, focusing on Windows, Linux and WordPress: the problems people actually run into, and the fixes that work. His server and WordPress guides come from systems he runs himself. Richard builds and maintains the platform behind Geek Rewind, from its Ubuntu servers and Nginx configuration to its custom WordPress plugins. Many new tutorials start with readers' questions, and he's always glad to answer them in the comments.
[…] Live Captions, you can enable or disable it, move the Live Captions bar, enable Live Captions in different languages, switch languages, and […]
[…] can also customize Live Captions, including changing the on-screen positions and adding other languages to view […]
[…] can customize the caption size and style for Live Caption. Some apps and sites will also use this setting. Click the Caption preferences link in Chrome to […]