How to Enable Live Caption in Google Chrome


Enable Live Caption in Chrome by going to Settings, then Accessibility, and toggling the Live Caption switch on. This feature automatically generates captions for audio and video played in your browser. You can also manage language packs and translation options here.
Enable or disable Live Caption in Google Chrome
Live Caption in Google Chrome shows automatic subtitles for any video or audio playing in your browser. That includes sites and media that have no captions of their own. Everything happens in Chrome, so you can also use it with your speakers muted.
The short version: open Chrome, click the three vertical dots in the top right corner, select Settings, click Accessibility in the left menu, and switch the Live Caption toggle on or off. The steps below walk through each click and tell you what you should see.
- Open the Google Chrome browser. Make sure it is up to date, because Live Caption needs Chrome version 89 or later. Most installs update on their own.
- Click the Customize and Control button (the three vertical dots) in the top right corner. A drop-down menu opens.
- Select Settings. The Settings page opens in a new tab.

- Open Google Chrome.
- Click the Customize and Control button (the three vertical dots) in the top right corner. The Chrome menu opens, and Settings is near the bottom of it.
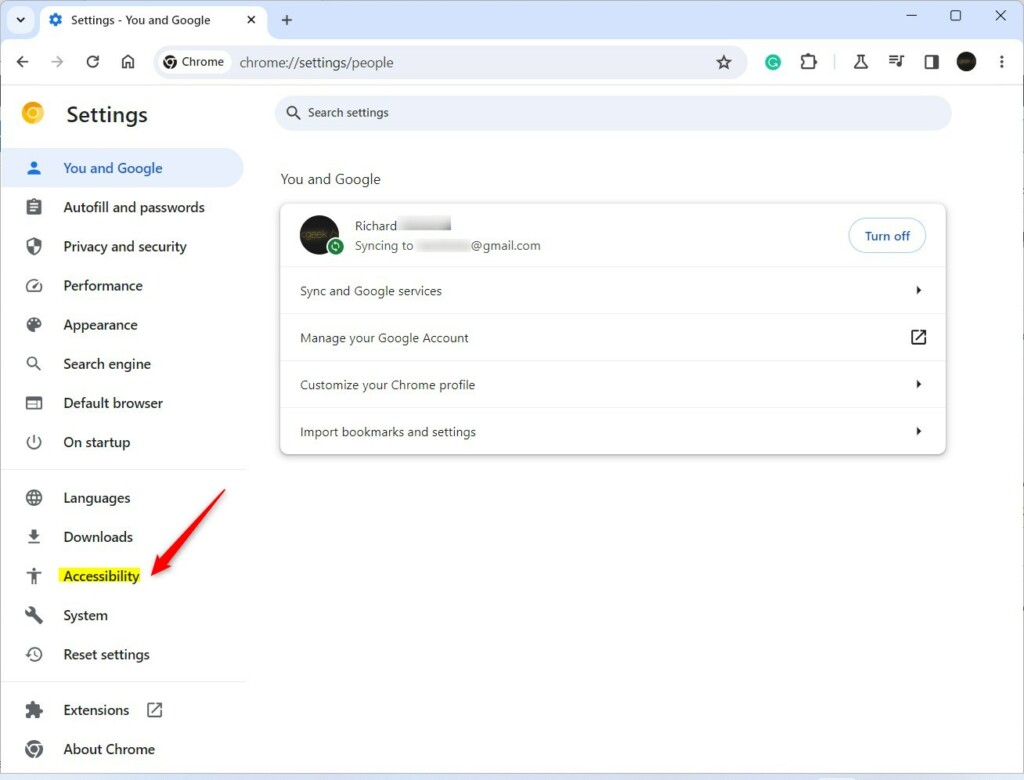
- In the left menu of the Settings page, click Accessibility. The accessibility options appear on the right.
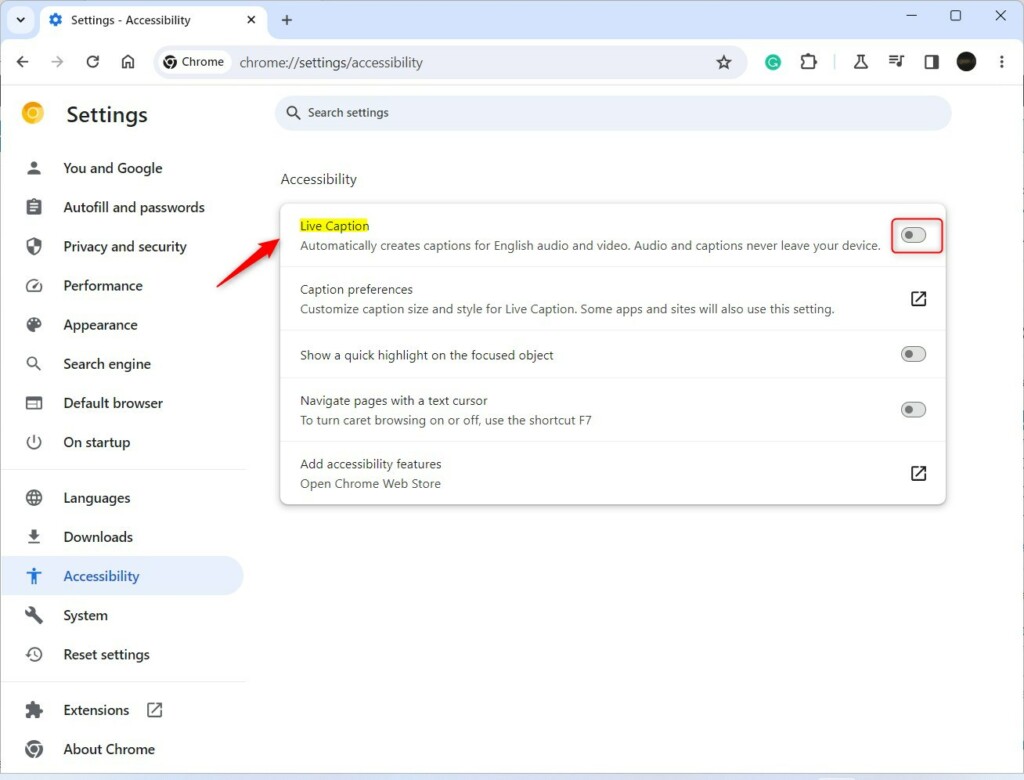
- On the right side, click the Live Caption tile. In some Chrome versions it shows as a row with a toggle instead.
You can also skip the menus. Type chrome://settings/accessibility into the address bar and press Enter to open this page directly.
- Toggle the Live Caption switch to On to turn the feature on, or to Off to turn it off.
- If you turned it on, wait a moment. The first time, Chrome downloads the speech recognition files it needs, so a short delay is normal. You need an internet connection for that download only.
The switch should now show as on. No restart is needed. To undo the change, come back to this page and switch it off.
Managing Languages and Translation
Live Caption in Google Chrome supports more than one language. It does this by downloading speech recognition packs directly to your computer, so recognition still runs on your device.
- Go to Settings Accessibility and open the Live Caption options.
- Look for the language setting and choose the language you want captions in. Chrome downloads the pack for it. Wait for the download to finish before you play media.
You can also use the Live Translate feature to convert English audio into text in another language as you watch. The list of available languages depends on your Chrome version, so if a language is missing, update Chrome and check again.
Live Translate translates English captions into other languages as they appear. To use it:
- Open the Live Caption settings in Settings Accessibility
- Pick your preferred language for the translation.
- Play a video or audio clip with English speech.
The caption text should now update in your chosen language while the media plays. If the option does not appear, your Chrome version may not include it yet.
With Live Caption on, media playing in Google Chrome now shows automatic captions without any extra setup. A small caption box appears over the page when speech is detected. Captions only cover audio that plays inside Chrome. Sound from other apps on your PC is not captioned.
Managing Live Caption takes a quick toggle in the settings menu whenever you need to turn it on or off. The feature helps everyone, not only people with hearing loss. It is handy in noisy rooms, in quiet offices, or when you just want to follow a video without sound.
To change how the captions look, such as text size, font or color, adjust the style settings in the same menu where you turn Live Caption on or off.
Have a question about this guide?
Answered by AI from this guide. Good questions may be added to this page — please don't include personal details.
Did this guide fix your problem?

About the Author
Richard
Tech Writer, IT Professional
Richard is a writer at Geek Rewind who turns complex IT tasks into clear, step-by-step guides. He draws on years of hands-on experience in system administration and enterprise IT operations, focusing on Windows, Linux and WordPress: the problems people actually run into, and the fixes that work. His server and WordPress guides come from systems he runs himself. Richard builds and maintains the platform behind Geek Rewind, from its Ubuntu servers and Nginx configuration to its custom WordPress plugins. Many new tutorials start with readers' questions, and he's always glad to answer them in the comments.
No comments yet — be the first to share your thoughts!