How to Add or Remove Language to Live Captions in Windows 11

Live Captions in Windows 11 lets you add or remove languages so you can understand audio in more than one language.
Live Captions turns spoken audio from your PC into text that appears on your screen right away. This helpful feature is built into Windows 11, starting with version 22H2.
By adding new languages, you can get captions for audio that isn’t in your main language. You can also remove language packs you no longer need to save space on your computer.
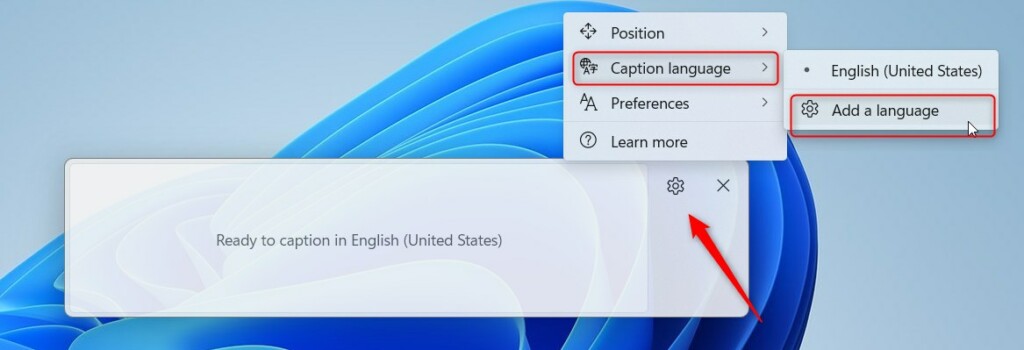
Open Live Captions settings by clicking the gear icon on the caption bar. Select “Caption language” and then “Add a language.” Search for your desired language and ensure “Speech recognition” is enabled before installing it.
What is Live Captions?
Windows 11 Live Captions is a helpful feature that shows you what’s being said on your computer as text on the screen. It works for any sound, like videos or calls, turning them into live captions. You can quickly turn this on by pressing the ⊞ Win+Ctrl+L keys together.
WINDOWS + CTRL + L on your keyboard. You can also go to the Accessibility settings in Quick Settings. Quick Settings is the menu you open by clicking the speaker, Wi-Fi, or battery icons at the bottom right of your screen. Learn more about turning it on and off here.Why Add More Languages to Live Captions?
- It helps people who don’t speak the language in the audio understand better.
- It supports people who are deaf or hard of hearing and speak different languages.
- It can make captions more accurate. Windows gets more language options to recognize what’s being said.
How to Add Other Languages to Live Captions
Adding more languages to Windows 11 Live Captions can make the feature much more useful if you listen to audio in different languages or want more accurate text. To add languages, first turn on Live Captions using ⊞ Win+Ctrl+L. Then, click the gear icon on the Live Captions bar to open its settings.
- Turn on Live Captions by pressing
WINDOWS + CTRL + Lor through Quick Settings. - In the Live Captions bar that appears on your screen, click the Settings button. It usually looks like a gear icon.
- Click on Caption language. Then choose Add a language.
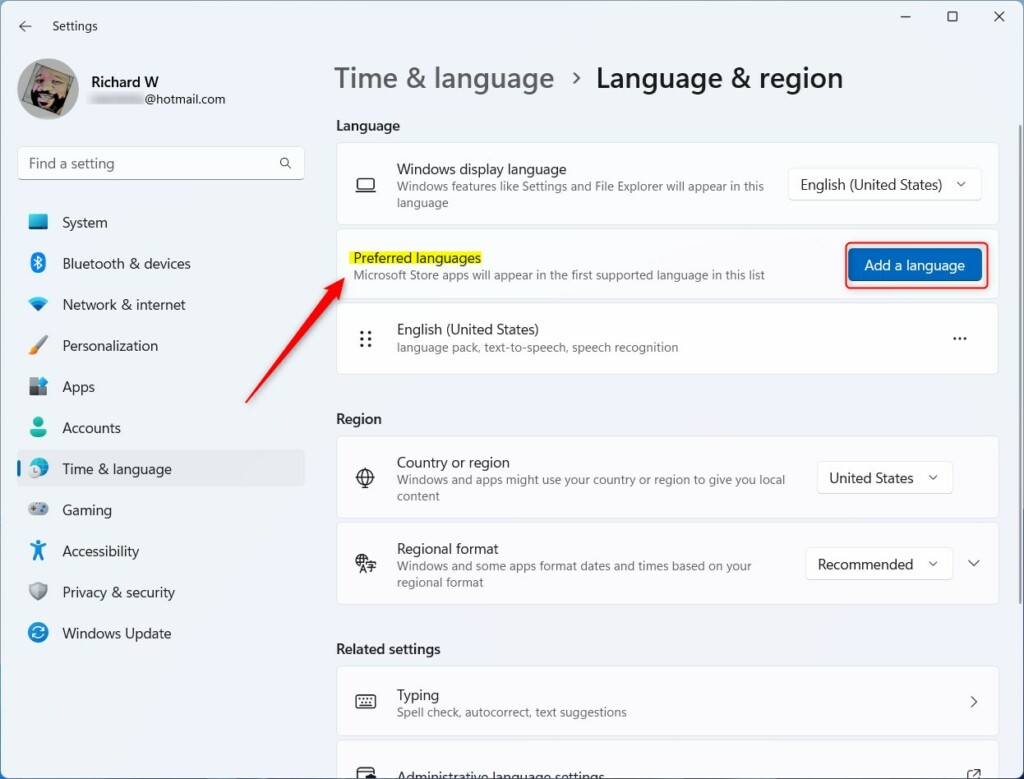
- This opens the Language & region settings page.
- Under Preferred languages, click Add a language.
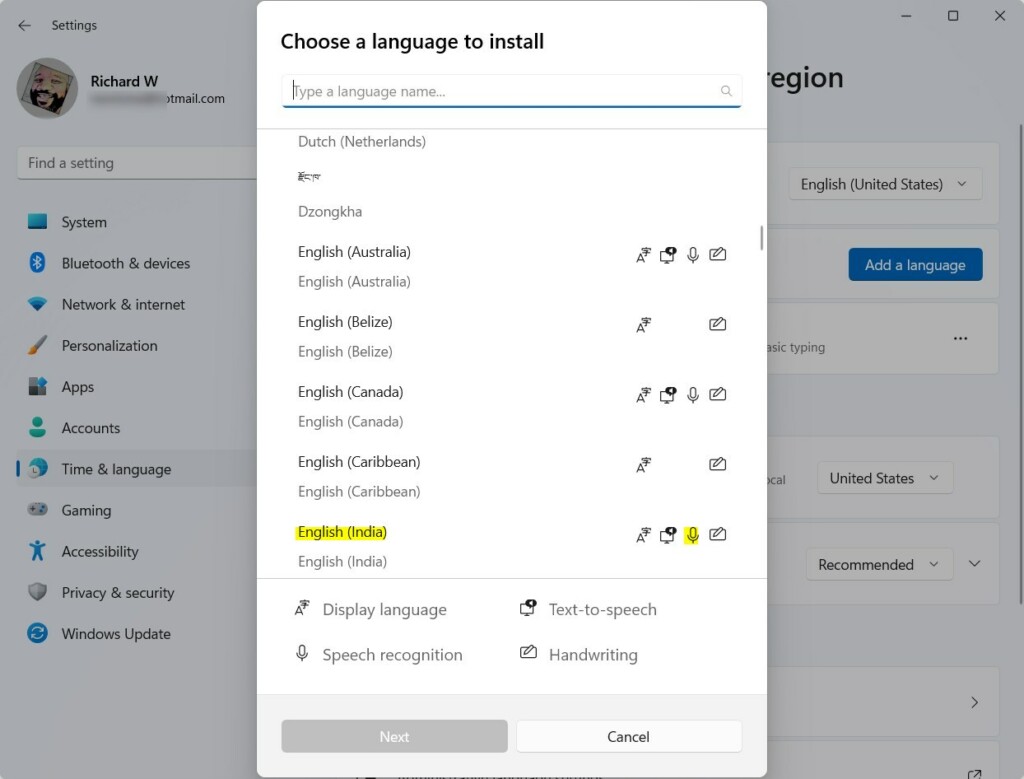
- Search for the language you want to add. Make sure the language supports Speech recognition.
- Click Next to continue.
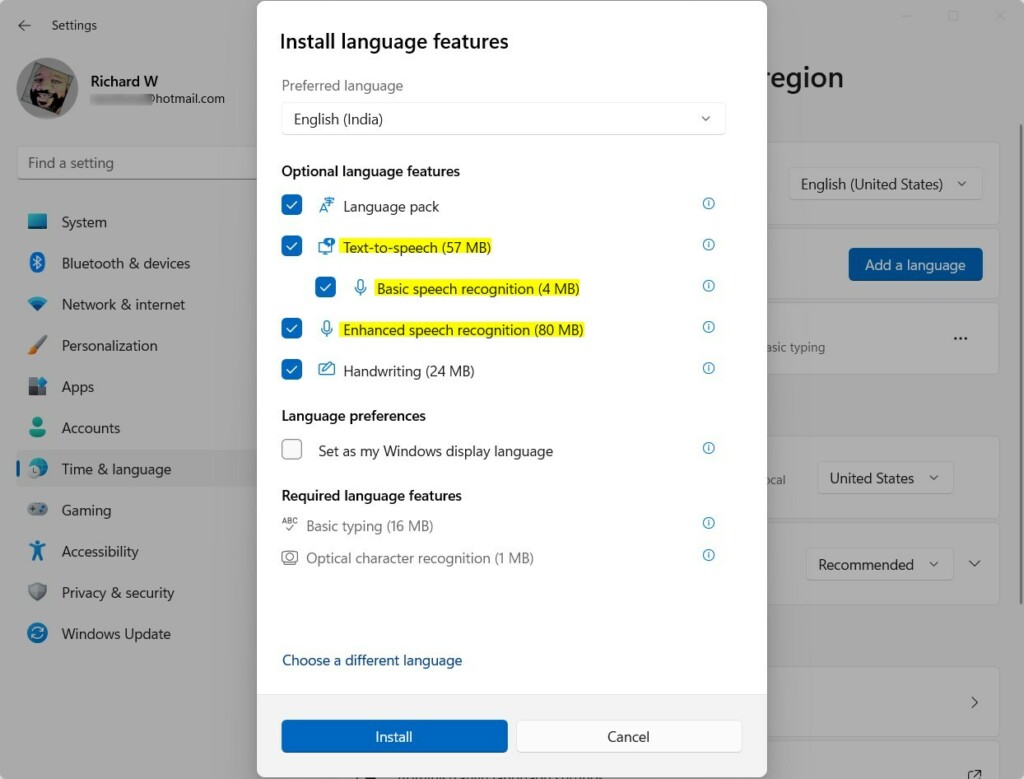
- In the next window, check that Enhanced speech recognition is selected. You can also choose other language features if you want.
- [Requires admin privileges] Click Install to add the language.
- Once installation finishes, your new language shows up in the Live Captions' Caption language menu. Now you can select it anytime you want captions in that language!
Summary
- Adding languages makes Live Captions more useful for people who speak different languages or have hearing difficulties.
- It helps you understand audio content better if it's in a language you don't know well.
- It improves caption accuracy by giving Windows more language options.
- The process involves adding the language through Windows' Language settings and making sure speech recognition is installed.
Adding languages to Windows 11 Live Captions improves this feature for everyone, especially people who speak multiple languages or have trouble hearing. Adding languages helps you understand content in languages you don't know well and improves the overall accuracy of the Live Captions. This process involves adding the language through Windows' main Language settings.
Was this guide helpful?

About the Author
Richard
Tech Writer, IT Professional
Richard, a writer for Geek Rewind, is a tech enthusiast who loves breaking down complex IT topics into simple, easy-to-understand ideas. With years of hands-on experience in system administration and enterprise IT operations, he’s developed a knack for offering practical tips and solutions. Richard aims to make technology more accessible and actionable. He's deeply committed to the Geek Rewind community, always ready to answer questions and engage in discussions.


No comments yet — be the first to share your thoughts!