How to Transfer Photos from an iPhone or Android Phone to Your Windows 11 PC

Transferring photos from an iPhone or Android phone to a Windows 11 PC lets you back up your memories, free up phone storage, and edit pictures on a larger screen. When you connect the phone with a USB cable, it shows up in File Explorer and in the Photos app, much like a flash drive. You can then copy your pictures to the computer in a few minutes.
This guide uses the Photos app, which is built into Windows 11. The steps work for both iPhone and Android. I point out the differences where they matter.
Connect your unlocked phone to your PC using a data-transfer USB cable. Open the Windows Photos app, click Import, select your phone, choose your photos, and wait for the transfer to complete.
Method 1Using a USB Cable
A USB cable is still one of the most reliable ways to move photos. It does not depend on Wi-Fi , a cloud account or free cloud storage, and it copies the original files at full quality. Windows treats the phone as an external drive, so it can read the photo folders on it.
Get the Right Cable
- Check your cable before you plug it in.
Some cheap cables that come with chargers or accessories carry power only. They charge the phone, but the computer never sees the files. If your phone charges but never appears on the PC, a power-only cable is the most common cause. Try the cable that came with the phone, or any cable sold as “data” or “sync” capable.
Connect Your Phone
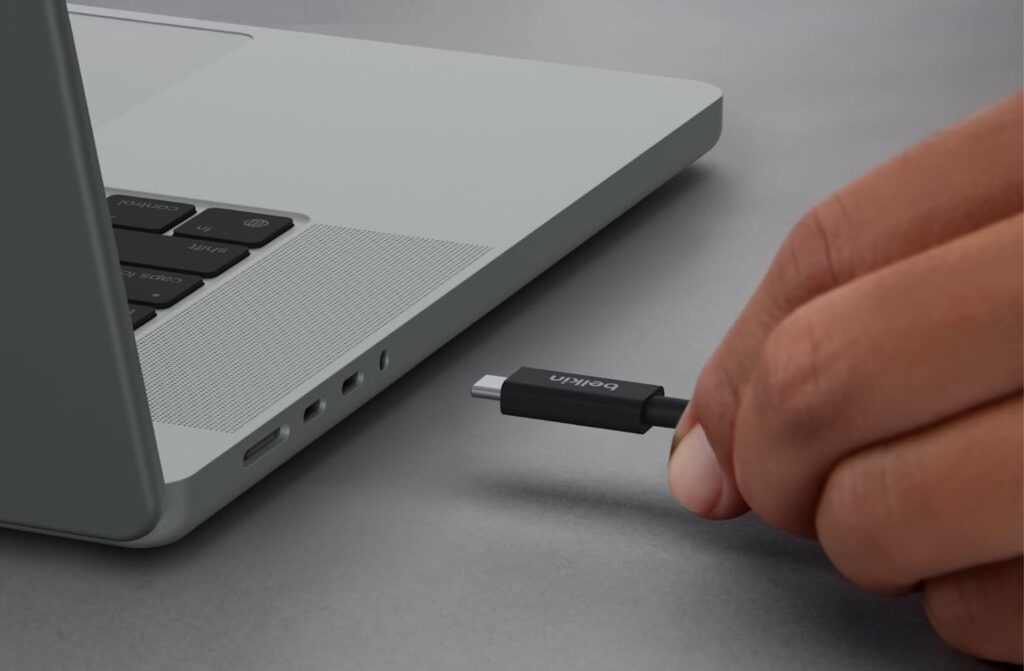
- Plug the small end of the cable into the phone.
- Plug the other end into a USB port on the PC.
Use a port directly on the computer. On a desktop, the ports on the back of the tower are best because they connect straight to the motherboard. An unpowered USB hub can drop the connection halfway through a large transfer. If a port does nothing, try a different one before you suspect the phone.
Unlock Your Phone
- Wake the phone and unlock the screen.
- Answer any prompt that appears on the phone.
A locked phone refuses data requests from a computer, for security reasons. After you unlock it, the phone usually asks what the connection should do:
- iPhone: You will see a Trust This Computer? prompt. Tap Trust and enter your passcode. If the prompt never shows, unplug the cable, unlock the phone, and plug it in again.
- Android: Pull down the notification shade and tap the USB notification, which usually says the phone is charging this device via USB. Choose File transfer. On some phones this option is called Transfer files or Photo transfer (PTP). The default is often charging only, which is why the phone does not show up.
Windows may play a connection sound and install a driver the first time. Give it a few seconds.
Open the Photos App on Your PC
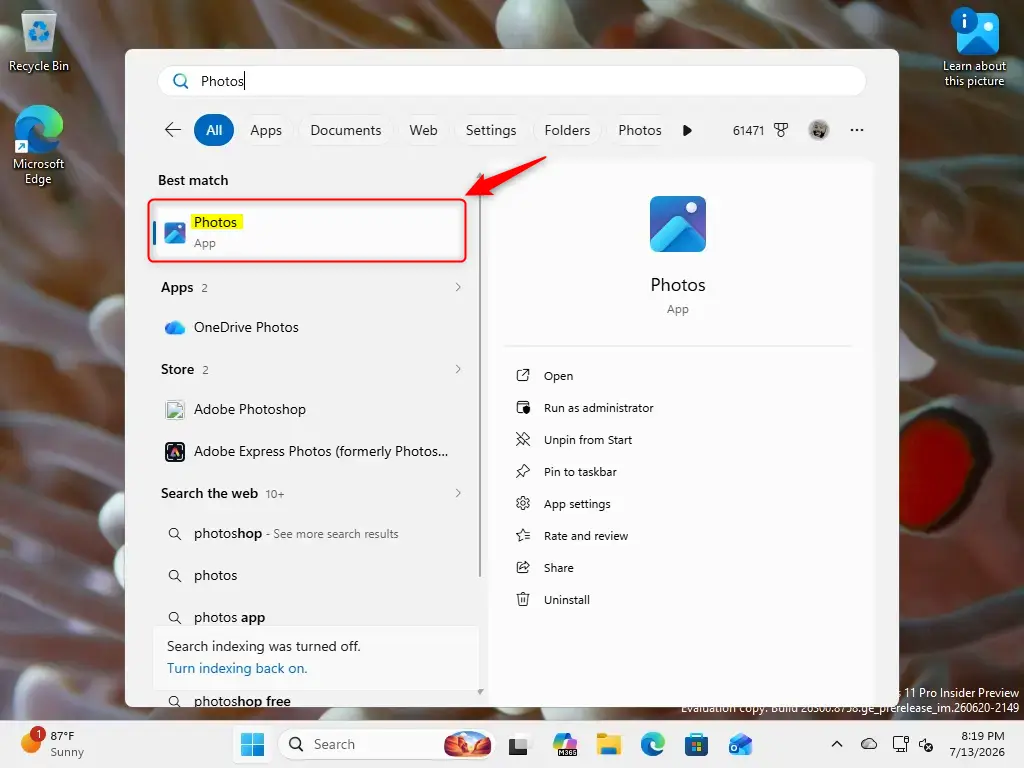
- Click the Start button, the Windows logo, usually in the bottom-left corner of the taskbar.
- Type Photos and select the Photos app from the results.
The Photos app opens and shows your pictures and videos. It is included with Windows 11. If it is missing, you can reinstall it from the Microsoft Store.
Start Importing
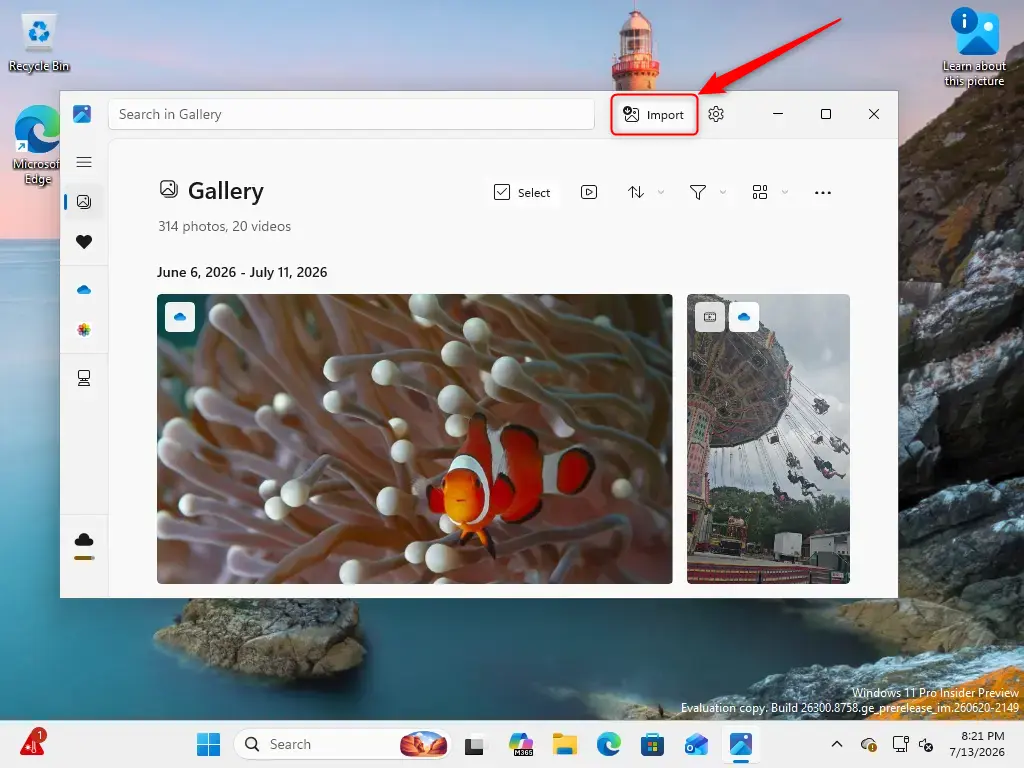
- Click Import near the top of the Photos window.
- Choose your phone from the list of connected devices.
Your phone should appear in the menu by its name. The exact wording of the menu entries varies slightly between versions of the Photos app, but the option refers to a connected device or USB device. If the phone is not listed, check that it is unlocked, that you tapped Trust or chose File transfer, and that the cable carries data. You can also open File Explorer, select This PC in the left pane, and look for the phone there. Photos are usually in Internal Storage DCIM
Choose Your Photos
- Wait while the app scans the phone.
- Select the photos and videos you want to copy.
The scan can take a while if the phone holds thousands of items. When it finishes, you can tick items one by one or select many at once, so you can move a whole batch in one go. Pick the ones you want before you start the import.
If you have an iPhone, your photos may be saved in HEIC format. Windows 11 can usually open these, but if some pictures do not show a preview, install the HEIF Image Extensions from the Microsoft Store. You can also change the iPhone setting under Settings Photos Transfer to Mac or PC. Choose Automatic so the phone converts photos to a more compatible format when it transfers them.
Wait for the Transfer
- Click the import button in Photos and let the copy finish.
Large batches, long videos, or older USB ports can add several minutes. Keep the phone unlocked and the cable plugged in until Photos says the import is done. Unplugging early can leave you with partial or corrupt files. Once the import completes, the pictures are on your PC, usually in your Pictures folder. They stay on the phone until you delete them yourself, so check that the copies open before you clear space.
References:
https://support.microsoft.com/en-us/windows/apps/photos/import-photos-and-videos-from-phone-to-pc
Summary
To transfer photos using a USB cable, here is the short version:
- Use a data-transfer USB cable, not a charge-only one.
- Connect your phone to your PC and unlock your phone. Tap Trust on an iPhone, or choose File transfer on an Android phone.
- Open the Windows Photos app and click Import.
- Select your phone and choose the photos you want to transfer.
- Wait for the files to copy over, and keep the phone connected until the import finishes.
Was this guide helpful?

About the Author
Richard
Tech Writer, IT Professional
Richard is a writer at Geek Rewind who turns complex IT tasks into clear, step-by-step guides. He draws on years of hands-on experience in system administration and enterprise IT operations, focusing on Windows, Linux and WordPress: the problems people actually run into, and the fixes that work. His server and WordPress guides come from systems he runs himself. Richard builds and maintains the platform behind Geek Rewind, from its Ubuntu servers and Nginx configuration to its custom WordPress plugins. Many new tutorials start with readers' questions, and he's always glad to answer them in the comments.


No comments yet — be the first to share your thoughts!