

This article explains how to change how the braille text cursor is displayed with Narrator on Windows 11.
Narrator is a screen-reading app built into Windows that reads the text on your screen aloud and describes events for users with low vision or blindness.
When you use the Narrator app, you can turn on or off its keyboard shortcuts, launch it automatically, adjust the voice, speed, and volume, manage natural voices, lower other apps volume when the Narrator is speaking, change Narrator audio output device, change verbosity level, emphasize formatted text, enable or disable Narrators phonetic reading, pause for punctuation, adjust how the Narrator read advanced details, adjust the way capitalized text is read, add a braille display with Narrator, change the input/output language for a braille display, change input/output table types, change notification timeout settings, and more.
Another setting one can configure with braille display using Narrator is how the text cursor is displayed. You can select multiple configuration options, including hiding the text cursor completely.
The braille text cursor display options in Windows help improve the user experience for individuals who rely on braille displays to interact with their computers.
Change how the braille text cursor is displayed on Windows
As mentioned above, users can change how the braille text cursor is displayed with Narrator on Windows 11.
Here’s how to do it.
First, open the Windows Settings app.
You can do that by clicking on the Start menu and selecting Settings. Or press the keyboard shortcut (Windows key + I) to launch the Settings app.
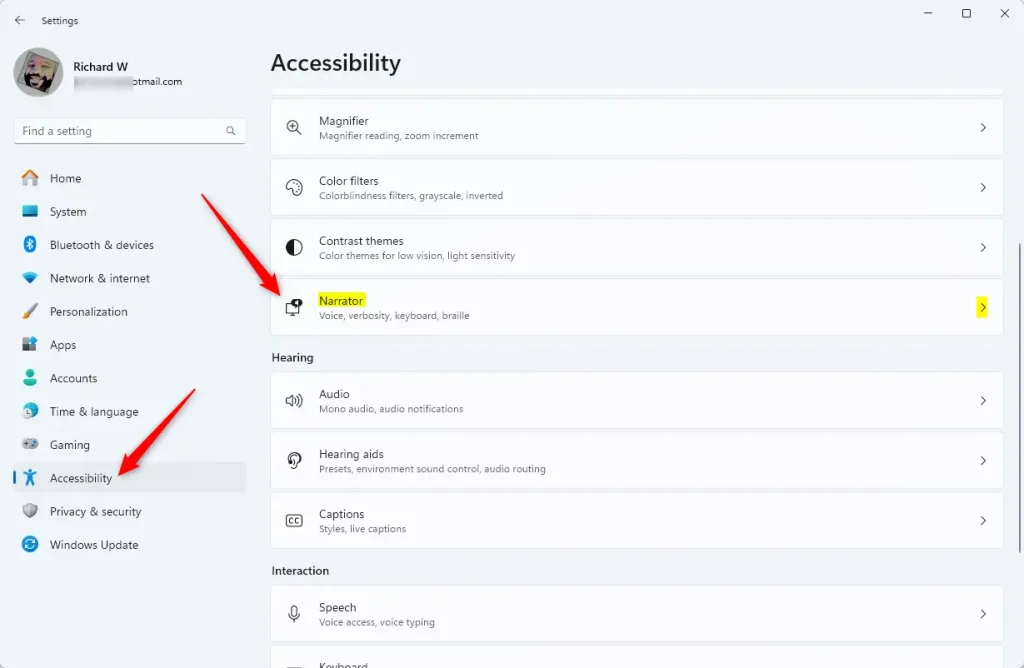
When the Setting app opens, click the Accessibility button on the left and select the Narrator tile on the right to expand it.
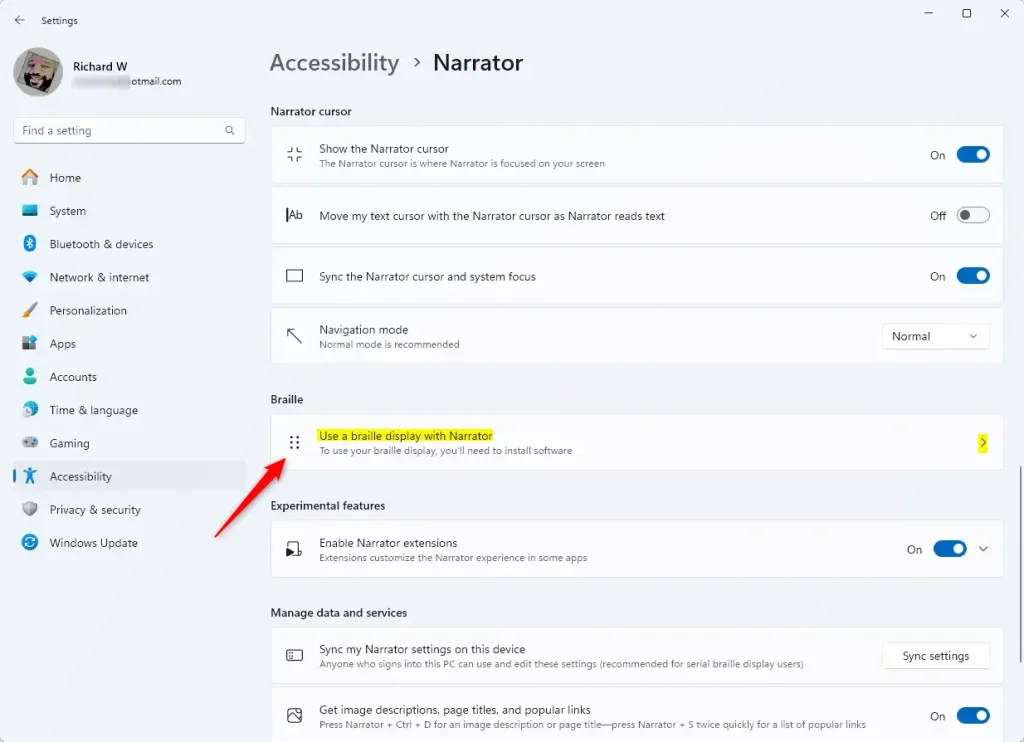
On the Narrator settings pane, under “Braille,” expand the “Use a braille display with Narrator” tile to access the braille page.
On the braille page, click the “Download and install braille” button to start the installation if not already installed.
Once installed, you will have the option to turn Braille on or off.
Next, click the “Add a braille display” button under Braille displays and drivers, and choose your Braille display manufacturer and connection type.
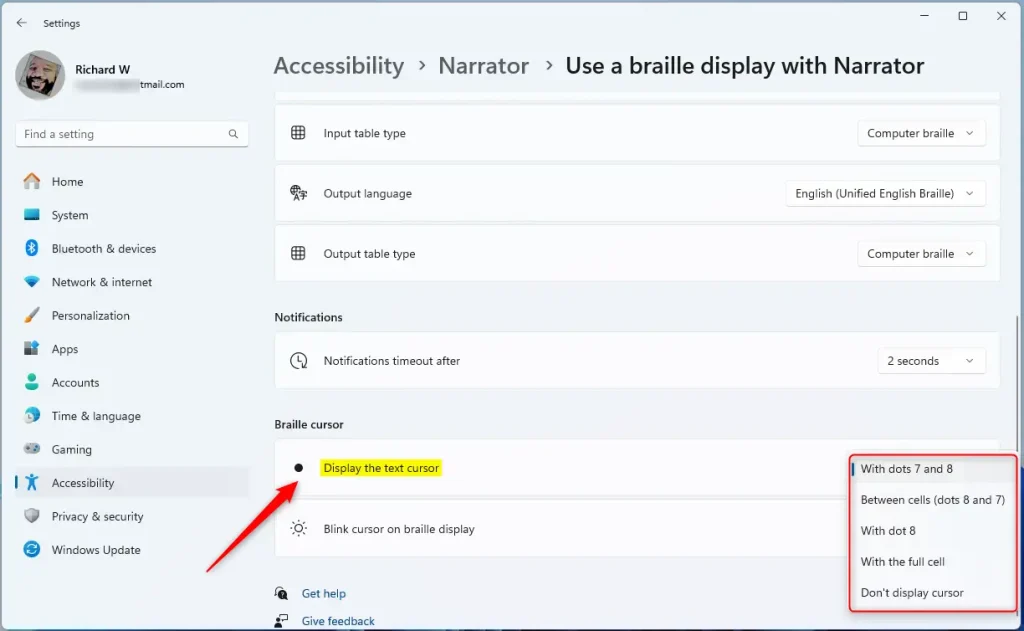
Then, select the “Display the text cursor” tile under “Braille cursor.” Next, select the desired option from the drop-down menu to choose how the text cursor is displayed.
That should do it!
Conclusion:
- Changing the braille text cursor display settings in Windows 11 enhances the user experience for individuals who rely on braille displays.
- Users can customize the display of the text cursor according to their preferences, including the option to hide it completely.
- Following the simple steps outlined in this article, individuals can effectively manage the braille text cursor display with Narrator on Windows 11 to suit their needs.
Leave a Reply