How to Use a Braille Display with Narrator on Windows 11
Using a braille display with Narrator on Windows 11 lets you read screen content using braille characters.
Install braille support via Settings > Accessibility > Narrator > Braille. Download and install the braille support package, then restart your computer. Finally, turn on braille support and add your specific braille display.
Narrator is the built-in screen reader for Windows that speaks text aloud, and connecting a braille display means you can feel that text instead of just hearing it.
This feature makes Windows 11 much more accessible for people who are blind or have low vision, allowing them to interact with their computer through touch.
Windows 11 includes Narrator from the start, so you don’t need to download anything extra to get started with it.
- Turn keyboard shortcuts on or off
- Change the voice, speed, and volume
- Choose where the voice comes from (like speakers or headphones)
To use a braille display with Narrator, you’ll need to install specific software and drivers for your PC. The braille display connects to your computer using a USB cable or a serial port.
How to Set Up a Braille Display on 🪟 Windows 11
Follow these steps to get your braille display working with Narrator:
Step 1Open Windows Settings
Click on the Start menu (that’s the Windows logo in the bottom-left corner) and select Settings. Alternatively, press Windows key + I on your keyboard to open the Settings app quickly.
Step 2Go to Accessibility and Find Narrator
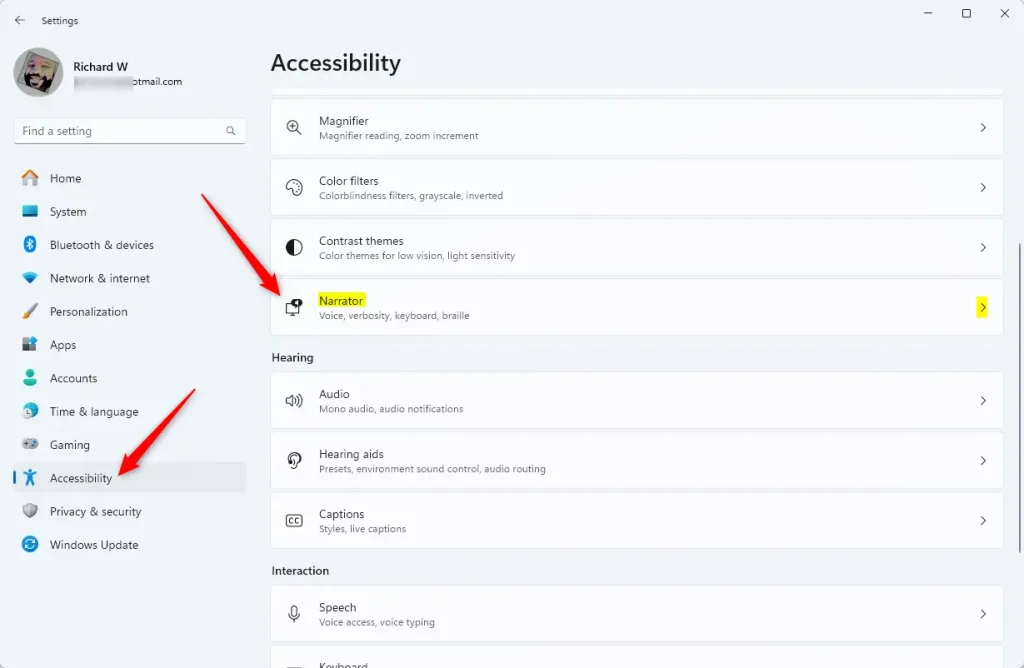
In the Settings window, click Accessibility from the left menu.
Next, find and click on Narrator on the right side.
Step 3Open Braille Settings
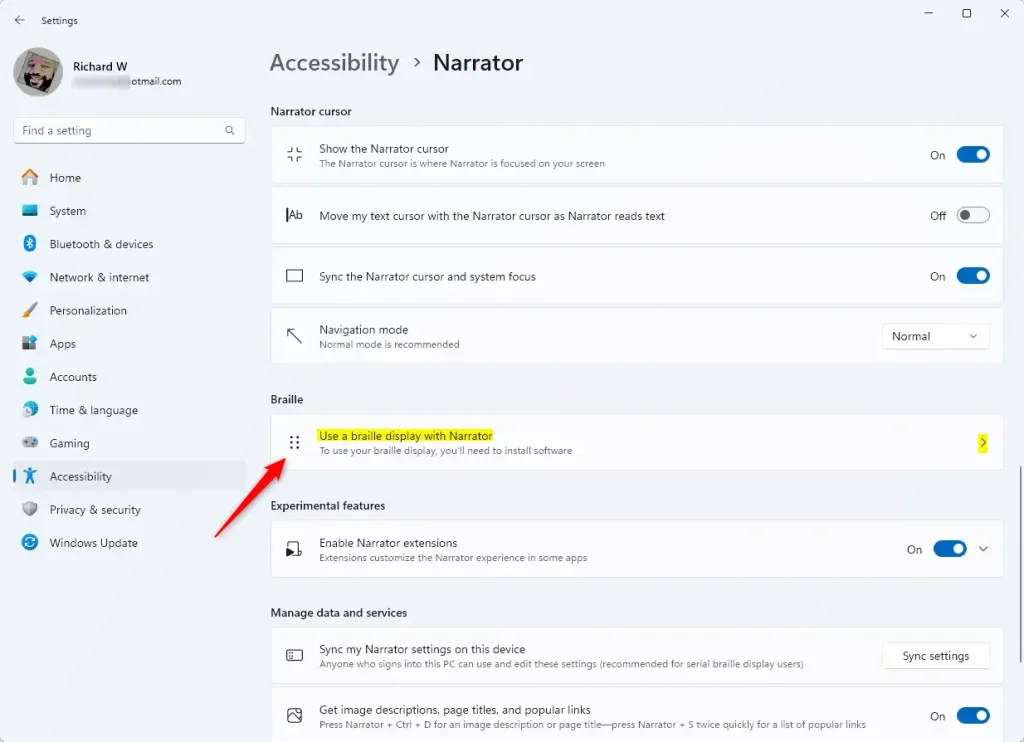
Under the Narrator settings, scroll down to the Braille section.
Click ‘Use a braille display with Narrator’ to see the braille options.
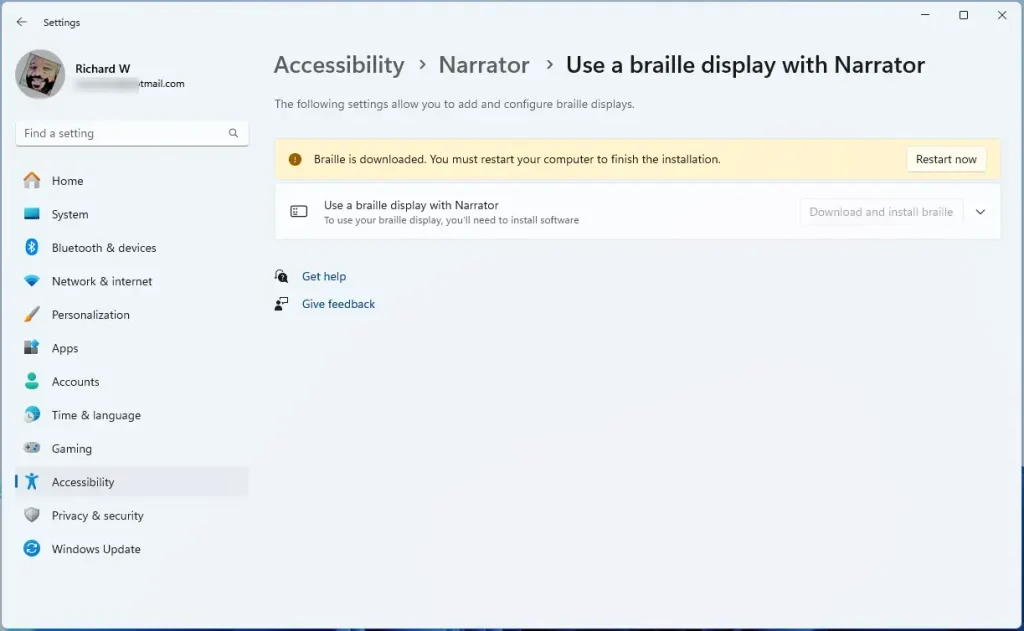
Step 4Download and Install Braille Support
Click the Download and install braille button.
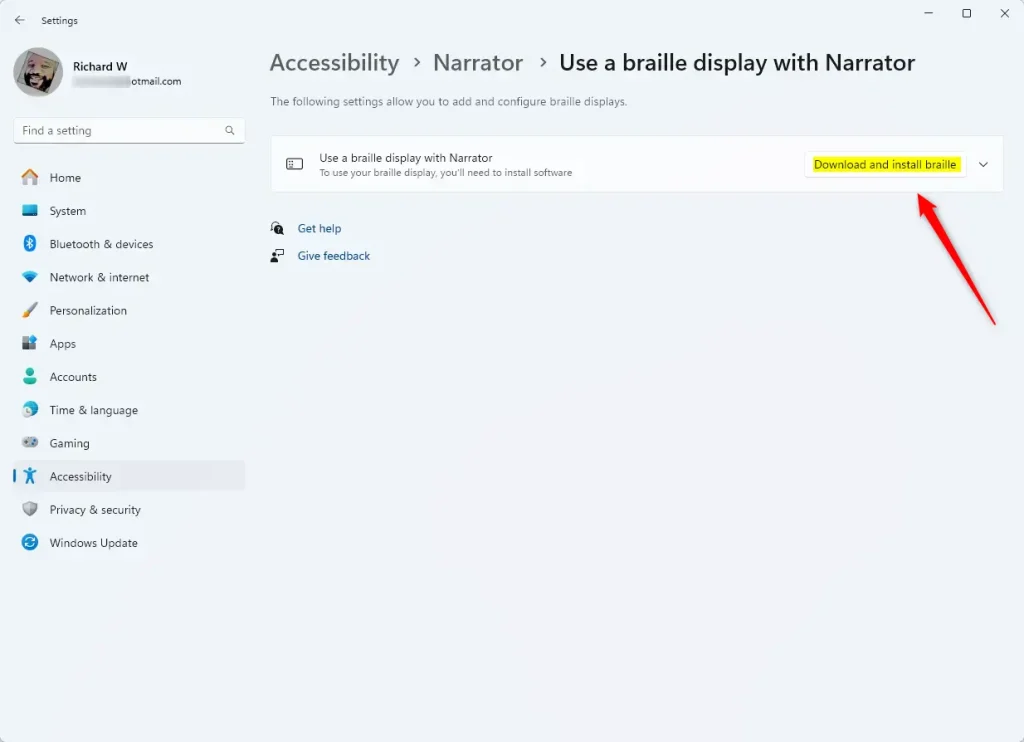
Wait for the download and installation to complete. Your computer will prompt you to restart; please do so.
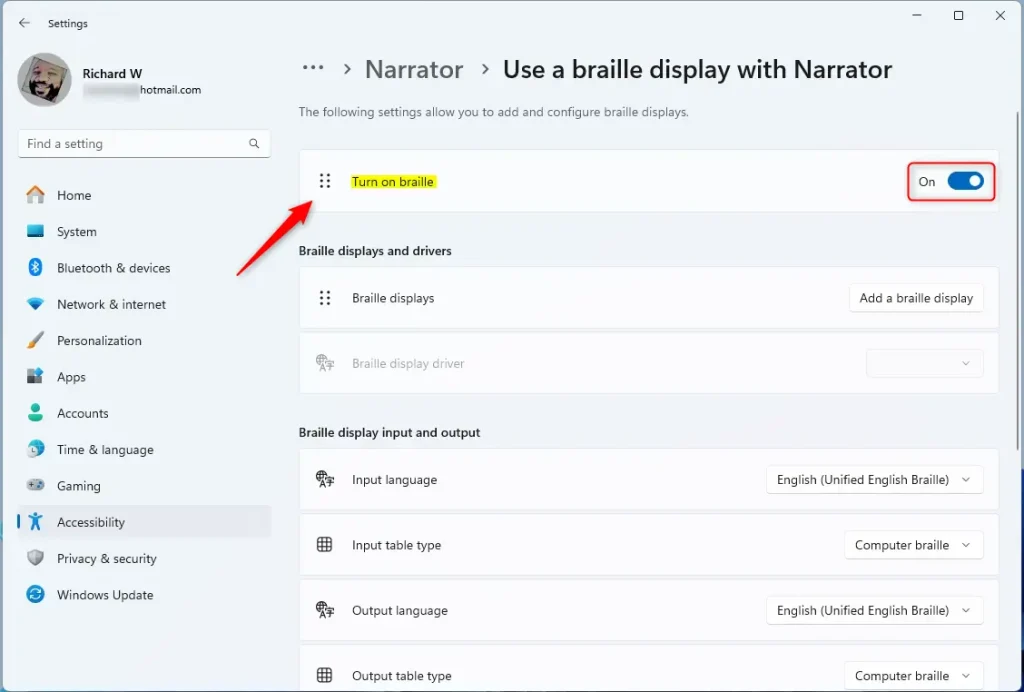
Step 5Turn On Braille Support
After restarting, go back to the Narrator settings.
Turn on the switch next to Turn on braille.
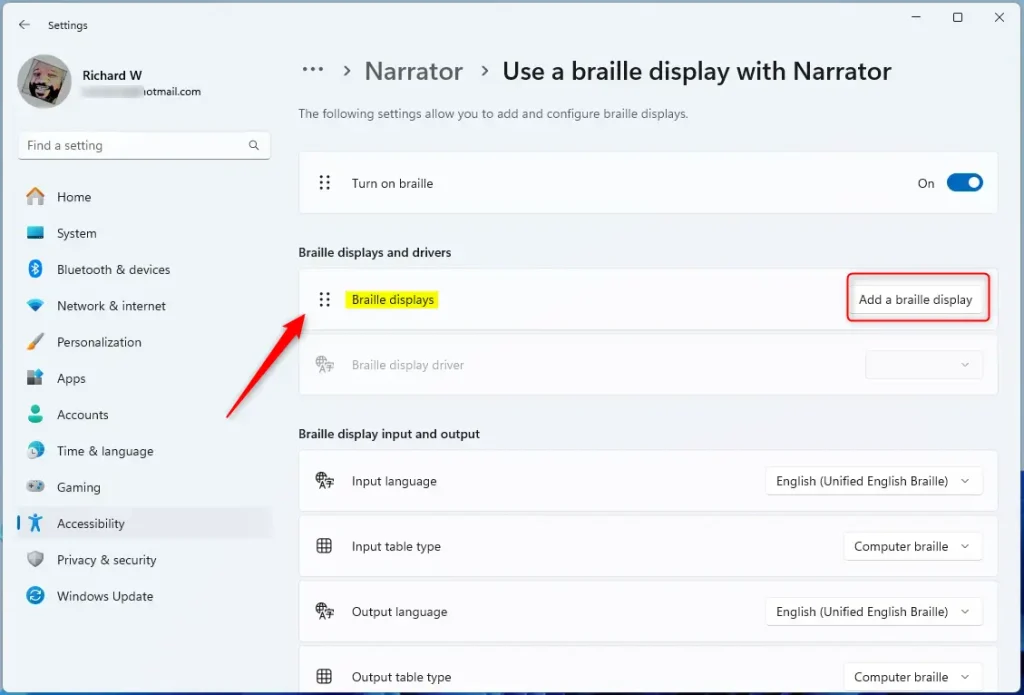
Step 6Add Your Braille Display
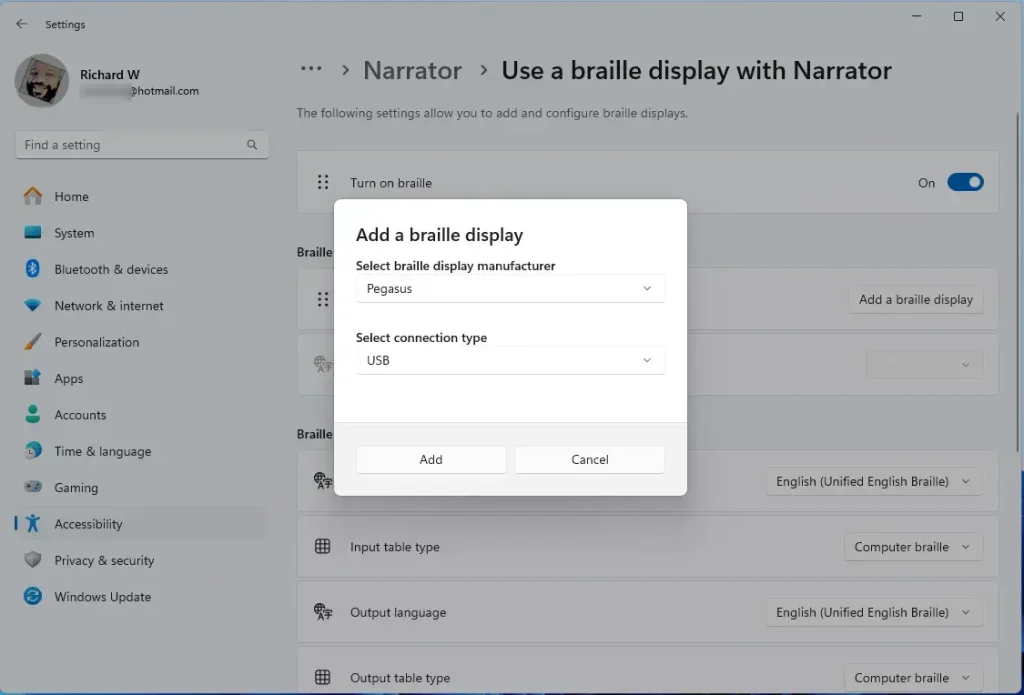
Adding your braille display to Windows 11 with Narrator involves a few steps. Open Narrator settings and choose ‘Add a braille display.’ Then, select your display’s brand, like Focus B, and its connection type, such as USB or serial, before clicking ‘Add’ to finish the setup.
To add your braille display to Narrator on Windows 11, start by selecting its brand from the list, like a Focus Blue or Chameleon display. Then, choose how it connects, whether via a USB cable or a serial port. Click “Add” to finish the setup.
Screen reader setup for external devices requires specific instructions. If you use a different screen reader, like JAWS or NVDA, or specialized software, you’ll need to follow the setup instructions provided by that specific program. These instructions guide you through connecting and configuring the screen reader with your braille display.
That’s it! Your braille display should now work with Narrator on Windows 11.
Summary
Using a braille display with Narrator on Windows 11 greatly improves computer access for people who are blind or have low vision. The braille display setup on Windows 11 is quick; you download the needed software and drivers right through Windows Settings, which usually takes only a few minutes.
To get started, download braille support software and drivers through Windows Settings. This process generally takes only a few minutes.
Once set up, you can enjoy a better, more accessible computer experience with braille output.
To learn more about Narrator and its features, visit the Microsoft Accessibility website. The Microsoft Accessibility website offers a helpful guide detailing Narrator's capabilities for users with vision impairments, such as screen reading and braille display integration.
What is a braille display on a computer?
A computer Braille display operates by raising and lowering different combinations of pins electronically to produce in Braille what appears on your computer screen. The display is refreshable meaning that the configuration of Braille changes continuously as the user moves around on the screen.
Are there braille screens?
There are a variety of different braille displays on the market. Some current choices include: Focus 40 Blue 5th Gen by Freedom Scientific. Brailliant BI 40 by Humanware.
Was this guide helpful?

About the Author
Richard
Tech Writer, IT Professional
Richard, a writer for Geek Rewind, is a tech enthusiast who loves breaking down complex IT topics into simple, easy-to-understand ideas. With years of hands-on experience in system administration and enterprise IT operations, he’s developed a knack for offering practical tips and solutions. Richard aims to make technology more accessible and actionable. He's deeply committed to the Geek Rewind community, always ready to answer questions and engage in discussions.


No comments yet — be the first to share your thoughts!