How to Change Braille Display Notification Timeout in Windows 11
The Braille Display Notification Timeout in Windows 11 determines how long messages stay visible on your braille display when you use Narrator.
This setting lets you control the time notifications appear before they disappear automatically. You can set it from a minimum of 3 seconds to a maximum of 5 minutes.
Adjusting this timeout helps you ensure you have enough time to read important alerts on your braille device without them vanishing too fast.
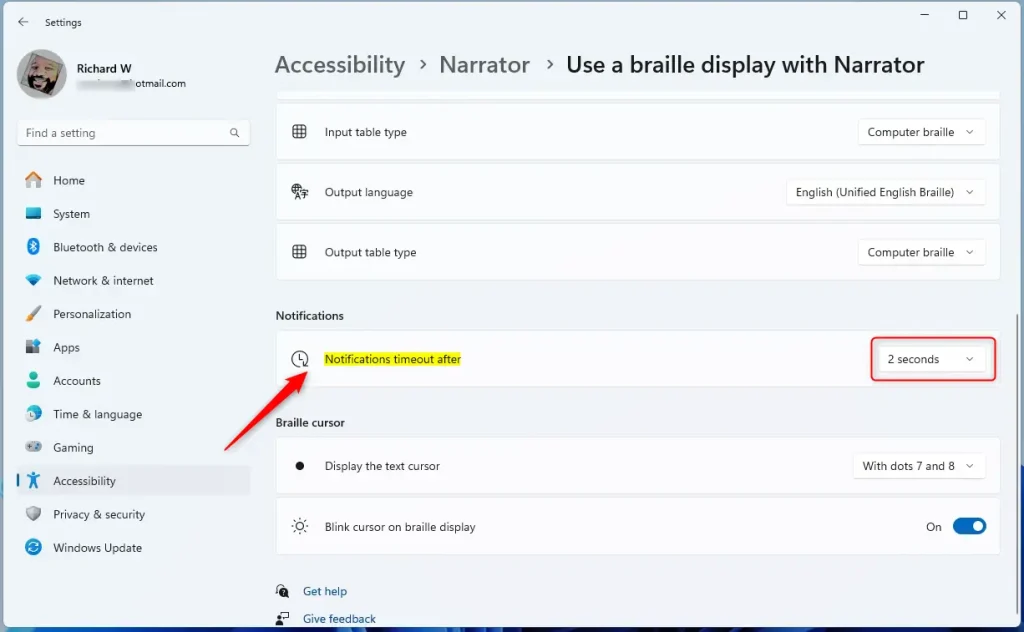
Open Settings, navigate to Accessibility, then Narrator, and finally Braille. Under Notifications timeout after, select your desired duration. This adjusts how long braille notifications remain visible with Narrator.
Steps to Change Notification Timeout for Braille Display
- Open Settings. Click the Start menu (the Windows icon in the bottom-left corner) and choose Settings. Or press
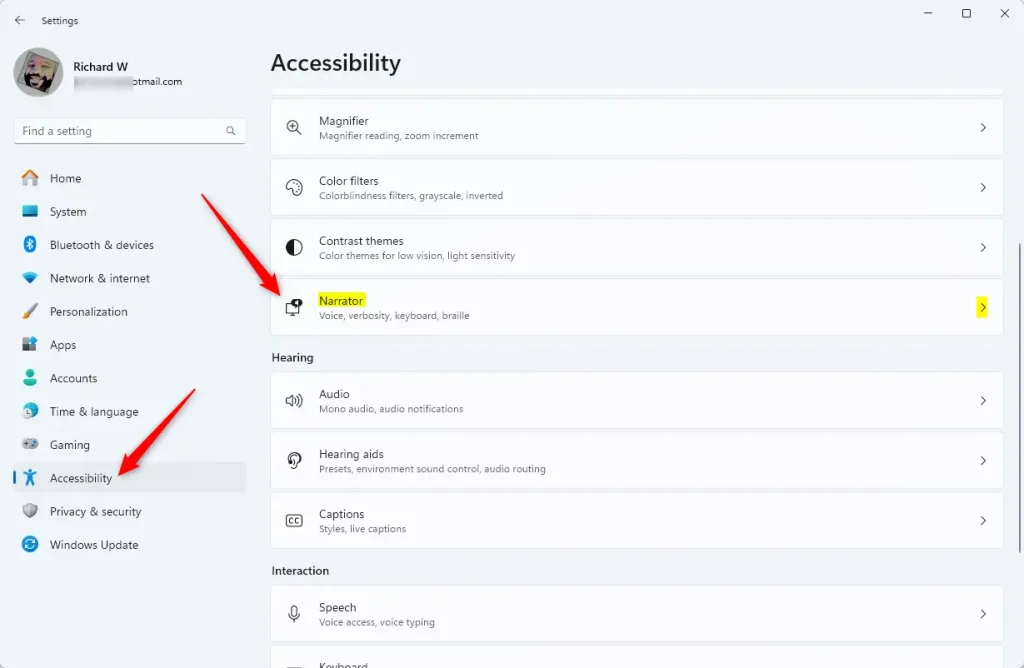
Windows key + Ion your keyboard to open the Settings app quickly. - Go to Accessibility. In the Settings window, find and click Accessibility on the left side menu.
- Open Narrator Settings. On the right side, click on the Narrator section to see more options.
Open the Settings app to change the braille display notification timeout in Windows 11. Click the Start menu and select Settings, or press the Windows key + I together. From there, navigate to Accessibility and then Narrator settings to find the option.
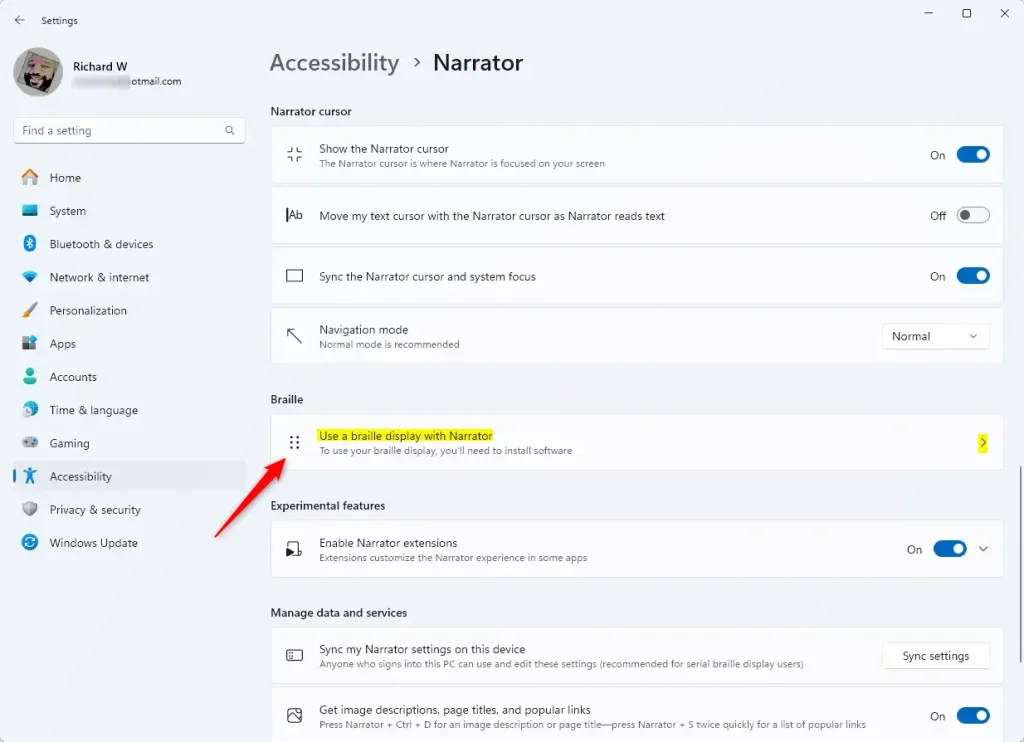
- Find Braille Settings. Scroll down to the Braille section and click on Use a braille display with Narrator to open it.
Open the Settings app to change the braille display notification timeout in Windows 11. Click the Start menu and select Settings, or press the Windows key + I together. Then, navigate to Accessibility and Narrator settings.
- If you haven’t installed braille support yet, click Download and install braille to add it to your computer. (Learn more about installing braille support)
- Add your braille display. Under Braille displays and drivers, click Add a braille display and choose your device’s brand and connection type.
- Find the Notifications section. Click on Notifications timeout after.
- Pick your timeout length. Choose how long you want notifications to stay on your braille display before they disappear. You can select options like 5 seconds, 10 seconds, or more.
Open the Settings app to change the braille display notification timeout in Windows 11. Click the Start menu and select Settings, or press the Windows key + I together. Next, navigate to Accessibility and then Narrator settings.
What happens when you’re done? Your braille display notifications will now remain visible for the duration you selected.
Summary
This guide explained how to adjust the braille display notification timeout in Windows 11. You learned the steps to access Settings, find Narrator options, and modify notification duration. Personalizing this setting ensures your braille display notifications appear for the optimal amount of time for you.- You learned how to open the Settings app and find the Narrator braille display options.
- You can change how long notifications stay on your braille display to make reading easier and avoid interruptions.
- If you want to learn more about using Narrator and braille displays, check out this helpful guide: How to Use a Braille Display with Narrator on Windows 11.
Was this guide helpful?

About the Author
Richard
Tech Writer, IT Professional
Richard, a writer for Geek Rewind, is a tech enthusiast who loves breaking down complex IT topics into simple, easy-to-understand ideas. With years of hands-on experience in system administration and enterprise IT operations, he’s developed a knack for offering practical tips and solutions. Richard aims to make technology more accessible and actionable. He's deeply committed to the Geek Rewind community, always ready to answer questions and engage in discussions.


No comments yet — be the first to share your thoughts!