Windows 11 Printer Not Working? 9 Ways to Fix Printing Issues

Printer problems in Windows 11 happen when stuck print jobs, outdated drivers, or broken network connections block communication between your computer and the printer. These common errors leave you with an unresponsive device or one that constantly shows offline status.
You can fix most Windows 11 printing faults in 5 minutes using 9 built-in troubleshooting methods, ranging from restarting the print spooler (a background service that manages print jobs) to reinstalling printer hardware.
To fix a Windows 11 printer not working, open the Settings app, go to System, click Troubleshoot, select Other troubleshooters, and click Run next to Printer. If that fails, restart your printer, check your cables and Wi-Fi connection, or clear the print spooler service in the Windows Services app.
1Unplug and Restart Your Printer
Restarting your printer clears out temporary memory glitches that freeze up its internal computer. Leave your printer turned on, go to the back, and unplug the power cord completely for about sixty seconds. If you use a USB cable to connect the printer directly to your computer, unplug that wire too before plugging everything back in.
- Leave your printer turned on.
- Go to the back of your printer and unplug the power cord completely.
- Unplug the USB cable if your printer connects directly to your computer with a wire.
- Wait for at least 60 seconds to let all the leftover electrical power drain out of the machine.
- Plug the power cord straight into a wall outlet instead of a power strip to rule out power issues.
- Turn your printer back on and wait for it to finish starting up and settle into a ready state.
2Check Your Cables or Wireless Connection
Checking your cables and wireless connection fixes broken links between your Windows 11 computer and your printer. For a wired setup, unplug the USB cable from both devices, check for dust, and plug it firmly into a different port on your computer while avoiding external USB hubs that often fail to send data properly.
- For USB connections: Unplug the USB cable from both your computer and your printer. Check the ends to make sure there is no dust or damage. Plug it firmly back into a different USB port on your computer. Try to avoid using external USB hubs, as they often fail to supply enough steady power for data transfer.
- For Wi-Fi connections: Make sure your Windows 11 computer and your printer are connected to the exact same wireless network . If your home router has both a 2.4 GHz and a 5 GHz band, devices on different bands often struggle to find each other. Check your printer’s small screen or status lights to confirm it has an active wireless connection.
3Run the Built-In Windows Printer Troubleshooter
Running the built-in Windows printer troubleshooter scans your system for common printing errors, repairs broken settings, and restarts essential background services automatically. To open this tool, click the Start button , open the Settings app, select System on the left sidebar, click Troubleshoot on the right, and then choose Other troubleshooters.
- Click the Start button on your taskbar and open the Settings app (the gear icon).

Taskbar - In the Settings menu, click on System in the left sidebar.
- Scroll down on the right side and click on Troubleshoot.
- Click on Other troubleshooters to see a list of available repair tools.
- Find the Printer entry in the list and click the Run button next to it.
- Follow any on-screen steps that appear as the tool checks your system, and apply any suggested fixes.
4Clear and Reset the Print Spooler Service
Clearing and resetting the Print Spooler (a service that manages your printing queue) fixes stuck documents that block all future print jobs from processing on your Windows 11 computer. Since this service manages your printing queue, restarting this background program clears out corrupted files and gets your printer moving again. Note that you need an administrator account to change system services.
- Click the Start menu, type Services into the search bar, and click on the Services desktop app.
- Scroll down the alphabetical list until you find Print Spooler.
- Right-click on Print Spooler and select Stop.
- Next, press the Windows Key + E on your keyboard to open File Explorer.
- In the address bar at the top, paste the following folder path and press Enter:
C:\Windows\System32\spool\PRINTERS - If a warning box appears asking for permission to access the folder, click Continue. Once inside, select and permanently delete every file inside this folder. Do not delete the folder itself, just the contents inside. (These are the stuck print jobs).
- Return to the Services window, right-click on Print Spooler again, and select Start.
- Change the startup type of the Print Spooler to Automatic if it is not already set that way, by right-clicking it, choosing Properties, and updating the startup type.
5Force Your Printer Status Back to Online
Forcing your printer status back to online fixes the common issue where Windows 11 mistakenly marks a working device as offline after a brief network drop. To fix this, open the Windows Start menu, go to Settings, select Bluetooth & devices on the left menu, click on Printers & scanners on the right, and find your specific printer to change its status.
- Open the Windows Start menu and click on Settings.
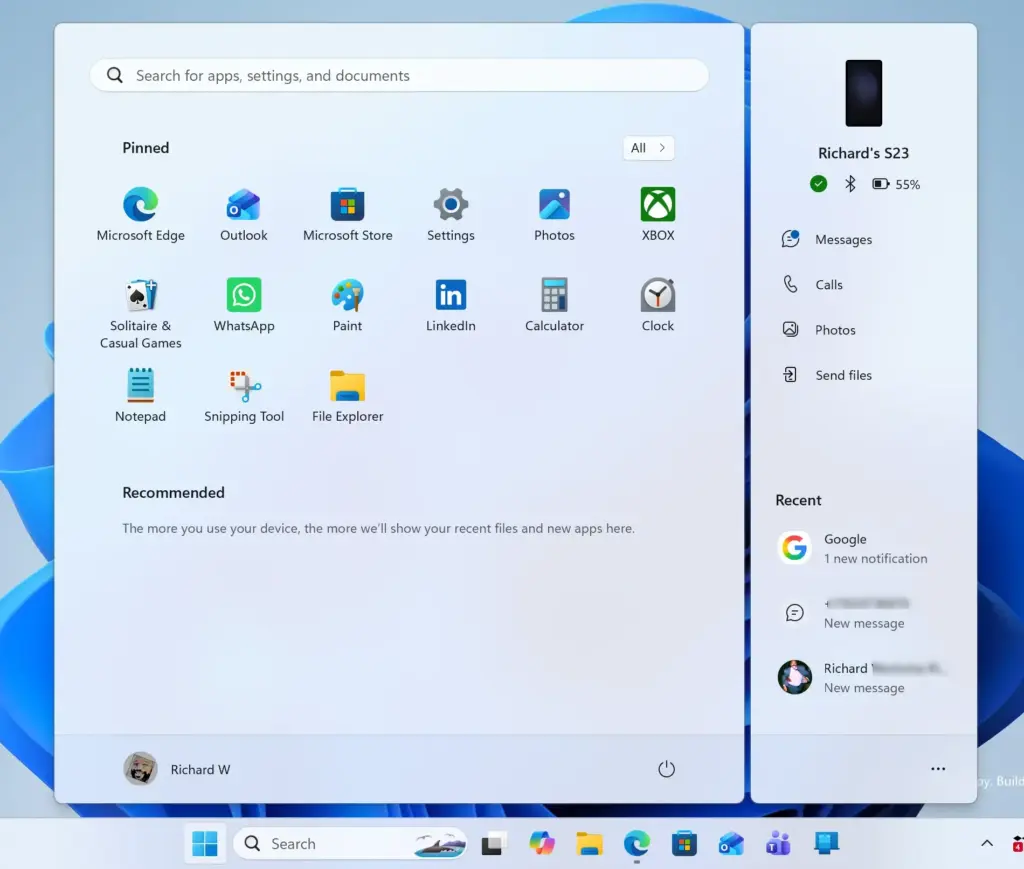
Start Menu - Click on Bluetooth & devices in the left menu, then click on Printers & scanners on the right.
- Find your specific printer model in the list and click on it.
- Click on the button that says Open print queue.
- In the window that pops up showing your current print jobs, click on the word Printer in the top menu bar.
- Look for the option that says Use Printer Offline. If there is a checkmark next to it, click it to remove the checkmark. This switches your printer back to online mode.
- Close the window and try printing a test page.
6Uninstall and Reinstall Your Printer
Uninstalling and reinstalling your printer clears out old software errors and creates a fresh connection when your current printer setup is broken. To do this, open the Windows Start menu, go to Settings, select Bluetooth & devices, click on Printers & scanners, click on your problematic printer name, and select the Remove device button to finish the first step of the fix.
- Open the Windows Start menu and go to Settings.
- Select Bluetooth & devices, then click on Printers & scanners.
- Click on the name of your problematic printer.
- Click the Remove or Remove device button to delete it from your computer.
- Once the device is removed, click the Add device button near the top of the page.
- Wait a few moments for Windows to scan your network and local ports for your printer.
- When your printer appears in the list, click Add device and follow the simple on-screen setup steps to finish reinstalling it.
7Install the Latest Driver for Your Printer
Installing the latest printer driver (software that lets your computer talk to your hardware) ensures all advanced features work correctly and fixes failures caused by major operating system updates. Start by finding your printer brand and exact model number printed on the machine, then open your web browser to visit the official manufacturer support page to download the correct software.
- Find your printer brand and exact model number (usually printed on the front or top of the machine).
- Open your web browser and visit the official support website for your printer brand (such as HP, Brother, Canon, Epson, or Lexmark).
- Go to their Software and Drivers download section.
- Type in your exact model number to find the official driver package made for Windows 11.
- Download the installer file to your computer.
- Note: Administrative privileges are required to install new device drivers on your computer.
- Double-click the downloaded file and follow the manufacturer's step-by-step instructions to install the fresh driver software. Restart your computer when the installation finishes.
8Disable Offline Printing via Device Properties
Disabling offline printing through device properties forces Windows to stay connected when your printer keeps slipping back into offline mode. Open the Windows Start menu, type Control Panel in the search bar, click on View devices and printers under Hardware and Sound, and right-click your printer icon to change these deeper connection settings.
- Open the Windows Start menu, type Control Panel in the search bar, and open the classic Control Panel app.

Control Panel - Under the Hardware and Sound category, click on View devices and printers.
- Find your printer icon, right-click on it, and select Printer properties (make sure to select properties, not just general properties).
- Click on the Ports tab at the top of the window to see which port your printer uses. Make sure the correct USB or WSD network port has a checkmark next to it.
- Next, click on the Advanced tab.
- Make sure that the spool settings are set up correctly, such as "Spool print documents so program finishes printing faster" and "Start printing immediately."
- Click Apply and then OK to save your changes.
9Check for Pending Windows Updates
Checking for pending Windows updates installs critical patches from Microsoft that fix known bugs, security holes, and hardware connection problems affecting your printer. Open the Start menu, open your Settings app, click on Windows Update in the menu, and click the Check for updates button to see if any new system patches are waiting to download.
- Click the Start menu and open your Settings app.
- Click on Windows Update in the far-right or bottom-left menu.

Settings › Windows Update - Click the Check for updates button to see if any new system patches are waiting to download.
- If updates are found, let Windows download and install them.
- Note: Administrative privileges are required to install system updates and reboot the computer.
- Click the Restart now button to finish applying the updates and let your system reboot cleanly. Check your printer once you are back on the desktop.
Advanced Troubleshooting: Checking Windows Services and Port Configurations
Checking Windows services and port configurations resolves deep system blocks that prevent your PC from talking to your printer. If you tried all the standard steps and your printer still will not print, the issue might be inside your Windows 11 system services. Along with the Print Spooler, a few other background services must run smoothly for network and USB printing to work.
Open the Services app again by typing Services into the Start menu search bar. Look for services named RPC Endpoint Mapper and Remote Procedure Call (RPC), which handle communication between different programs. Both the RPC Endpoint Mapper and Remote Procedure Call (RPC) services must be running, and the startup type for these services should be set to Automatic. If these core Windows communication channels are turned off or struggling, your computer cannot send data to external hardware like a printer.
Also, check your network discovery settings if you use a wireless printer. Open your Windows 11 Settings, go to Network & internet, click on Advanced network settings, and select Advanced sharing settings. Make sure that Network discovery is turned on so your computer can actively search for and talk to devices sharing your local home network.
Preventing Future Printer Headaches on 🪟 Windows 11
Preventing future printer headaches on Windows 11 stops random hardware failures and connection drops before they start. Printer problems can feel totally random, but you can take a few simple steps to stop future trouble, such as avoiding sudden power cuts and keeping your device software fully updated.
- Avoid sudden power cuts: Always use the physical power button on the printer to turn it off. Unplugging it from the wall while it is active can break its internal software and cause startup errors.
- Keep software updated: Periodically check your printer manufacturer's support app for software updates made for your printer model.
- Use static IP addresses if possible: If you have a wireless printer, giving your printer a permanent static IP address through your home router settings stops your printer from changing network addresses every time your router reboots. This is a very common cause of "Printer Offline" errors.
Summary
Printer issues in Windows 11 can be frustrating, but they are usually easy to fix when you know the right steps. Most problems come from temporary memory glitches, stuck print jobs, loose cables, or offline status settings. Working through these nine simple steps gets your printer working again quickly.
Was this guide helpful?

About the Author
Richard
Tech Writer, IT Professional
Richard is a writer at Geek Rewind who turns complex IT tasks into clear, step-by-step guides. He draws on years of hands-on experience in system administration and enterprise IT operations, focusing on Windows, Linux and WordPress: the problems people actually run into, and the fixes that work. His server and WordPress guides come from systems he runs himself. Richard builds and maintains the platform behind Geek Rewind, from its Ubuntu servers and Nginx configuration to its custom WordPress plugins. Many new tutorials start with readers' questions, and he's always glad to answer them in the comments.
No comments yet — be the first to share your thoughts!