How to Delete Printer Drivers in Windows 11
You delete printer drivers in Windows 11 to free up disk space and prevent software conflicts caused by outdated or corrupted driver files.
Printer drivers are essential software that allows your PC to communicate with your printer, and sometimes these drivers remain on your system even after you uninstall the printer itself.
Leaving these orphaned drivers can lead to issues like a new printer not being detected or general system instability. For instance, a lingering driver for an old HP LaserJet 1020 could interfere with installing a brand-new Canon PIXMA model.
Removing these unnecessary drivers ensures your Windows 11 system runs smoothly and efficiently.
Delete printer drivers in Windows 11 by first removing the printer in Settings. Then, open Print Server Properties by typing printui /s /t2, select the driver, and click Remove. Choose “Remove driver and driver package” for a complete deletion.
Why delete printer drivers?
When you uninstall a printer, Windows often leaves the driver files behind. These files take up space and can cause conflicts if they are corrupted. You should delete them to stop ‘ghost printers’ from appearing in apps like Word or Photoshop.
What happens when done?
Once finished, the driver package is completely removed from your system. You will need to download and install the driver again if you decide to use that printer in the future. This ensures a clean install without old, broken files interfering with your new setup.
Step 1Remove the printer
Before you delete the driver, you must remove the printer from your settings.
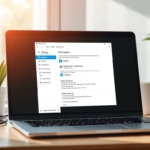
- Open Settings by pressing Windows key + I.

windows 11 settings button - Click Bluetooth & devices on the left.
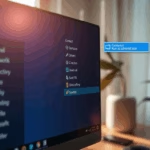
- Select Printers & scanners on the right.

windows 11 add new scanners - Click on the name of the printer you want to delete.

windows 11 share a printer with others - Click the Remove button.
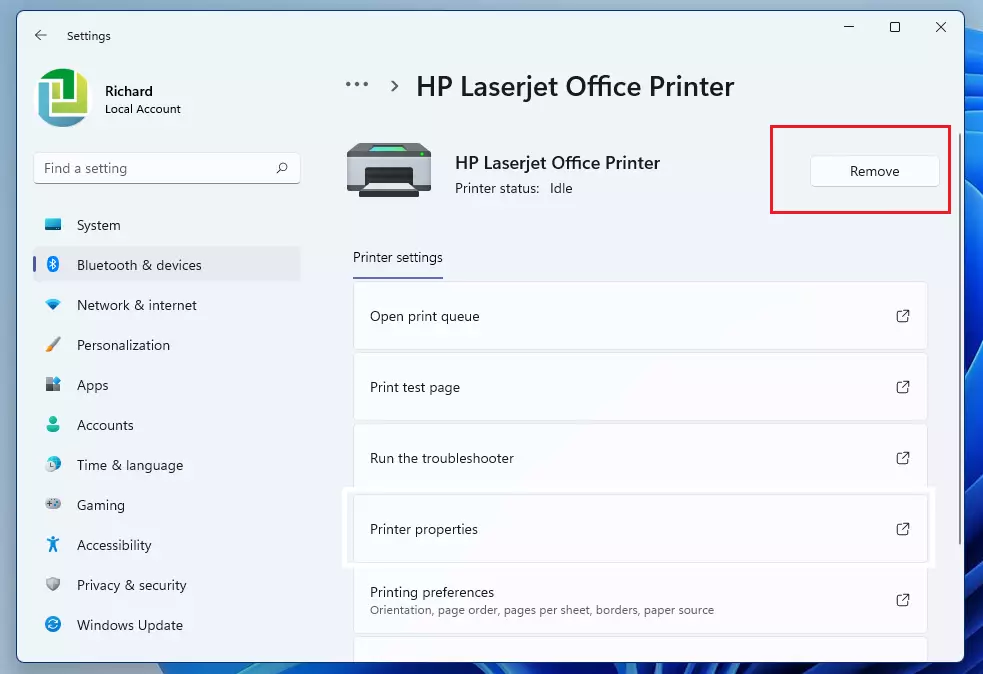
windows 11 share printer properties remove
Step 2 Restart the Print Spooler Service
- Press Windows key + R, type services.msc, and press Enter.
- Scroll down to find Print Spooler.
- Right-click it and select Restart.
Step 3Delete the driver using Print Server Properties
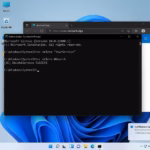
You can delete printer drivers in Windows 11 using the Print Server Properties tool. This tool helps you manage all the printer drivers installed on your computer. To open it, press the Windows key and R at the same time, then type printui /s /t2 and press Enter.
- Press Windows key + R, type printui /s /t2, and press Enter.
- A list of installed drivers will appear.
- Select the driver you want to remove and click Remove.
- Choose Remove driver and driver package to fully wipe it from 📁C:\Windows\System32\DriverStore.
Step 4Advanced Cleanup with Command Line
- Open Command Prompt as Administrator.
- Type pnputil /enum-drivers to see all installed drivers.
- Identify the Published Name (e.g., oem12.inf).
- Type pnputil /delete-driver oem12.inf /uninstall and press Enter.
Step 5Registry Cleanup
Note: This step requires administrator privileges. Sometimes registry keys keep printers alive.
- Press Windows key + R, type regedit, and press Enter.
- Navigate to 🗝️HKEY_LOCAL_MACHINE\SYSTEM\CurrentControlSet\Control\Print\Printers.
- Delete the folder corresponding to your old printer.
Summary
Deleting old printer drivers in Windows 11 helps keep your computer running smoothly and saves disk space by removing unneeded files.
Why do printer drivers still appear in Word or Photoshop after removal?
Printer drivers might still show up in apps like Word or Photoshop after you’ve removed the printer because the driver files often stay in the Windows DriverStore.
How to perform a clean install of printer drivers in 🪟 Windows 11?
To perform a clean install, first remove the printer in Settings, then delete the driver package using the printui /s /t2 command. Restart your computer to clear the Print Spooler, then download the latest driver directly from the manufacturer’s website and run the installer as an administrator.
Was this guide helpful?

About the Author
Richard
Tech Writer, IT Professional
Richard, a writer for Geek Rewind, is a tech enthusiast who loves breaking down complex IT topics into simple, easy-to-understand ideas. With years of hands-on experience in system administration and enterprise IT operations, he’s developed a knack for offering practical tips and solutions. Richard aims to make technology more accessible and actionable. He's deeply committed to the Geek Rewind community, always ready to answer questions and engage in discussions.
What does it mean if the “remove” button isn’t there when you open up the printer in settings?