
This post shows steps for students and new users to delete or remove a printer driver in Windows 11.
When you remove a printer in Windows, the removal process doesn’t delete the printer’s drivers. The drivers will remain installed on the computer so that they can be reused if needed in the future.
When you get a similar printer, connect it to Windows, and it should start working with the same previously installed drivers. Windows comes with some pre-installed printer drivers for the most popular printers. That’s why some popular printers automatically work when connected to Windows 11.
Although installing a printer with currently installed printer drivers is a good approach, some drivers may not work as well as others. If there’s a problem with the current printer drivers or they are corrupted, it’s better to delete them and install new ones working with a printer.
Why install it on your computer if you no longer need a printer driver? Why waste space or have drivers you’re not going to use again?
How to remove a printer from Windows 11
As mentioned above, one can quickly delete a printer driver from Windows. If a printer driver is not used again, you can delete it from your computer. The steps below show you how to do it.
First, you must remove the printer, which you will no longer remove. Below is how to remove a printer from Windows 11.
Windows 11 has a centralized location for the majority of its settings. Everything can be done, from system configurations to creating new users and updating Windows from its System Settings pane.
To get to System Settings, you can use the Windows key + I shortcut or click on Start ==> Settings, as shown in the image below:

Alternatively, you can use the search box on the taskbar to search for Settings. Then select to open it.
Windows Settings pane should look similar to the image below. In Windows Settings, click Bluetooth & devices, then select the Printers & Scanners tile on the right pane of your screen, shown in the image below.

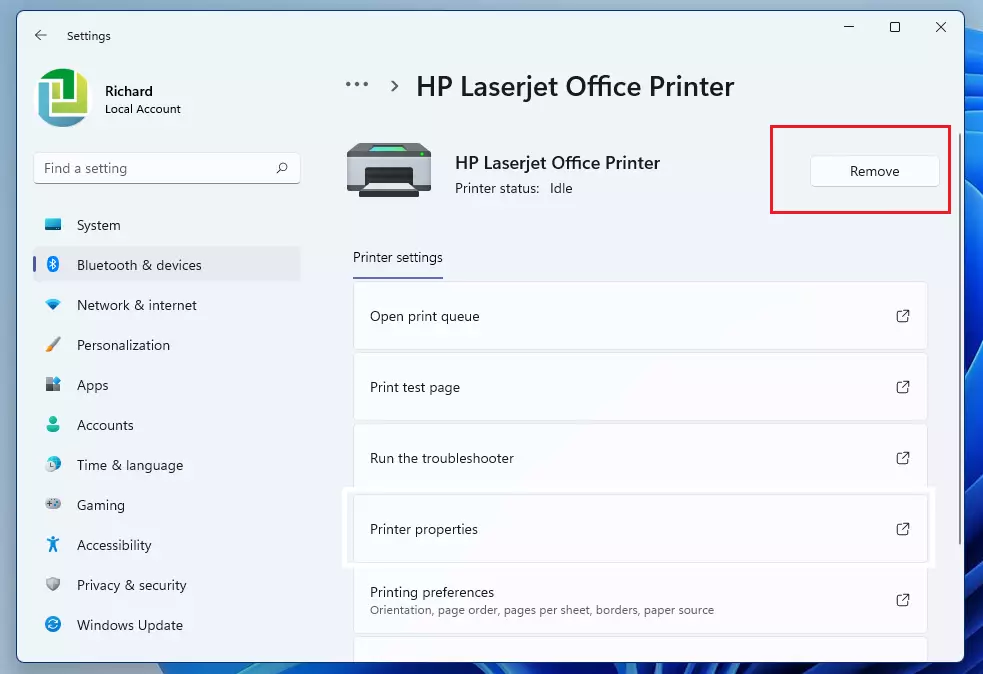
Next, click on the tile of the printer you want to delete from Windows. If you have multiple printers installed on your PC, they should all be listed on this page.

Once the printer detail pane opens, click the Remove button to remove the printer from Windows.
How to delete a printer driver in Windows 11
Now that the printer has been removed, you can delete the drivers associated with the printer.
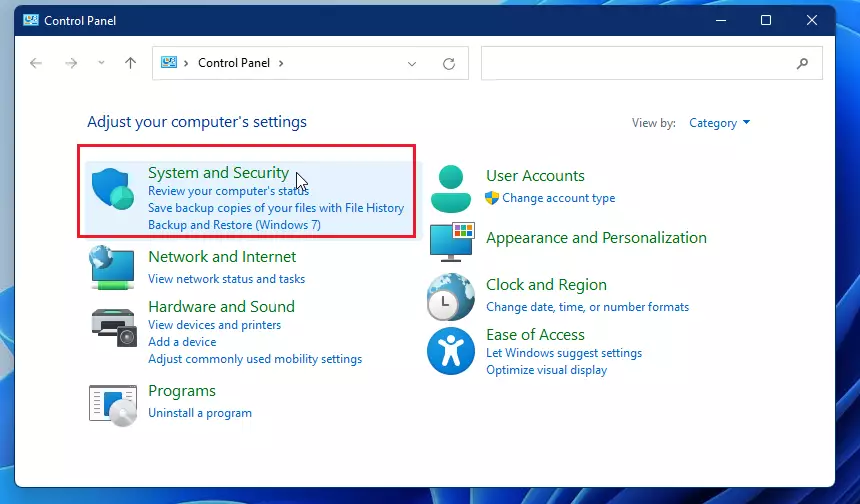
To delete a driver, open the Control Panel in Windows 11
Then, go to the System and Security category.
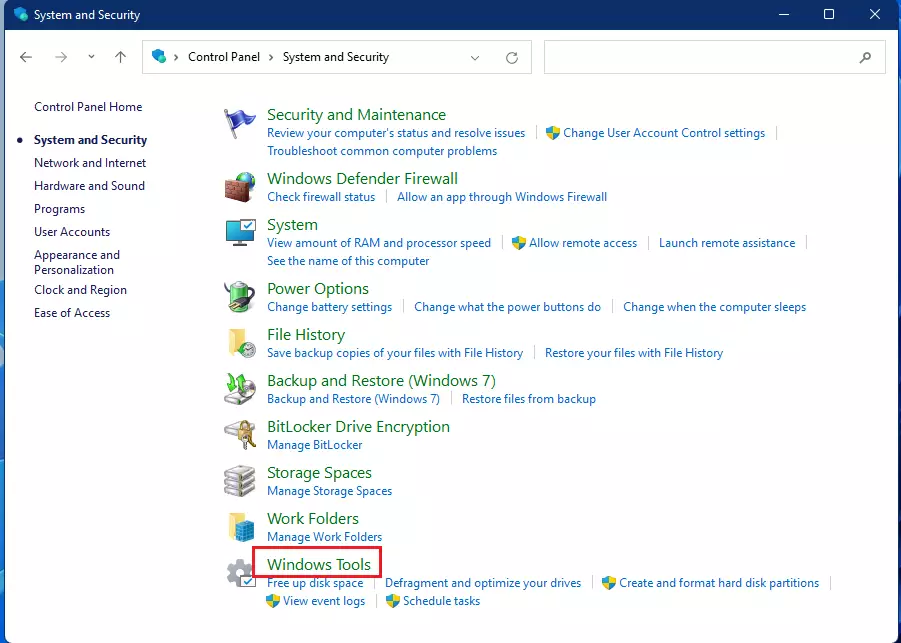
Click Windows Tools.
On the Windows Tool page, click and open Print Management.
Expand the Custom Filters branch and select All Drivers from the left navigation pane.
Locate the printer driver on the list, right-click, and select Remove Driver Package.
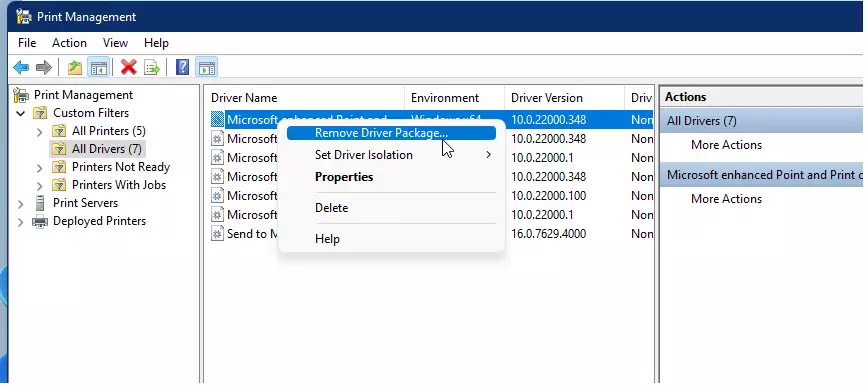
Click Yes when prompted to confirm the removal.
That should do it!
Conclusion:
- Removing unused printer drivers helps free up space on your computer.
- Follow the outlined steps to ensure a smooth removal process.
- You can easily re-install drivers in the future if needed.
- Keeping your system clean of unnecessary drivers can improve performance.
- Regular maintenance of installed drivers is recommended for optimal system function.
Leave a Reply to Riley Cancel reply