How to Check Print Queue on This Computer


The print queue shows every document waiting to print, along with its status. Checking it lets you inspect active documents, cancel frozen print jobs, or restart a stalled printing process without rebooting your computer. This guide covers Windows 11 and shows several ways to open the queue, then how to manage the jobs in it.
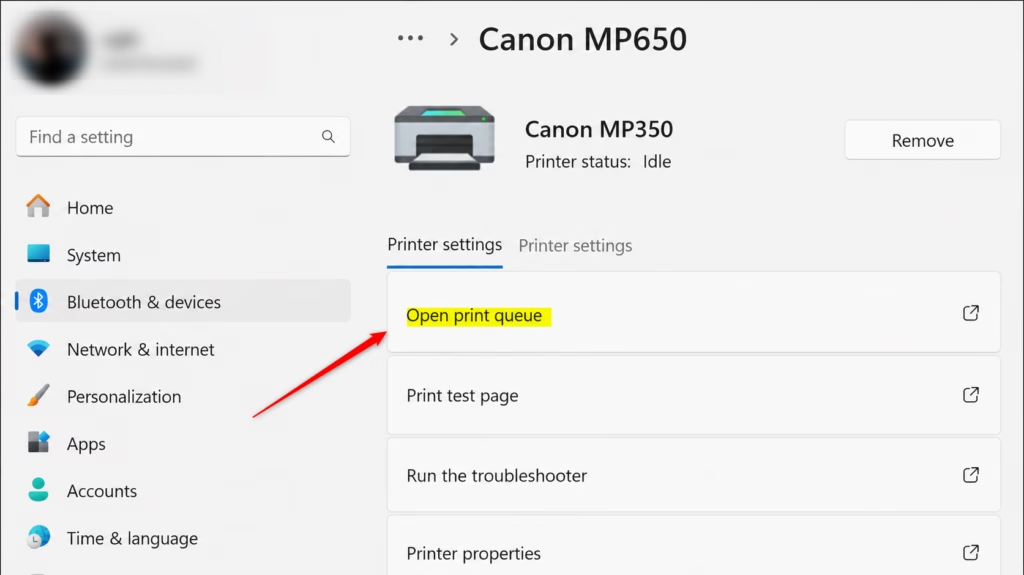
Open Settings , go to Bluetooth & devices Printers & scanners, click your printer, then click Open print queue. A window opens showing all documents waiting to print, their status, and lets you cancel or pause jobs.
Using the Settings App
The Settings app is the quickest route in Windows 11. It lists every printer connected to your computer, and from there you can open the queue for any of them. The path is Bluetooth & devices Printers & scanners.

- Press the Win+I to open Settings . The Settings window appears with a list of categories on the left.
- Select Bluetooth & devices from the left-hand menu.
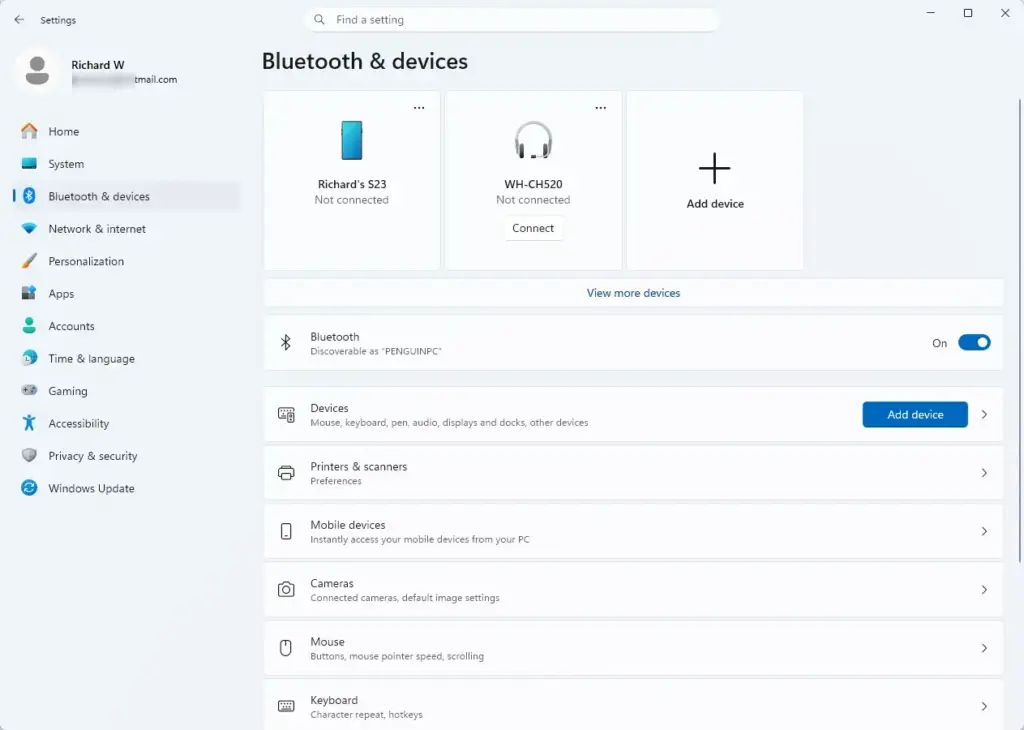
- Click Printers & scanners. You will see every printer installed on the system, including virtual ones such as Microsoft Print to PDF.
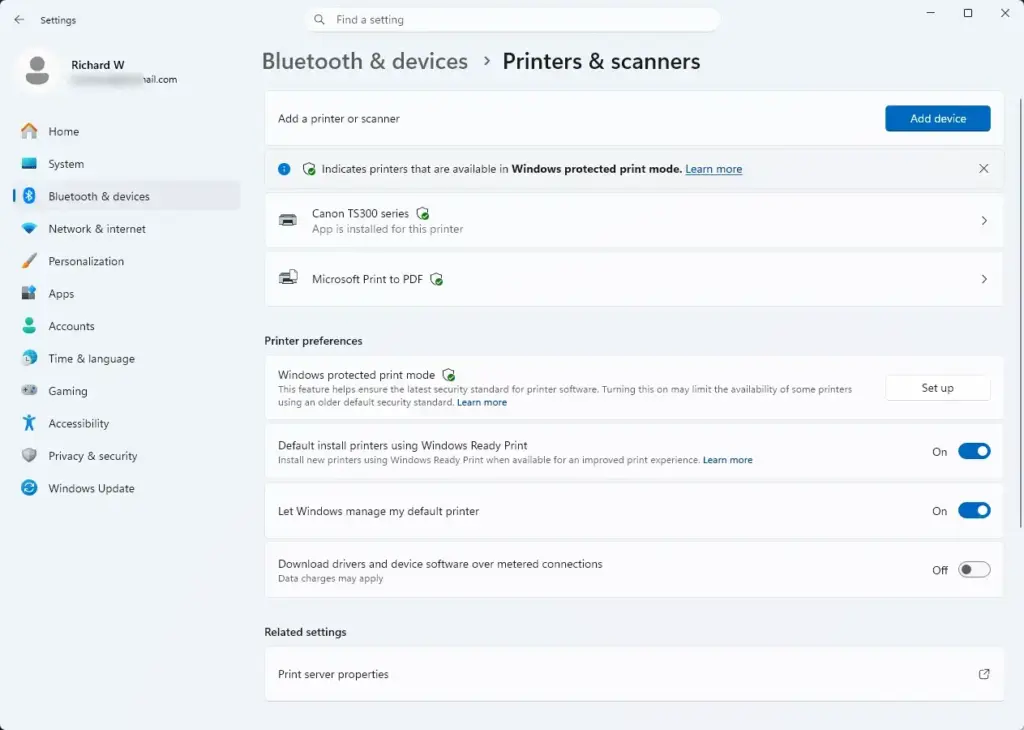
- Click the printer whose queue you want to inspect. Its settings page opens.
- Click Open print queue. A separate window opens listing the active and pending documents for that device. If the list is empty, nothing is waiting to print.
Using the Windows Control Panel
The classic Control Panel gives you another way to reach the queue, and it is useful if the Settings app is not working. It uses the older Devices and Printers window, which is still present in Windows 11 Home and Pro.

- Press the Win+R to open the Run dialog box.
- Type
control printersinto the Open field and press Enter. The Devices and Printers window opens. - Find your printer icon under the Printers section.
- Right-click the printer icon and select See what’s printing from the context menu . The print queue window opens.
Using the Taskbar Notification Area

This is the fastest way to open the queue when a job is in progress. The icon disappears once the job finishes, so if you don’t see it, nothing is currently being sent.
- Look at the notification area (the system tray) in the bottom-right corner of your screen, near the clock.
- Click the upward-facing arrow if you do not see the printer symbol right away. This reveals the hidden icons.
- Double-click the printer icon. The print queue window opens for the device that is processing the job.
Managing Print Jobs in the Queue
Once the queue window is open, you can clear errors, pause transmission, or cancel documents that are blocking your printer. A single stuck document at the front of the queue can hold up everything behind it, so removing it often gets printing moving again.
- Click the document in the queue to select it.
- Click the Document menu at the top of the queue window.
- Select Cancel to stop and delete the selected job, or select Pause to temporarily halt its transmission to the printer. A paused job stays in the list until you resume it from the same menu.
- To clear everything at once, click the Printer menu at the top of the queue window and select Cancel All Documents.
If you cancel a document by mistake, you will need to print it again from the original program. A cancelled job can also take a few seconds to disappear from the list, especially if the printer is offline.
Restarting the Print Spooler Service
Sometimes a job refuses to be deleted and its status stays on Deleting or never changes. In that case, restarting the Print Spooler service usually fixes the frozen queue. This service manages print jobs in the background, and restarting it requires administrator privileges. If you are signed in with a standard account, Windows will ask for an administrator password.
- Press the Windows key + X and select Task Manager from the menu. You can also open Task Manager directly by pressing Ctrl + Shift + Esc.
- Click the Services tab on the left-hand side of Task Manager. It is the icon that looks like a puzzle piece.
- Scroll down the alphabetical list and find the service named Spooler.
- Right-click Spooler and select Restart. Approve the administrator prompt if it appears. The status should briefly change and then show Running again.
- Open the print queue again and check whether the stuck jobs are gone. If they are still listed, cancel them now, since the queue should respond.
Restarting the service does not require a reboot, but any documents that were still printing may need to be sent again.
Checking the Print Queue Using PowerShell
PowerShell lets you query the active print queue directly from the command line without opening any graphical windows. This is handy for quick checks, or when you manage more than one printer.
- Right-click the Start button and select Terminal (or Windows PowerShell, depending on your build). A command window opens.
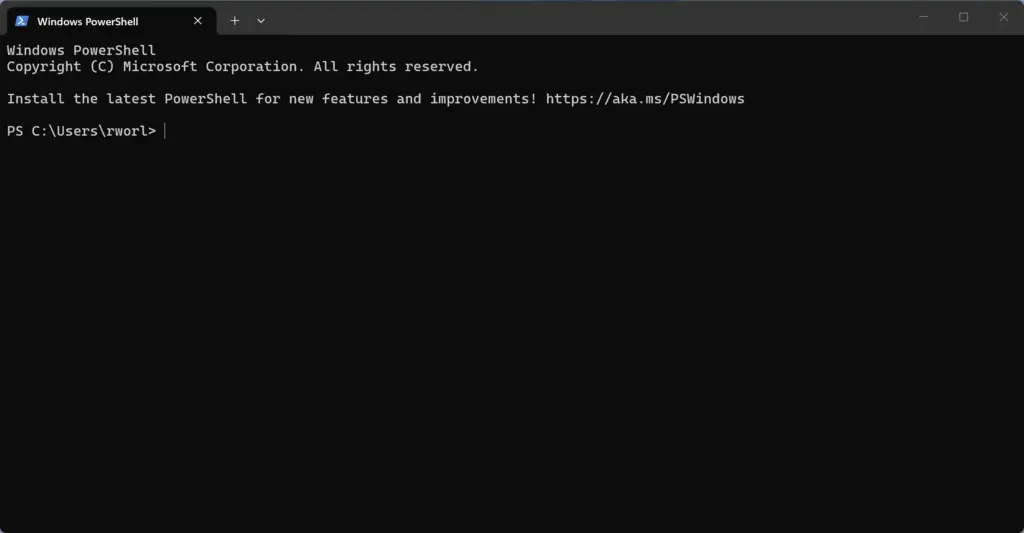
- Type the following command and press Enter to view jobs on a specific printer:
Get-PrintJob -PrinterName "PRINTER-NAME". Replace PRINTER-NAME with your exact device name, as shown in Printers & scanners. The jobs appear as a list in the window, and an empty result means the queue is clear. - Type the following command and press Enter to cancel all jobs on that printer:
Remove-PrintJob -PrinterName "PRINTER-NAME" -JobID ID-NUMBER. As with the graphical option, this cannot be undone. If you get an access denied message, close the window and reopen Terminal as an administrator.
What to do next
You should now be able to view active documents, clear stuck tasks, and manage printer communication on your Windows system. If problems persist, update your printer drivers, or remove the device and add it again through the Printers & scanners page in Settings.
Have a question about this guide?
Answered by AI from this guide. Good questions may be added to this page — please don't include personal details.
Did this guide fix your problem?

About the Author
Richard
Tech Writer, IT Professional
Richard is a writer at Geek Rewind who turns complex IT tasks into clear, step-by-step guides. He draws on years of hands-on experience in system administration and enterprise IT operations, focusing on Windows, Linux and WordPress: the problems people actually run into, and the fixes that work. His server and WordPress guides come from systems he runs himself. Richard builds and maintains the platform behind Geek Rewind, from its Ubuntu servers and Nginx configuration to its custom WordPress plugins. Many new tutorials start with readers' questions, and he's always glad to answer them in the comments.
No comments yet — be the first to share your thoughts!