What to Do When Windows 11 Loses Internet After Waking from Sleep

Windows 11 sometimes loses its internet connection after waking from sleep. It is a power management glitch: Windows cuts power to the network adapter when the PC rests and then fails to bring it back. You wake the PC and find a globe icon with a warning sign on the taskbar . Often the only way to load a webpage again is to reboot.
Network cards are allowed to shut down to save electricity, but Windows doesn’t always wake them up again. You can usually fix this for good by changing a few power settings in Device Manager, so the hardware stays ready the moment you touch the mouse or keyboard. This guide starts with the quick fixes and moves on to more involved ones. Work down the list and test sleep after each change.
When Windows 11 loses internet after waking from sleep, the network adapter has shut down to save power and won’t turn back on. Open Device Manager, expand Network adapters, right-click your adapter, select Properties, go to the Power Management tab, and uncheck “Allow the computer to turn off this device to save power.” Restart your PC to apply the change.
Understanding Why 🪟 Windows 11 Loses Internet After Sleep
The usual cause is that Windows turns off your network adapter to save power and then doesn’t turn it back on when the computer wakes. The network adapter is the internal chip or USB device that connects your PC to Wi-Fi or an Ethernet cable. It has to stay powered for your connection to work.
Normally, when you press a key or move the mouse, Windows tells the adapter to wake up too. Sometimes a software bug, an old driver, or a power-saving setting stops that from happening. Windows thinks it is saving energy, but the adapter stays off until you restart the machine.
Common signs of this problem include:
- The Wi-Fi icon disappears from the taskbar , or Wi-Fi is missing from the Quick Settings panel.
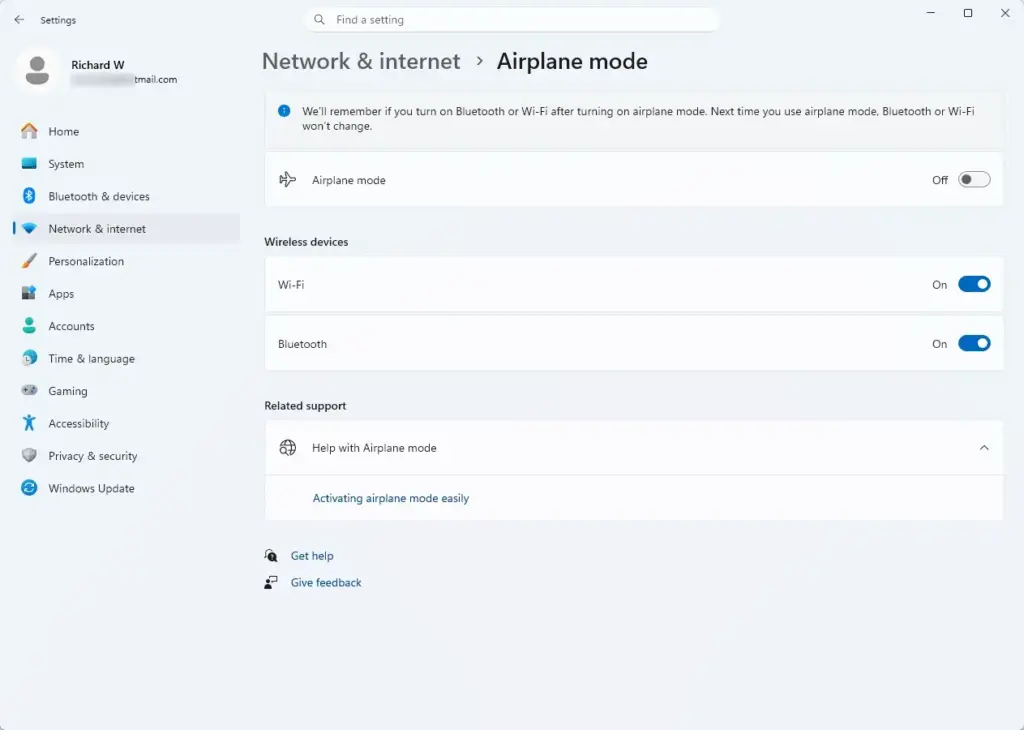
Settings › Network & internet › Airplane mode - Your wired Ethernet connection shows an “Unidentified Network” or “No Internet” message.
- Network troubleshooting tools find no adapters, or say an Ethernet cable is unplugged when it is plugged in securely.
- The problem happens every time the computer goes to sleep, not just once in a while.
The two fixes that work most often are changing the adapter’s power setting in Device Manager and updating the adapter driver. Turning off Fast Startup helps in some cases too. Fixing this means you stop losing work to a dead connection and you don’t have to restart just to get back online.
Step 1Run the Built-In Network Troubleshooter
Start with the built-in network troubleshooter. It checks your adapters, resets some connection settings, and can fix simple driver communication problems without any extra software. It takes a minute, and it doesn't change anything you can't undo.
- Click the Start button and select Settings (the gear icon).
- Click System in the left menu.
- Scroll down on the right and click Troubleshoot.
- Click Other troubleshooters. You should see a list of tools, each with a Run button.
- Find Network and Internet in the list and click Run next to it.
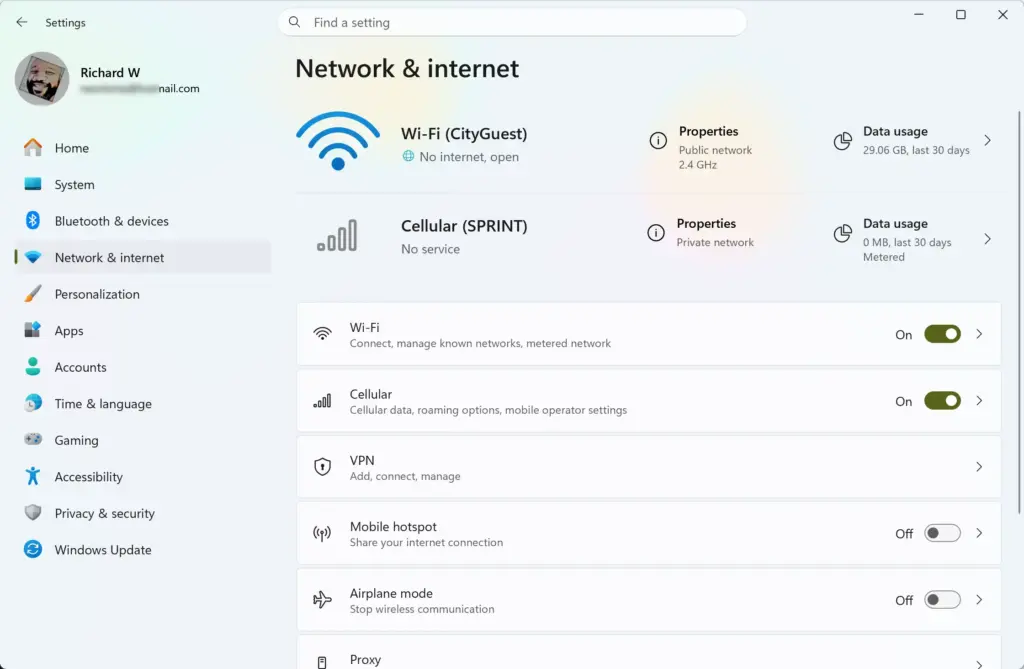
Settings › Network & internet - Wait while Windows scans your network settings, then follow any instructions on screen. A window opens and asks what you are having trouble with, so choose the option that matches your problem.
If the troubleshooter finds a problem, it tries to fix it automatically and tells you what it changed. If it finds nothing, don't worry. That is common with sleep problems, because the fault only shows up after the PC wakes. The fixes below deal with the actual cause.
Step 2Change Power Management Settings for Your Network Adapter
This is the fix that works most often. Windows has a setting that lets it switch off the network adapter to save power. Turning it off stops Windows from putting your Wi-Fi or Ethernet card into a sleep state it can't wake from.
- Right-click the Start button and select Device Manager.
- Find the category named Network adapters and click the small arrow next to it. The list of adapters expands.

Device Manager - Find your main network device. A Wi-Fi adapter might be called something like Intel Wireless, Realtek Wireless, or Qualcomm. A wired adapter might be called PCIe Family Controller or Intel Ethernet Connection. Ignore entries such as WAN Miniport or Bluetooth Device, which are virtual adapters.
- Right-click your network adapter and select Properties. A properties window opens.
- Click the Power Management tab at the top. Some adapters, especially certain USB ones, don't show this tab. If yours doesn't, skip ahead to the next section.
- Uncheck Allow the computer to turn off this device to save power.
- Click OK to save your changes.
If your computer has both Wi-Fi and Ethernet adapters, repeat these steps for each one. That way neither connection drops when the system wakes. You don't need to restart, but put the PC to sleep and wake it to test. To undo the change, tick the box again.
Step 3Update Your Network Drivers
An outdated or buggy driver is a common reason the adapter won't wake after sleep. A newer driver often fixes how the hardware responds to power state changes. You can update it through Device Manager.
- Right-click the Start button and open Device Manager.
- Expand the Network adapters category.
- Right-click your network adapter and select Update driver.
- Choose Search automatically for drivers. Windows now looks for a newer driver.
- If Windows finds one, let it install. You may need to restart afterward.
If Windows says the best driver is already installed, that only means it found nothing newer in its own sources. You can also check Settings Windows Update Advanced options Optional updates Driver updates for an adapter driver. Better still, go to your computer maker's support site (Dell, HP, Lenovo, Asus, and so on), or your motherboard maker's site for a desktop. Find your exact model, download the latest network driver, and run the installer. If the problem started right after a driver update, open the adapter's Properties in Device Manager, go to the Driver tab, and try Roll Back Driver if it is available.
Step 4Disable Fast Startup in 🪟 Windows 11
Fast Startup saves part of the system state to disk when you shut down, so the next boot is quicker. That saved state can leave network hardware in a bad condition, and turning the feature off makes Windows start cleanly instead. Many people report it helps with network problems around sleep and startup. It costs you only a slightly slower boot.
Note: This step requires administrator privileges on your computer.
- Click the Start button, type Control Panel in the search bar, and click the app when it appears.

Control Panel - In the top right corner, change the View by option to Large icons or Small icons.
- Click Power Options.
- On the left side, click Choose what the power buttons do.
- At the top of the window, click Change settings that are currently unavailable. Windows may ask you to confirm. The options in the Shutdown settings section are now editable.
- Under Shutdown settings, uncheck Turn on fast startup (recommended). If this option is missing, hibernation is probably turned off on your PC.
- Click Save changes.
Use Restart (not Shut down) once to apply the change, then test sleep. To undo it, follow the same steps and tick the box again.
Step 5Reset Your Network Settings
A network reset removes and reinstalls your network adapters and sets networking back to its defaults. This clears out corrupted settings that normal troubleshooting can't reach. Use it after the earlier fixes, because it also wipes your saved connections.
Note: This step requires administrator privileges on your computer.
- Open the Settings app from the Start menu.

Settings - Click Network & internet in the left menu.
- Click Advanced network settings on the right.
- Scroll down and click Network reset.
- Read the warning, then click Reset now.
- Click Yes to confirm.
Your computer restarts automatically, so save your work first. The reset removes all saved Wi-Fi networks, and it can also remove VPN client settings and virtual adapters. After the restart, reconnect to your Wi-Fi and type the password again. You may need to set up your VPN again too.
Advanced Unique Solutions for Stubborn Network Issues
If you have tried the standard steps and the connection still drops after sleep, these advanced fixes deal with hardware and USB power behavior. Try them in order, and test sleep after each one.
Power Cycling the Motherboard Residual Power
A power cycle drains leftover electrical charge from the motherboard. That can clear a built-in network chip that is stuck in a frozen state after sleep. You shut the computer down completely, remove all power, and hold the power button for 30 seconds. This forces a full hardware reset of the chip.
- Shut down your computer completely. Use Shut down, not sleep or restart.
- Unplug the power cord from the back of a desktop, or disconnect the charger if you use a laptop.
- If your laptop has a removable battery, take it out. If the battery is built in, skip this step.
- Press and hold the physical power button for a full 30 seconds. Nothing will appear to happen, which is normal. This drains the remaining charge from the components.
- Plug the power cord or charger back in, and put the battery back if you removed it.
- Turn the computer on and test sleep mode.
Checking Universal Serial Bus (USB) Selective Suspend for USB Wi-Fi Adapters
USB selective suspend lets Windows cut power to idle USB devices. If you use a USB Wi-Fi adapter, Windows may switch it off during sleep and not wake it. Turning this setting off keeps the adapter powered. It only matters for USB adapters, so skip it if you use a built-in card. The setting applies to your active power plan, so repeat it if you switch plans.
To stop Windows from turning off your USB Wi-Fi adapter:
- Open the Control Panel and go to Power Options.
- Click Change plan settings next to your currently selected power plan.
- Click Change advanced power settings. A small window opens.
- Scroll down the list and click the plus sign next to USB settings.
- Click the plus sign next to USB selective suspend setting.
- Change the setting from Enabled to Disabled. On a laptop you will see two options, On battery and Plugged in. Set both to Disabled if you want the adapter always powered.
- Click Apply, then click OK.
On a laptop, keeping USB devices powered on battery can use a little more power. To undo the change, set the option back to Enabled.
Summary
To fix internet loss after sleep in Windows 11, adjust the adapter's power management setting, update the network driver, turn off Fast Startup, and reset the network settings if needed. Together these stop Windows from switching off your network hardware when the PC wakes. Start with the simple changes and work down the list until the connection stays stable.
Begin with the network troubleshooter and the power management setting in Device Manager. If the problem continues, move on to the driver update, Fast Startup, and network reset. For stubborn cases, try a motherboard power cycle, or disable USB selective suspend if you use a USB Wi-Fi adapter. Test sleep after each change so you know which one fixed it.
Was this guide helpful?

About the Author
Richard
Tech Writer, IT Professional
Richard is a writer at Geek Rewind who turns complex IT tasks into clear, step-by-step guides. He draws on years of hands-on experience in system administration and enterprise IT operations, focusing on Windows, Linux and WordPress: the problems people actually run into, and the fixes that work. His server and WordPress guides come from systems he runs himself. Richard builds and maintains the platform behind Geek Rewind, from its Ubuntu servers and Nginx configuration to its custom WordPress plugins. Many new tutorials start with readers' questions, and he's always glad to answer them in the comments.


No comments yet — be the first to share your thoughts!