Fix Audio Cracking After Waking from Sleep Mode


Audio cracking after waking from sleep mode is a distortion glitch that happens when your sound card or USB speakers fail to resume properly from a low-power state. Windows 10 and Windows 11 PCs often experience this static, popping, or buzzing noise because audio drivers get confused during the wake-up process.
You can stop this audio distortion for good without having to reboot your computer every time you step away from your desk. Several simple fixes will help you get clear sound back instantly.
Fix audio cracking after waking from sleep mode by restarting the background sound program. Press the Win, type Services, and open the Services app. Scroll down the list, right-click on Windows Audio, and select Restart. This refreshes your sound system without needing to reboot your entire computer.
Basic Checks and Quick Fixes
Quick fixes like unplugging your speakers or restarting the Windows Audio service often resolve audio cracking in seconds. Unplugging and re-plugging your USB or Bluetooth audio device forces Windows to reload the connection and clear out static. Restarting the Windows Audio service refreshes background sound processes without changing any advanced settings on your computer.
- Unplug and Re-plug Your Audio Device: If you use USB speakers, a USB headset, or Bluetooth headphones, unplug them. Wait five seconds, and plug them back in. This forces Windows to recognize the device again and often clears out the static.
- Restart the Windows Audio Service: Windows runs background programs called services to handle everyday tasks. You can restart the audio service without rebooting your whole computer. Press the Win, type Services, and click the Services app. Scroll down the alphabetical list until you find Windows Audio. Right-click on Windows Audio and select Restart. If a confirmation box pops up asking if you also want to restart related services, click Yes.
- Disconnect USB Hubs: Many cheap USB hubs struggle to manage power correctly when a computer wakes from sleep. If your audio device plugs into a USB hub, try plugging it directly into a USB port on the back or side of your computer.
Method 1Restart Your Audio Driver
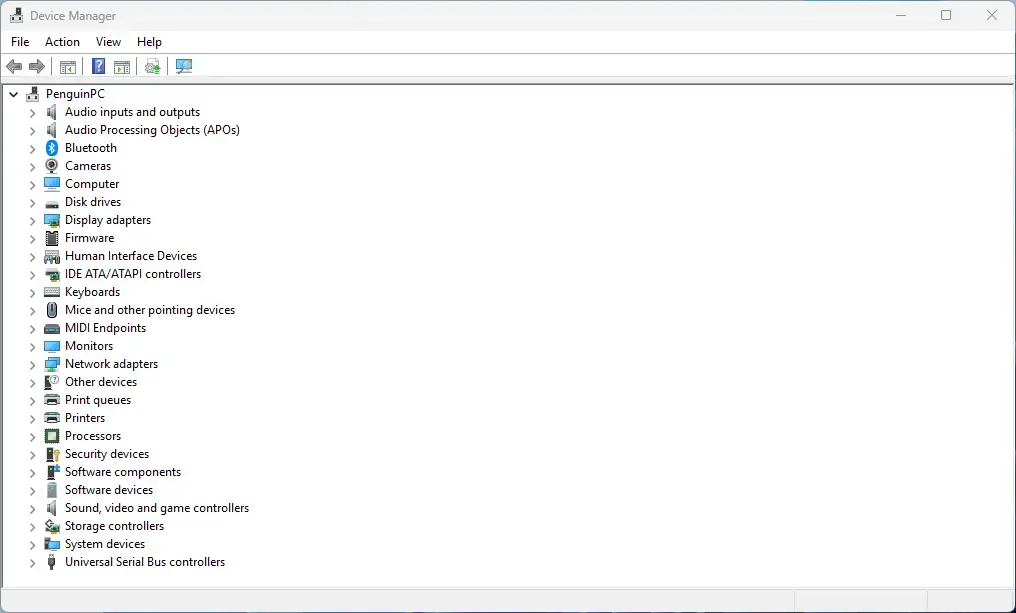
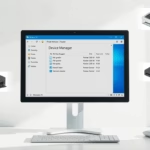
Restarting your audio driver in Device Manager fixes audio cracking after waking from sleep mode by refreshing the software connection between Windows and your sound card. This safe troubleshooting step resets your sound management software without deleting or reinstalling any system files. You can complete this quick reset using the built-in Device Manager menu on your taskbar .
- Right-click the Start button on your taskbar and select Device Manager.
- Scroll down the list of devices and click the arrow next to Sound, video and game controllers to open the menu.
- Find your main audio device in the list. It is usually called Realtek Audio, Intel High Definition Audio, or something similar.
- Right-click your audio device and select Disable device. A warning message might appear telling you that disabling the device will stop it from working. Click Yes or Confirm.
- Wait about five seconds.
- Right-click the same audio device again and select Enable device.
- Test your sound to see if the crackling is gone.
Method 2Update or Roll Back Your Audio Drivers
Updating or rolling back your audio drivers resolves post-sleep audio glitches caused by outdated or buggy hardware software. Hardware manufacturers frequently release new driver versions specifically designed to fix sleep mode bugs and eliminate popping noises in your speakers or headphones. Replacing a faulty driver gives your sound card the stable software it needs to wake up properly.
- Open the Device Manager by right-clicking the Start button .
- Expand the Sound, video and game controllers section.
- Right-click your audio device and select Update driver.
- Choose Search automatically for drivers. Windows will search your computer and the internet for a newer version. If it finds one, follow the on-screen steps to install it .
If a recent update triggered the noise, the new driver may be unstable. Roll it back by opening Device Manager and expanding Sound, video and game controllers. Right-click your audio device and select Properties.
- Open the Device Manager and expand Sound, video and game controllers.
- Right-click your audio device and select Properties.
- Click on the Driver tab at the top of the window.
- Click the Roll Back Driver button if it is available and not grayed out.
- Follow the prompts to restore the previous version of the driver, then restart your computer.
Method 3Disable Audio Enhancements
Disabling built-in audio enhancements stops sound distortion caused by software features conflicting with your audio hardware after waking from sleep mode. Turning off these extra sound effects through the Control Panel sound settings often clears up persistent cracking and popping noises instantly. This prevents Windows from applying demanding processing filters that trigger audio static after a sleep cycle.
- Click the Start button, type Control Panel, and open the app.
- Click on Hardware and Sound, then click on Sound. A new window will pop up showing your playback devices.
- Click on your default speakers or headphones so they are highlighted, then click the Properties button at the bottom right.
- In the Properties window, look for a tab labeled Enhancements or Spatial Sound. Depending on your Windows version, this might be under an Advanced or General tab.
- Check the box that says Disable all enhancements or Disable all sound effects.
- Click Apply, then click OK.
- Repeat these steps for any other playback devices you use.

Method 4Change Audio Sample Rate and Bit Depth
Changing your audio sample rate and bit depth in the sound properties menu prevents your computer from using an audio format that is too demanding for your sound card after sleep. Lowering these settings helps your hardware handle the transition out of sleep mode without causing annoying static or audio cracking. You can adjust these values safely through the classic Control Panel sound menu.
- Open the Control Panel and go to Hardware and Sound Sound
- Select your primary speakers or headphones and click Properties.
- Click on the Advanced tab at the top.
- Look for the section called Default Format. You will see a drop-down menu with options like 24-bit, 48000 Hz or 16-bit, 44100 Hz.
- Change the setting to a lower quality format, such as 24-bit, 44100 Hz or 16-bit, 48000 Hz.
- Click Test to see how it sounds, then click Apply and OK.
Method 5Adjust USB Power Management Settings
Adjusting USB power management settings stops Windows from cutting power to your USB ports to save energy during sleep mode, which frequently causes audio cracking. Preventing your computer from turning off power to your USB sound devices ensures they wake up cleanly every time you use them. You can turn off this power-saving feature through Device Manager in a few clicks.
- Right-click the Start button and select Device Manager.
- Scroll down and click the arrow next to Universal Serial Bus controllers to open the list.
- Look for items named USB Root Hub or Generic USB Hub.
- Right-click the first hub in the list and select Properties.
- Click on the Power Management tab if it is available.
- Uncheck the box that says Allow the computer to turn off this device to save power.
- Click OK.
- Repeat this process for every USB Root Hub and Generic USB Hub listed in Device Manager.
Method 6Turn Off Fast Startup
Turning off Fast Startup stops Windows from keeping a small part of your system in a semi-hibernation state that causes hardware glitches like audio cracking after sleep. Disabling this boot feature gives your computer a completely fresh start every time you turn it on and clears lingering driver conflicts. Note that this step requires administrator privileges to change the system power settings.
- Click the Start button, type Control Panel, and open it.
- Click on Hardware and Sound, then click on Power Options.
- On the left side of the window, click the link that says Choose what the power buttons do.
- Click the link near the top that says Change settings that are currently unavailable.
- Look at the bottom of the window under Shutdown settings. Uncheck the box next to Turn on fast startup.
- Click the Save changes button at the bottom.
- Restart your computer normally once to apply the changes.
Advanced Expert Tips: Unique Angles Competitors Miss
Most online guides stop after suggesting driver reinstalls and power management tweaks. If your audio still crackles after trying everything above, looking at deeper system settings is necessary. Here are two advanced methods that most websites miss.
Advanced Tip 1: Adjusting PCI Express Link State Power Management
Adjusting PCI Express Link State Power Management stops Windows from cutting power too aggressively to internal sound cards connected to your motherboard. Changing this advanced power setting ensures your internal sound card maintains power stability and avoids audio cracking after waking from sleep mode. You can modify this option safely inside the advanced power plan settings in Control Panel.
- Click the Start button, type Control Panel, and open it.
- Navigate to Hardware and Sound Power Options
- Next to your currently selected power plan, click the Change plan settings link.
- Click the link that says Change advanced power settings. A small window will pop up.
- Scroll down the list and click the plus sign next to PCI Express to expand the category.
- Click the plus sign next to Link State Power Management.
- If you are using a laptop, you will see settings for On battery and Plugged in. If you are on a desktop, you will just see one setting.
- Click the drop-down menu and change the setting from Maximum power savings or Moderate power savings to Off.
- Click Apply, then click OK.
Advanced Tip 2: Checking for DPC Latency Spikes
Checking for DPC latency spikes (delays in how your computer handles background tasks) helps you find poorly coded drivers that take too long to respond after your computer wakes from sleep. Using a free latency tool lets you track down the exact background process causing traffic jams and severe audio cracking in your system. You can monitor these system delays using a trusted third-party diagnostic utility called LatencyMon.
You can check this using a free tool called LatencyMon:
- Download LatencyMon from a trusted developer website.
- Install and run LatencyMon on your computer.
- Put your computer into sleep mode for a few minutes, then wake it back up.
- Open LatencyMon and click the green Play button at the top to start monitoring your system.
- Let it run for a minute or two while you play some audio.
- Check the main results tab. LatencyMon will tell you if your system is ready for real-time audio and will highlight any specific driver files that cause high latency.
- If a specific driver is causing the problem, update or reinstall that driver right away.
Summary
Audio cracking after waking from sleep mode points to power management conflicts and driver communication failures. Check your audio drivers, adjust USB power settings, or modify advanced power options to restore clear sound permanently.
Was this guide helpful?

About the Author
Richard
Tech Writer, IT Professional
Richard is a writer at Geek Rewind who turns complex IT tasks into clear, step-by-step guides. He draws on years of hands-on experience in system administration and enterprise IT operations, focusing on Windows, Linux and WordPress: the problems people actually run into, and the fixes that work. His server and WordPress guides come from systems he runs himself. Richard builds and maintains the platform behind Geek Rewind, from its Ubuntu servers and Nginx configuration to its custom WordPress plugins. Many new tutorials start with readers' questions, and he's always glad to answer them in the comments.
No comments yet — be the first to share your thoughts!