How to Roll Back Device Drivers in Windows 11
You roll back a device driver in Windows 11 to revert to a previous, stable version when a recent update causes hardware malfunctions.
This process involves uninstalling the current driver and restoring the last known working version stored by Windows, often called the driver store. It’s your quickest solution for issues like a graphics card suddenly failing after a software update.
For instance, if your specific graphics card, like an NVIDIA GeForce RTX 4090, begins to stutter after an update applied on April 15, 2024, rolling back the driver will likely resolve the problem.
You perform this fix when a new driver installation introduces instability, aiming to restore your hardware’s functionality without impacting your personal data.
To roll back a device driver in Windows 11, open Device Manager, right-click the device, select Properties, go to the Driver tab, and click “Roll Back Driver.” Select a reason and confirm to revert to the previous driver version.
How to revert to previous device drivers
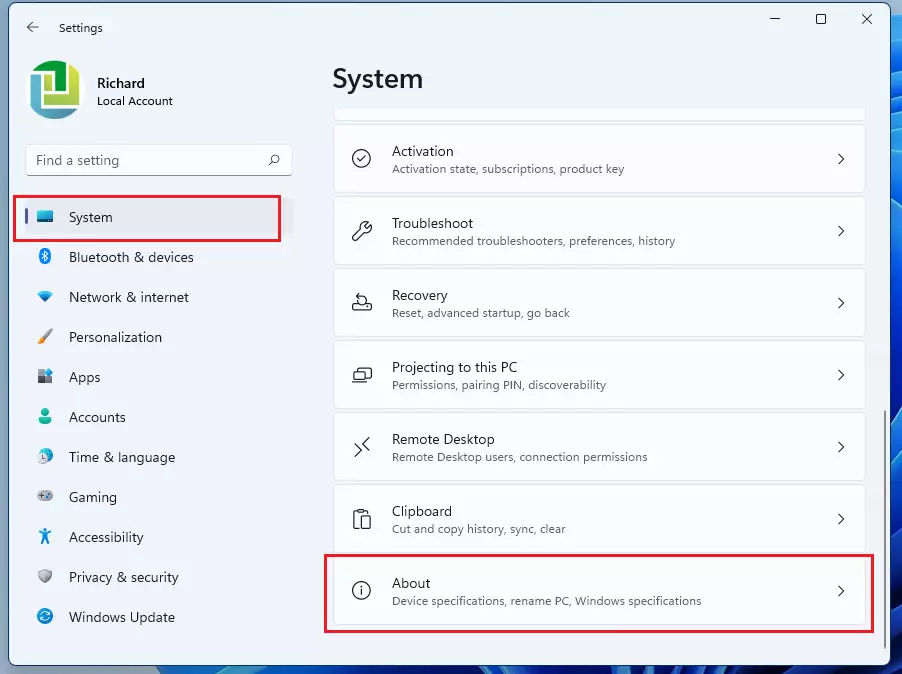
You can revert to previous device drivers in Windows 11 if a recent update is causing problems with your computer’s hardware. This means going back to an older driver version that you know worked correctly. The easiest way to do this is by using the Device Manager, which you can open quickly from the Start button menu.
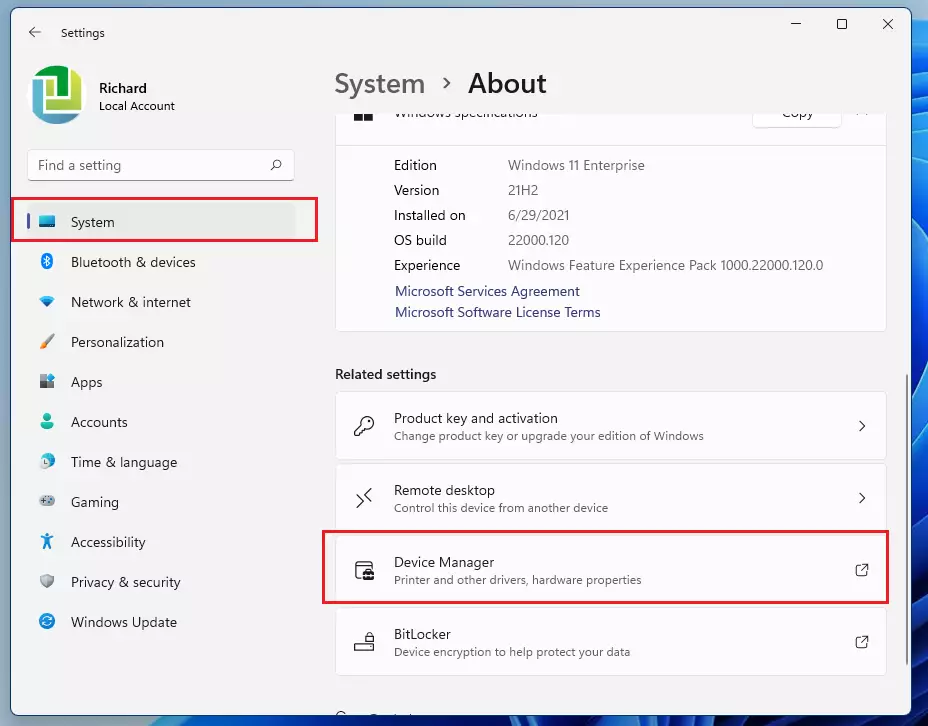
The fastest way to access the tools you need is through the ⊞ Win+X menu. First, right-click the Start button and select Device Manager from the list.

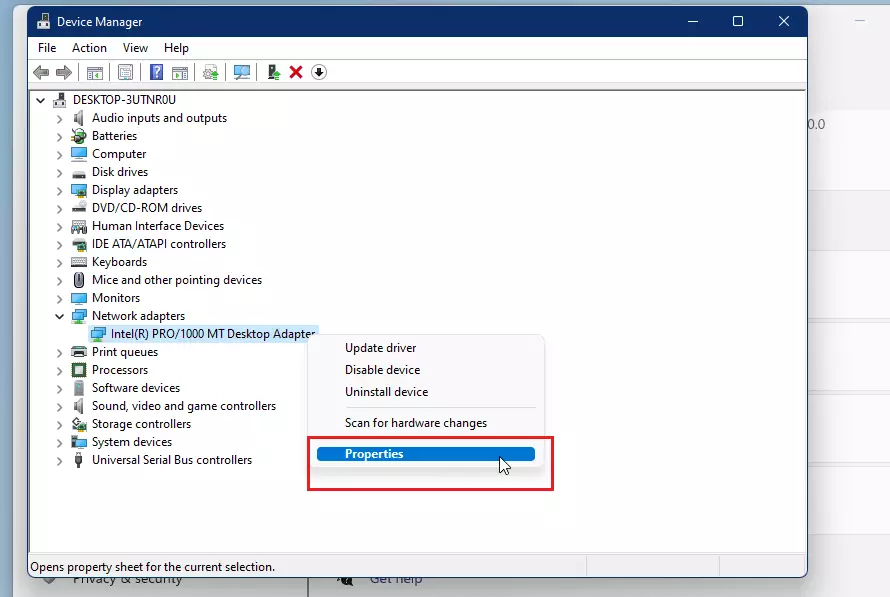
Once the Device Manager is open, find the device causing the driver conflict. Click the small arrow next to the device category to see the hardware list. Right-click the specific device and select Properties.
Click the button to begin. A window will appear asking why you want to roll back. Select the reason that fits your situation, such as “The previous version of the driver performed better,” and click Yes to continue.
Troubleshooting Driver Issues
If rolling back drivers doesn’t fix your hardware problems, you might need to check for specific Windows DCH driver requirements or verify your hardware’s ID.
Summary
Rolling back device drivers is a straightforward way to fix stability issues that might pop up after a Windows update. The Device Manager is your main tool for managing these drivers. If the ‘Roll Back’ option is greyed out, it simply means there isn’t an older driver version available to switch to.- Rolling back is a simple way to fix stability issues caused by recent updates.
- Use the Device Manager (⊞ Win+X) to manage your hardware drivers.
- If the ‘Roll Back’ button is greyed out, no previous driver version is available.
- Rolling back drivers does not delete your personal files.
- Always restart your computer after the process to ensure everything works correctly.
Why is the Roll Back Driver button greyed out?
The ‘Roll Back Driver’ button is greyed out in Windows 11 when your system doesn’t have a previous driver version saved.
Will rolling back a driver delete my personal files?
No, rolling back a device driver will not delete your personal files, photos, or documents. It only affects the specific software instructions used by Windows to communicate with your hardware. It is a safe troubleshooting step that only changes system-level driver files, not your user data.
Was this guide helpful?

About the Author
Richard
Tech Writer, IT Professional
Richard, a writer for Geek Rewind, is a tech enthusiast who loves breaking down complex IT topics into simple, easy-to-understand ideas. With years of hands-on experience in system administration and enterprise IT operations, he’s developed a knack for offering practical tips and solutions. Richard aims to make technology more accessible and actionable. He's deeply committed to the Geek Rewind community, always ready to answer questions and engage in discussions.


Cannot select “Roll Back Driver”, it is grayed out.
Same situation. Any solution to this problem?
Hello, Thank You for taking the time to help me. I did what you said.It seems my rollback driver is not even highlighted for me to click on
I want roll back driver
[…] open the Device Manager (devmgmt.msc) […]