How to Install or Update Audio Drivers in Windows 11

This guide helps you update or install audio drivers on Windows 11.
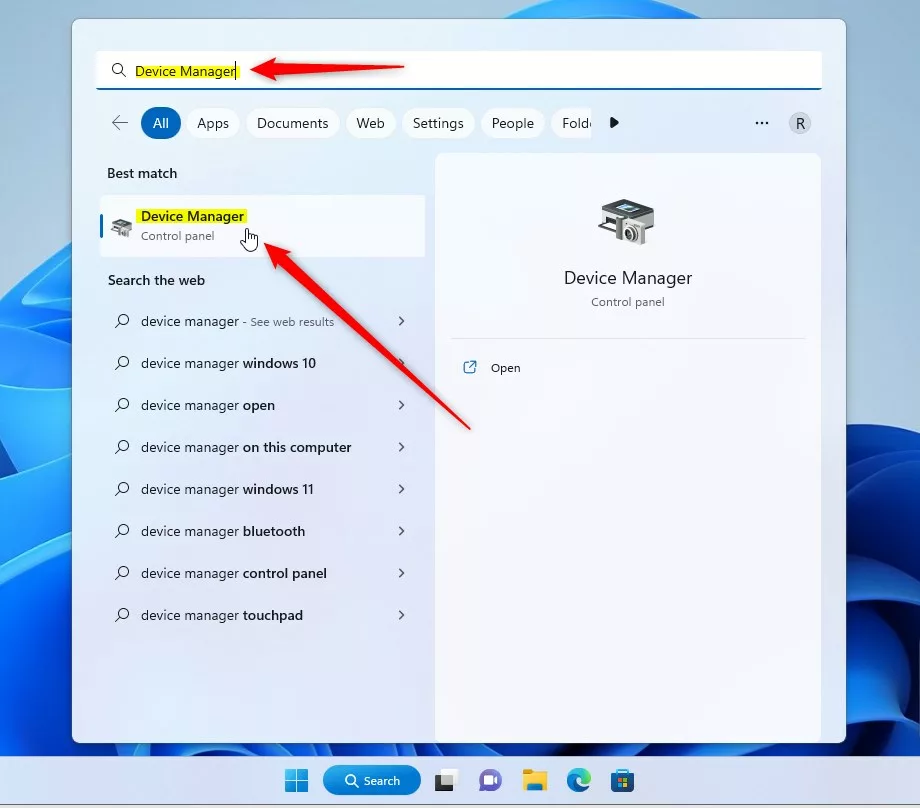
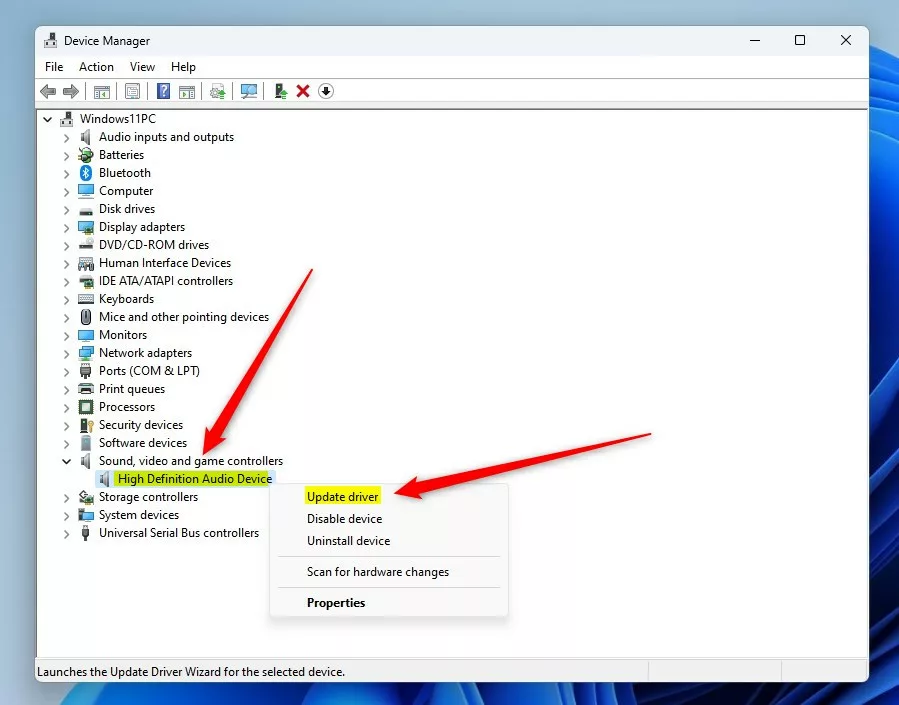
Update audio drivers via Device Manager by right-clicking Start, selecting Device Manager, expanding Sound, video, and game controllers, right-clicking your audio device, and choosing Update driver. You can also check Windows Update under Advanced options for Optional updates.
Quick Fix Checklist
- Check if your speakers are muted or unplugged.
- Restart the Windows Audio Service.
- Run the Windows Audio Troubleshooter.
- Check for Optional Updates in Windows Update.
- Reinstall the driver via Device Manager.
Why Update Audio Drivers?
Audio drivers essentially act as a translator between your computer’s hardware and the software you use. Outdated drivers can cause crackling sounds, low volume, or complete silence. Updating them keeps your system running smoothly.
What Happens When Done?
After updating, your audio device should communicate more effectively with Windows. This usually fixes playback errors and can improve your overall sound quality, ensuring your hardware works well with even the newest apps.
Restarting the Windows Audio Service
Restarting the Windows Audio Service can fix sound problems when the driver is okay but the service isn’t running.
1. Press the Windows key + R, then type services.msc and hit Enter.
2. Scroll down to find Windows Audio.
3. Right-click it and select Restart.
4. Repeat this for Windows Audio Endpoint Builder.
Install Audio Drivers via Optional Updates
Sometimes, Windows Update buries driver updates. If you’re experiencing sound issues, it’s a good idea to check here first.
1. Click Start, then Settings.
2. Navigate to Windows Update > Advanced options.
3. Select Optional updates.
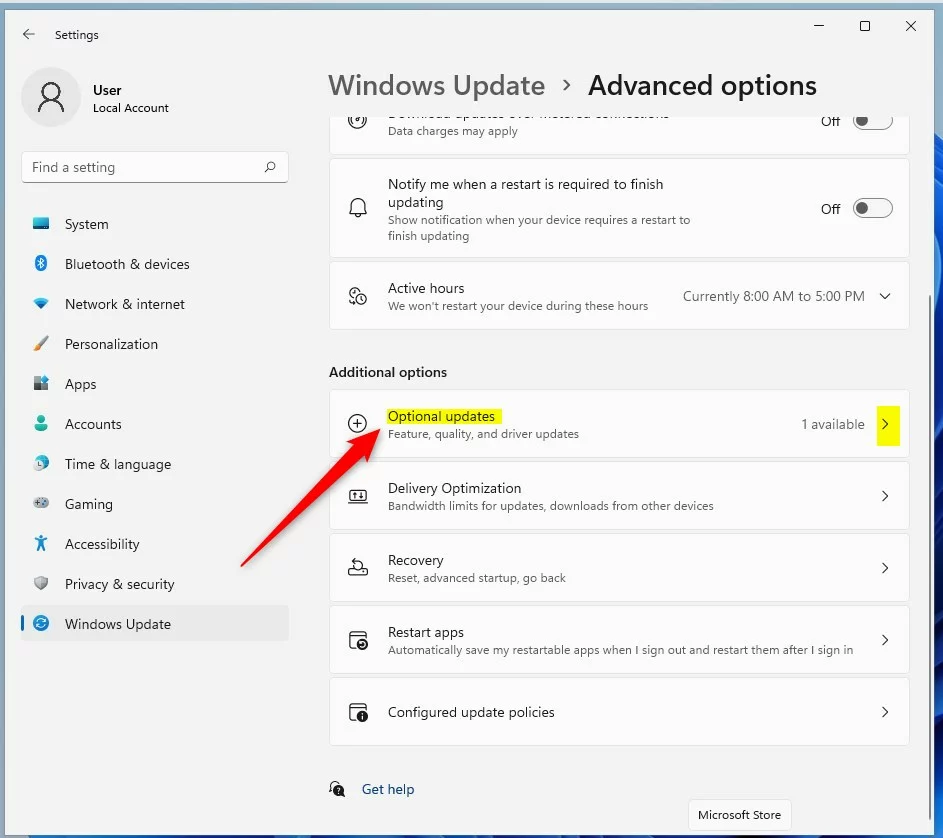
If an audio driver shows up, select it and click Download & install.
Install or Update Audio Drivers via Device Manager
Updating your audio drivers in Windows 11 is easy using the built-in Device Manager tool.
1. Right-click Start and select Device Manager.
2. Expand Sound, video, and game controllers.
3. Right-click your device (e.g., Realtek High Definition Audio) and select Update driver.
4. Choose Browse my computer for drivers to use a file from an OEM support page.
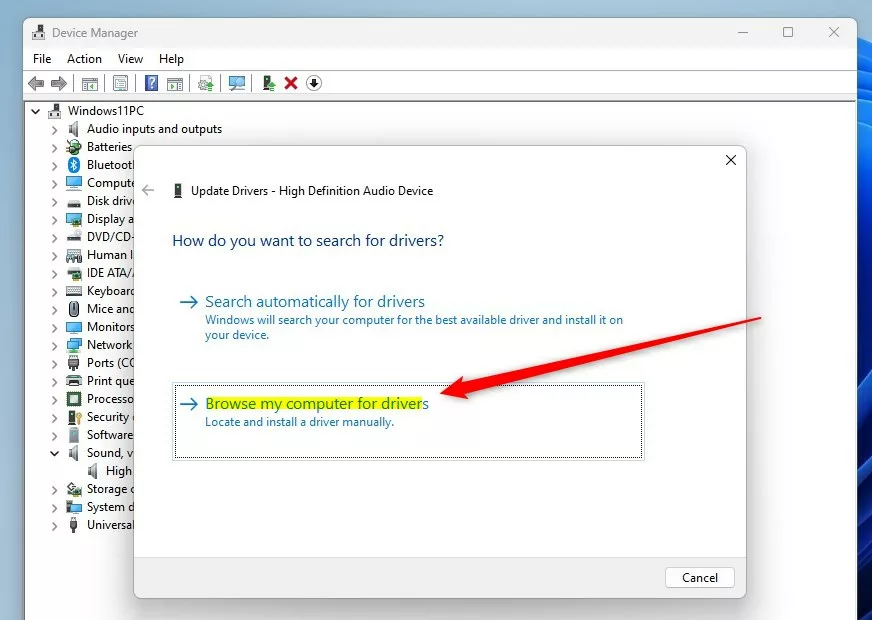
5. Click Browse to locate your downloaded file.
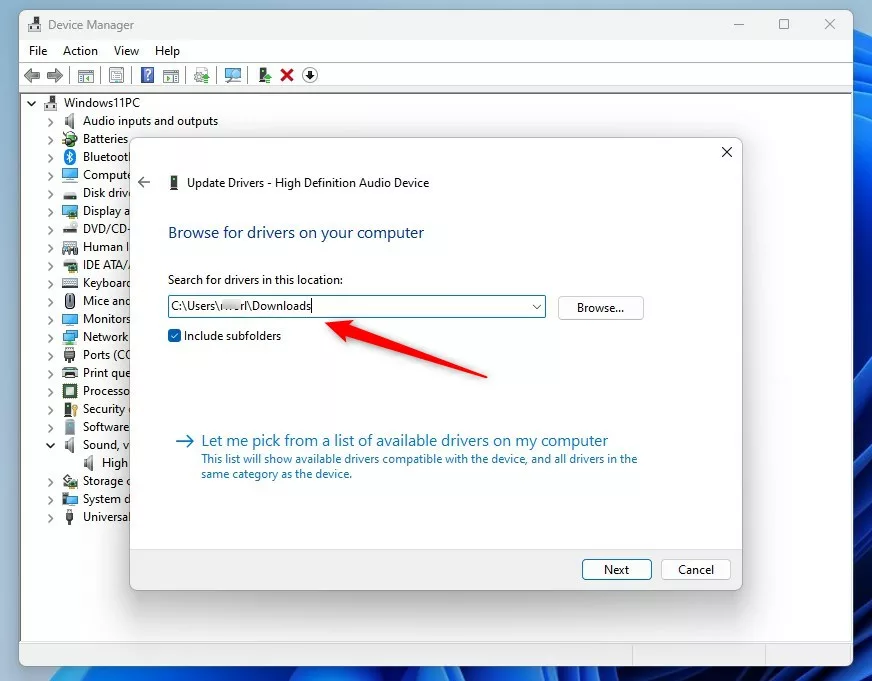
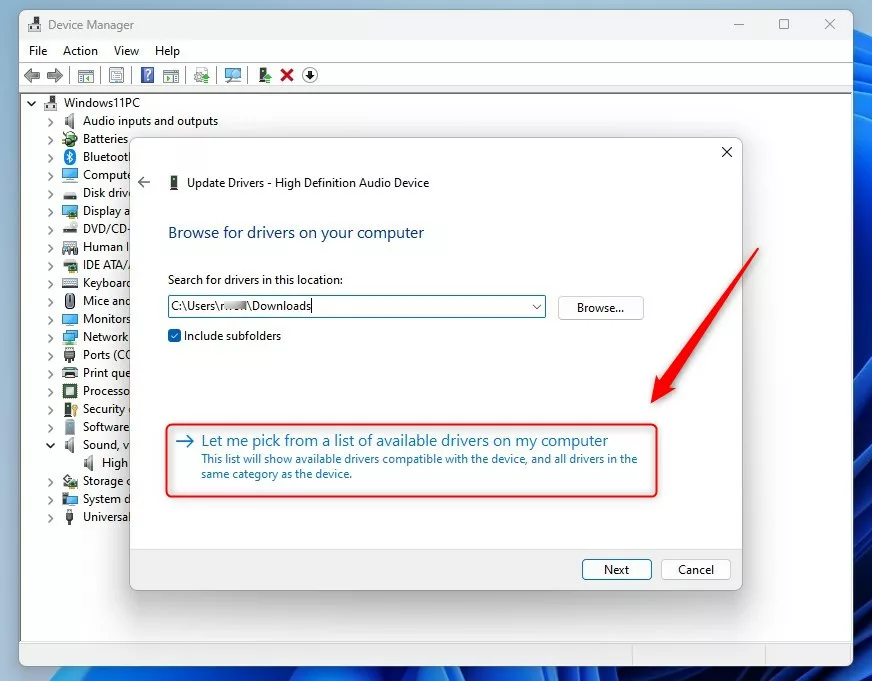
6. If you don’t have a file, select Let me pick from a list of available drivers on my computer to see system-stored drivers like those in 📁C:\Windows\System32.
Troubleshooting Failed Installations
If you encounter Device Manager error code 10, it means the device failed to start. Your next step is to try uninstalling the device and then restarting your PC. Windows will usually attempt to reinstall the driver automatically when it boots back up.
Manufacturer-Specific Drivers
Should you use Windows Update or the manufacturer? Windows Update is convenient, but manufacturer websites (like Dell, HP, or Lenovo) often provide specific audio enhancements that general drivers lack. Always check your PC manufacturer’s support page first if you have unique audio issues.
Summary
Updating your audio driver solves most sound problems. Use Optional updates for convenience or Device Manager for manual control. If sound fails, restart the Windows Audio Service or check the manufacturer’s website for the latest software. Always restart your computer to finalize changes.
Why is my audio driver not showing up in Device Manager?
If your audio driver isn’t showing up in Device Manager, it might be disabled in your BIOS, disconnected, or require a hidden devices view.
What is the difference between High Definition Audio and Realtek drivers?
High Definition Audio drivers are basic Microsoft ones, while Realtek drivers are specific to your sound hardware and often offer more features.
Was this guide helpful?

About the Author
Richard
Tech Writer, IT Professional
Richard, a writer for Geek Rewind, is a tech enthusiast who loves breaking down complex IT topics into simple, easy-to-understand ideas. With years of hands-on experience in system administration and enterprise IT operations, he’s developed a knack for offering practical tips and solutions. Richard aims to make technology more accessible and actionable. He's deeply committed to the Geek Rewind community, always ready to answer questions and engage in discussions.


No comments yet — be the first to share your thoughts!