Pick a Regional Format Locale in Windows 11

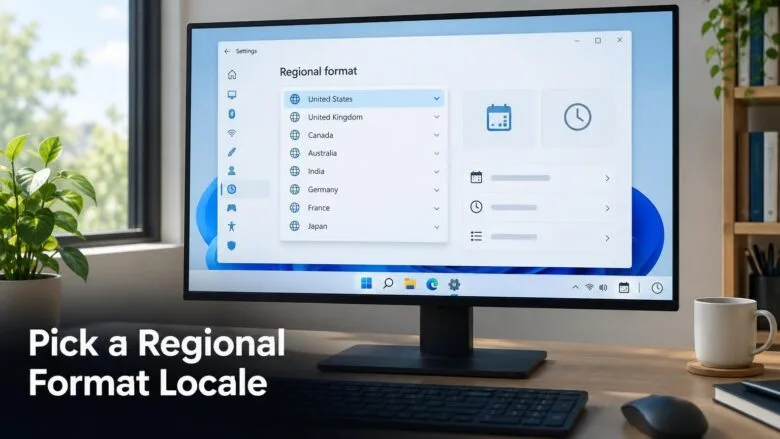
Change how Windows 11 shows dates, times, numbers and currency by picking a regional format. The setting is called Regional format, and you pick it at Settings Time & language Language & region. Choosing a new locale takes about a minute and does not need a restart.
A regional format locale is a preset that bundles those display rules for a country or region. For example, English (United Kingdom) writes 31/12/2025, and English (United States) writes 12/31/2025. This post covers the steps, how to fine-tune individual formats, and how to apply your choice to the sign-in screen and new accounts.
To change your locale in Windows 11, open Settings , select Time & language, then Language & region. Under Region, open the Regional format drop-down and pick a locale such as English (United Kingdom). The change takes effect at once without a restart, though some apps may need relaunching to show the new date and number style.
What a Regional Format Locale Changes
A regional format changes how Windows and most apps present information. It does not translate anything. The affected items are:
- Short and long date formats, such as 12/31/2025 or 31 December 2025.
- Short and long time formats, including 12-hour or 24-hour clocks.
- The decimal symbol and digit grouping, such as 1,234.56 or 1.234,56.
- The currency symbol and where it sits relative to the amount.
- The first day of the week and the default calendar.
- The measurement system, metric or U.S.
Spreadsheets and databases that import text files are the first to break when the decimal symbol is wrong. Check the format before you open such files.
Regional Format vs. Display Language vs. Country or Region
Windows 11 keeps several location and language settings next to each other, and people often mix them up. Each does a different job:
- Windows display language sets the language of menus, buttons and system messages.
- Regional format sets how dates, times, numbers and currency look. This is the setting this post covers.
- Country or region tells Windows and the Microsoft Store where you are, so apps can offer local content and services.
- System locale sets the language for older programs that do not support Unicode (the modern text standard). It lives in a separate dialog and needs a restart.
You do not need to install a language pack to use a different regional format. A Windows display language in English can sit beside a German or Japanese number and date style.
How to Pick a Regional Format Locale in 🪟 Windows 11
These steps change your locale settings for your own account. They do not need administrator rights. The steps match current Windows 11 releases (23H2 and 24H2); a label may differ slightly on an older build.
The numbered steps below set your regional format locale from start to finish.
- Open Settings. Press Windows + I, or right-click Start and choose Settings. The Settings window opens on the System page.
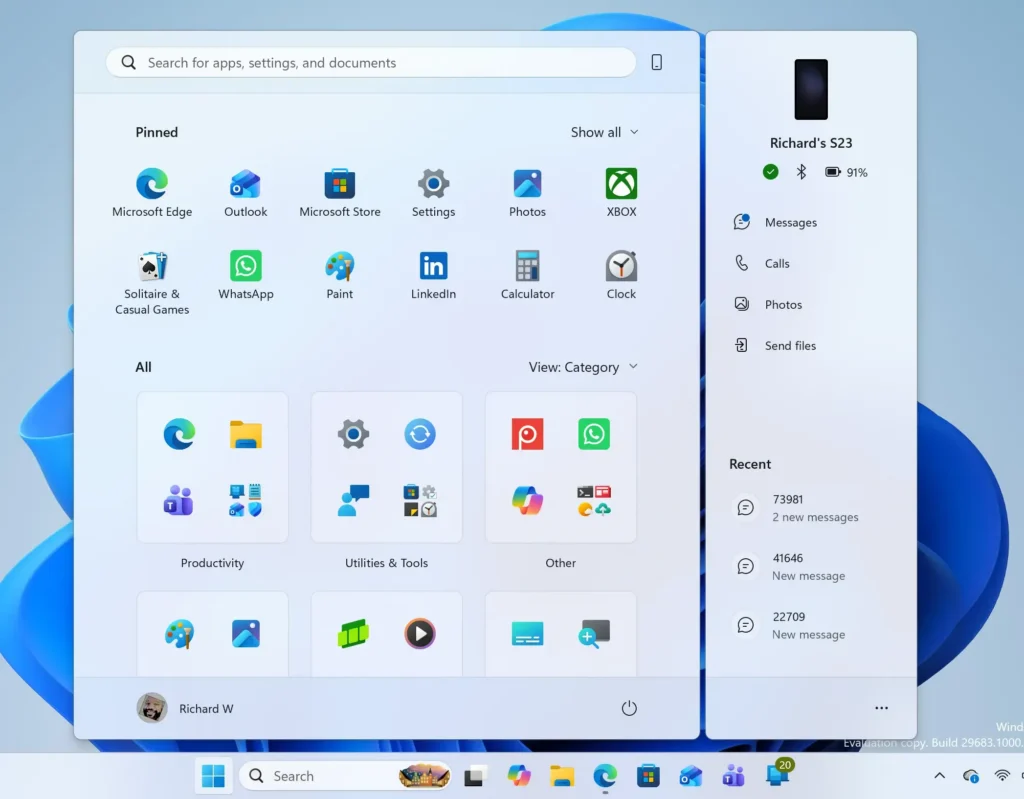
- Select Time & language in the left pane. The page shows Date & time, Language & region, and Typing.

Settings › Time & language - Select Language & region. You see your display language and preferred languages at the top, and a Region section below them.
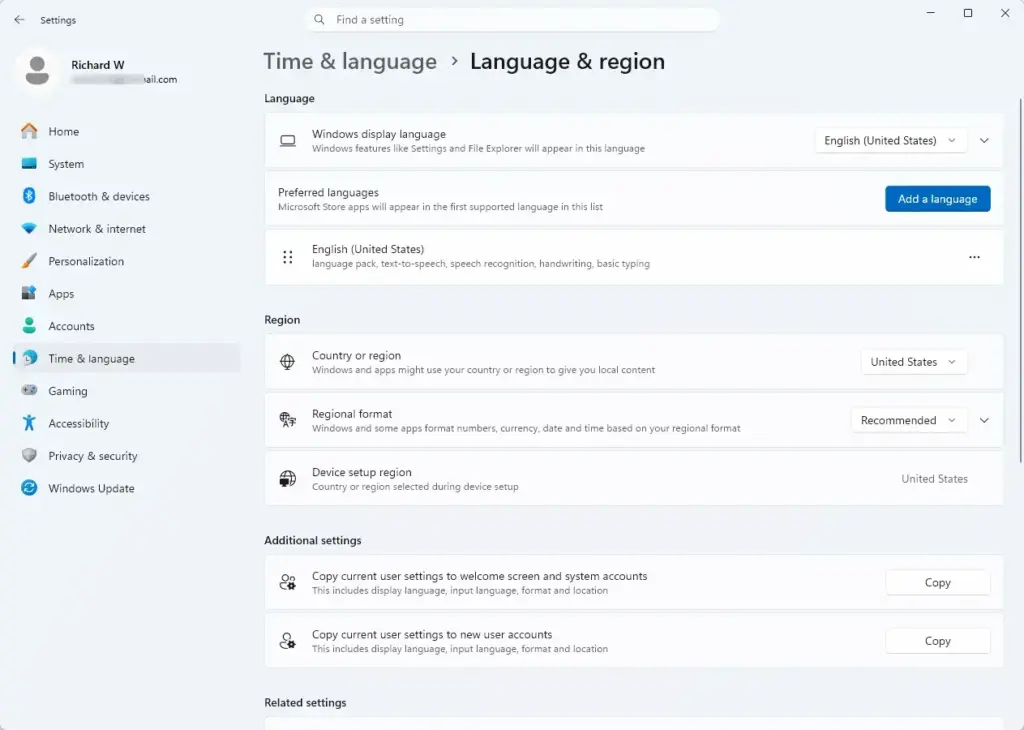
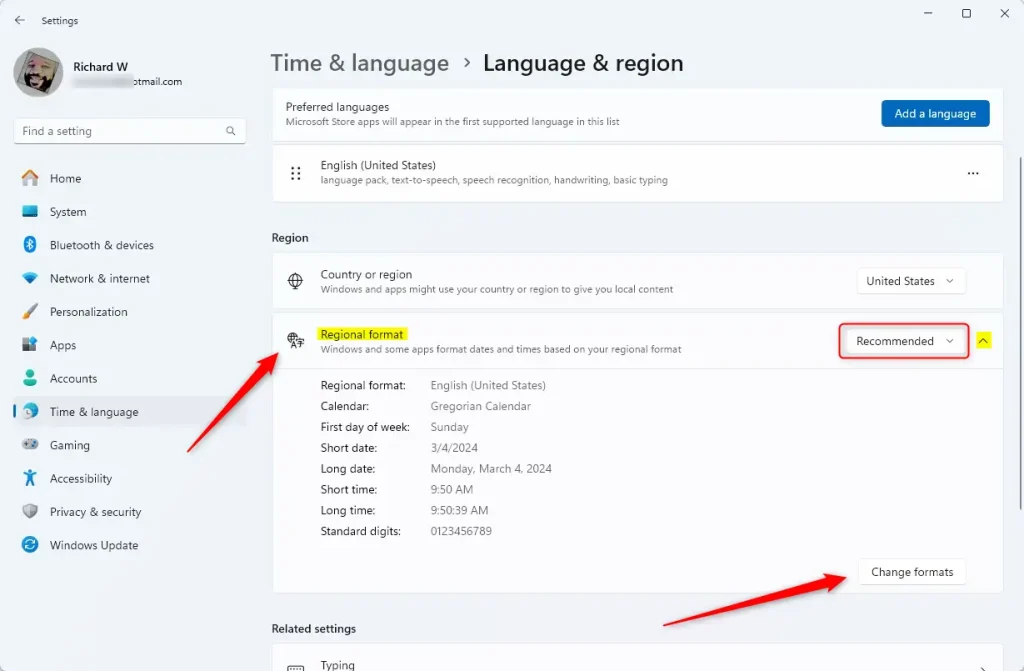
Settings › Time & language › Language & region - Find the Regional format row in the Region section. It shows your current format, for example English (United States).
- Select the Regional format row to expand it, if the drop-down is hidden. On some builds, the drop-down shows on the row itself.
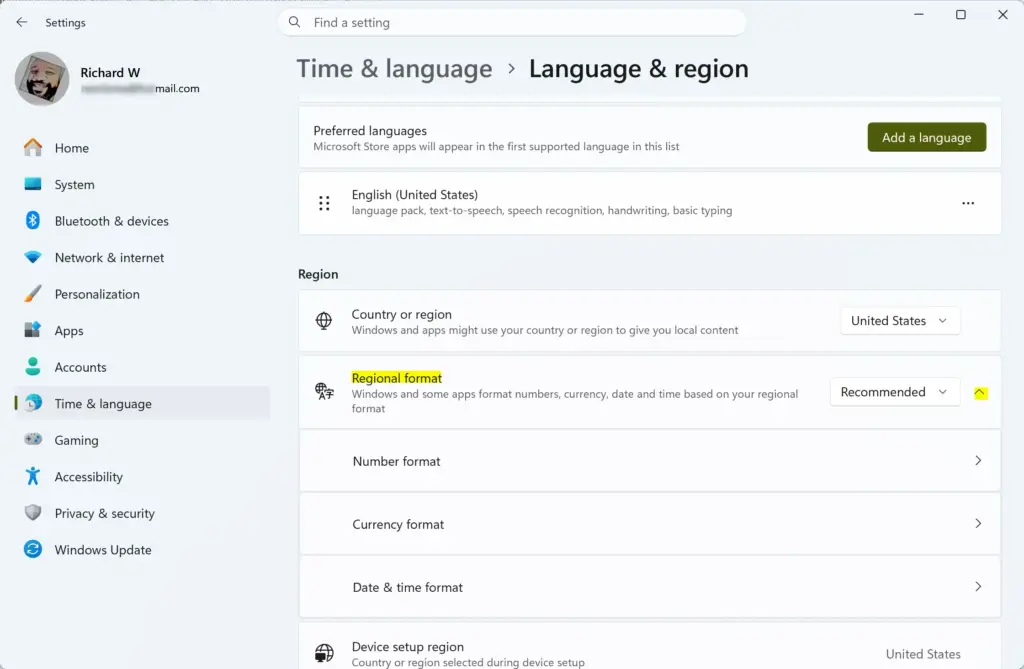
- Open the Regional format drop-down list. A list of locales appears. Windows places a Recommended entry first, which matches your display language.
- Select your locale, for example English (United Kingdom). Scroll or type the first letters to find it quickly.
- Check the sample dates and times shown under the row. They update when you pick a locale, so you can confirm the change before you leave the page.
- Close Settings. Windows saves the choice immediately, and no Apply or OK button is needed.
- Close and reopen any app that was running during the change. Some apps read the format only at start-up, so they keep the old style until you relaunch them.
If a desktop app still shows the old date style after you reopen it, sign out of Windows and sign back in. That reloads the format for every app in your session.
If the Locale You Want Is Not in the List
The list covers the locales that ship with Windows 11, and it is long. Locales are sorted by language name, so look under the language rather than the country. For instance, Swiss German is listed under German (Switzerland). If a locale is still missing, choose the nearest one and then adjust the individual formats, as described in the next section.
Customize Date, Time and Number Formats
Picking a locale gives you a preset. You can then override single items, such as a 24-hour clock with an American date. These changes start in Settings and continue in the classic Region dialog for numbers and currency.
Change the Calendar, First Day of the Week and Date and Time Styles
The Settings page covers the items most people want to change. The steps below set them.
- Open Settings Time & language Language & region
- Select the Regional format row to expand it.
- Select Change formats. A page opens with lists for Calendar, First day of week, Short date, Long date, Short time and Long time.
- Open the list you want to change, for example Short time.
- Select a style from the list. A time such as 17:30 is a 24-hour style; 5:30 PM is a 12-hour style.
- Repeat for any other item, then close Settings. Each list saves when you pick an entry.
On some builds, these lists sit directly inside the expanded Regional format row and there is no separate Change formats button. The lists are the same in both layouts.
Change the Decimal Symbol, Currency and Measurement System
Numbers, currency and the measurement system are not on the Settings page. They are in the classic Region dialog from Control Panel, under Additional settings. Use these steps to reach them.
- Press Windows + R to open the Run box.
- Type
intl.cpland press Enter. The Region dialog opens on the Formats tab.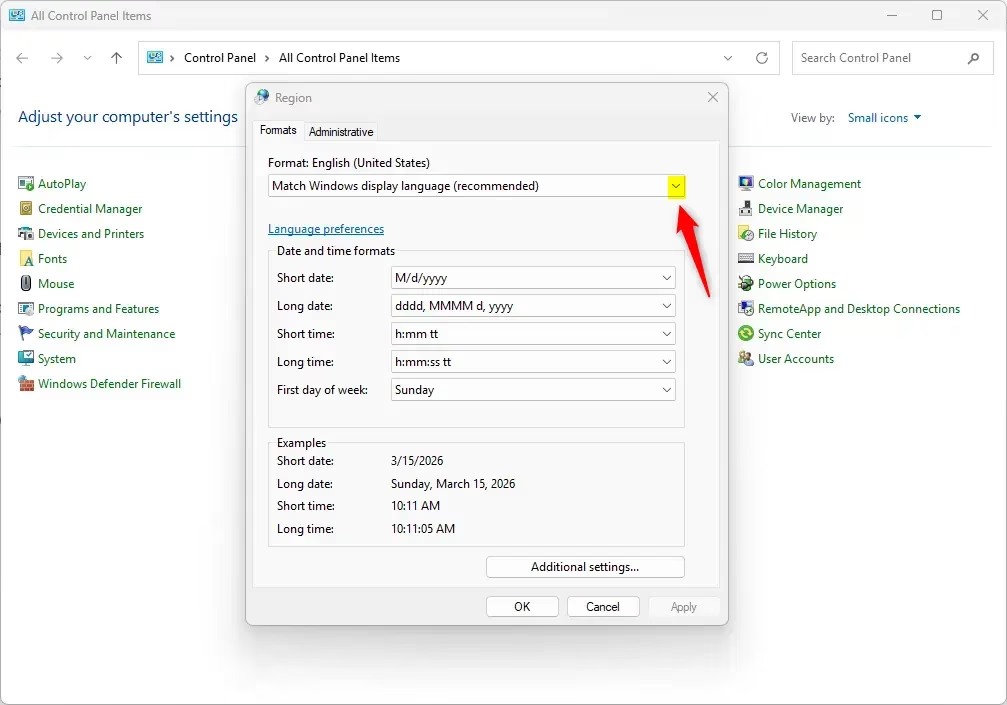
- Check the Format drop-down. It shows the same locale you chose in Settings, and you can change it here as well.
- Select Additional settings. The Customize Format dialog opens with tabs for Numbers, Currency, Time and Date.
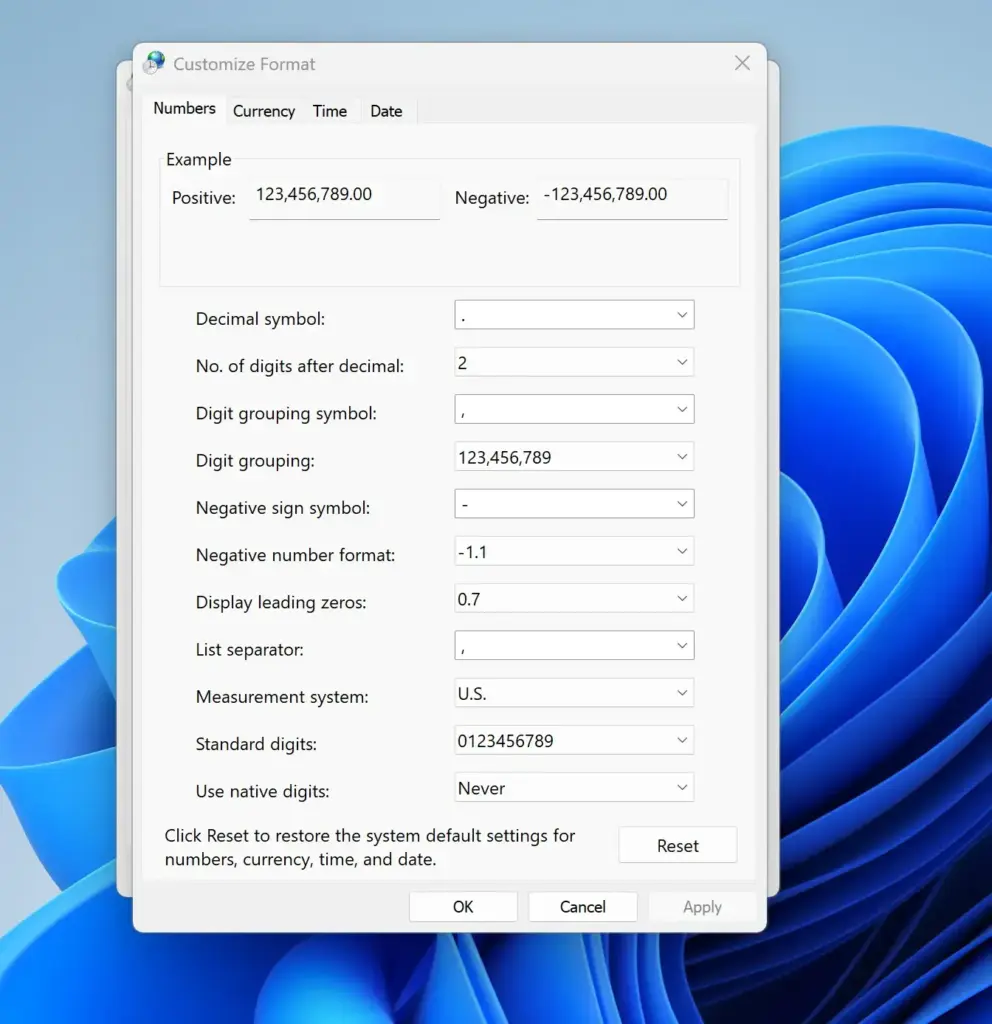
- Open the Numbers tab to change the Decimal symbol, Digit grouping symbol, List separator and Measurement system.
- Open the Currency tab to change the Currency symbol and how negative amounts display.
- Select Apply, then OK, then OK again on the Region dialog. The values take effect straight away in apps you open afterward.
The List separator matters if you work with CSV files (text files with comma- or semicolon-separated values). Some locales use a semicolon, and Excel splits columns based on that setting. If a CSV opens as a single column, check this value first.
Apply Your Regional Format to the Sign-In Screen and New Accounts
Your regional format applies only to your own account. The sign-in screen, system accounts and any user created later keep their original format. To copy your settings to them, use the Administrative tab. This step needs administrator rights, which means an account that can change settings for the whole PC. Windows asks you to approve it when you select the button.
- Press Windows + R, type
intl.cpl, and press Enter. - Open the Administrative tab.
- Select Copy settings (administrator required). Approve the User Account Control prompt, which is the pop-up that asks whether to allow changes. The Welcome screen and new user accounts settings dialog opens.
- Tick Welcome screen and system accounts to apply your formats to the sign-in screen.
- Tick New user accounts to use your formats as the default for accounts created later.
- Select OK. Existing accounts other than yours do not change.
The dialog also shows your current display language and format at the top. Check that they are the ones you want to copy before you select OK.
Change the System Locale for Older Programs
It decides which language older, non-Unicode programs use to show text. Change it only if an older program displays garbled characters. This step needs administrator rights and a restart, so save your work first.
- Open the Region dialog with Windows + R and
intl.cpl, then open the Administrative tab. - Select Change system locale (administrator required). The Region Settings dialog opens.
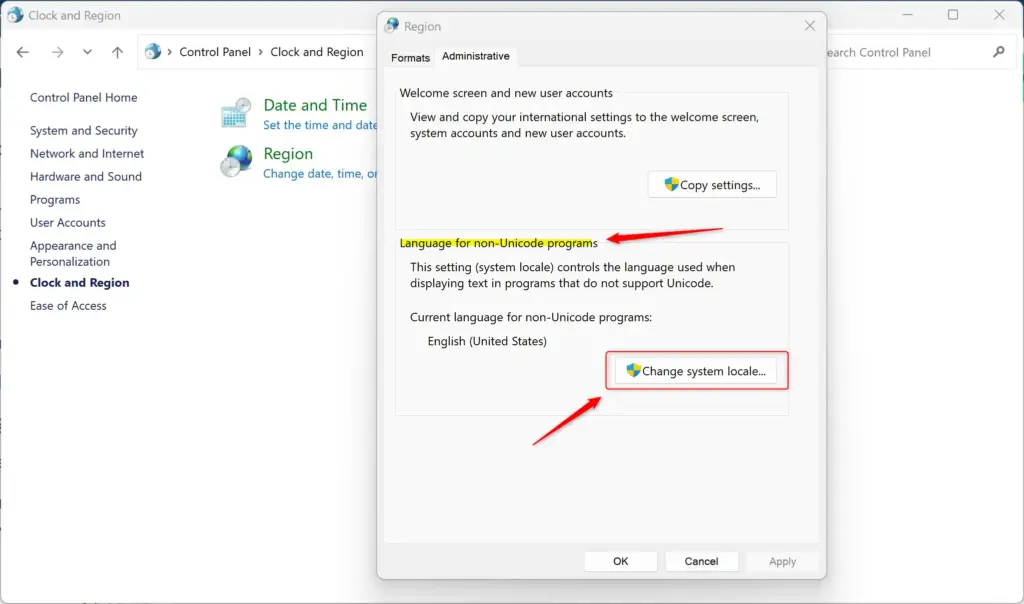
Click 'Change system locale' button in Windows 11 Region settings. - Open the Current system locale drop-down and choose the language the old program expects.
- Leave Beta: Use Unicode UTF-8 for worldwide language support unchecked unless the program's maker tells you to turn it on. It can break other older programs.
- Select OK, then select Restart now. The change applies after the PC restarts.
Set Your Country or Region
Country or region is a separate setting from the regional format. It controls the store, news and some app content you see. Change it when the Microsoft Store shows the wrong catalog or prices, for example.
- Open Settings Time & language Language & region
- Find Country or region in the Region section.
- Open the drop-down list and select your country.
Changing it does not alter your date and number formats. Microsoft Store purchases and subscriptions can be tied to a region, so check your account before you switch to a country where you do not live.
Why the Regional Format Option Is Missing or Greyed Out
Most PCs show the Regional format setting with no extra steps. If yours does not, one of these causes is likely.
- The PC is managed by an organization. A work or school PC can lock language and region settings. Settings may show a message that some settings are managed by your organization. Ask your IT team to change the format for you.
- You are not on the right account. The Regional format setting applies to each user account separately. A change made while signed in as someone else does not carry over to your account.
- An app ignores the setting. Websites often follow your browser's language list rather than the Windows regional format. Some apps also have their own date and number options. Check the app's settings.
- Settings may not show the list yet. If the drop-down shows no entries, close Settings and open it again. If that fails, sign out and sign in.
Windows 11 Home and Windows 11 Pro behave the same here. Your Windows edition does not control whether this option appears. A management policy set by an administrator does.
How to Undo a Regional Format Change
You can reverse any of these changes at any time. Pick the method that fits what you changed.
- Open Settings Time & language Language & region
- Open the Regional format drop-down list.
- Select Recommended, or the locale you used before. This restores the preset formats for that locale.
- To clear single overrides to numbers or currency, open
intl.cpland select Additional settings. - Select Reset in the Customize Format dialog, then select OK. The values return to the defaults for the selected locale.
The system locale and the Welcome screen copy are separate. To undo them, repeat their steps with the original values.
What to Do Next
Open the Clock in the taskbar and a File Explorer window to confirm the new date and time style appears. If a desktop app still uses the old style after you sign out and back in, check whether the app has its own date setting. If the text in menus is in the wrong language, that is the Windows display language, which you change in the same Language & region page under Windows display language.
Have a question about this guide?
Answered by AI from this guide. Good questions may be added to this page — please don't include personal details.
Did this guide fix your problem?

About the Author
Richard
Tech Writer, IT Professional
Richard is a writer at Geek Rewind who turns complex IT tasks into clear, step-by-step guides. He draws on years of hands-on experience in system administration and enterprise IT operations, focusing on Windows, Linux and WordPress: the problems people actually run into, and the fixes that work. His server and WordPress guides come from systems he runs himself. Richard builds and maintains the platform behind Geek Rewind, from its Ubuntu servers and Nginx configuration to its custom WordPress plugins. Many new tutorials start with readers' questions, and he's always glad to answer them in the comments.
No comments yet — be the first to share your thoughts!