How to Turn On Live Captions Screen Reader Audio in Windows 11

- 15 steps
- Includes a restart or sign-out
The Include screen reader audio setting in Windows 11 controls whether Live Captions (the built-in feature that turns spoken audio into on-screen text) transcribes the speech from a screen reader. Open Settings Accessibility Captions and switch the setting on. It is off by default.
Microsoft added the setting in KB5127936 (a numbered Windows update package), an optional preview update released on October 27, 2026 for Windows 11 25H2. It covers screen readers such as Narrator, JAWS, and NVDA. With the setting off, captions focus on microphone and system audio.
To turn on the Include screen reader audio setting in Windows 11, open Settings Accessibility Captions and switch Include screen reader audio on. It is off by default and needs KB5127936 or a later update, which adds the setting for Windows 11 25H2. Once on, Live Captions also transcribes your screen reader, such as Narrator, JAWS, or NVDA.
What the Include screen reader audio setting does
A screen reader reads on-screen text, menus, and notifications aloud. Narrator is the one built into Windows. JAWS and NVDA are third-party screen readers that many people install instead.
The Windows 11 live captions screen reader audio setting decides whether that spoken output ends up in your captions. Off, Live Captions concentrates on what you and other people say into the microphone and on audio that apps play through the system. On, it also transcribes what the screen reader says.
Who might want it on
Microsoft has not said who the setting is for. Read the advice below as a practical guess based on what the setting does. Turning it on makes sense if you want a written record of what your screen reader announces, or if you want captions to show everything your PC says aloud. Turning it off makes sense if screen reader speech is cluttering captions you want to keep for meetings, videos, and calls.
Because the setting is off by default, nothing changes for anyone who never opens it.
Before you start
KB5127936 is an optional preview update. Optional updates (previews that you install by choice, not automatically) do not always install on their own. A PC can be fully up to date on the usual monthly schedule and still lack this one. The same feature should arrive later in a regular update, but the notes do not give a date for that.
Live Captions itself also needs to be available on your PC. If you have never used it, read how to enable or disable Live Captions in Windows 11 first, then come back here.
How to turn on the Include screen reader audio setting
These steps switch on the Windows 11 live captions screen reader audio setting so Live Captions transcribes your screen reader as well as your microphone and system audio.
- Open Settings. Press the Win and I together, or right-click the Start button and choose Settings.
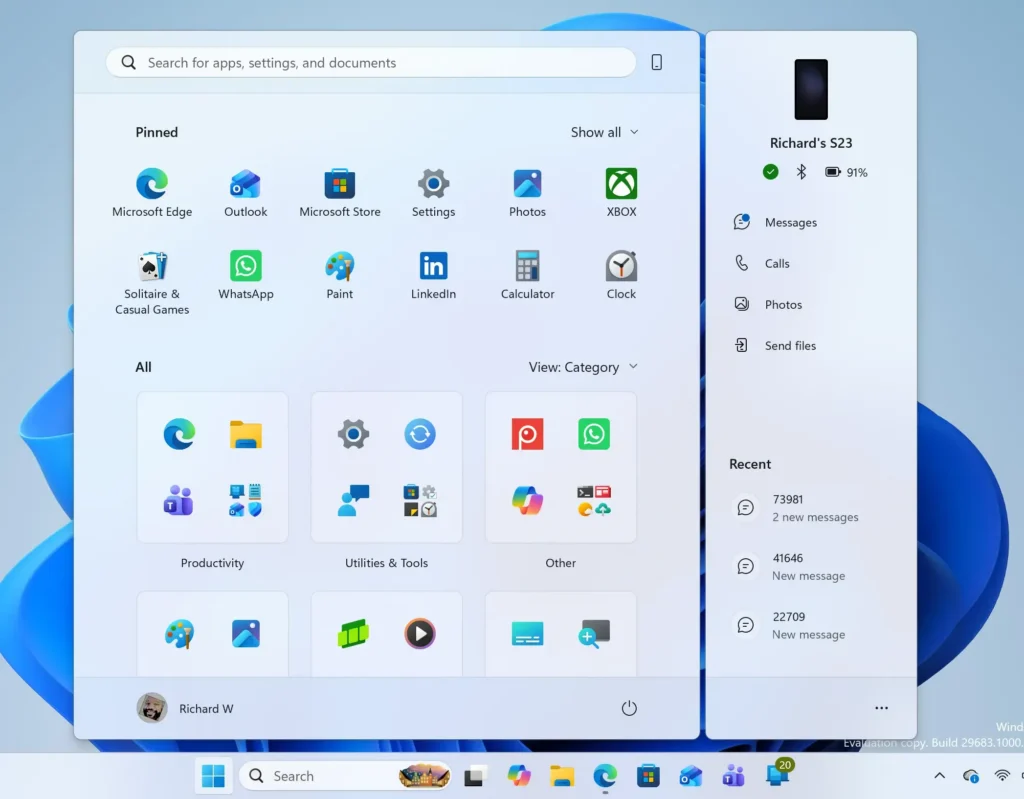
Windows 11 Start menu search panel for opening OpenSSH Client settings - Select Accessibility in the left pane. The Accessibility page lists its options in groups.
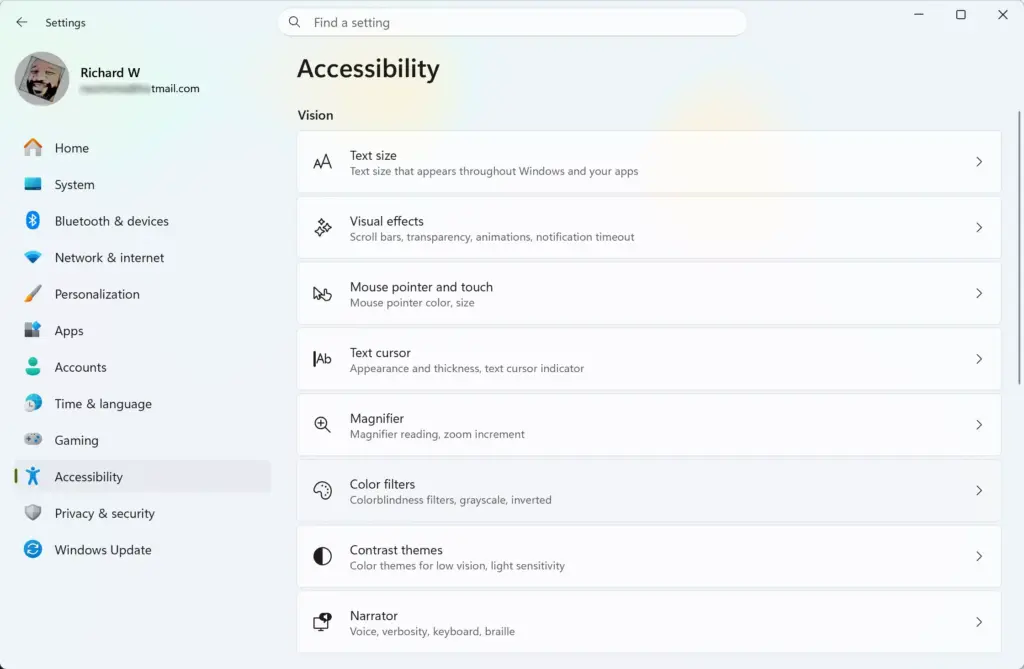
Settings › Accessibility - Select Captions. The page opens with the caption options for Windows 11. The full path is Settings Accessibility Captions.
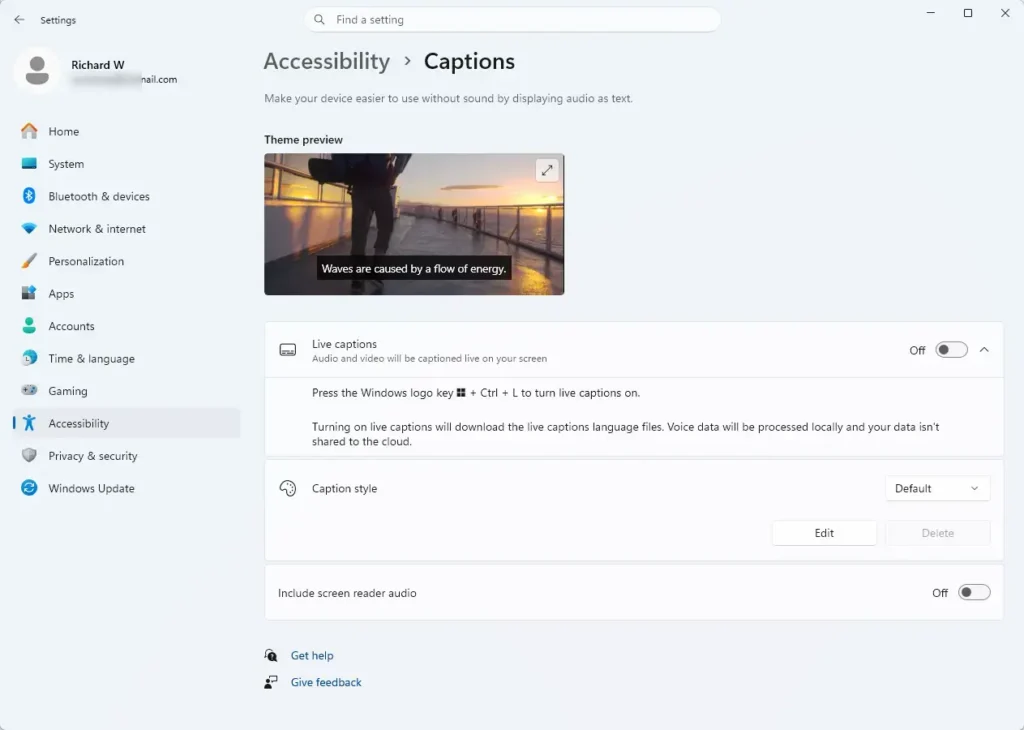
Settings > Accessibility > Captions - Find Include screen reader audio on the Captions page. If you cannot see it, go to the section below on a missing setting.
- Turn Include screen reader audio on. The switch moves to the on position. The change applies to Live Captions from then on.
- Check that Live Captions is running. If the caption bar is not at the top of your screen, turn Live Captions on using the steps in the post linked above.
The exact layout of the Captions page can change while Microsoft rolls the update out. The release notes confirm the setting name and its location on the Captions page. They do not say where on that page it sits or what the other options around it are called. If the page looks different from what you expected, look for the setting by name.
What you should see afterwards
After you turn the setting on, speech from a running screen reader should appear in the Live Captions bar along with other audio. To test it, start Narrator from Settings Accessibility Narrator and let it read a few lines of text on screen. Watch the caption bar while it speaks.
If you use JAWS or NVDA, start it the way you normally do and listen for it to read something aloud. The captions should show that speech as text. Transcription is not perfect, so expect the occasional misheard word, as with any other audio.
The notes do not say whether you need to restart Live Captions or sign out for the setting to take effect. If the caption bar does not show screen reader speech straight away, turn Live Captions off and on again. That is a reasonable first check, not a documented requirement.
If the setting is missing
The most likely reason you do not see Include screen reader audio is that your PC has not installed KB5127936 or a later update. Check Windows Update.
- Open Settings. Press the Win and I together.
- Select Windows Update. It sits at the bottom of the left pane.
- Select Check for updates. Windows searches for anything waiting to install.
- Install any update listed, including optional ones. Look for KB5127936 by name if the page lists it.
- Restart the PC if Windows asks you to. Updates often finish installing during a restart.
- Open Settings Accessibility Captions again. Look for Include screen reader audio.
The Windows Update page has a toggle called Get the latest updates as soon as they’re available. Microsoft uses it to control how quickly your PC receives new features. If a feature has not reached your PC and you want it sooner, that is the place to look. Microsoft’s notes do not say whether this toggle affects the setting. Do not rely on it to bring the setting to your PC.
Check your Windows version
Microsoft lists Windows 11 25H2 for this update. To see which version you run, open Settings System About and read the Version line under Windows specifications. If it shows an older version, the setting may not be available to you yet. Microsoft’s notes do not say whether it is coming to earlier versions, so check the release notes at support.microsoft.com for the latest details.
Check that the Captions page itself is there
If Settings Accessibility does not show a Captions entry at all, Live Captions may not be available on your device. Availability can depend on the device and the Windows version, and the notes here do not go into those limits. Look for Live Captions among the quick options on your PC. If it is not offered anywhere, the feature is not available to you yet.
How to turn the setting off again
The setting is off by default, so reversing it returns Live Captions to how it worked before. Turning it off stops the captions from transcribing screen reader speech. Microphone and system audio captions are unaffected.
- Open Settings. Press the Win and I together.
- Select Accessibility. Then select Captions.
- Turn Include screen reader audio off. The switch moves to the off position.
Turning it off deletes nothing. You can switch it back on at any time.
Other Live Captions settings worth knowing about
The Include screen reader audio setting is one of several controls for Live Captions. Once captions show what you need, you can tune the rest of the feature:
- Move the caption bar if it covers something you need. Adjust the Live Captions position in Windows 11 explains the options.
- Switch the spoken language Live Captions listens for. Change the Live Captions language in Windows 11 covers it.
- Add a language that Live Captions does not offer yet. Add languages to Live Captions in Windows 11 shows how, and this guide to adding or removing a Live Captions language covers removal.
- Control how much of the transcript Live Captions keeps. Change the Live Captions transcript recording length in Windows 11 explains it.
Those settings are separate from Include screen reader audio. Changing one does not change the others.
What is known so far
This is a new setting, and Microsoft has published only a short description. The setting is named Include screen reader audio. It is off by default. It covers screen readers such as Narrator, JAWS, and NVDA. It lives at Settings Accessibility Captions. It arrived in KB5127936, an optional preview update from October 27, 2026, for Windows 11 25H2.
Not confirmed in the release notes: whether the setting works the same way with every screen reader, whether a restart is needed, and where it appears in the page layout. Microsoft can change details such as these while the feature rolls out, so use the notes at support.microsoft.com as the reference if your PC behaves differently.
What to do next
If the captions now show your screen reader and you do not want them to, turn the setting off in Settings Accessibility Captions. If the option still does not appear after you install updates, recheck your Windows version under Settings System About, then install the next monthly update when it arrives. Once the captions show what you want, move the caption bar to a spot that suits your screen layout with the position guide above.
Have a question about this guide?
Answered by AI from this guide. Good questions may be added to this page — please don't include personal details.
Did this guide fix your problem?

About the Author
Richard
Tech Writer, IT Professional
Richard is a writer at Geek Rewind who turns complex IT tasks into clear, step-by-step guides. He draws on years of hands-on experience in system administration and enterprise IT operations, focusing on Windows, Linux and WordPress: the problems people actually run into, and the fixes that work. His server and WordPress guides come from systems he runs himself. Richard builds and maintains the platform behind Geek Rewind, from its Ubuntu servers and Nginx configuration to its custom WordPress plugins. Many new tutorials start with readers' questions, and he's always glad to answer them in the comments.
No comments yet — be the first to share your thoughts!