How to Customize Mouse Pointer Size and Color in Windows 11 Accessibility Settings

Mouse pointer size and color settings in Windows 11 let you change how your cursor looks so you can spot it on your screen in seconds. You can drag a slider to grow the pointer from the default size of 1 up to 15. You can also pick a bright color such as pink, green, or yellow. None of this needs extra software.
Each change takes only a few clicks and applies right away. A pointer that is bigger or easier to see means less squinting and less eye strain over a full workday. Everything here works the same on Windows 11 Home and Pro, and none of it needs a restart.
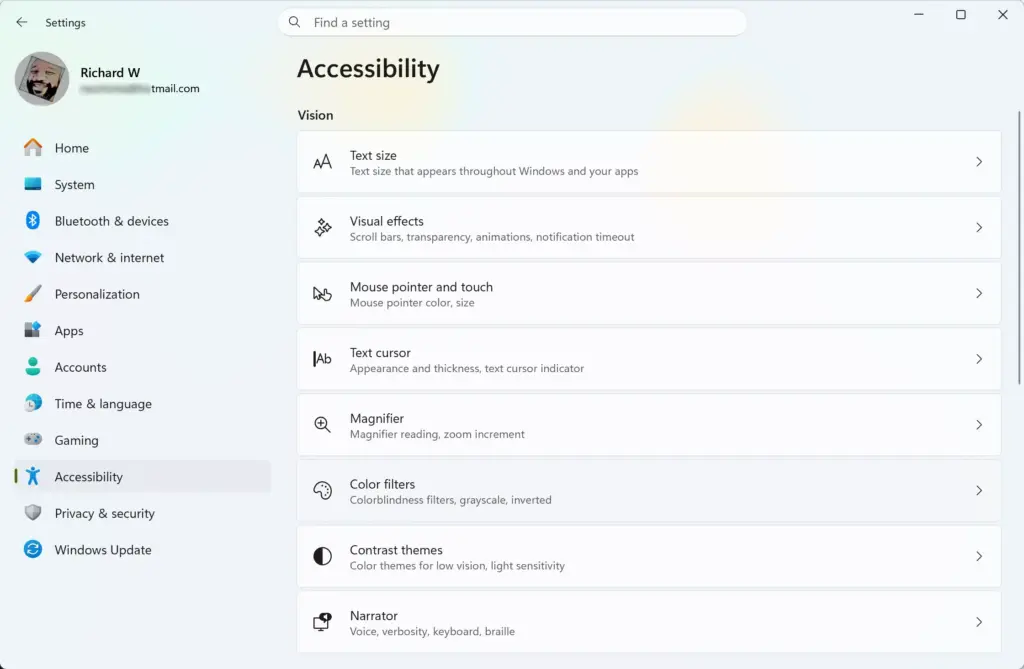
Open Settings by pressing Win+I, click Accessibility in the left menu, then select Mouse pointer & touch. Drag the Size slider to adjust pointer size from 1 to 15, and click Custom under Mouse pointer style to pick a color from the palette. Changes apply.
Understanding 🪟 Windows 11 Accessibility Tools for Your Mouse
Windows 11 Accessibility tools make the screen easier to see and use. These built-in settings let you change how the mouse pointer looks, make the cursor bigger, and add visual helpers so you do not lose the arrow on a busy screen or a large display.
If you do not like a change, come back to the same page and set it back.
How to Access Mouse Pointer Settings in 🪟 Windows 11
You reach the mouse pointer settings through the Settings app, in the Accessibility section. The quickest way in is the keyboard: press the Win+I and Settings opens at once.
- Click the Start button on your taskbar , or press the Win on your keyboard. The Start menu opens.
- Select the Settings app, which looks like a small gear. You can skip the first step by pressing the Win+I. The Settings window opens.

- In the Settings window, click Accessibility in the left-hand menu. The Accessibility options appear on the right.
- On the right side, scroll down the list and click Mouse pointer & touch. Depending on your Windows 11 build, the label may read “Mouse pointer and touch”. It is the same page.
This page has a preview of your current pointer near the top, followed by the style, size, and touch options. The steps below cover each one.
How to Change Mouse Pointer Style and Color
You change the pointer style and color on the Mouse pointer & touch page. You can use the standard white pointer, a black pointer, an inverted pointer, or a color of your own choosing.
- Open the Settings app and go to Accessibility Mouse pointer & touch
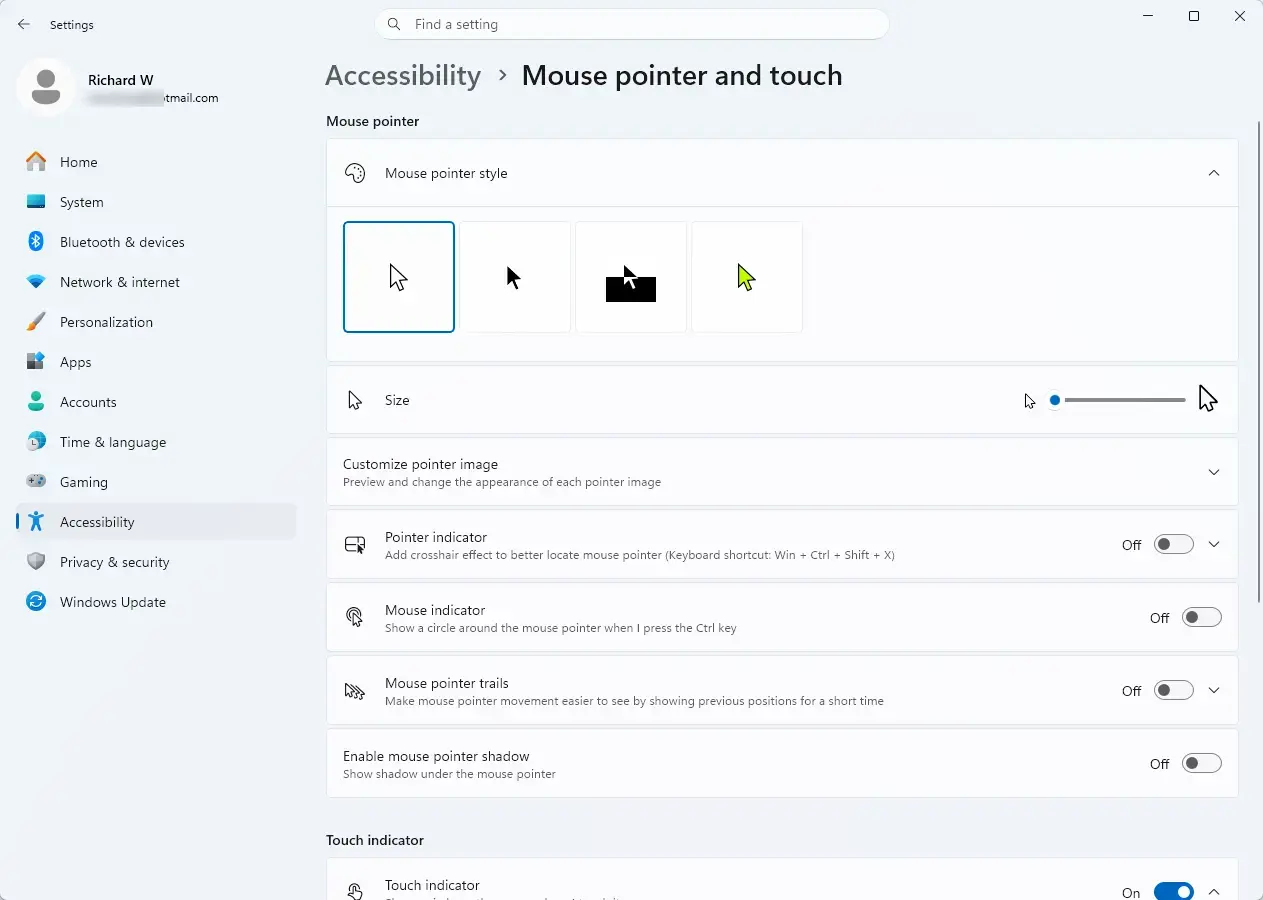
- Find the section labeled Mouse pointer style. You will see four small picture buttons:
- White: The default Windows pointer.
- Black: A solid black pointer that stands out well against bright white backgrounds like web pages and word processor documents.
- Inverted: Changes color to contrast with whatever it moves over, so it is white on a dark background and black on a light one.
- Custom: Lets you pick any color you like.
- Click the Custom button, the fourth option with the colorful wheel icon. A row of color choices appears below the buttons.
- Under Recommended colors, click one of the pre-selected bright colors, such as yellow, pink, or green. The pointer changes color straight away, and you can check it in the preview.
- If none of those suit you, click Choose another color to open a full color palette. Click your preferred shade, then click Done. Your pointer updates immediately.
Pick a color that contrasts with the backgrounds you see most. Bright green or pink works well on both light and dark screens. To undo the change, click White again. A few apps and games draw their own cursor, so they may ignore this setting.
How to Make Your Mouse Pointer Larger or Smaller
You make the pointer larger or smaller with the size slider on the same Accessibility page. It scales the cursor from the normal size of 1 up to a very large arrow at 15, which helps a lot on big or high-resolution screens.
- Open the Settings app and go to Accessibility Mouse pointer & touch
- Find the slider labeled Size.
- Click and drag the slider to the right to make the pointer larger, or to the left to make it smaller. The pointer grows or shrinks as you move the slider.
Choose a size that is easy to see but does not cover too much of your screen content. A very large pointer can hide small buttons and text. If that happens, drag the slider back a notch or two. Setting it back to 1 restores the default.
Additional Tips to Never Lose Your Mouse Pointer Again
Size and color are a good start, but Windows 11 has a few more options that make the cursor easier to find. These two live in the classic Mouse Properties window rather than the new Settings pages.
Turn on Mouse Pointer Trails
Pointer trails leave a fading copy of the cursor behind it as it moves. That makes it much easier to follow across fast movement or several monitors. You turn them on in the classic Mouse Properties window.
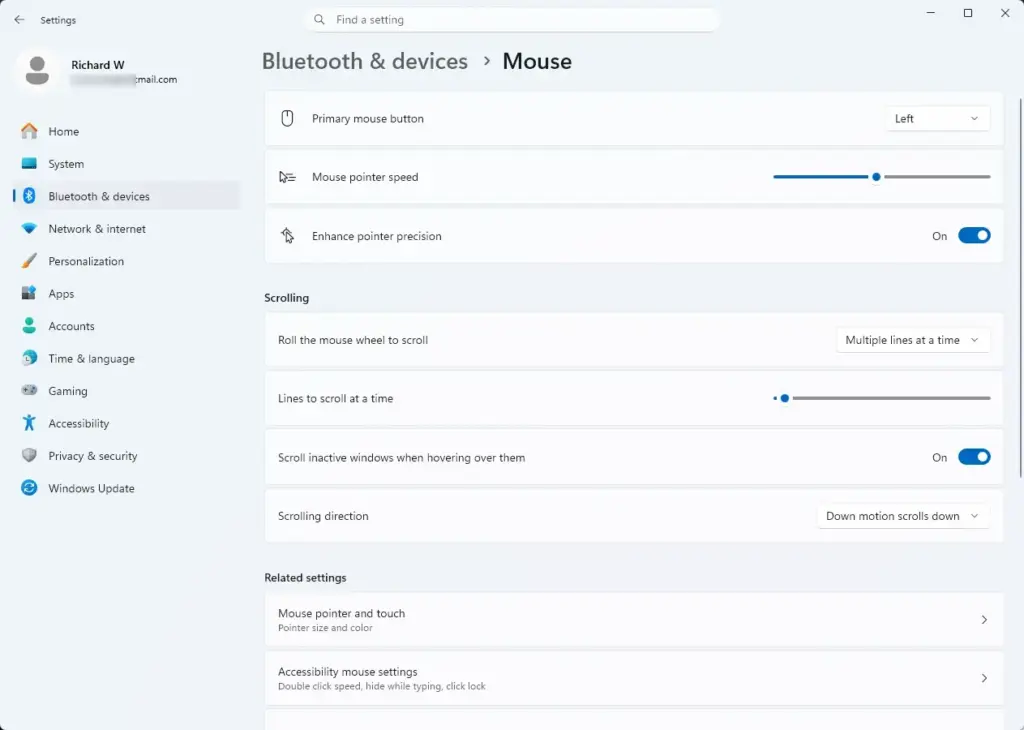
- Open the Settings app and select Bluetooth & devices Mouse
- Under Related settings, click Additional mouse settings. The classic Mouse Properties window opens. If it does not appear, check the taskbar, as it sometimes opens behind Settings.
- Click the Pointer Options tab at the top of the window.
- In the Visibility section, check the box next to Display pointer trails.
- Drag the slider to set the trail length. Short trails are less distracting, and long ones are easier to see.
- Click Apply, then OK. Move the mouse and you will see the trail behind the pointer.
To remove the trails, clear the checkbox and click Apply and OK again.
Use the Keyboard Shortcut to Find Your Pointer
You can make Windows show you where the pointer is whenever you press the Ctrl key. A ripple animation closes in on the cursor, which is handy when it gets lost among open windows or on a large desktop.
- Open Settings and go to Bluetooth & devices Mouse Additional mouse settings The Mouse Properties window opens.
- Click the Pointer Options tab.
- Go to the bottom of the Visibility section and check the box Show location of pointer when I press the CTRL key.
- Click Apply, then OK.
Now, whenever you lose track of the cursor, tap the Ctrl key. An animated circle closes in on the exact location of your mouse. To turn it off, clear the same checkbox.
Advanced Visual Aids: Touch Indicators and Contrast Themes
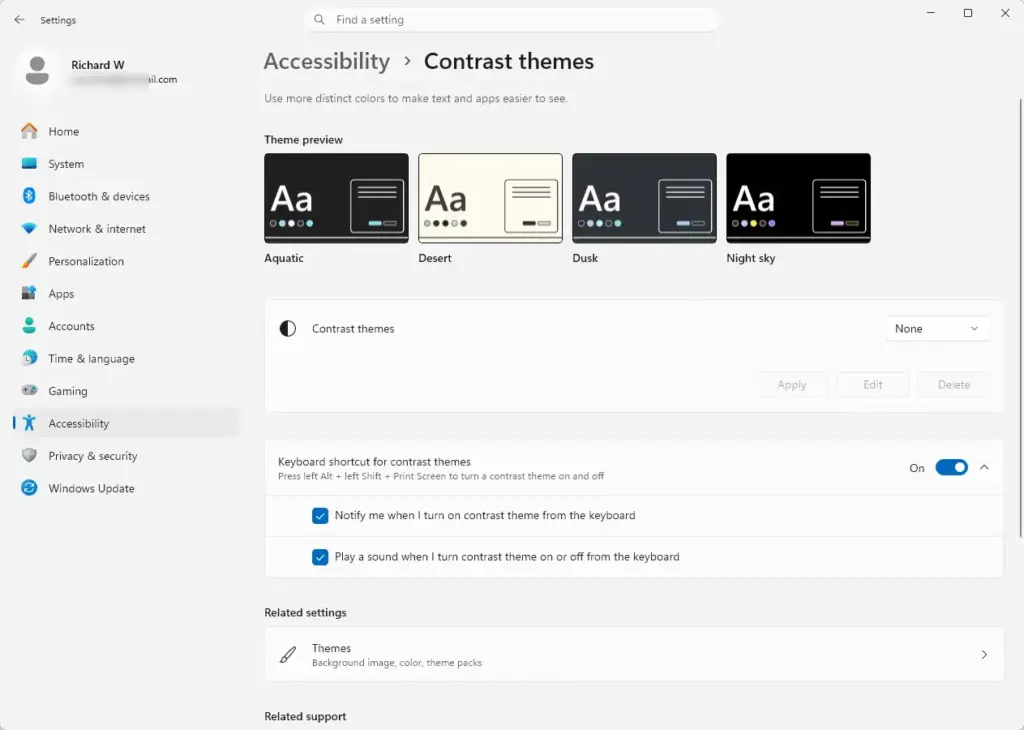
If you use a touchscreen alongside your mouse, or you want a high-contrast look across the whole system to reduce eye fatigue, Windows 11 has two more settings worth knowing.
Enable Touch Indicators
The touch indicator shows a visual circle on the screen wherever your finger touches it. This makes touch actions easier to see, which helps when you are presenting or recording the screen. You turn it on in the Accessibility settings.
- Open the Settings app and go to Accessibility Mouse pointer & touch
- Find the Touch indicator switch.
- Turn the switch On. A checkbox appears underneath it.
- Optionally, check the box below the switch to make the touch circle darker and larger, so it is easier to see.
The indicator is meant for touchscreens. On a PC without one, you may see the switch but nothing will happen. Turn the switch back to Off to remove the circles.
Apply Contrast Themes
A contrast theme changes the colors of text, buttons, and backgrounds across the whole computer. This reduces eye strain and makes everything easier to read. You choose one in the Accessibility settings.
- Open the Settings app and click Accessibility.
- Select Contrast themes.
- Open the drop-down menu and choose a theme, such as Aquatic, Desert, Dusk, or Night sky.
- Click the Apply button. The screen goes blank for a moment, then comes back in a high-contrast palette. Every element, including your customized mouse pointer, stands out clearly.
Contrast themes change how everything looks, so they can feel strong at first. Try a couple of themes before settling on one. To go back to the normal look, choose None in the same drop-down menu and click Apply. No restart is needed in either direction.
Summary
Customizing the mouse pointer in Windows 11 is a simple way to make the computer easier to use and to reduce eye strain. You can change the pointer size and color, turn on trails, and use the Ctrl key to find the cursor when you lose it. If you also use touch, the touch indicator and contrast themes add a little more help.
Have a question about this guide?
Answered by AI from this guide. Good questions may be added to this page — please don't include personal details.
Did this guide fix your problem?

About the Author
Richard
Tech Writer, IT Professional
Richard is a writer at Geek Rewind who turns complex IT tasks into clear, step-by-step guides. He draws on years of hands-on experience in system administration and enterprise IT operations, focusing on Windows, Linux and WordPress: the problems people actually run into, and the fixes that work. His server and WordPress guides come from systems he runs himself. Richard builds and maintains the platform behind Geek Rewind, from its Ubuntu servers and Nginx configuration to its custom WordPress plugins. Many new tutorials start with readers' questions, and he's always glad to answer them in the comments.
No comments yet — be the first to share your thoughts!