How to Enable Mouse Pointer Indicator in Windows 11

The mouse pointer indicator in Windows 11 places a colored circle around your cursor. It helps you spot the pointer on busy screens, on multiple monitors and on high-resolution displays, where the cursor can shrink to a small arrow against a crowded desktop. It is an accessibility feature, but plenty of people without vision problems find it useful too.
You turn it on in Settings, where you can also choose a circle color that stands out against your desktop background. A light circle disappears on a light wallpaper, so pick a color that contrasts with what you usually have on screen. The feature works the same on Windows 11 Home and Pro.
Open Settings , click Accessibility, then Mouse pointer and touch. Toggle the Pointer indicator switch to On. A colored circle appears around your cursor immediately, making it easier to spot on busy screens.
What is the Mouse Pointer Indicator?
With the indicator on, a colored circle follows your cursor wherever it goes. This makes the pointer much easier to find after you move between monitors, switch windows or come back to a screen you haven’t touched for a while.
Once the feature is active, pressing Ctrl + Ctrl (press the left Ctrl key twice) on the keyboard toggles it on or off. That is handy when you only need the circle now and then and don’t want to open Settings each time.
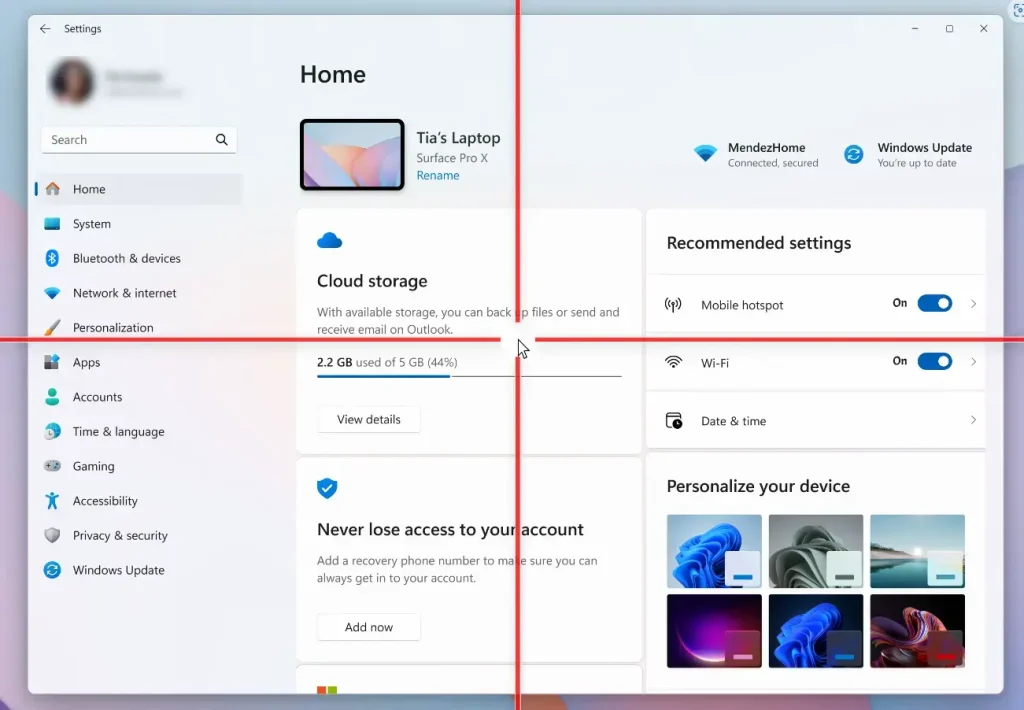
How to Turn On or Off the Mouse Pointer Indicator
This is the simplest method and the one I’d use first. The steps below match current Windows 11 builds. If your Settings pages look different, check that you are fully updated, because Microsoft has moved some accessibility options between releases.
- Open Settings . Click the Start button and select Settings, or press
Windows key + Ion your keyboard. The Settings window opens. - Click Accessibility in the left menu. The accessibility options appear on the right.
- On the right side, under the Vision section, click Mouse pointer and touch. The pointer settings page opens.
- Click the Pointer indicator option.
- Set the switch to On. The circle should appear around your pointer straight away. You can also pick a color for the circle. Move the mouse over a few different windows to check the color is easy to see.
- To turn it off, set the switch to Off. Nothing else changes, so you can switch it back on whenever you like.
If the option is missing or greyed out, the PC may be managed by an employer or school that locks accessibility settings. In that case, ask your administrator. The Registry method below needs administrator rights, so it won’t get around that restriction.
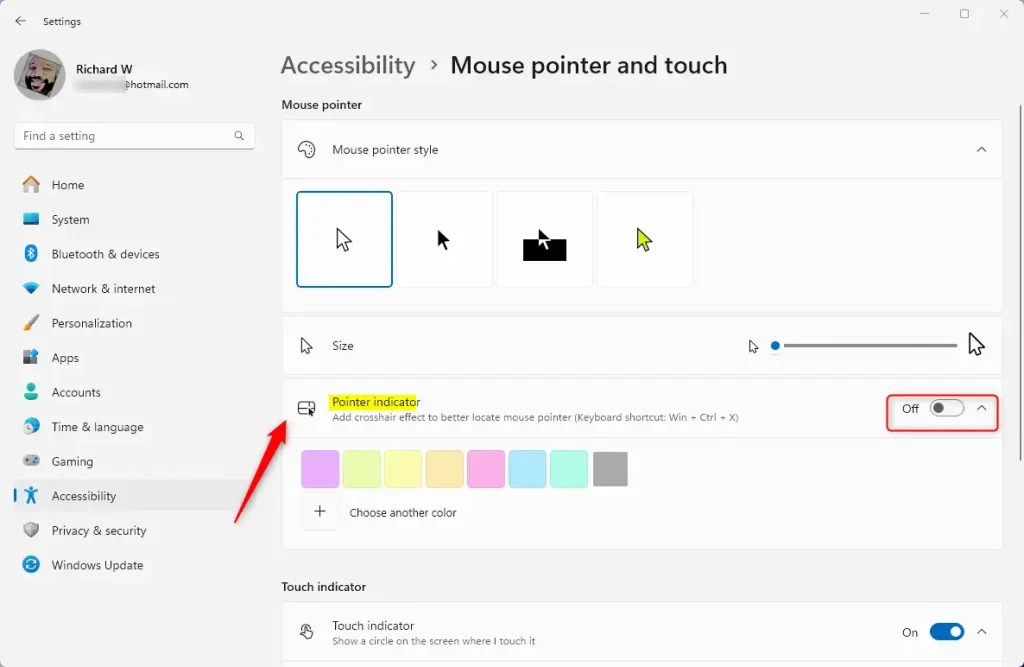
The pointer indicator gives you a colored circle around the cursor, so you can find it instantly. To change it, open the main Windows Settings app, go to the accessibility options, select the mouse settings and move the Pointer indicator switch to the position you want.
Once the indicator is enabled, the keyboard shortcut Ctrl + Ctrl (press the left Ctrl key twice) is a quick way to toggle the display on and off. It only works after you have turned the feature on in Settings, so if the shortcut does nothing, check the switch first.
Alternative Method: Using the Windows Registry Editor
This is useful if you are scripting a change or can't get the Settings page to behave. It is also the riskier method, so use Settings if you can. Registry Editor is included in both Home and Pro editions.
Incorrect changes can destabilize the operating system. Before you edit anything, consider backing up the key. In Registry Editor, select it, then choose File and Export to save a copy you can restore later.
- ★ Admin privileges required: Open the Registry Editor. Press
Windows key + R, typeregedit, then pressEnter. If Windows asks for permission, click Yes. The Registry Editor window opens. - Navigate to this folder path:
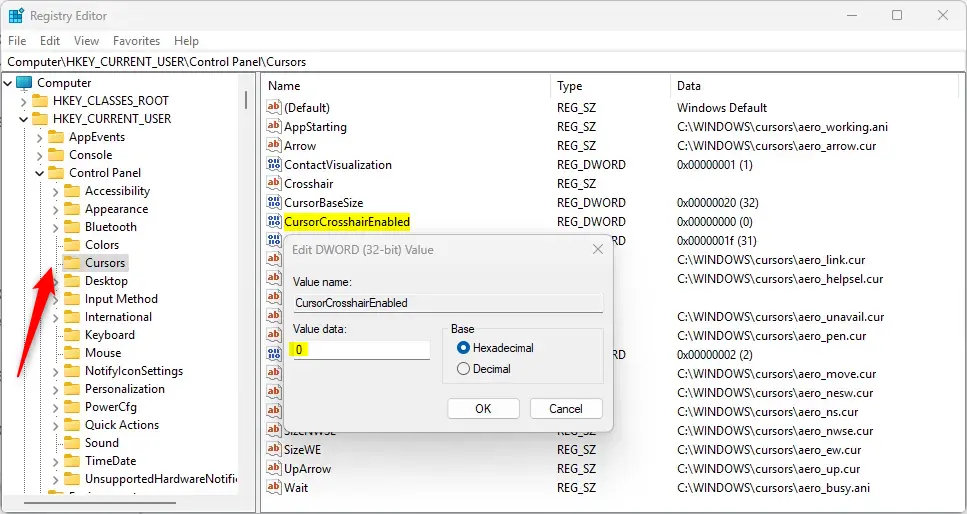
Computer\HKEY_CURRENT_USER\Software\Microsoft\Accessibility. The keys and values for that location appear in the right panel. - In the right panel, find the entry named
CursorCrosshairEnabled is not a real value; the pointer indicator settings are stored under HKCU\Software\Microsoft\Accessibility (e.g. CursorType, CursorColor). - Double-click it and change its value:
- Set it to
1to turn the Mouse Pointer Indicator ON. - Set it to
0to turn it OFF.
- Set it to
- Click OK and close the Registry Editor.
- Restart your computer to apply the change. After you sign back in, check whether the circle appears around the pointer.
To undo the change, repeat the steps and enter the OFF value, or import the backup you exported earlier.
Summary
- The Mouse Pointer Indicator helps you find your mouse pointer by adding a colored circle around it.
- You can turn it on or off quickly with the keyboard shortcut
Ctrl + Ctrl (press the left Ctrl key twice), once the feature is enabled. - To enable or disable the feature, use the Windows Settings app, or the Registry Editor if you prefer. Settings is the safer choice, and the Registry method needs admin rights and a restart.
- This feature makes Windows 11 more user-friendly, especially for people with vision difficulties.
The pointer indicator makes your cursor easy to find on busy screens by drawing a colored circle around it whenever you need it. You can control it from the Settings menus, from the Registry Editor, or with the keyboard shortcut, depending on what suits you best. Choose a circle color that contrasts with your wallpaper so it does its job.
Have a question about this guide?
Answered by AI from this guide. Good questions may be added to this page — please don't include personal details.
Did this guide fix your problem?

About the Author
Richard
Tech Writer, IT Professional
Richard is a writer at Geek Rewind who turns complex IT tasks into clear, step-by-step guides. He draws on years of hands-on experience in system administration and enterprise IT operations, focusing on Windows, Linux and WordPress: the problems people actually run into, and the fixes that work. His server and WordPress guides come from systems he runs himself. Richard builds and maintains the platform behind Geek Rewind, from its Ubuntu servers and Nginx configuration to its custom WordPress plugins. Many new tutorials start with readers' questions, and he's always glad to answer them in the comments.
No comments yet — be the first to share your thoughts!