How to Configure Custom Pointer Color and Size in Windows 11 Mouse Pointer Settings

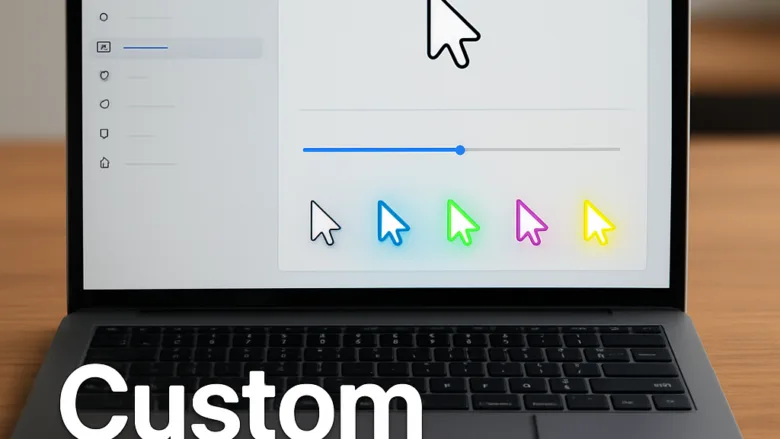
Custom pointer color and size in Windows 11 Mouse Pointer Settings let you change the color and scale of your cursor so you can see it better on screen. Windows 11 includes 7 default color presets, a custom color picker tool, and a size scale that runs from level 1 up to level 15.
Scaling the pointer past level 5 can cause minor trailing on older graphics hardware. The color adjustments use hardware acceleration when it is available, which prevents lag or stuttering when you move the cursor quickly across games, desktop apps, and full-screen videos.
These settings are the same on Windows 11 Home and Pro, and none of the changes below need a restart. Every change applies to your own user account as soon as you make it.
Open Settings Accessibility Mouse pointer and touch. Drag the Size slider to level 1–15 to change pointer size, or click the Custom icon under Mouse pointer style and select a color from the palette, or click the plus sign to open the color picker and enter RGB or HEX values. Changes apply immediately.
How to Open Mouse Pointer Settings in 🪟 Windows 11
The pointer settings live in the Accessibility section of Settings. This is where you change the size, color, and style of your cursor.
- Press Win+I to open Settings . The Settings window opens with a list of categories in the left sidebar.
- Click Accessibility in the left-hand sidebar. The accessibility options appear in the right-hand pane.
- Click Mouse pointer and touch in the right-hand pane.
Leave it open, because the next sections all use it.
How to Change Mouse Pointer Size
A larger pointer is easier to spot on a big screen, and it helps if small objects are hard for you to see. The slider gives you 15 levels to choose from.
- Open Settings and go to Accessibility Mouse pointer and touch.
- Find the Size slider on the page.
- Click and drag the slider to the right to increase the size, up to level 15. The pointer on your screen updates immediately as you move the slider, so you can stop as soon as it looks right.
- Release the mouse button. The size is saved automatically, and there is no Apply button to click.
Setting the size too high makes precision tasks like selecting text or clicking checkboxes difficult. Aim for a size between 2 and 4 for the best balance of visibility and accuracy. If the pointer feels too big later, drag the slider back to the left. Level 1 is the standard size.
How to Choose a Custom Pointer Color in 🪟 Windows 11
A bright or unusual pointer color makes it much harder to lose track of your cursor. The color options are under the Custom pointer style.
- Open Settings and go to Accessibility Mouse pointer and touch.
- Under the Mouse pointer style section, click the fourth icon, labeled Custom. A palette of colors appears below the style icons.
- Windows shows a default palette of recommended pointer colors. Click any of the color circles to apply it instantly. Move the mouse and you will see the new color on the pointer.
- If your preferred color is not in the default row, click the Choose another color plus sign button to open the full color picker spectrum.
- Click and drag within the color gradient box. If you already have an exact shade in mind, enter the RGB or HEX values instead. These are codes that define specific colors digitally.
- Click Done to apply the color.
To go back to the plain look, click the first or second style icon in the same section, which are the white and black pointers. If the Custom icon does not seem to respond, check that you are on the Mouse pointer and touch page and not a different Accessibility page.
Using Inverted Pointer Style as an Alternative
The inverted pointer style changes the cursor color automatically so it contrasts with whatever is directly behind it. Over a white background it turns black, and over a dark background it turns white. This makes the cursor easy to see anywhere on the screen.
To turn it on, go to Accessibility Mouse pointer and touch and click the Inverted icon under Mouse pointer style. Pick a different style icon at any time to switch back.
Advanced Customization via Legacy Mouse Properties
The legacy Mouse Properties window gives you older customization tools, including detailed pointer schemes, custom cursor graphics, and mouse trails. You open it from the Run dialog box.
- Press Windows Key + R to open the Run dialog box.
- Type
main.cpland press Enter. The traditional Mouse Properties window opens. - Click the Pointers tab at the top of the window.
- Click the Scheme drop-down menu and select a predefined cursor set, such as Windows Black (system large) or Windows Standard (extra large). The preview list below the menu changes to show each cursor in the scheme.
- Click Apply, then click OK to save your changes.
Keep in mind that a scheme you choose here can change how the pointer looks compared with the style you set in Settings.
Troubleshooting Common Pointer Customization Issues
Most pointer problems in Windows 11 come from outdated graphics drivers or from third-party cursor apps that reset your settings. If your pointer color goes back to the default after a reboot, work through these checks.
- Update your display drivers through Windows Update. Install any graphics driver updates it offers, then restart the PC.
- Check your user account settings. Make sure you are signed in to the same account where you changed the pointer, because these settings are saved per user.
- Look for third-party cursor or customization apps. If you have one installed, close it or uninstall it, since it may be overwriting your pointer color on each startup.
- Reapply your size and color in Accessibility Mouse pointer and touch and restart once to confirm the settings now stick.
Was this guide helpful?
0% of readers found this helpful (1 votes)

About the Author
Richard
Tech Writer, IT Professional
Richard is a writer at Geek Rewind who turns complex IT tasks into clear, step-by-step guides. He draws on years of hands-on experience in system administration and enterprise IT operations, focusing on Windows, Linux and WordPress: the problems people actually run into, and the fixes that work. His server and WordPress guides come from systems he runs himself. Richard builds and maintains the platform behind Geek Rewind, from its Ubuntu servers and Nginx configuration to its custom WordPress plugins. Many new tutorials start with readers' questions, and he's always glad to answer them in the comments.



No comments yet — be the first to share your thoughts!