How to Change Mouse Double-Click Speed in Windows 11
Changing your mouse double-click speed in Windows 11 lets you control how quickly Windows recognizes two clicks as a single double-click action.
This setting is found in the Mouse Properties, and it helps Windows correctly register your clicks, so you don’t accidentally select things or miss your intended actions.
Windows 11 usually has a “Medium” speed set by default, but you can slide it faster or slower to match how you click.
Adjusting this can make your computer much easier to use if the standard speed feels too fast or too slow for you.
Adjust the double-click speed slider in the Mouse Properties window. Access this by going to Settings > Bluetooth & devices > Mouse > Additional mouse settings. Move the slider left for slower or right for faster clicks, testing with the folder icon.
How to change the mouse double-click speed
Changing your mouse double-click speed in Windows 11 is done through the Settings app. This adjustment helps if you find the default speed too fast or too slow, by changing how quickly Windows registers two clicks as one.
- Open the Settings app by pressing the Windows key + I on your keyboard, or by clicking Start > Settings.

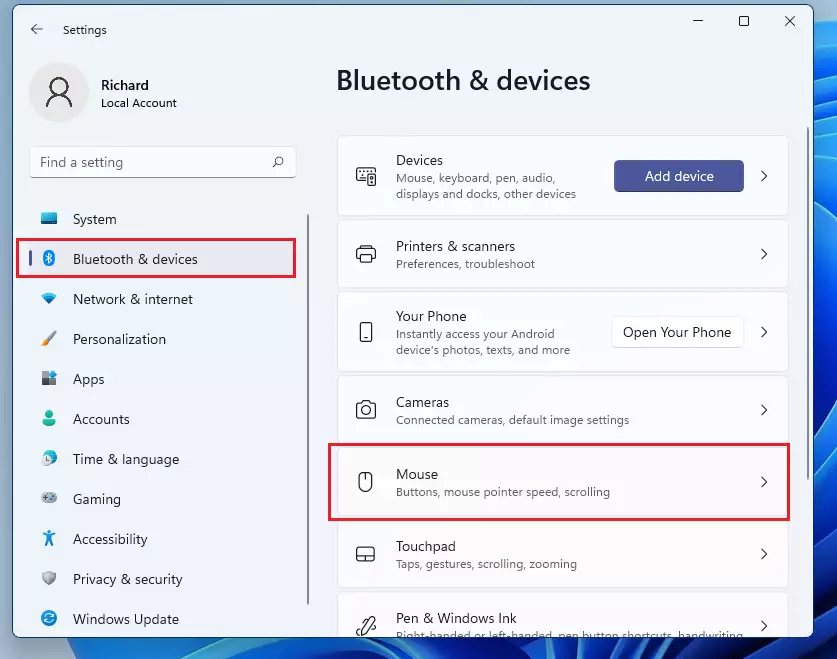
- In the Settings menu, click on Bluetooth & devices on the left side.
- Select Mouse on the right side of the screen.
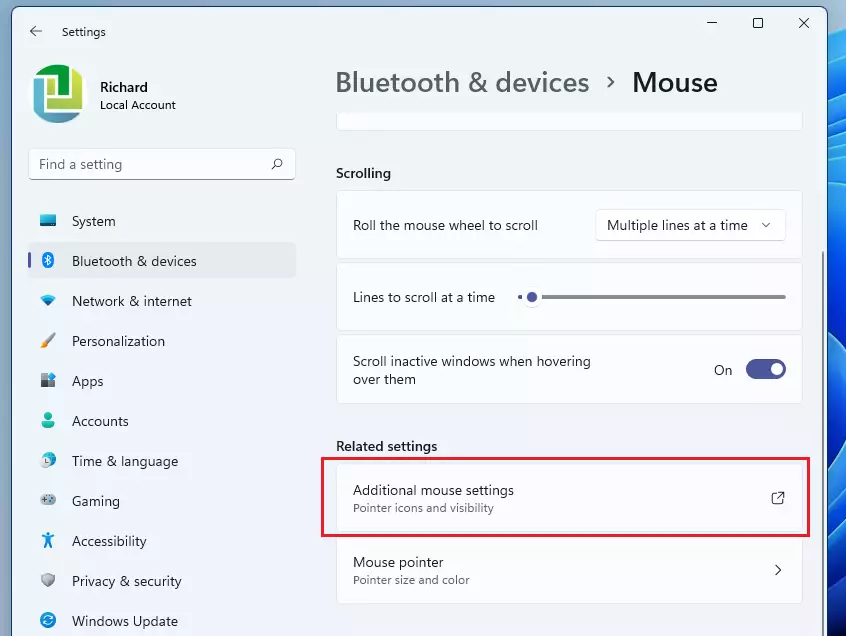
- Scroll down to the bottom and click on Additional mouse settings.
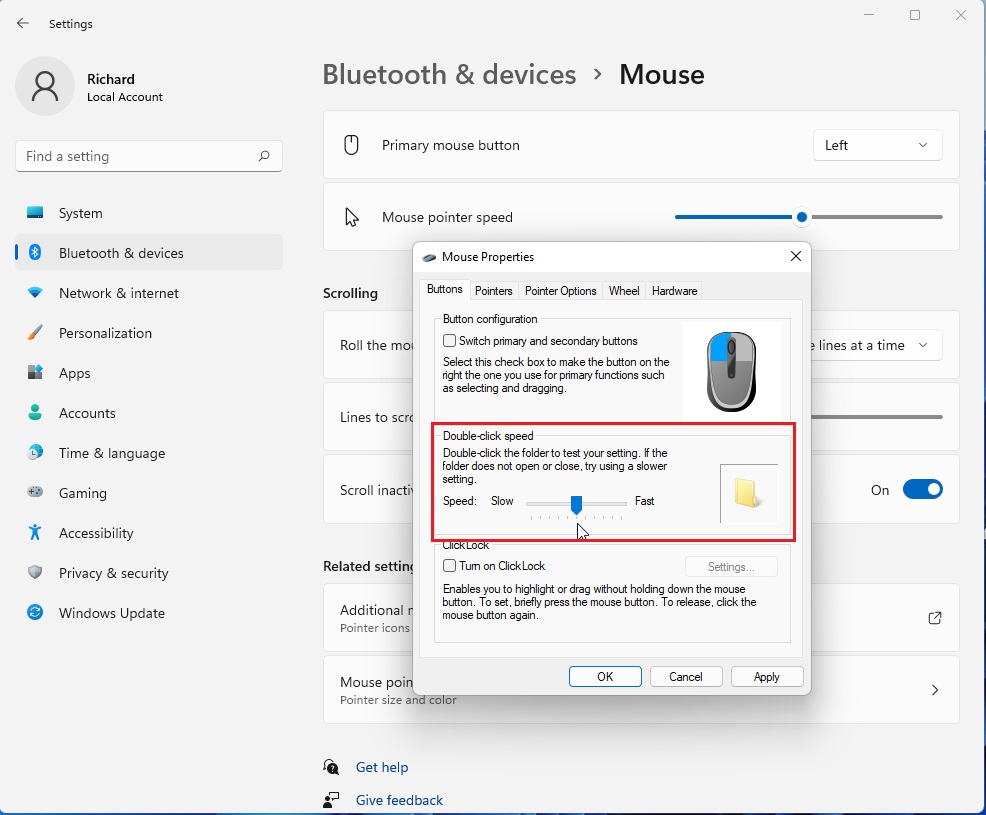
- A small window called Mouse Properties will pop up. Under the Buttons tab, look for Double-click speed.
- Move the slider to the left for a slower speed or to the right for a faster speed.
- Use the folder icon on the right to test your new speed. If it does not open or close, adjust the slider again until it works for you.
- Click OK to save your changes.
Troubleshooting Ghost Double-Clicks
If your mouse seems to double-click on its own, even after you’ve changed the speed setting, it’s likely a hardware issue.
Advanced Customization
For more detailed mouse control beyond basic settings, you can explore the Windows Registry, a system file where many adjustments are stored.
Summary
Adjusting your mouse’s double-click speed offers a quick way to make your computer experience smoother and less frustrating.
Why does my mouse double-click when I only click once?
This is usually caused by a failing mechanical switch inside your mouse. First, try increasing the double-click speed in your settings to see if it masks the issue. If the problem continues across different computers, the hardware is likely faulty and needs to be replaced.
Does changing the double-click speed affect gaming performance?
No, the double-click speed setting only affects how Windows interprets clicks for opening files and folders. It does not change your mouse sensitivity, input lag, or response time in games. Gaming performance is determined by your mouse DPI and polling rate settings.
How do I reset mouse settings to default?
To reset your mouse settings, move the double-click speed slider back to the middle position. For more advanced resets, you can uninstall your mouse driver in Device Manager and restart your computer. Windows will automatically reinstall the default drivers upon rebooting.
Was this guide helpful?

About the Author
Richard
Tech Writer, IT Professional
Richard, a writer for Geek Rewind, is a tech enthusiast who loves breaking down complex IT topics into simple, easy-to-understand ideas. With years of hands-on experience in system administration and enterprise IT operations, he’s developed a knack for offering practical tips and solutions. Richard aims to make technology more accessible and actionable. He's deeply committed to the Geek Rewind community, always ready to answer questions and engage in discussions.


No comments yet — be the first to share your thoughts!