Easy Guide: Change Mouse Pointer Style & Size in Windows 11


To change the mouse pointer size in Windows 11, open Settings Accessibility Mouse pointer and touch, then drag the Size slider. The change applies at once, with no restart. The same page lets you change the pointer style and color.
The pointer is the small arrow or symbol that follows your hand on screen. A bigger or more colorful one is easier to find on a large monitor, a busy desktop, or in low light. Windows 11 offers 15 built-in colors, custom color palettes, and more than 40 preset pointer designs. You can enlarge the pointer up to 15 times its standard size. These options work the same on Windows 11 Home and Pro, and none of them need an administrator account.
Change your Windows 11 mouse pointer by pressing Win+I to open Settings , clicking Accessibility, then Mouse pointer and touch. Choose a style (White, Black, Inverted, or Custom), adjust the size slider from 1 to 15, and pick a color if needed. Changes apply immediately.
What Happens When You Change Your Pointer?
When you pick a custom style or color, Windows shows “(None)” in the scheme box. This is normal. It means you are using a custom setup rather than a saved pointer theme. You don’t need to fix it.
Where are these settings saved? Windows stores them per user, so another account on the same PC keeps its own pointer. The locations are:
HKEY_CURRENT_USER\Control Panel\Cursors
HKEY_CURRENT_USER\Software\Microsoft\Accessibility
How to Change Your Mouse Pointer
You change the pointer in the Settings app, under the accessibility menu. There you pick a new style or drag the size slider. Changes apply immediately, so you do not need to sign out or restart. In this guide "cursor" and "pointer" mean the same thing: the arrow that moves with your mouse. The blinking line you see when typing is a separate text cursor with its own settings under Accessibility Text cursor
These steps change the mouse pointer size and style in Windows 11:
- Open Settings by pressing
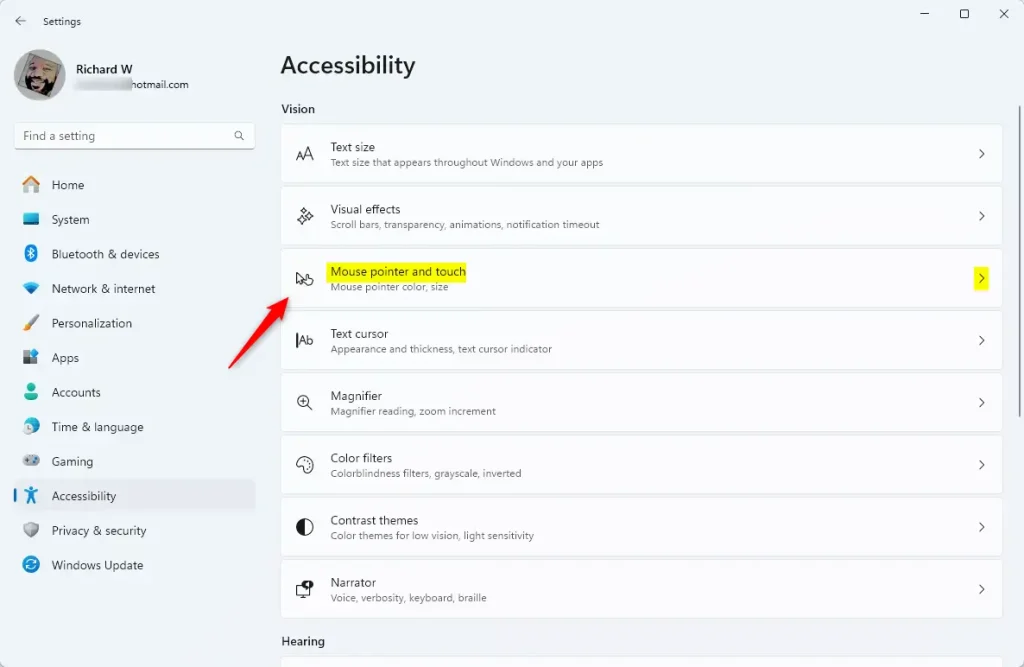
Win+I. The Settings window opens. - Click Accessibility on the left side. The accessibility categories appear on the right.
- Click Mouse pointer and touch. You should now see the pointer options.
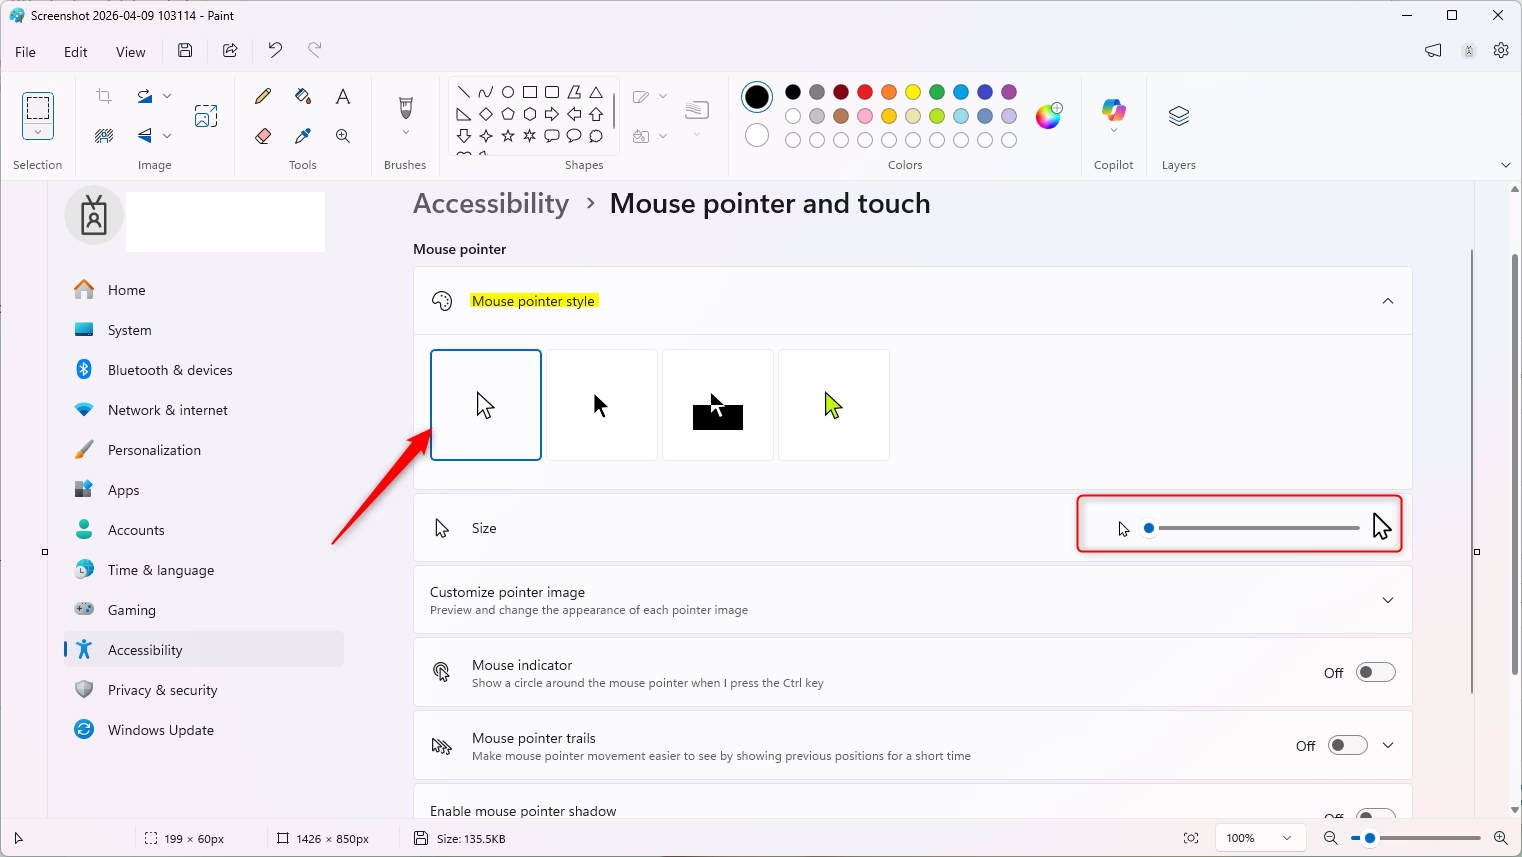
- Choose a style under Mouse pointer. The options are White (default), Black, Inverted, or Custom. The pointer changes as soon as you click.
- Drag the Size slider to the size you want. You can choose from 1 to 15, and the default is 1. Move the mouse over a few windows to check that the size is comfortable.
- Pick a color if you chose the Custom style. Use one of the three methods below. If you chose White, Black, or Inverted, you are done.
Option A: Select Color from "Recommended colors"
This is the quickest method. Windows offers a row of ready-made colors, so you do not have to mix anything yourself.
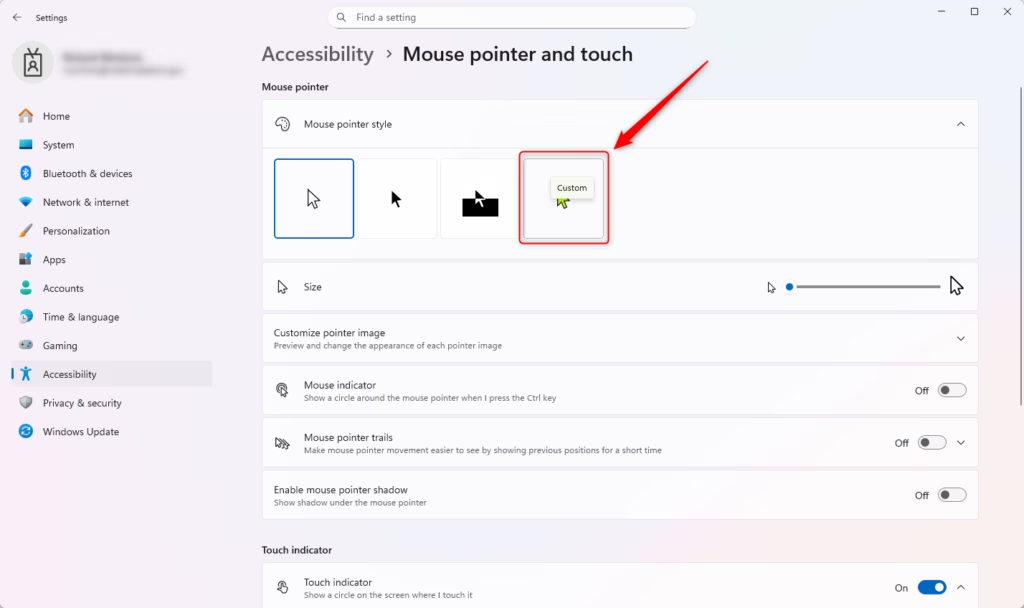
- Select the Custom style first. The Recommended colors section appears only after you do this.
- Find the Recommended colors section on the same page. It shows a row of color swatches.
- Click the color you want. The pointer takes on that color right away.
Option B: Choose Another Color
Use this method when none of the recommended colors suits you and you want to pick a shade by eye.
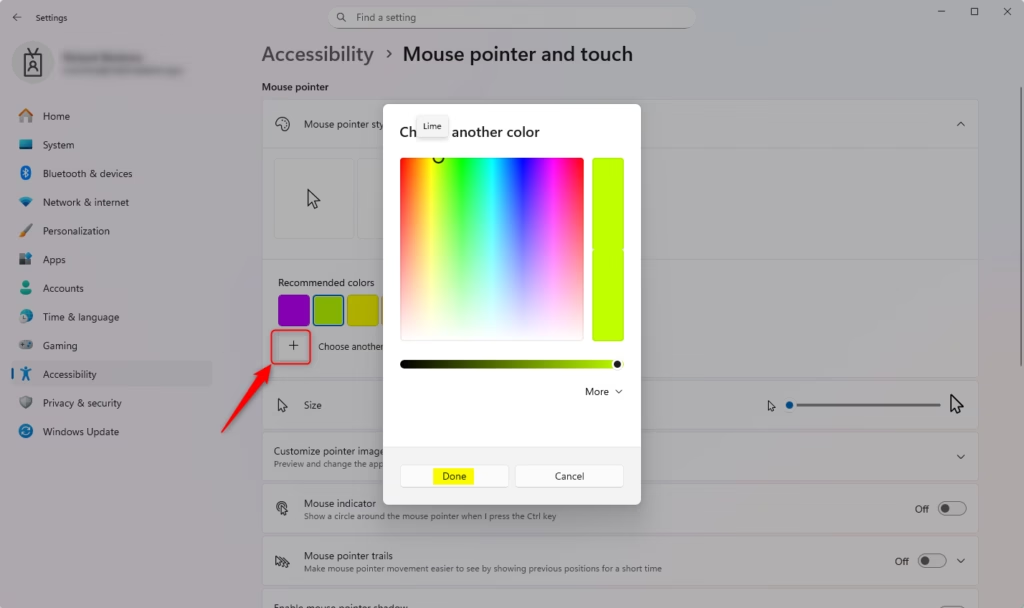
- Click Choose another color. A color picker opens.
- Select a base color from the left side of the picker.
- Use the slider to adjust and customize the color. The preview updates as you move it.
- Check the color shown on the right side. This is your current selection.
- Click Done when you're finished. The pointer now uses the new color.
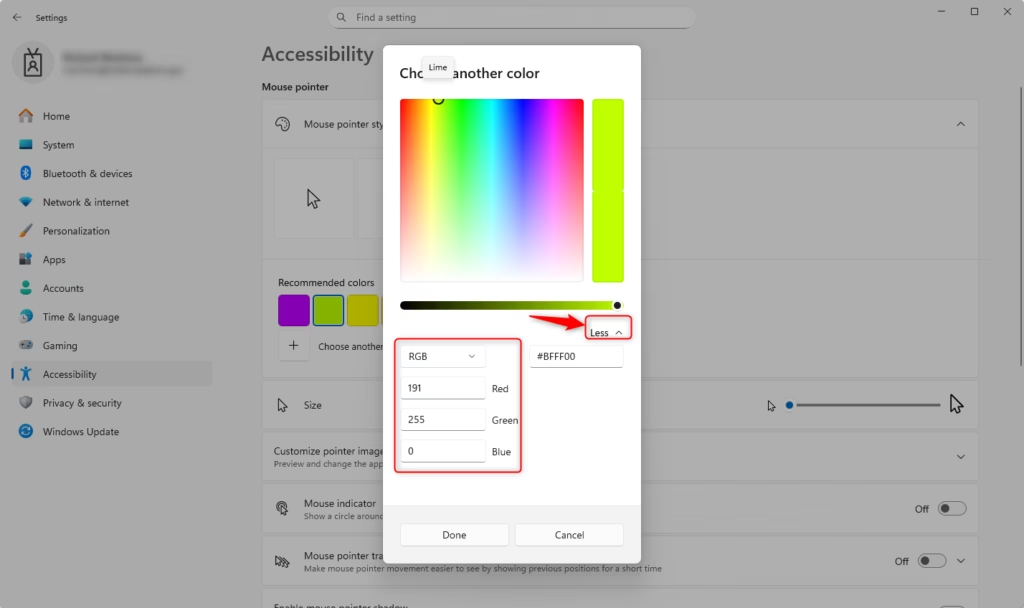
Option C: Specify Custom RGB or HSV Color
Use this method if you need an exact color, for example to match a color you already use elsewhere.
- Click Choose another color. The color picker opens.
- Click More. The color value fields appear.
- Click Done when you're finished. The pointer now uses the exact color you entered.
If you can't see the Custom style or the color options, your copy of Windows 11 may be out of date. Run Windows Update, restart if it asks you to, and check this page again.
Summary
Personalizing the mouse pointer in Windows 11 makes the cursor easier to see during daily tasks. There are four core styles: White, Black, Inverted, and Custom. A size slider runs from 1 to 15, and dedicated color pickers let you choose a custom color. If you don't like the result, set the style back to White and the size to 1.
Have a question about this guide?
Answered by AI from this guide. Good questions may be added to this page — please don't include personal details.
Did this guide fix your problem?

About the Author
Richard
Tech Writer, IT Professional
Richard is a writer at Geek Rewind who turns complex IT tasks into clear, step-by-step guides. He draws on years of hands-on experience in system administration and enterprise IT operations, focusing on Windows, Linux and WordPress: the problems people actually run into, and the fixes that work. His server and WordPress guides come from systems he runs himself. Richard builds and maintains the platform behind Geek Rewind, from its Ubuntu servers and Nginx configuration to its custom WordPress plugins. Many new tutorials start with readers' questions, and he's always glad to answer them in the comments.
No comments yet — be the first to share your thoughts!