

This article explains how to change the notification timeout settings for a braille display on Windows 11.
Narrator is a screen-reading app built into Windows that reads the text on your screen aloud and describes events for users with low vision or blindness.
When you use the Narrator app, you can turn on or off its keyboard shortcuts, launch it automatically, adjust the voice, speed, and volume, manage natural voices, lower other apps volume when the Narrator is speaking, change Narrator audio output device, change verbosity level, emphasize formatted text, enable or disable Narrators phonetic reading, pause for punctuation, adjust how the Narrator read advanced details, adjust the way capitalized text is read, add a braille display with Narrator, change the input/output language for a braille display, change input/output table types, and more.
When you turn on the braille display with Narrator, you can adjust the notifications timeout settings from the Settings app.
If notifications vanish too quickly, you can extend the timeout to give yourself more reading time. Conversely, you can shorten the timeout if notifications linger and disrupt your workflow.
Change notifications timeout settings for a braille display
As mentioned above, users can adjust the notifications timeout settings for a braille display on Windows.
Here’s how to do it.
First, open the Windows Settings app.
You can do that by clicking on the Start menu and selecting Settings. Or press the keyboard shortcut (Windows key + I) to launch the Settings app.
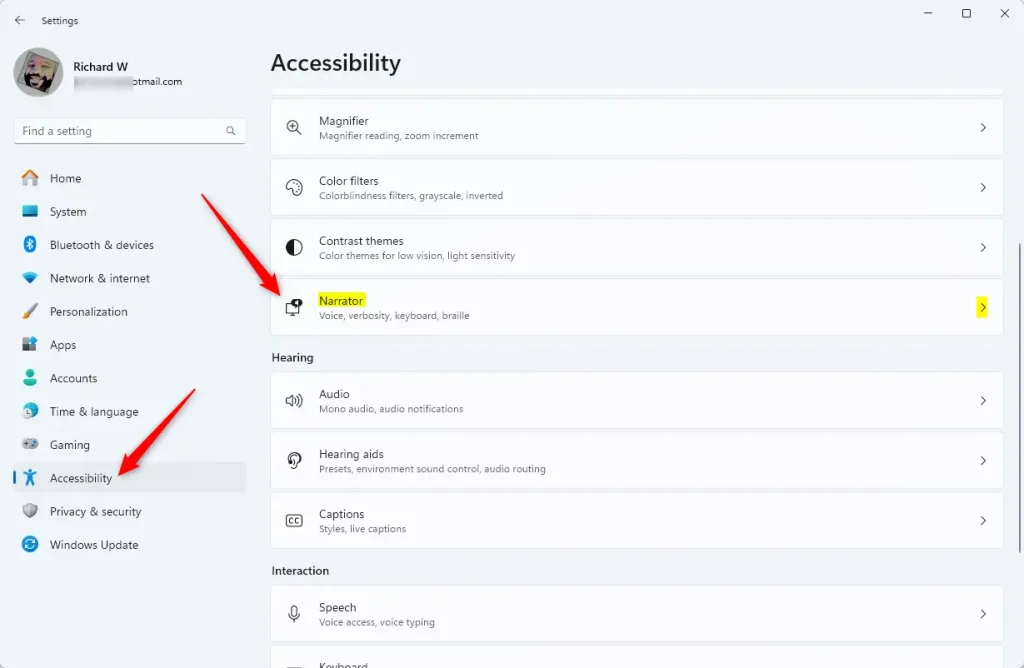
When the Setting app opens, click the Accessibility button on the left and select the Narrator tile on the right to expand it.
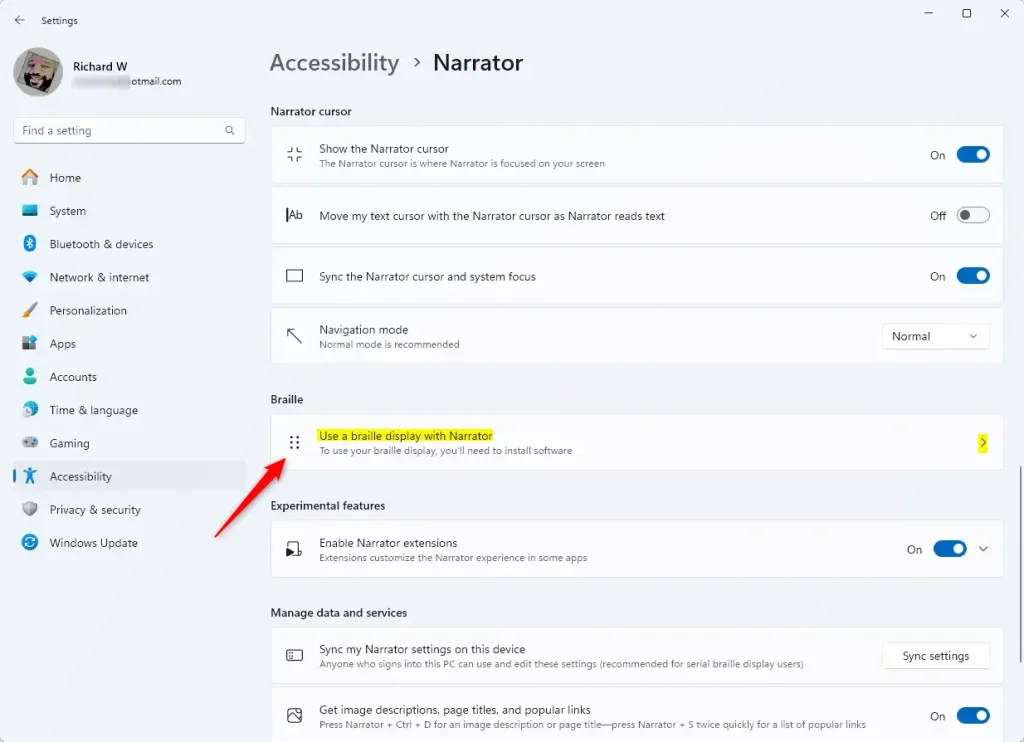
On the Narrator settings pane, under “Braille,” expand the “Use a braille display with Narrator” tile to access the braille page.
On the braille page, click the “Download and install braille” button to start the installation if not already installed.
Once installed, you will have the option to turn Braille on or off.
Under the section “Braille displays and drivers,” click on “Add a braille display.” Choose your Braille display manufacturer and connection type.
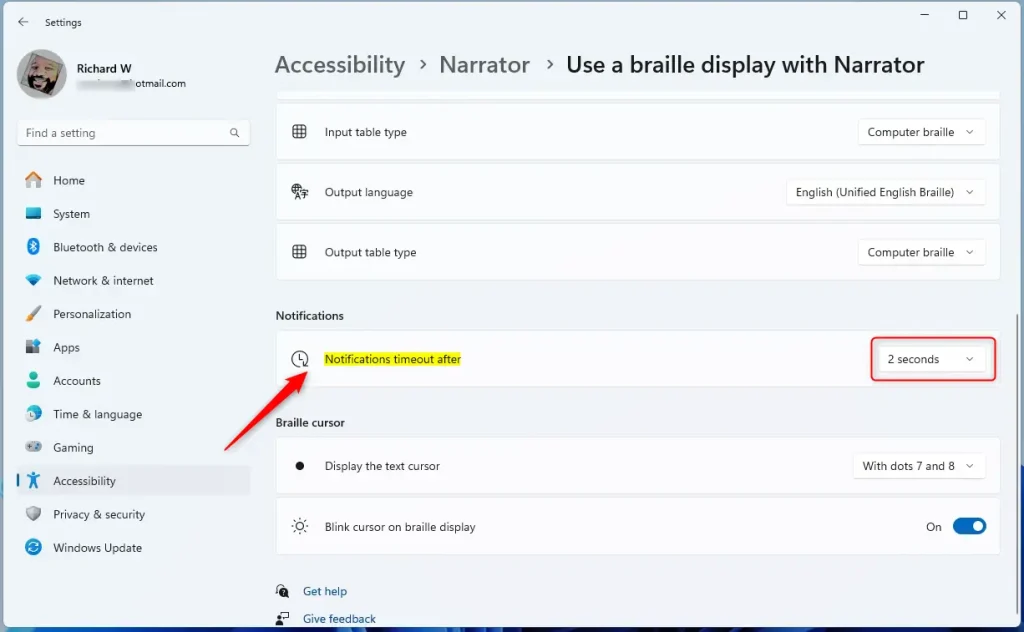
Under Notifications, select the “Notifications timeout after” tile. Then, select the desired time from the drop-down menu to dismiss notifications.
That should do it!
Conclusion:
- In this article, we explored how to change the notifications timeout settings for a braille display on Windows 11, providing step-by-step instructions.
- Users can now adjust the timeout for notifications to optimize their reading experience, ensuring notifications do not disrupt their workflow.


Leave a Reply to Customize Braille Text Cursor in Windows 11 – Geek Rewind Cancel reply