Get Visual Alerts Instead of Sounds for Notifications in Windows 11

- 15 steps
- Needs administrator rights
To get visual alerts instead of sounds in Windows 11, open Settings Accessibility Audio and choose an option under Flash my screen during audio notifications. Windows then flashes the title bar (the strip across the top of a window that shows its name), the active window, or the whole screen whenever it plays a notification sound.
Windows 11 includes the flash setting, so you need no extra software or administrator rights. It works the same on Home and Pro editions.
This guide covers the steps, which flash option to pick, how to silence the sounds themselves, and what to check if nothing flashes.
To get visual alerts instead of sounds in Windows 11, open Settings Accessibility Audio and choose a option under Flash my screen during audio notifications. Pick Flash the title bar of the active window for the least intrusive signal. Windows flashes that part of the screen whenever it plays a notification sound.
What the Flash My Screen Setting Does
Windows plays short sounds for events such as a new notification, a reminder, or an error. The Flash my screen during audio notifications setting adds a visual signal each time one of those sounds plays. It helps if you are deaf or hard of hearing, work with the speakers muted, or share a quiet room.
The setting does not replace or change the sound. It adds a flash alongside it. To end up with visual alerts only, you also need to turn the sounds off, which a later section covers.
You can pick from four choices in the drop-down list. The wording varies slightly between Windows 11 builds, but the choices are these:
- Never flash: the default. No visual signal appears.
- Flash the title bar of the active window: only the top strip of the window you are using flashes. This is the least intrusive option.
- Flash the active window: the whole window you are using flashes.
- Flash the entire screen: everything on the display flashes. This is the hardest to miss.
Before You Start
The steps below match current Windows 11 releases such as 24H2 and 25H2. No restart is needed, and the setting applies to your account as soon as you choose an option. You do not need an administrator account.
If your PC belongs to a school or employer, an administrator may manage some accessibility settings. In that case the option can be missing or greyed out. The troubleshooting section below covers that.
How to Turn On Visual Alerts in 🪟 Windows 11
These steps get you visual alerts instead of sounds in Windows by turning on the screen flash for audio notifications. When you finish, Windows flashes your chosen part of the screen each time a sound alert plays.
- Press the Win+I (
Windows + I) to open Settings. The Settings window opens with a list of categories on the left.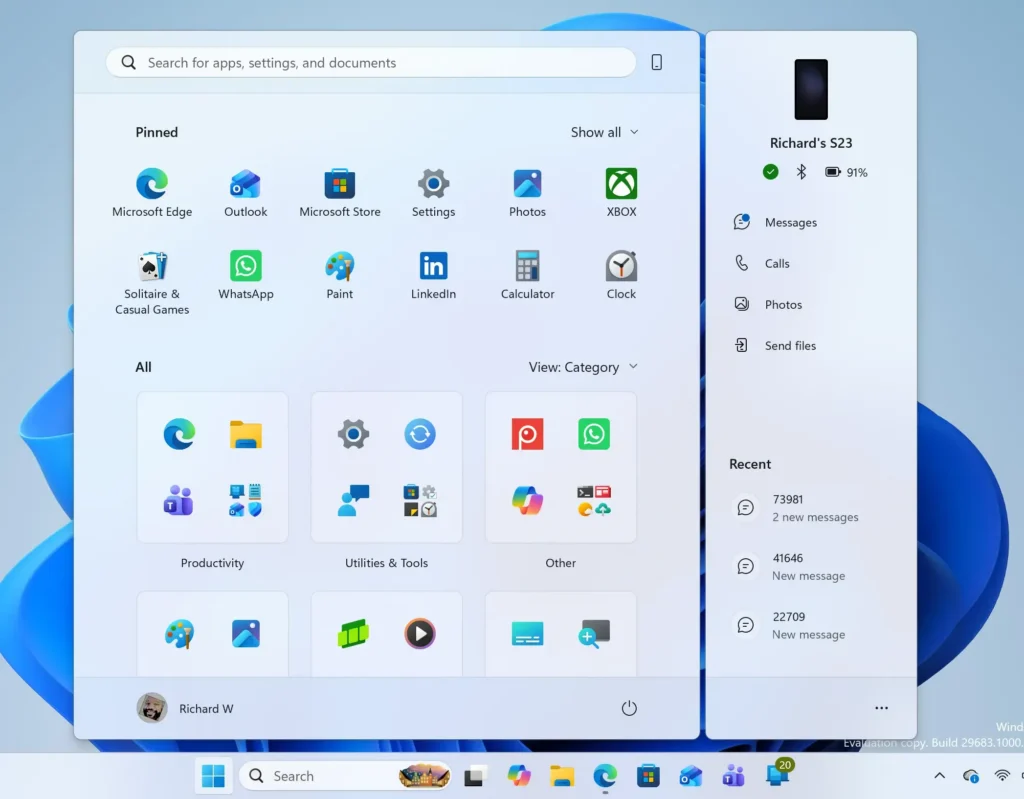
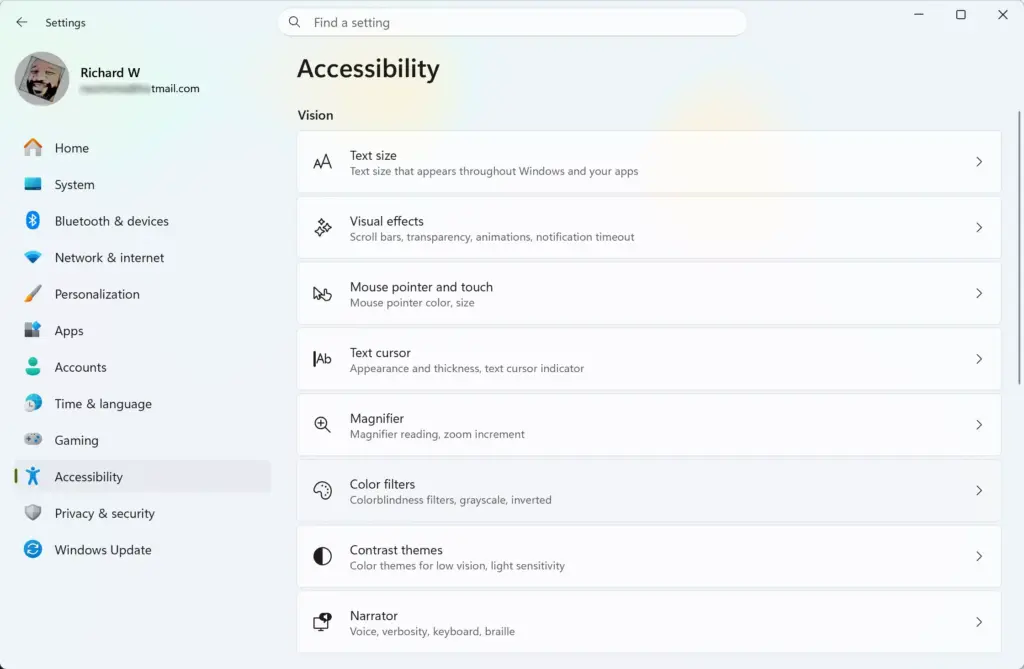
Windows 11 Start menu search panel for opening OpenSSH Client settings - Click Accessibility in the left pane. The right side shows accessibility options grouped under Vision, Hearing and Interaction.
Settings › Accessibility - Click Audio under the Hearing group. If you cannot see it, scroll down the right pane. The Audio page opens with volume, mono audio (one sound played through both speakers) and flash options.
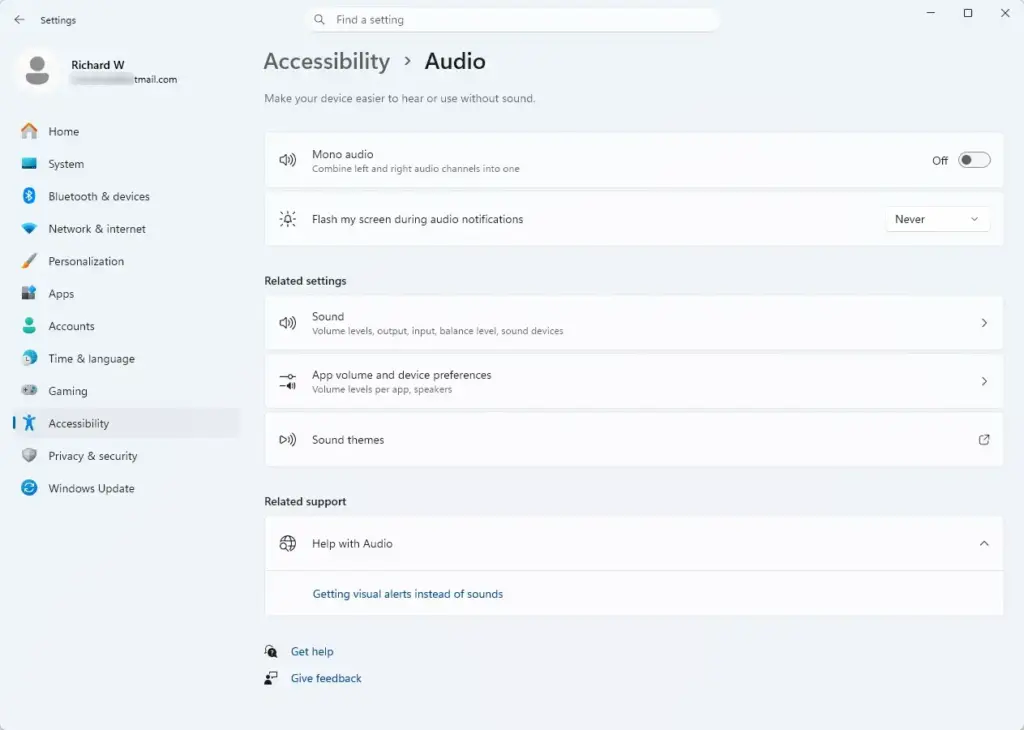
Settings › Accessibility › Audio - Find Flash my screen during audio notifications. It sits near the middle of the Audio page and shows Never flash by default.
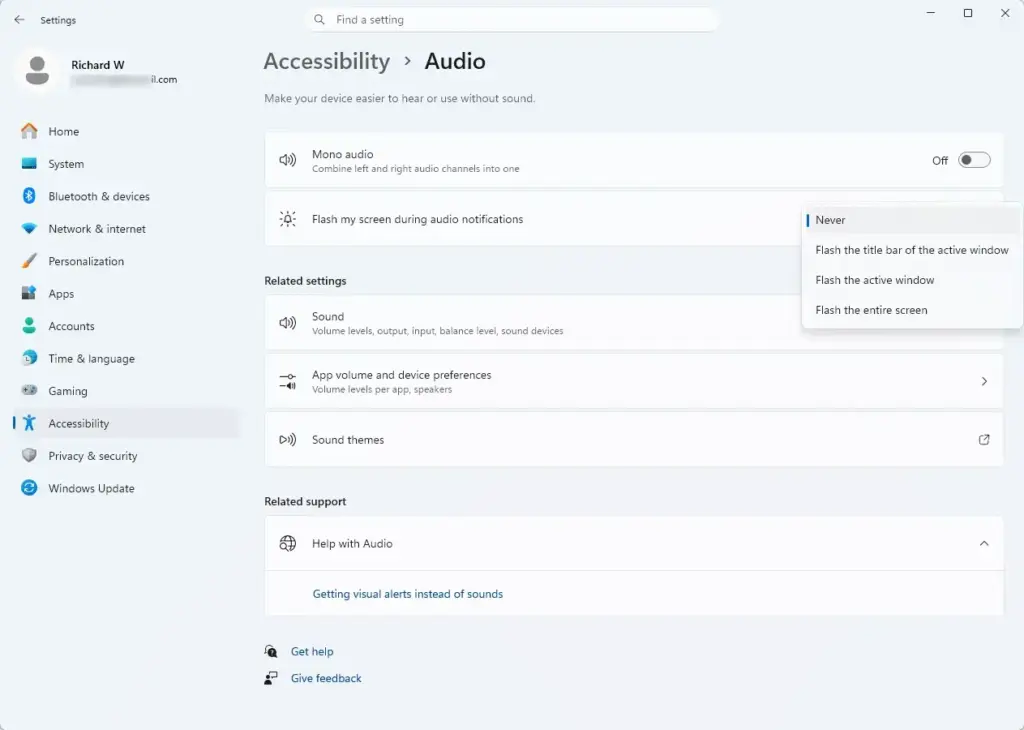
- Open the drop-down list next to it. The four flash choices appear.
- Select the option you want. Choose the title bar option if you are unsure. Windows saves the choice at once, and there is no Save button.
- Trigger a real notification to test it. For example, ask someone to message you or set a short reminder in an app. The part of the screen you chose flashes as the sound plays.
- Close Settings. The setting stays on until you change it.
If you do not see a flash in step 7, the app may not be playing a standard Windows sound. See the troubleshooting section below before you change anything else.
Turn Off Notification Sounds So Only the Flash Remains
The flash setting does not silence anything on its own. If you want notifications to be visual only, turn off the sound for each app that plays one. Windows 11 handles this per app in the Notifications settings.
- Open Settings System Notifications. A list of apps that can send notifications appears below the main switch.
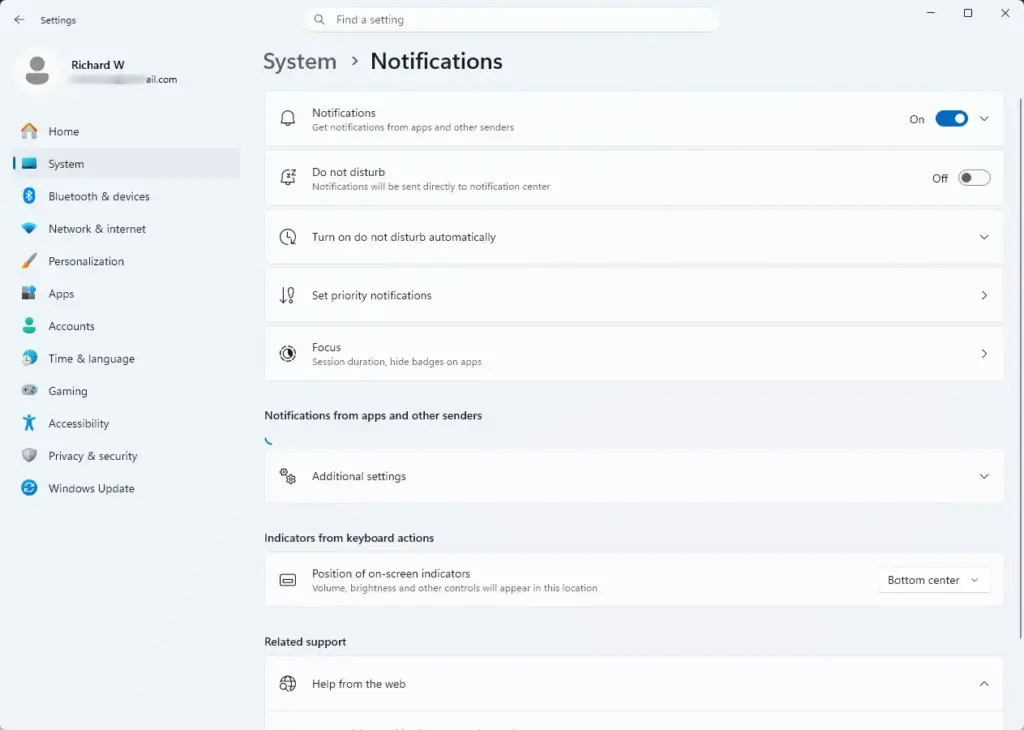
Settings › System › Notifications - Click the app you want to silence. Its entry expands to show notification options.
- Clear the Play a sound when a notification arrives check box. The app keeps sending notifications but no longer plays a sound for them.
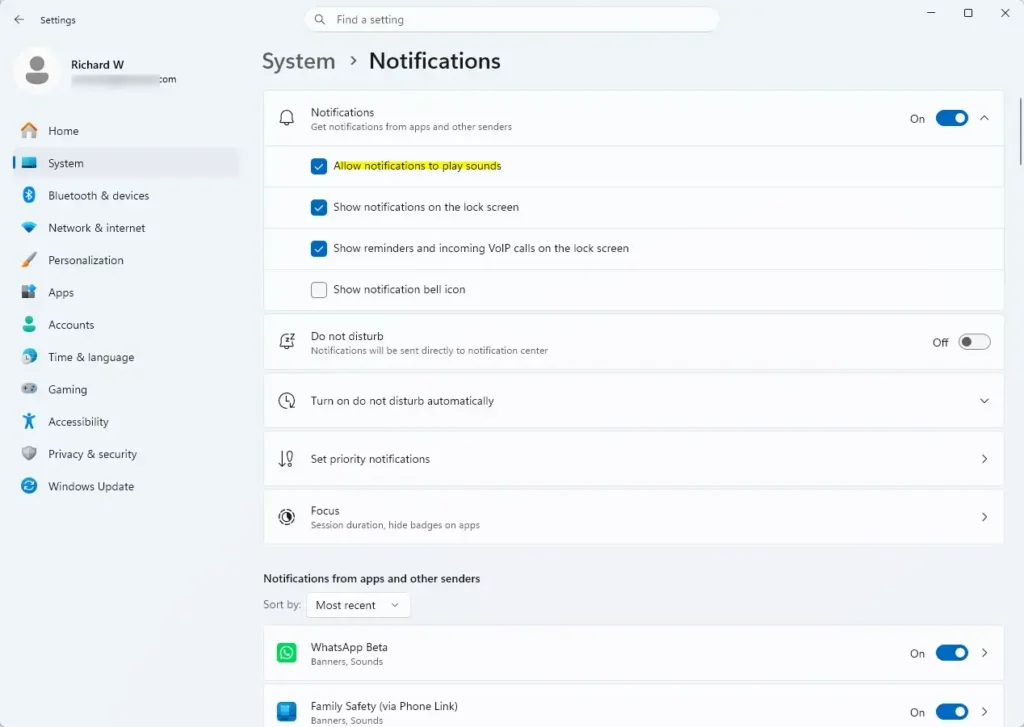
Settings > System > Sound - Repeat for any other apps, then send yourself a test notification. The banner (the pop-up box above the clock) still appears, but the app plays no sound.
If you only need the sounds off for a while, turning notification sounds on or off in Windows 11 covers the other routes, including the system-wide options.
Setting it to No Sounds removes the system sounds that the flash feature reacts to. The flash may stop after you do this. If it does, restore the previous scheme and use the per-app method above instead.
Add Taskbar Flashing and Banners for Extra Visibility
The screen flash covers system sounds. Two other visual signals help when you work in many windows at once.
The first is the notification banner. Windows shows a banner for most notifications by default, and each app has a Show notification banners switch on the Notifications page (Settings System Notifications). Leave it on for the apps you care about.
To see missed alerts, open the notification center (the panel that opens when you click the date and time). For the bell icon in that area, see how to turn the notifications bell icon on or off.
The second is taskbar flashing. When an app in the background wants your attention, its taskbar button can flash. In current Windows 11 builds the switch is under Settings Personalization Taskbar Taskbar behaviors, labeled Show flashing on taskbar apps. If you do not see it, check Windows Update, because older builds may not include it.
To control which apps can send banners in the first place, read how to manage Windows 11 notifications.
Why the Option Is Missing, Greyed Out, or Not Flashing
The Audio page or the flash option is missing
The Audio page under Accessibility is part of Windows 11. If you cannot find it, check which Windows version you run. Open Settings System About and read the version under Windows specifications. If you run an unsupported or old build, install updates through Settings Windows Update and look again.
The option is greyed out
On a work or school PC, an administrator can lock accessibility settings. Ask your IT department which policy is locking the setting. They can check it for you. On a personal PC, sign in with your own account and restart once, then check again.
The setting is on but nothing flashes
Work through these checks in order:
- Check whether the app plays its own audio instead of a Windows sound. The flash is tied to Windows sounds. An app that uses its own audio engine may not trigger it. Not every app uses Windows sounds, so test with a built-in app such as Calendar or Mail.
- No sound is playing. If you removed the sound for that notification, there may be nothing for Windows to flash on. Turn the sound back on for one app and test.
- Do Not Disturb is on. Do Not Disturb (the mode that hides notification banners and sounds) can suppress alerts. Check the notification center, or read how to set priority notifications for Do Not Disturb to allow the important ones through.
- The flash is too subtle. The title bar option is easy to miss if you look elsewhere. Switch to Flash the active window or Flash the entire screen and test again.
If Do Not Disturb turns on by itself at set times, how to silence notifications automatically with Do Not Disturb shows where those rules live.
How to Turn Visual Alerts Off
You can reverse the change at any time. The same drop-down list controls it.
- Open Settings Accessibility Audio. The Audio page opens.
- Open the list next to Flash my screen during audio notifications. The flash choices appear.
- Select Never flash. Windows stops flashing the screen straight away.
This does not bring back any notification sounds you turned off per app. To restore those, return to Settings System Notifications and select the Play a sound when a notification arrives check box again for each app.
If This Didn’t Work
If the screen still does not flash, test with a built-in app, then check the Do Not Disturb status in the notification center. A feature update can reset accessibility settings, so recheck Settings Accessibility Audio after a major update. If you want to silence alerts completely instead, how to disable Windows 11 notifications is the closest next task.
Have a question about this guide?
Answered by AI from this guide. Good questions may be added to this page — please don't include personal details.
Did this guide fix your problem?

About the Author
Richard
Tech Writer, IT Professional
Richard is a writer at Geek Rewind who turns complex IT tasks into clear, step-by-step guides. He draws on years of hands-on experience in system administration and enterprise IT operations, focusing on Windows, Linux and WordPress: the problems people actually run into, and the fixes that work. His server and WordPress guides come from systems he runs himself. Richard builds and maintains the platform behind Geek Rewind, from its Ubuntu servers and Nginx configuration to its custom WordPress plugins. Many new tutorials start with readers' questions, and he's always glad to answer them in the comments.
No comments yet — be the first to share your thoughts!