How to Use Image Creator in Windows 11

- 15 steps
- Needs administrator rights
Image Creator is Microsoft’s free AI tool that turns a written description into pictures. The quickest way to use it on Windows 11 is to open bing.com/images/create in Microsoft Edge and sign in with a Microsoft account. Then type what you want to see and select Create.
Image Creator runs on Microsoft’s servers, so any Windows 11 PC with a web browser can use it. You do not need a Copilot+ PC, a download, or administrator privileges.
Open Microsoft Edge, go to bing.com/images/create, and sign in with your Microsoft account. Type a description of the picture in the prompt box and select Create. Image Creator runs online, so no download or Copilot+ PC is needed, and the generated images appear in a grid within a minute or.
What Image Creator is and what you need
Image Creator is a generative AI tool (software that produces new images from text instead of searching for existing ones). People also search for it as Bing Image Creator or the Bing AI image generator. All three names point to the same web page.
Before you start, check that you have:
- A Microsoft account. This is the account you use for Outlook.com, Xbox, or Microsoft 365. Image Creator asks you to sign in before it generates anything.
- A web browser. Microsoft Edge is already installed on Windows 11, but other browsers also work.
- An internet connection. The images are generated online, not on your PC.
Microsoft may change how many images you can generate quickly, and which options appear around the prompt box. The steps below cover the parts that stay the same. If your screen looks slightly different, look for the same labels in a nearby position.
How to use Image Creator in 🪟 Windows 11
Follow these steps to go from the Image Creator page to a saved AI image on your PC. Each step is listed below.
- Open Microsoft Edge. Select the Edge icon on the taskbar, or search for Edge in the Start menu. Another browser also works.
- Go to bing.com/images/create. Type the address in the address bar and press Enter. The Image Creator page opens, with a box for describing your image.
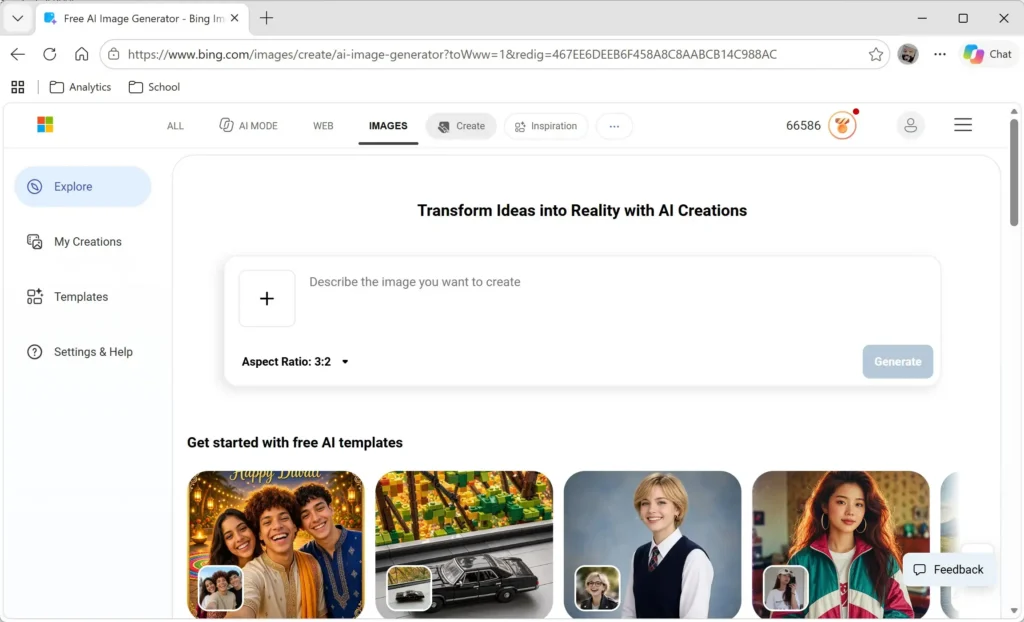
- Select Sign in. The button is in the top-right corner of the page. If you already see your account name or picture there, skip to step 5.
- Sign in with your Microsoft account. Enter your email address and password, then approve any security prompt. The page reloads and shows you as signed in. If sign-in fails with a work or school account, try a personal Microsoft account. The source material does not confirm whether work accounts are supported.
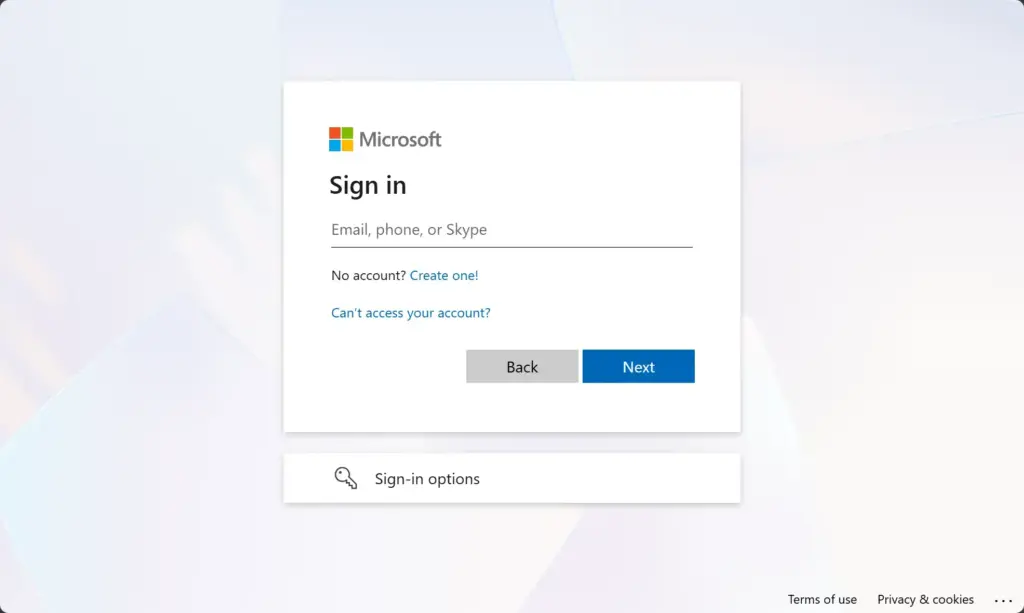
Microsoft account login page for signing in with email and password. - Click the prompt box. A prompt is the text description you give the AI. The box sits near the top of the page and contains placeholder text.
- Type a description of the image. Write what the picture shows, where it is set, and what style you want. For example: “a lighthouse on a rocky coast at sunrise, watercolor painting”.
- Select Create. Image Creator starts generating. The button label can vary slightly by layout, but it is the main action button beside or below the prompt box.
- Wait for the results. A progress indicator appears first. When it finishes, several images appear in a grid, each a different interpretation of your prompt.
- Select an image to open it. A larger view opens with the image and a set of actions, such as saving or sharing.
- Select Download. Edge saves the image to your Downloads folder by default. Open File Explorer, select Downloads in the left pane, and you will see the new file. The option may appear as an icon or sit inside a menu, depending on the layout.
If you do not like any of the results, change the prompt and select Create again. A small wording change often produces a noticeably different image.
Write a prompt that gets better results
Image Creator works from your words alone, so detail matters. A vague prompt such as “a dog” returns generic pictures. A specific prompt gives the AI something to build on.
Cover these points, in roughly this order:
- SubjectWhat is in the picture? Be exact. “A grey tabby cat” works better than “a pet”.
- SettingWhere is it? “On a windowsill in a rainy city” gives the scene a context.
- Style or mediumName a look, such as “oil painting”, “pencil sketch”, “3D render”, or “photograph”.
- Lighting and moodWords like “soft morning light” or “dramatic shadows” change the feel noticeably.
- CompositionAdd “close-up”, “wide shot”, or “viewed from above” to control the framing.
Keep each prompt to one main idea. A prompt that crams in five unrelated objects usually returns a muddled picture. Generate the main scene first, then try variations by changing one detail at a time.
AI images often have flaws. Hands, small text, and fine patterns are common weak spots. If lettering appears in the image, expect it to be garbled and plan to add real text in an editor afterwards.
Upload your own image
The Image Creator page also offers a way to start from a picture you already have, instead of describing everything in words. Look for an upload option near the prompt box, such as Upload your own. Select it, choose a file from your PC, and add a prompt describing how to change or build on it.
This feature has changed layout over time, and the exact controls may differ on your screen. If you do not see an upload option, Microsoft may not have enabled it for your account or region yet. Text-only prompts still work.
Find and reuse your earlier images
The page header includes links such as Explore, My Creations, and Templates. Their positions can change, but these are the three worth knowing:
- My Creations lists images you generated while signed in. Open it if you closed the page before downloading a result.
- Explore shows ideas and images that other people made. It is a quick way to see what style of prompt produces a certain look.
- Templates offers ready-made starting points that you can adjust.
Open Image Creator faster from the taskbar or Start menu
Image Creator is a website, not an app listed in the Start menu. If you use it often, install the page as an app (Edge treats a site installed this way as its own app) so it opens in its own window with its own icon. Here is how to do it in Edge.
- Open bing.com/images/create in Edge. Make sure the page has fully loaded.
- Select Settings and more. This is the three-dot icon in the top-right corner of the Edge window.
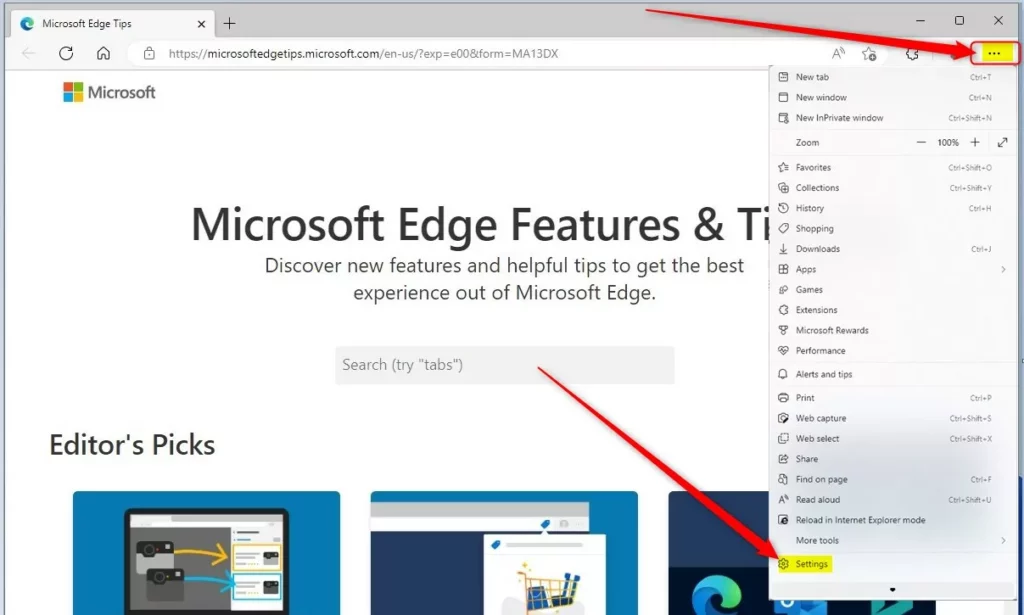
micrsoft edge browser more option and settings - Select More tools Apps. A submenu opens.
- Select Install this site as an app. Edge shows a confirmation box with a name and icon for the app.
- Select Install. Image Creator opens in its own window. Edge may also offer to pin it to the taskbar or Start menu, and you can accept either option.
To remove the app later, open Settings Apps Installed apps, find the entry, select the three dots beside it, and choose Uninstall. This removes only the shortcut. Your Microsoft account and saved creations stay untouched.
Other places 🪟 Windows 11 offers AI image creation
The web page is the most reliable route, but Microsoft builds image generation into other parts of Windows too. The Copilot app (Windows 11’s built-in AI assistant) can generate images when you describe what you want in the chat. Paint has also carried image-generation features on some PCs and versions.
Which of these you see depends on your Windows build, your region, and your hardware, and Microsoft changes them often. If a feature is missing from your PC, use the web page instead, because it does not depend on your Windows version.
Fix common Image Creator problems
The page asks you to sign in again and again
Clear the cookies (small files a website stores in your browser) for bing.com, or open the page in a private window (in Edge, press Ctrl+Shift+N). Browser add-ons (extensions) that block cookies or trackers can interrupt the sign-in. If a private window works, an extension or stored data is the cause.
Your prompt is blocked or returns an error
Image Creator refuses prompts that break Microsoft’s content rules. You see a message instead of images. Reword the prompt to remove the flagged idea, and avoid requests involving real people, violence, or adult content. Repeatedly submitting blocked prompts can lead to restrictions on your account, so rewrite rather than retry.
Generation is slow or stops
Heavy demand can slow results. Wait a minute, then try again. Microsoft may also limit how quickly you can create images, and if it does, the page tells you. Microsoft has linked faster generation to points from Microsoft Rewards (Microsoft’s points program) in some versions of the tool, but this changes, so check the on-screen message for your account.
The page does not load or an option is missing
Some options appear in certain regions or accounts first, and Microsoft rolls others out over time. Confirm that you are signed in and try a second browser. Check Microsoft’s Image Creator help page for your region to see which countries are supported.
Privacy and saved creations
Your generated images are saved to your account under My Creations. To review the activity data Microsoft holds for your account, sign in at account.microsoft.com and open the privacy section. The exact place where Image Creator history appears can change, so check Microsoft’s Help page for the current deletion steps.
What to do next
Your downloaded images are ordinary files, so you can edit them like any other picture. To cut out a subject, follow our guide to removing image backgrounds in Windows 11 Paint. In the Photos app, you can remove an image background, replace an image background, or blur the background to push attention onto the main subject.
Have a question about this guide?
Answered by AI from this guide. Good questions may be added to this page — please don't include personal details.
Did this guide fix your problem?

About the Author
Richard
Tech Writer, IT Professional
Richard is a writer at Geek Rewind who turns complex IT tasks into clear, step-by-step guides. He draws on years of hands-on experience in system administration and enterprise IT operations, focusing on Windows, Linux and WordPress: the problems people actually run into, and the fixes that work. His server and WordPress guides come from systems he runs himself. Richard builds and maintains the platform behind Geek Rewind, from its Ubuntu servers and Nginx configuration to its custom WordPress plugins. Many new tutorials start with readers' questions, and he's always glad to answer them in the comments.
No comments yet — be the first to share your thoughts!